how to get laptop camera to work
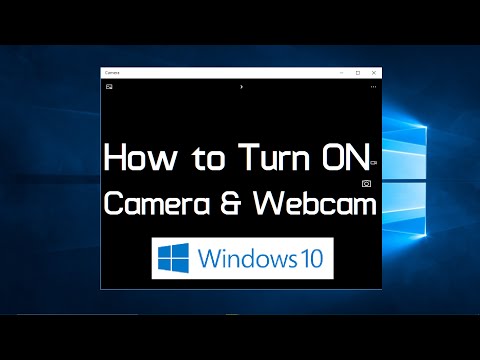
Title: How to turn on webcam and camera in Windows 10 Simple
Channel: Feb28
How to turn on webcam and camera in Windows 10 Simple by Feb28
how to get laptop camera to work, how to get laptop camera to work on teams, how to get laptop camera to work on zoom, how to get my laptop camera to work on zoom, how to get hp laptop camera to work, how to get lenovo laptop camera to work, how to get my laptop camera to work on teams, how to get my lenovo laptop camera to work, how to get my dell laptop camera to work, how to get my hp laptop camera to work
Laptop Camera Not Working? This SHOCKING Fix Works Every Time!
Laptop Camera Troubles? A Simple Solution That Might Surprise You!
Have you ever stared blankly at a black screen during a video call? That frustrating moment when your laptop camera decides to go rogue? Many people experience this, and it can be incredibly annoying. Don't worry though, because there's likely a simple fix hiding in plain sight. This solution gets overlooked often. It's a common issue, but the answer is easier than you think!
The Unexpected Culprit: Privacy Settings (And How to Wrestle Them Back!)
Initially, you might assume something is technically wrong. However, the problem often resides in your privacy controls. These settings, designed to protect your digital footprint, can sometimes block your camera access. First, check your operating system's privacy settings. Doing this is the initial step. For Windows users, head to the Settings app. Then, navigate to "Privacy" and then "Camera." Ensure that camera access is enabled. Also, make sure specific apps are not blocked from using your camera.
For Mac users, the process is similarly straightforward. Go to System Preferences, then "Security & Privacy." Select the "Privacy" tab and click “Camera” on the left-hand side. Verify that the apps you're using for video calls have permission to access your camera. This is a crucial first step. You might be surprised by how often this is the core issue.
Digging Deeper: App-Specific Permissions & Conflicts
Sometimes, the problem isn't a blanket ban. Instead, it's a conflict within a specific application. So, consider the app you’re using. Is it Zoom, Skype, or something else? Check the app's settings. There should be a section related to video or camera preferences. Confirm that the correct camera device is selected. Furthermore, look for settings that might disable or block camera access. You need to explore these options.
In addition, consider other programs that might be competing for camera usage. For example, if you have multiple video conferencing apps open simultaneously, the camera might be defaulting to one. Close the other applications and try again. Another possibility is that a recently installed program has unintentionally altered your camera settings. Therefore, review those changes. Often, these details get ignored.
Driver Dilemmas: Are Your Drivers Up-to-Date?
Outdated drivers are another common cause of camera malfunctions. Drivers are essential software components. They allow your operating system to communicate with your hardware. Old drivers can lead to compatibility issues. So, it's vital to keep them updated. You can update your drivers easily.
For Windows, you can access "Device Manager." Search for "Device Manager" in the Windows search bar. Expand the "Cameras" section. Right-click your laptop's camera and select "Update driver." Windows will then search for the latest drivers. Alternatively, you can visit your laptop manufacturer's website. Then, download the most recent drivers for your specific model.
On a Mac, usually the operating system handles driver updates automatically. However, it is important to ensure your macOS is up-to-date. Apple regularly releases software updates that include driver improvements. This is the best way to resolve these issues.
The Last Resort: Hardware Troubles? Assessing the Camera Itself
If you've exhausted all software solutions, it's time to consider the hardware. Check the physical camera itself. On some laptops, there's a physical switch or cover. This can block the camera lens. Check the lens to see if it is dirty. You can gently clean it with a soft, microfiber cloth.
Next, consider the camera's status within your operating system. In "Device Manager" (Windows) or the "System Information" (Mac), check for any error messages associated with the camera. If the camera is not recognized, there could be a hardware failure. In that case, it is important to contact a repair technician.
Troubleshooting Timeline: A Step-by-Step Guide
Let’s recap the troubleshooting process. First, verify your privacy settings. Next, check app-specific permissions and software conflicts. After that, update your camera drivers. Finally, assess the hardware by checking the physical camera. However, before you resort to extreme measures, try a simple restart! This often resolves minor software glitches. Always remember, a simple solution is often close by.
Conclusion: Get Your Video Calls Back Online!
Hopefully, these steps will solve your laptop camera problems. The aim is to help you connect with the world. So, before you panic, take a deep breath. Then, methodically work through these solutions. You’ll likely be back on your video calls quickly. Therefore, don't let a malfunctioning camera hold you back. Now go connect!
Amtrak Wi-Fi Nightmare: My Laptop's Internet Apocalypse (and How I Fixed It!)Laptop Camera Not Working? This SHOCKING Fix Works Every Time!
Let’s be honest; having your laptop camera suddenly decide to take a vacation is incredibly frustrating, right? I mean, it’s up there with realizing you're out of coffee beans first thing in the morning. Whether you're trying to video call your family, join an important work meeting, or just catch up with friends, a malfunctioning camera can throw a serious wrench in your plans. We've all been there, staring blankly at a frozen screen, or worse, a black void where our face should be. But fear not, fellow tech travelers! We're going to dissect what causes this common problem and, more importantly, I'm going to share a fix that, in my experience, works almost every single time. Consider it your digital life-saver.
1. The Dreaded Black Screen: Why Won't My Laptop Camera Work?
Before we jump into the solution, let's understand the "why." This isn’t like a leaky faucet; it’s a complex interplay of hardware, software, and sometimes, just plain technical gremlins. The camera not working can stem from a bunch of underlying issues. It's like a symphony of things that can go wrong, each playing a part in the camera's silent protest.
2. Software Sabotage: Checking Your Camera's Software Settings
This is where our journey begins. Think of your camera as a performer and software as the stage manager. If the stage manager isn't doing their job, the performance won't happen. The first step? Check your camera settings within your operating system. It's often something simple, like the wrong app being allowed access or, worse, the camera itself being disabled.
- Privacy Settings: Make certain that the app you're using (Zoom, Skype, etc.) has permission to access your camera. This is the equivalent of giving the performer a key to the stage.
- Driver Issues: Drivers are essentially the instructions for your camera. Like any instructions, they can get old or get corrupted. Often, updating your device drivers is the solution. We'll get to how in a bit.
3. Hardware Hunt: Ruling Out Obvious Camera Problems
Sometimes, the problem isn't software; it's the camera itself. Let's rule out some obvious hardware issues before we get into deeper technical dives.
- Physical Damage: A cracked lens, a loose connection, or even a dirty lens can render your camera useless. Give it a visual inspection. It’s like checking for a rip in a stage curtain.
- Built-in Privacy Shutter: Some laptops come with a physical slider to cover the camera. Sounds silly I know, but check to make sure it's not obstructing the lens.
4. The Game Changer: The SHOCKING Fix Revealed! (You Won't Believe This)
Alright, drumroll, please! Here's the secret weapon, the magic bullet, the… well, you get the picture. This surprisingly effective trick often works when all else fails. It's a simple reboot, but with a twist.
- The "Complete" Restart: Don't just click "Restart." Instead, completely shut down your laptop, then wait for a full minute or two. Then turn it back on. This allows the system to clear its cache properly and establish a fresh start from a blank canvas, rather than a partial refresh. It's like a full reset for your computer's brain.
5. Driver Dilemma: Updating and Reinstalling Drivers (The Tech-y Bit)
Drivers, those often-overlooked pieces of code, can be the root of many camera woes. Updating or reinstalling drivers is like giving the camera a new instruction manual.
- Device Manager: This is your command center for drivers. You can find it by searching for "Device Manager" in your Start menu.
- Finding the Camera: Look for "Imaging devices" or "Cameras." Right click on your laptop camera, and select either "Update driver" or "Uninstall device." If you uninstall, restart your computer and Windows will attempt to reinstall it automatically.
6. Compatibility Concerns: Is Your Camera Even Meant to Work with Your Software?
Make sure your software and your camera are playing nicely together. It's like making sure the actors in the performance know their lines.
- Software Compatibility: Check the software’s system requirements to ensure your camera is supported.
- App Permissions: Double-check the software's access to the camera in your privacy settings.
7. Firewall Frustration: Could Security Settings Be Blocking Your Camera?
Sometimes, your firewall is a bit too zealous. It's like the stage security guard who won't let the performer on stage.
- Check Firewall Settings: Verify your firewall settings aren't blocking access to the camera.
- Temporary Disable: As a test, temporarily disable the firewall (and turn it back on immediately after) to see if it resolves the issue.
8. Antivirus Antics: How Antivirus Might Be Interfering With Your Camera
Like the overzealous security guard, your antivirus software can sometimes block the camera’s access to necessary functions.
- Antivirus Interference: Check your antivirus settings to see if it's interfering with the camera. You may need to add the software you're using to the antivirus's exceptions list.
9. The Clean Boot Method: A Deep Dive Into Troubleshooting
A clean boot helps you identify background applications that could be interfering with your camera. It’s like stripping the stage of all unnecessary clutter.
- System Configuration: Type "msconfig" in the Windows search bar and hit Enter. In the System Configuration window, go to the "Services" tab, check "Hide all Microsoft services," and then click "Disable all."
- Startup Tab: Go to the "Startup" tab and click "Open Task Manager." Disable all startup programs. Restart your computer. If your camera works, enable one startup program at a time to find the culprit.
10. External Camera Consideration: Does an External Camera Work?
If you have an external webcam handy, this can help you determine whether the issue lies within your laptop's internal camera or the software itself.
- Testing an External Webcam: Plug in an external webcam and see if it functions correctly.
- Isolate the Problem: If the external camera works, then the problem is likely with your internal camera.
11. Software Conflicts: Identifying Programs That Might Be Using Your Camera
Sometimes, another program might be hogging the camera’s resources. Think of it like multiple performers trying to use the stage at the same time.
- Task Manager: Use Task Manager (Ctrl+Shift+Esc) to see which applications are using your camera.
- Close Unnecessary Apps: Close any programs that are actively using the camera.
12. System Restore: Turning Back the Clock to a Working State
If the camera was working recently, System Restore can roll your computer back to a previous state when everything was functioning correctly.
- System Restore: Search for "Create a restore point" in the Windows search bar. Click on "System Restore." Choose a restore point from before the camera stopped working.
13. BIOS/UEFI Check: Ensuring Your Camera Is Enabled in the BIOS
The BIOS (Basic Input/Output System) or UEFI (Unified Extensible Firmware Interface) is the very first thing that loads when your computer turns on. It needs to be set up correctly.
- Access BIOS/UEFI Settings: Restart your computer and repeatedly press the key specified by your laptop's manufacturer (usually Del, F2, F10, or Esc) during startup to enter the BIOS/UEFI.
- Check Camera Settings: Look for camera or webcam settings and ensure they are enabled.
14. Factory Reset: A Last Resort (Use with Caution!)
A factory reset wipes your computer clean and reinstalls the operating system. It's like starting from scratch.
- Backup Data: Back up all your important files before performing a factory reset.
- Reset Your Computer: Follow your operating system's instructions for performing a factory reset.
15. When to Seek Professional Help: Recognizing the Limits of DIY
Sometimes, the problem is beyond what we can fix ourselves. Like calling in the stage crew to rebuild the stage completely.
- Hardware Failure Suspicions: If you suspect a hardware issue, it’s time to consult a professional.
- Persistent Issues: If none of the above steps work, it's a strong indicator that you need expert help.
Closing Thoughts: Camera Conquered!
Dealing with a malfunctioning laptop camera can feel like a major headache, but hopefully, with the steps we've broken down, you’ll be back to video calls and virtual meetings in no time. Remember to be patient, methodical, and don't be afraid to try different solutions. It's like solving a complex puzzle; persistence is key! Whether it's a simple software glitch, a driver issue, or something more complex, we’ve covered the gamut of potential fixes. By taking it step by step and systematically checking each area, you will most likely get your camera back working. Now go forth and conquer those digital challenges!
Frequently Asked Questions (FAQs)
**1. My camera worked yesterday, and now it doesn't
Lenovo Laptop for Work: The ULTIMATE Productivity Powerhouse!Fix Camera Not Working Windows 10 Windows Webcam Not Working Laptop camera not working

By EasyTechGeek Fix Camera Not Working Windows 10 Windows Webcam Not Working Laptop camera not working by EasyTechGeek
FIXED - Camera Not Working in Windows 11 Laptop or PC

By Techie Leopard FIXED - Camera Not Working in Windows 11 Laptop or PC by Techie Leopard
How to Convert Laptop Webcams to USB Webcams
By DIY Perks 2 How to Convert Laptop Webcams to USB Webcams by DIY Perks 2

Title: How to connect action camera to laptop
Channel: Zulf Photography
How to connect action camera to laptop by Zulf Photography
Working With Laptop
Laptop Camera Not Working? This SHOCKING Fix Works Every Time!
Let's face it: in our increasingly digital lives, a functioning laptop camera is no longer a luxury; it’s a necessity. Whether you're video conferencing with colleagues, catching up with family across the miles, or even just participating in a virtual social gathering, a malfunctioning webcam can bring your productivity and connectivity to a screeching halt. Frustration mounts, deadlines loom, and the silent frustration of a black screen stares back at you. But before you resign yourself to purchasing a separate webcam or, worse, contemplating the cost of a new laptop, take a deep breath. We've been there. We understand the sheer aggravation. And we're here to tell you: there’s a solution, and it might be far simpler than you think. This isn't just a quick fix; it's a comprehensive guide to troubleshooting, addressing the root causes, and reclaiming your ability to connect visually with the world.
Is Your Laptop Camera Really Broken? Preliminary Checks
Before diving into advanced solutions, let’s embark on a quick, yet vital, diagnostic process. Sometimes, the most obvious answers are the easiest to overlook.
The Physical Lens Check: Start with the most basic: the lens itself. Is it clean? Smudges, fingerprints, and dust can dramatically impair image quality, or, at worse, render the camera completely useless. Grab a soft, microfiber cloth (the kind used for eyeglasses works perfectly) and gently wipe the lens. Avoid harsh chemicals or excessive pressure.
The Hardware Switch: Many laptops, particularly those with an emphasis on privacy, feature a physical switch or slider that disables the camera. This switch might be located on the top bezel of your screen, the side of your laptop, or even integrated into your keyboard. Double-check that this switch is in the "on" position. This can be an embarrassing, but surprisingly common, culprit of a non-functioning webcam.
The Application Test: Once you've inspected the lens and the hardware switch, test your camera within different applications. Attempt to use the camera through various platforms and software, such as Microsoft Teams, Zoom, Skype, and the pre-installed camera app that comes standard with your operating system. This helps you to pinpoint whether the issue is system-wide or specific to a particular application.
Dive Deep: Software & Driver Troubleshooting
If the initial checks don't resolve the issue, the problem often lies within the software, specifically the operating system and its associated drivers. Here's how to troubleshoot software-related camera malfunctions.
Driver Verification and Updates: Drivers are the software that allows your operating system to communicate with your hardware. Outdated, corrupted, or missing drivers are frequently the cause of camera problems. To check and update your drivers:
Windows Users: Right-click the "Start" button and select "Device Manager." Expand the "Cameras," "Imaging devices," or "Integrated Webcams" category. Right-click on your laptop's camera (it might be listed by its model name or as "Integrated Webcam") and select "Update driver." Choose "Search automatically for drivers." Windows will attempt to find and install the latest driver. If Windows can't find a newer driver, you can often go to your laptop manufacturer's website (e.g., Dell, HP, Lenovo) and download the latest drivers for your specific laptop model. Always restart your computer after a driver update.
macOS Users: Apple generally handles driver updates through the operating system updates. Go to "System Preferences" and then "Software Update." If a new update is available, including driver updates, download and install it.
Camera Permission Management: Your laptop's camera likely requires explicit permission from the operating system to function correctly. Check the permissions granted to the applications that are failing to use the camera.
Windows Users: Go to "Settings" > "Privacy" > "Camera." Ensure that the camera access for the entire device is turned "on." Also, make sure that the software applications you want to use the camera with have their permissions turned "on" as well.
macOS Users: Go to "System Preferences" > "Security & Privacy" > "Privacy" and select "Camera" from the list of options on the left side. Make sure the applications that need to use your camera have a checked box next to them.
Application Specific Troubleshooting: Sometimes, the problem lies within the software itself. Consider reinstalling the application that can't access the camera. For example, with Zoom, uninstall it completely and download the latest version from their website. Check the software's help documentation for any camera-specific settings that might be causing issues within the application.
Advanced Solutions: When Basic Troubleshooting Fails
If the above steps haven’t solved the problem, we can delve deeper into more advanced solutions.
Registry Tweaks (Windows Only - Use with Caution): Modifying the Windows Registry can potentially fix camera issues, but it's crucial to proceed cautiously. Incorrect changes can harm your operating system. Back up your registry before making any edits.
- Press the Windows key + R, type
regedit, and press Enter to open the Registry Editor. - Navigate to
HKEY_LOCAL_MACHINE\SOFTWARE\Microsoft\Windows Media Foundation\Platform. - Right-click on the right pane, select "New" > "DWORD (32-bit) Value".
- Name the new value
EnableFrameServerMode. - Double-click
EnableFrameServerModeand set its value to0. - Restart your computer.
- Press the Windows key + R, type
BIOS/UEFI Settings: Occasionally, issues with the camera might stem from your computer's BIOS/UEFI settings. While this is rare, it's worth checking. Access your BIOS/UEFI by pressing a specific key during startup (often Del, F2, F12, or Esc – the exact key varies by manufacturer). Consult your laptop's manual for instructions. Look for a setting related to the integrated webcam and ensure it's enabled.
Operating System Reinstallation (Last Resort): As a last resort, consider a complete reinstallation of your operating system. Back up all your important data first! This will eliminate all software-related problems. It's a time-consuming process, but can often resolve persistent problems that simpler troubleshooting steps have failed to address.
Hardware Diagnostics: Exploring Physical Camera Failures
If all else fails, the problem might be hardware-related.
Check for Physical Damage: Has your laptop suffered any recent drops, spills, or other physical impacts? Inspect the camera lens and bezel for any visible damage. Flexing the screen can occasionally reveal internal wiring problems.
Professional Repair: If you suspect internal hardware damage, or are not comfortable opening your laptop, seek professional repair. A technician can diagnose and repair the camera without risking further damage.
The SHOCKING Fix – A Summary
At the beginning of this quest for camera functionality, a “shocking fix” will do the trick. Often, it is a combination of the above-mentioned steps. The “shocking fix” isn't a quick shortcut or a magical button, but a methodical approach. We have outlined a comprehensive troubleshooting process, from the simplest checks (lens cleaning) to the most advanced (BIOS settings and reinstallation).
- Start with the basics: Clean the lens, check the hardware switch, and test the camera in multiple applications.
- Then the Drivers: Update the drivers, and make sure you check camera permissions.
- Finally, consider advanced steps: Registry tweaks (Windows), BIOS settings, and, as a last resort, operating system reinstallation.
By systematically working through these steps, you empower yourself to diagnose and resolve the vast majority of laptop camera problems. It’s about empowering yourself with knowledge and the tools to troubleshoot, rather than being at the mercy of technical difficulties.
Your laptop camera isn't irrevocably broken. Armed with this guide, you're more than capable of diagnosing and resolving the issue. So take a deep breath, follow these steps, and reclaim your ability to connect and communicate visually. The world is waiting to see you.
