why isn't my laptop camera working on zoom
Title: How to Fix Zoom Camera Webcam Not Working Problems on Windows 10
Channel: Softbay
How to Fix Zoom Camera Webcam Not Working Problems on Windows 10 by Softbay
why isn't my laptop camera working on zoom, why isn't my webcam working on zoom, why is laptop camera not working on zoom
Zoom Camera Nightmare! Laptop Cam FAIL? FIX IT NOW!
Zoom Camera Calamity! Your Laptop's Visual Woes, Solved!
Have you ever stared into your laptop's camera and felt a wave of dread? That’s precisely what I'm talking about. Suddenly, you’re facing a pixelated abyss, and your perfectly crafted appearance is sacrificed. It’s a common plight. We’ve all been there. You're not alone if you’ve experienced the Zoom camera fail. Prepare for a journey. We'll explore solutions to conquer your laptop cam frustrations.
The Pre-Meeting Panic: Recognizing the Symptoms
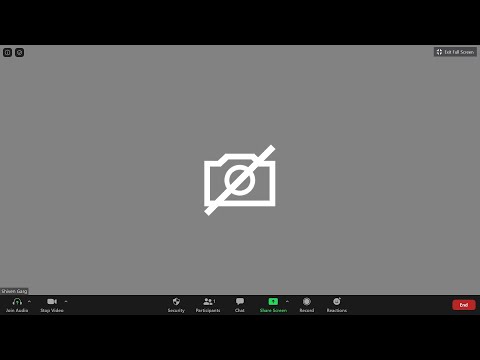
Before diving in, let's identify the enemy. A failed laptop camera manifests in several ways. Often, you experience a blurry image. This is one of the main identifiers. The picture might be frozen. The camera could be completely black. You may hear the dreaded "camera not found" error message. In other words, your virtual presence is compromised. Your carefully planned video call falls apart.
Troubleshooting 101: Initial Checks and Balances
First things first: don't panic! So, take a deep breath. Let’s begin with the basics. Ensure your camera is actually enabled. There's often a physical switch or a software setting. This is the easiest fix. Check the camera indicator light. Does it illuminate when you activate the camera? Also, consider the application you’re using. Zoom, Skype, or Google Meet, all have their specific camera settings. Consequently, the problem may stem from within the platform.
Driver Dilemmas: Updating Your Camera's Software
Drivers are the unsung heroes of your computer’s hardware. Consider them an essential part of your computer. Now, let’s explore how to update the driver. They are the software that allows your camera to communicate with your laptop. Outdated drivers frequently cause problems. Therefore, updating them is crucial. Go to your device manager. Locate your camera. Right-click and select "Update driver." Follow the on-screen prompts. In short, a simple update might resolve your issues.
App Permissions: Granting Access to Your Camera
Your operating system is designed for security. Hence, you need to grant apps permission to use your camera. For instance, Windows and macOS both have privacy settings. These settings control which applications can access your camera. Review these settings. Ensure the apps you use for video calls have the necessary permissions. In addition, you might have accidentally denied access. Now, check your operating system settings.
The Software Showdown: Conflicting Applications and Camera Conflicts
Sometimes, the problem lies within the software itself. Multiple applications might wrestle for camera access. This can lead to conflicts. If you have several video conferencing tools open simultaneously, try closing some. Then, see if one specific application is causing issues. Similarly, an application might be misconfigured. Reinstalling the software can sometimes fix this. Remember to restart your laptop after any software changes.
Hardware Hurdles: Assessing the Camera's Physical State
Let's face it, sometimes the issue is physical. Examine your laptop's camera lens. Is it covered in smudges, dust, or fingerprints? Gently clean it with a microfiber cloth. The lens might be damaged. Also, consider the camera hardware itself. If the camera is built-in, inspect the surrounding area. If you use an external webcam, try a different USB port. This could suggest a port problem.
Restart and Re-evaluate: The Power of a Simple Reboot
Sometimes, the simplest solutions are the most effective. A system restart often resolves many minor glitches. It clears temporary files. It refreshes system processes. Reboot your laptop, after trying the aforementioned steps. After the restart, test your camera again. Hopefully, things will be back to normal.
The Ultimate Victory: Achieving Camera Nirvana
By methodically working through these troubleshooting steps, you should identify the root cause. You should conquer your laptop camera nightmares. You can now rejoin your video calls with confidence. Now you can present your best self. Remember to be patient. Sometimes, it’s a process. But the reward is a clear, crisp video feed. You have the power. So, go forth and conquer!
The ULTIMATE Best Tote Bags for Laptops: [Year] Edition!Zoom Camera Nightmare! Laptop Cam FAIL? FIX IT NOW!
Okay, let's be honest, how many of us have been there? You think you're looking sharp for that all-important Zoom call – maybe a big presentation, a job interview, or even just catching up with friends – only to be greeted by a grainy, pixelated image of your face staring back at you. It's the Zoom camera nightmare! That dreaded laptop cam fail that makes you look like you're broadcasting from a forgotten corner of the internet. Fear not, fellow digital denizens! We've all been there, and we're here to help you escape this digital purgatory. This isn't just a quick fix; it's a journey to Zoom camera fluency, ensuring you look your best, no matter what the occasion.
1. The Agony of the Awful Webcam: A Shared Experience
Let's start by acknowledging the elephant in the virtual room. The built-in webcam on your laptop, bless its heart, is rarely the star of the show. It’s often a tiny, underpowered sensor that struggles in anything less than perfect lighting. Think of it like a budget-friendly point-and-shoot compared to a professional DSLR camera. That's the reality we're up against. The struggle is real – we've all witnessed and experienced it.
2. Why Your Laptop Camera Is Letting You Down: The Usual Suspects
So, what's causing this digital disarray? The culprits are typically a combination of factors:
- Poor Lighting: This is the number one enemy. Your laptop's webcam needs light to function effectively.
- Underpowered Hardware: As mentioned, built-in webcams aren't exactly state-of-the-art. They're designed for basic functionality, not professional-quality streaming.
- Software Issues: Sometimes, it's not the hardware, but the software. Glitches, outdated drivers, or incorrect settings can cripple your camera's performance.
- Bandwidth Bottlenecks: A slow or unstable internet connection can also contribute to a blurry or laggy video feed.
3. Lights, Camera, Action! Illuminating the Situation for a Better Zoom Experience
Let’s tackle the lighting issue first. This is the low-hanging fruit – the easiest and often most effective fix.
- Natural Light is Your Friend: Position yourself facing a window. Avoid direct sunlight, which can cause harsh shadows. Soft, diffused light is ideal. Think of it like painting with light – you want a gentle, even glow.
- Artificial Lighting Options: If natural light is unavailable or insufficient, invest in a ring light or a small desk lamp. Position the light source in front of you, slightly above eye level, to illuminate your face evenly. Avoid placing the light behind you, as this will create backlighting and make you appear silhouetted.
- Test Your Setup: Before your call, do a test run. Check how you look at different times of day and in different lighting conditions.
4. Driver's Seat of Your Webcam: Making Sure the Software Knows How To Rock
Outdated drivers are like a car running on old fuel – it might still work, but it won't be performing at its peak. Here's how to update your webcam drivers:
- Windows: Search for "Device Manager" in the Windows search bar. Expand "Cameras," right-click on your webcam, and select "Update driver."
- Mac: Check for software updates in System Preferences/System Settings.
5. Zoom Settings 101: Fine-Tuning Your Virtual Presence
Even with perfect hardware and lighting, your Zoom settings can make or break your video quality. Here's a quick walkthrough:
- Access Settings: Open Zoom and go to Settings (usually a gear icon).
- Video Settings: In the Video tab, ensure your correct webcam is selected. Experiment with "Enable HD" and "Touch up my appearance" (use with caution – it can sometimes look artificial).
- Audio Settings: Make sure your microphone is working properly and adjust the volume accordingly. Consider using a headset with a built-in microphone for better audio quality.
6. The External Webcam Advantage: Taking It To The Next Level
Let's face it– sometimes, the internal webcam just won't cut it. An external webcam is a game-changer. They offer superior image quality, better low-light performance, and often come with features like autofocus and built-in microphones. Think of it as upgrading from a bicycle to a Ferrari.
- Ease of Use: External webcams are typically plug-and-play. Connect it to your laptop via USB, and Zoom will usually recognize it automatically.
- Variety of Choices: There's a wide range of options available, from budget-friendly models to professional-grade cameras. Research reviews and choose one that fits your needs and budget.
7. Internet Speed Check: Bandwidth and Its Impact
Picture this: you're trying to stream a high-definition movie, but your internet connection is chugging along at dial-up speeds. That's what happens to your Zoom video when you have a slow internet connection. To ensure a smooth video experience:
- Test Your Speed: Use a speed test website (like Speedtest.net) to check your upload and download speeds. Zoom recommends a minimum of 600kbps upload and download for a good experience.
- Close Unnecessary Applications: Close any programs that are using a lot of bandwidth (e.g., streaming services, file downloads).
- Consider a Wired Connection: A wired Ethernet connection is generally more stable and faster than Wi-Fi.
8. Background Blues: Smart Choices for Virtual Backdrop
Your background can also impact your video quality, so let's make some smart choices:
- Keep it Simple: A clean, uncluttered background is always best. This helps viewers focus on you, not the chaos behind you.
- Virtual Backgrounds (Use with Caution): Zoom's virtual backgrounds can be fun, but they can also be distracting or glitchy. Use them sparingly and make sure your background is clearly defined (a solid color wall works well).
- Physical Background Considerations: If you're using a physical background, try to avoid busy patterns or bright colors, as these can be distracting. A neutral wall, a bookshelf, or any visually appealing background works well.
9. Framing Your Shot: Composing For the Best Visuals
How you frame yourself in the camera is essential. Use it to your advantage:
- Eye Level Rule: Position your webcam at eye level. This makes you appear more approachable and confident.
- The Rule of Thirds: Imagine your screen is divided into thirds, both horizontally and vertically. Place your face, or important parts, in these sections.
- Shoulder to Head: Frame the shot from your shoulders to the top of your head.
10. Audio Assurance: Sounding Your Best (or At Least Okay)
Video is only half of the equation. Terrible audio can ruin an otherwise perfect video call.
- External Microphone: A good external microphone can drastically improve your audio quality.
- Headsets: Headsets with built-in microphones are a great option for clear audio.
- Test, Test, Test: Practice with a friend or record yourself to make sure your audio sounds clear and professional.
11. Quick Fixes for Emergencies: Band-Aid Solutions
Sometimes, you need a quick, on-the-fly fix. Here are a few emergency solutions:
- Restart Zoom: Sometimes, a simple restart can resolve minor glitches.
- Close and Reopen Applications: Close any other programs that might be interfering with your camera or microphone.
- Check Your Volume Levels: Make sure your microphone and speaker volumes are set correctly.
12. The Art of the Mute Button, Use It Wisely!
Mastering the mute button is crucial for Zoom etiquette. Always mute yourself when you're not speaking to minimize background noise.
- Unmute with Permission: Ask others if you are speaking or asking a question, or have the option to speak, and then unmute yourself.
- Use the Chat Feature: if possible, use the chat feature.
13. Advanced Tips and Tricks: Mastering the Zoom Room
For the Zoom-savvy among us, here are some advanced tips:
- Use a Green Screen: For the ultimate virtual background experience, invest in a green screen.
- Record Your Meetings: If needed, record your Zoom meetings for later review or distribution.
- Explore Zoom's Features: Zoom offers a wide range of features, such as screen sharing, breakout rooms, and polls. Familiarize yourself with these features to enhance your virtual meetings.
14. Troubleshooting Common Zoom Camera Problems
Let’s troubleshoot some of the most common issues:
- Camera Not Working: Double-check your camera selection in Zoom settings, make sure your camera is connected, and verify that you haven't disabled the camera access on your system.
- Blurry Video: Ensure you have adequate lighting, check your internet speed, and update your camera drivers.
- Echoing Audio: Mute your computer's speakers and use headphones or a headset to prevent echo.
1
Asus Touchpad Dead? FIX This NOW!Camera Not Working On Zoom In Windows 1110 Tutorial

By MDTechVideos Camera Not Working On Zoom In Windows 1110 Tutorial by MDTechVideos
How to Fix Zoom Camera Not Working Problems on Windows 10 Web Camera Not Working in Zoom

By TechEpu How to Fix Zoom Camera Not Working Problems on Windows 10 Web Camera Not Working in Zoom by TechEpu
Zoom camera is not working

By CryptoTech Zoom camera is not working by CryptoTech
Title: How to Fix Webcam Issues in Zoom - Troubleshoot Web Camera Not Working in Zoom
Channel: Gauging Gadgets
How to Fix Webcam Issues in Zoom - Troubleshoot Web Camera Not Working in Zoom by Gauging Gadgets
Work From Home Laptop: Escape the Office NOW! (Secret Tips Inside!)
Zoom Camera Nightmare! Laptop Cam FAIL? FIX IT NOW!
Have you ever found yourself staring into a blurry abyss during a crucial Zoom call? That pixelated, unresponsive image from your laptop's built-in camera can be a professional disaster, leaving you feeling self-conscious and, frankly, a little frustrated. We've all been there – the dreaded "Laptop Cam FAIL." But fear not, fellow digital denizens! This guide is your comprehensive solution, designed to banish those Zoom camera woes and restore your on-screen presence to its former glory. We'll dissect the common culprits behind poor video quality and provide actionable, step-by-step solutions to ensure your next Zoom meeting is a smooth, visually appealing experience.
Understanding the Enemy: Why is Your Laptop Camera Failing You?
Before diving into fixes, let's identify the usual suspects. Several factors can contribute to the poor performance of your laptop camera, ranging from simple software glitches to more complex hardware issues. Recognizing these potential problems is the first step towards a clear and crisp video feed.
- Outdated Drivers: Your laptop's camera relies on specific drivers to function correctly. Outdated drivers can cause compatibility issues, leading to blurry images, freezing, or even complete camera failure.
- Software Conflicts: Other applications running in the background, particularly those utilizing video or audio, can sometimes conflict with your Zoom camera, resulting in reduced performance.
- Poor Lighting Conditions: The built-in camera in your laptop is often optimized for ideal lighting situations. Dim or unevenly distributed light is a primary cause of grainy, dark, and generally unattractive video.
- Camera Hardware Limitations: Let's be realistic – the webcam integrated into your laptop is typically not the highest quality. Limitations in the sensor and lens can make it struggle to keep up in less-than-perfect conditions.
- Zoom Settings Configuration: Zoom offers a wide range of settings that may be incorrectly configured. These settings can greatly impact the visual quality you are presenting.
- Bandwidth Issues: Your internet connection plays a vital role. A slow or unstable connection can cause video buffering, choppy playback, and a generally subpar Zoom experience.
Troubleshooting Your Laptop Camera: A Step-by-Step Guide to Success
Now, let's embark on a journey to reclaim your video clarity! Follow these carefully curated steps to diagnose and resolve your Zoom camera issues.
1. Driver Updates: The Foundation of Functionality
Your camera drivers are the digital backbone of its operation. Keeping them up-to-date is paramount for optimal performance.
Windows:
- Press the Windows key and the "X" key simultaneously.
- Select "Device Manager" from the menu.
- Expand the "Cameras" or "Imaging devices" section.
- Right-click on your webcam (it may be listed by its model or as "Integrated Webcam," etc.).
- Select "Update driver."
- Choose "Search automatically for drivers." Windows will search for and install the latest available drivers.
- If Windows can't find updates, visit your laptop manufacturer's website (e.g., Dell, HP, Lenovo) and search for your specific laptop model. Download and install the latest camera drivers from their official support pages.
macOS:
- Click the Apple icon in the top-left corner.
- Select "System Preferences" or "System Settings" (depending on your macOS version).
- Choose "Software Update."
- If driver updates are available, install them. macOS often handles driver updates automatically as part of OS updates.
- Occasionally, you may need to search the internet for the specific driver if the default macOS driver doesn't function properly.
2. Eliminate Software Conflicts: A Clean Slate for Your Camera
Certain applications can interfere with your camera's operation. Closing unnecessary programs can often resolve conflicts.
- Close Unused Applications: Before starting your Zoom call, close any applications that might be using your camera or microphone, such as other video conferencing software, media editing tools, or applications that use your camera for security purposes.
- Background Processes: Use Task Manager (Windows) or Activity Monitor (macOS) to review any running applications in the background processes that might interfere with your camera. Terminate any that are not essential.
- Check Camera Permissions: Ensure that Zoom has permission to access your camera and microphone. In Windows go to "Settings" > "Privacy" > "Camera" and make sure Zoom is enabled. For macOS, go to "System Preferences" > "Security & Privacy" > "Privacy" and ensure Zoom has access to your camera and microphone.
3. Lighting Magic: Illuminating Your On-Screen Presence
Proper lighting is arguably the single most impactful factor in improving video quality.
- Natural Light is King: Position yourself facing a window. Natural light is soft and flattering. Avoid direct sunlight, which can create harsh shadows.
- Even Distribution: Make sure the environment is evenly lit. Avoid sitting with your back to a window, as this will create a silhouette.
- Invest in Supplemental Lighting: If natural light is limited, consider investing in a ring light, a small studio light, or even a desk lamp with a soft white bulb. Position the light source in front of you and slightly above your eye level to eliminate shadows and highlight your face.
- Experiment with Positioning: Try different lighting setups to find what works best for your specific environment.
4. Zoom Settings Optimization: Fine-Tuning Your Video Feed
Zoom offers several settings that can significantly impact your video feed's quality.
Video Settings:
- Open the Zoom application and click on your profile picture, then click on "Settings."
- Select the "Video" tab.
- Make sure your correct camera is selected.
- Enable "HD" (if your camera supports it). This is a vital setting.
- Experiment with "Touch up my appearance" to soften the image and reduce blemishes (use this with caution, as it can look artificial).
- Adjust the "Adjust for low light" setting. This can help compensate for poor lighting conditions, but may degrade the image if you turn it to the maximum level.
Audio Settings:
- Click the "Audio" tab in the Zoom settings.
- Select your microphone.
- Test your microphone to ensure it's working correctly.
- Enable "Automatically adjust microphone volume." to normalize your audio levels.
- Consider enabling "Suppress background noise" to reduce distracting sounds.
5. Hardware Considerations: Exploring External Camera Options
If all else fails, or if you need a significant upgrade in video quality, consider using an external webcam.
- External Webcams: These devices often offer superior image sensors, lenses, and features than the built-in cameras.
- Resolution and Frame Rate: Choose a webcam with a high resolution (1080p or higher) and a good frame rate (30fps or higher) for smooth video.
- Connectivity: Most external webcams connect via USB. Ensure your computer has available USB ports.
- Placement: Position your external webcam at eye level or slightly above to achieve a more flattering angle.
- Lighting: External webcams often have built-in lights. Consider using a ring light for extra lighting.
6. Network Connection: Ensuring a Seamless Zoom Experience
A fast and stable internet connection is crucial for high-quality video calls.
- Test Your Internet Speed: Use an online speed test (e.g., speedtest.net) to check your download and upload speeds.
- Minimum Requirements: For a good Zoom experience, you'll need a minimum of 1.0 Mbps upload and download speed. HD video requires higher speeds.
- Wi-Fi vs. Ethernet: A wired Ethernet connection is generally more stable than Wi-Fi. If possible, connect your laptop directly to your router with an Ethernet cable.
- Close Unnecessary Applications: Close any applications that are consuming bandwidth, such as streaming services or large file downloads.
7. Troubleshooting Tips: Additional Fixes
If you're still experiencing issues, consider these additional troubleshooting steps:
- Restart Your Computer: This simple step can often resolve minor software glitches that might be affecting your camera.
- Zoom Reinstallation: Uninstall and reinstall the Zoom application. This can help repair corrupted files.
- Camera Cleaning: Gently clean the lens of your laptop camera with a microfiber cloth to remove smudges and dust.
- Check Privacy Settings: Double-check that your operating system's privacy settings allow Zoom to access your camera.
By methodically working through these steps, you'll be well on your way to resolving your Zoom camera nightmare, upgrading from a Laptop Cam FAIL to a professional and engaging video presence.
