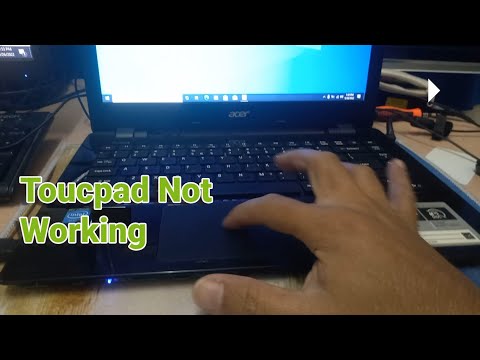
i have an acer laptop the touchpad quit working

Title: Acer Touchpad Not Working in Windows 1087 2025 Tutorial
Channel: TechFixIT
Acer Touchpad Not Working in Windows 1087 2025 Tutorial by TechFixIT
Acer Laptop Touchpad DEAD? This SHOCKING Fix Works!
Acer Laptop Touchpad Troubles? A Simple Solution That Might Surprise You!
Ever found yourself frantically clicking a dead Acer laptop touchpad? The frustration is real, isn't it? You’re in the middle of a crucial task, deadlines are looming, and suddenly, your cursor has vanished into digital oblivion. It’s a common predicament. But before you resign yourself to external mice or expensive repairs, I've got something you need to hear.
The Unexpected Culprit: A Quick Diagnostic
First things first, let’s not panic. Before you assume the worst, let’s perform some quick checks. Sometimes the simplest things evade us in moments of technological stress. Perhaps the touchpad is accidentally disabled. Many laptops have a dedicated key combination, like Fn + F7 (or a similar F key), designed to toggle the touchpad on and off. Give that a try. Additionally, ensure your touchpad isn't simply dirty. A crumb or speck of dust can sometimes mimic a hardware failure. Gently clean the touchpad surface.
Delving Deeper: Software Shenanigans
Assuming the basic checks have been exhausted, let's move into the realm of software. A malfunctioning driver can cause all sorts of bizarre behavior. Consequently, you will need to update or reinstall your touchpad drivers. This is often the key to unlocking a functional touchpad.
Finding Your Drivers
You can find these in two primary locations. Firstly, venture over to the Acer support website. Simply input your laptop's model number. Then, navigate to the “Drivers and Manuals” section. Download the latest touchpad driver. Secondly, Windows Update is also a reliable place. Windows typically updates drivers automatically. But you can force the issue. Go to Settings, then Update & Security, and then Windows Update. Click “Check for updates.”
The Driver Dance: Installation Steps
Once you’ve downloaded the driver, the installation process is usually straightforward. Run the setup file. Following the prompts, you can install the driver. Reboot your laptop. Afterward, check if the touchpad functions again. If the new driver still doesn’t work, then uninstall the existing driver. You can find this under Device Manager (search for it in the Windows search bar). Right-click the touchpad device. Select “Uninstall device.” Restart your laptop. Windows should automatically reinstall the driver upon startup.
Beyond the Basics: Advanced Troubleshooting
Still no luck? Now, we need to employ a few more advanced tactics. Consider checking your BIOS settings. The BIOS (Basic Input/Output System) controls various hardware functions. Accessing your BIOS usually involves pressing a specific key (Del, F2, F12, etc.) during startup. Consult your Acer laptop’s manual to determine the BIOS access key. Inside the BIOS, look for touchpad settings. Ensure it's enabled.
The Hidden Hardware Hurdle: A Possible Solution
Hardware issues are, unfortunately, sometimes the cause. However, before you consider extensive repairs, consider these possibilities. Loose connections are a frequent offender. Although not recommended unless you have some comfort level with hardware, consider opening your laptop. Examine the touchpad cable connection to the motherboard. Make sure it's securely plugged in. However, if you are uncomfortable with such a task, then let a professional handle it.
The Final Resort: Professional Help
If none of these steps have proven successful, it’s time to call in the experts. Contact Acer support. Describe the problem in detail. Alternatively, consult a reputable computer repair shop. They have the expertise to diagnose more complex hardware issues. This is crucial to getting your laptop fully functional.
Prevention is Key: Avoiding Future Touchpad Troubles
Preventative care is essential. Keep your touchpad clean. Regularly update your drivers. Handle your laptop with care. Avoid excessive pressure on the touchpad surface. These simple measures will help extend the life of your touchpad.
Conclusion: Back to Smooth Sailing
Dealing with a dead touchpad can be incredibly frustrating. But don't despair. Hopefully, one of the aforementioned troubleshooting steps will bring your touchpad back to life. Remember to be patient. Also, be methodical while going through the steps. Most importantly, don’t hesitate to seek professional help if necessary. So get back to your work, enjoy a smoothly functioning touchpad, and remember these tips for future reference.
Laptop Tote Bag: The Ultimate Work-From-Anywhere Style Statement!Acer Laptop Touchpad DEAD? This SHOCKING Fix Works!
Alright, let's be honest, there's nothing quite as frustrating as your Acer laptop's touchpad deciding to stage a silent strike. You're mid-sentence, crafting that perfect email, or maybe you're in the middle of a nail-biting game, and BAM! The cursor freezes, the world stops spinning, and you're left staring at a dead-as-a-doornail touchpad. We've all been there. It’s like your digital sidekick suddenly decided to take a permanent vacation. But before you start panicking and envisioning the hefty repair bill or, heaven forbid, shopping for a new laptop, breathe. We've got your back. Today, we're diving deep into why this seemingly minor issue can throw a wrench in your workflow and, more importantly, how to bring that touchpad back to life. Trust us, it's often simpler than you think.
The Silent Struggle: Why Your Acer Touchpad Might Be Ignoring You
Before we unleash the fix, let's explore the potential villains behind this digital drama. Think of it like a detective novel – we need to unearth the clues to understand the mystery.
- Driver Issues: Imagine drivers as the language your laptop uses to "talk" to its hardware. If those drivers are corrupted, outdated, or missing entirely, communication breaks down. Your touchpad can't understand the instructions, and thus, no movement. It's like trying to order coffee in a language you don't speak.
- Accidental Disablement: Sometimes, the solution is as simple as a misplaced finger. Many laptops have a keyboard shortcut – often a function key combined with another – that toggles the touchpad on and off. It's easy to accidentally hit it and trigger the silent treatment.
- Hardware Hiccups: Let’s face it, technology isn't perfect. Sometimes, the touchpad itself could have a physical problem. This is less common, but we need to consider all possibilities. Think of it like a tiny, delicate dance floor that's suddenly not responding to the rhythm.
- Software Conflicts: Certain applications or even the operating system itself can sometimes clash with the touchpad, causing it to malfunction. It's like two DJs fighting for control of the sound system.
- Dirty Deeds: Dust and debris can occasionally build up on the touchpad or around the edges, interfering with its functionality. This is akin to a stubborn speck of dust on your camera lens, blurring the picture.
The Shocking Fix: A Step-by-Step Guide Back to Smooth Sailing
Now, for the main event – the part you've been waiting for! Let's get that touchpad up and running. We're going to tackle this methodically, like a seasoned mechanic diagnosing a car issue.
Step 1: The Obvious (But Often Overlooked) Check
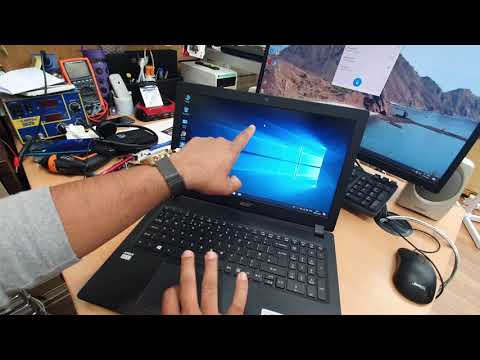
First things first, a quick sanity check. Is your touchpad accidentally disabled? Look for a function key (usually labeled "Fn") combined with another key that has a touchpad icon (often a square with a hand). Press them simultaneously. Did that do the trick? If so, congratulations, you've just solved the mystery with a simple shortcut. Pat yourself on the back; you're a tech wizard!
Step 2: Driver Detective Work: Updating or Reinstalling
If the shortcut didn't work, it's time to delve into the world of drivers. Think of drivers as the translator between your laptop and its components.
- Search for "Device Manager" in your Windows search bar (it's that little magnifying glass). Open it.
- Expand “Mice and other pointing devices.” You should see the entry for your touchpad (it might be called something like "HID-compliant mouse" or have "Synaptics" in the name if you have a Synaptics touchpad).
- Right-click on your touchpad. You have a couple of options here:
- "Update driver": Let Windows search for an updated driver online. Sometimes, this does the trick.
- "Uninstall device": If updating doesn't help, try uninstalling the driver. Then, restart your laptop. Windows should automatically reinstall the driver upon restart. This is like a digital factory reset for your touchpad.
Step 3: The Reboot Ritual: A Necessary Step
Sometimes, all your Acer laptop needs is a good, old-fashioned reboot. It's like hitting the refresh button for your system. Restart your laptop and see if the touchpad has returned to its former glory.
Step 4: Hardware Check: The Touchpad's Tale
While less common, the problem could be hardware-related. Inspect your touchpad for any visible damage – scratches, cracks, or anything that seems out of place. You can also try cleaning it gently with a slightly damp, lint-free cloth. Sometimes, a build-up of dirt can prevent the touchpad from registering your finger's movements.
Step 5: Dive Deeper: BIOS/UEFI and Power Settings
This is a little more advanced, but sometimes the issue resides in your computer's BIOS or UEFI settings. Accessing these settings varies depending on your Acer model; typically, you'll need to press a specific key (like Del, F2, or F12) repeatedly during startup before the Windows logo appears. Once in the BIOS/UEFI, look for a touchpad setting and ensure it's enabled. While in BIOS, also verify power settings. Make sure that your device is not set to hibernate or have a power-saving mode enabled that would prevent the touchpad from functioning properly.
Step 6: Software Conflicts: Isolation and Elimination
If the problem persists, try to identify if a specific software program is causing the issue. Start by closing all recently opened applications, especially those that might interact with input devices. If the touchpad starts working after closing a particular program, you've found the culprit.
Step 7: Consider External Input Devices
As a work-around, you can connect an external USB mouse. This will allow you to navigate your laptop while you continue troubleshooting the main touchpad.
Beyond the Fix: Proactive Measures to Keep Your Touchpad Happy
Now that we’ve hopefully revived your touchpad, let's talk about prevention. Because as the saying goes, an ounce of prevention is worth a pound of cure.
Keep Your Drivers Current: The Digital Vaccine
Make checking for driver updates a regular habit. Windows Update often handles this automatically for most systems, but it's always a good idea to manually check from time to time, especially for graphic card drivers, which could influence overall performance.
Protect Your Laptop: The Armor of Awareness
Treat your Acer laptop with care. Avoid extreme temperatures, spills, and physical impact. Think of it as protecting a precious jewel.
Clean Regularly: The Dust Bunny's Nemesis
Dust and debris are the enemies of all electronics. Regularly clean your touchpad with a soft, lint-free cloth. Make it part of your laptop maintenance routine – like brushing your teeth for your digital device.
Troubleshooting Acer Touchpad Issues: A Recap and Alternative Solutions
Run a Hardware Diagnostic Test: While less common, Acer often includes diagnostic tools that can help identify hardware issues. Check your Acer's support page for instructions.
Restore Your System: If you suspect the problem started after a recent software installation or update, consider using the System Restore feature in Windows to revert to a previous working state.
Windows Troubleshooter: Windows has built-in troubleshooters that can automatically detect and fix common touchpad problems. Try running the "Hardware and Devices" troubleshooter. Search for "troubleshoot" in the Windows search bar.
When to Call in the Professionals: Recognizing the Limits
We've covered a lot. However, let's be realistic. If you've exhausted all these troubleshooting steps and the touchpad is still unresponsive, it might be time to seek professional help.
- The Touchpad is Physically Damaged: If there's obvious damage, attempting a DIY repair is often futile and could potentially void your warranty.
- The Issue Persists After All Attempts: Sometimes, there’s an underlying hardware issue that requires specialized tools and expertise.
- You’re Uncomfortable with Advanced Troubleshooting: Don't hesitate to get external help if you're unsure about any of the steps.
Closing Thoughts: Empowered by Knowledge
There you have it! We've armed you with the knowledge and the tools to fight against the dreaded dead Acer laptop touchpad. Remember, often the simplest solutions are the most effective. Now go forth and conquer those digital obstacles, knowing you have the power to bring your touchpad back to life. We hope this guide helps you get that cursor moving again. Keep this article as your tech-savior, and never give up.
FAQs: Your Burning Questions Answered
1. My touchscreen doesn't work either. Is it related to the touchpad issue?
Possibly. If both your touchscreen and touchpad are unresponsive, it could point to a more significant driver or operating system problem. Start by updating drivers for both devices and checking for Windows updates. If the problem persists, consider a system restore or contact Acer support.
2. My Acer laptop touchpad works sometimes, but not always. What's going on?
This intermittent behavior can be frustrating. It usually points to a driver issue, a software conflict, or possibly a loose connection. Try updating your touchpad driver, checking for conflicting software, and ensuring your touchpad settings are configured correctly
Microsoft Pen on HP Laptop: The SHOCKING Truth!How to fix Acer touchpad not working

By JESSOK I.T STORE & SERVICES How to fix Acer touchpad not working by JESSOK I.T STORE & SERVICES
Acer Aspire 3 Track-pad not working solved
By Thepcphone Acer Aspire 3 Track-pad not working solved by Thepcphone
Acer Aspire E5-411 Series Touchpad not Working on Windows 10 FIXED
By JC-Tech tips Acer Aspire E5-411 Series Touchpad not Working on Windows 10 FIXED by JC-Tech tips

Title: Acer laptop touchpad not working
Channel: QUICK & EASY
Acer laptop touchpad not working by QUICK & EASY
Wifi On Laptop
Title: Mastering the Art of Gourmet Coffee Brewing at Home: A Comprehensive Guide
Coffee. The elixir of mornings, the companion to afternoons, the fuel for countless endeavors. We, as individuals, have a deep relationship with this complex beverage. But how often do we truly explore the vast landscape of coffee brewing beyond the familiar? Today, we embark on a journey to elevate your home coffee experience, transforming you from a casual consumer to a connoisseur. This guide offers a comprehensive roadmap, equipping you with the knowledge and techniques needed to brew coffee that rivals your favorite café, all within the comfort of your own kitchen. Prepare to unlock the secrets of exceptional coffee.
Understanding the Foundation: The Coffee Bean and Its Journey
The journey to superior coffee begins long before the brewing process. It starts with the bean. Coffee beans, the seeds of Coffea plant fruits, possess an extraordinary diversity. Understanding the origin, varietal, and processing methods of your beans is paramount.
Origin Matters: Terroir and Flavor Profiles: The terroir, or environmental factors, of a coffee-growing region profoundly impacts the final flavor. Consider the high altitudes of the Ethiopian highlands, which produce complex, floral-toned coffees. Contrastingly, the fertile volcanic soils of Sumatra contribute to full-bodied, earthy brews. Researching the origin of your beans allows you to anticipate the flavor characteristics, guiding your brewing decisions.
Varietal Variations: A World of Coffee Species: Within the Coffea genus, two species dominate the global coffee market: Arabica and Robusta. Arabica, generally considered superior, offers a more nuanced flavor profile, often characterized by acidity, sweetness, and complex aromas. Robusta, with its higher caffeine content and bolder, sometimes bitter taste, is frequently used in espresso blends. Experimenting with different Arabica varietals - such as the bright, citric notes of a Gesha or the chocolatey depths of a Typica – is a worthwhile adventure.
Processing Power: Unveiling the Bean's Potential: The processing method, the way the coffee cherries are treated after harvest, has a significant say in the final cup. Washed coffees, where the fruit pulp is removed before drying, tend to be cleaner, brighter, and more acidic. Natural or dry-processed coffees, dried with the fruit intact, often exhibit fuller bodies, enhanced sweetness, and sometimes fruitier notes. Honey-processed coffees fall between these two, offering a balance of the other two methods.
The Crucial Role of Equipment: Your Brewing Arsenal
The right equipment can dramatically enhance your brewing experience. Investing in quality tools is an investment in better coffee.
The Grinder: Your Gateway to Freshness: A burr grinder is non-negotiable for home coffee brewing. Unlike blade grinders, burr grinders provide a consistent particle size, which is essential for even extraction. Choose a burr grinder with adjustable settings to accommodate various brewing methods. A conical burr grinder is a great choice for its versatility and relatively quiet operation.
The Water: The Unsung Hero: Water quality plays a critical role. Use filtered water to remove chlorine and other impurities that can negatively impact the flavor. The water temperature is critical; for most brewing methods, aim for a water temperature between 195°F and 205°F (90°C and 96°C). A gooseneck kettle allows for precise pouring control, which is particularly important for pour-over methods.
The Brewing Methods: Exploring Your Options: Choose a brewing method based on your preferences and lifestyle. A French press offers a full-bodied, immersive experience. Pour-over methods, like the V60 or Chemex, provide clarity and control over the extraction. Espresso machines create concentrated flavor. Aeropress is a versatile method that combines immersion and pressure.
Crafting the Perfect Brew: Step-by-Step Techniques
Now, let us delve into the practical applications of these principles. We will explore brewing techniques, and each brew has its own specific steps to follow.
The French Press: Embracing Full Immersion:
- Grind: Use a coarse grind, similar to sea salt.
- Bloom: Add twice the amount of water as the coffee, and allow it to bloom for about 30 seconds.
- Pour: Slowly pour the remaining water over the grounds.
- Steep: Allow to steep for four minutes.
- Plunge: Slowly plunge the filter, stopping just before the grounds.
- Serve: Pour immediately to prevent over-extraction.
The Pour-Over (V60): Precision and Clarity:
- Grind: Use a medium-fine grind, similar to table salt.
- Rinse: Rinse the paper filter with hot water to eliminate paper taste.
- Bloom: Pour twice the total amount of water on the grounds, allow to bloom for 30 seconds.
- Pour: Slowly pour the remainder of the water in a circular motion, ensuring even saturation.
- Extraction: The total brew time should be around 2:30 minutes.
The Aeropress: Versatility in a Plunger:
- Grind: Use a fine grind, similar to espresso.
- Preheat: Warm the Aeropress with hot water.
- Add Coffee: Add your ground coffee to the chamber.
- Pour: Add your water, stirring it for agitation.
- Steep: Allow to steep for 1 minute.
- Press: Slowly press, aiming for 30 seconds.
Dialing in Your Brew: The Art of Refinement
Brewing exceptional coffee is an iterative process. Trial and error are critical.
Grind Size Adjustments: Experimenting with grind size is the most crucial variable. Too coarse, and your coffee will be under-extracted, resulting in sour, weak flavors. Too fine, and it will be over-extracted, leading to bitterness. Adjust your grind size until you achieve the desired balance of flavors.
Water Temperature Management: Water temperature affects extraction. Use a thermometer to ensure your water is within the ideal range. Adjusting the water temperature in the following brew session can help you achieve a better extraction.
Brew Time Optimization: The brew time dictates extraction. Experiment with different brew times for your chosen method until you achieve the desired taste.
Coffee-to-Water Ratio Calibration: The ratio of coffee to water is critical for consistency. A standard ratio is 1:15 (coffee to water), but you can adjust it to your personal preference.
Beyond the Brew: Storage, Cleaning, and Coffee Culture
Mastering coffee brewing isn't just about the process. It's about understanding the product and your methods.
Proper Coffee Bean Storage: Store your beans in an airtight container, away from light, heat, and moisture. Whole beans retain their freshness longer than pre-ground coffee. Consider storing beans in the freezer for extended preservation.
Equipment Maintenance: Regular cleaning is essential. Rinse your equipment after each use. Periodically descaling your kettles and espresso machines will remove mineral buildup.
The Coffee Community: Embrace the coffee community. Explore roasters, attend coffee tastings, and learn more. The world of coffee is vast, and continuous learning is the key to enjoying it fully.
Conclusion: Your Coffee Transformation
Brewing exceptional coffee at home isn't about following complex recipes or possessing expensive equipment. It is about understanding the fundamentals, embracing experimentation, and savoring the journey. As your skills develop, you'll discover the joy of crafting a perfect cup, tailoring it to your specific preferences. So, grab your beans, your grinder, and your favorite brewing method, and embark on this exciting adventure. Unlock the potential within each bean. The world of exceptional coffee awaits.
