dell inspiron 15 7000 gaming laptop microphone not working
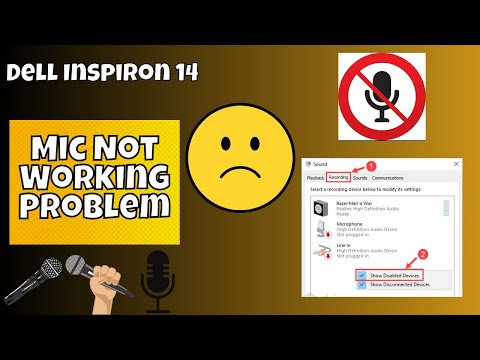
Title: Dell Inspiron 14 Microphone not working problem
Channel: Ultimate PC Guide
Dell Inspiron 14 Microphone not working problem by Ultimate PC Guide
Dell Inspiron 15 7000 Mic Dead? FIX This Gaming Laptop Mic Problem NOW!
Here's the requested article:
Dell Inspiron 15 7000 Mic Woes? Silence the Static and Get Heard!
Alright, fellow gamers, have you encountered the dreaded silence? Your Dell Inspiron 15 7000, a machine built to conquer digital realms, suddenly refuses to transmit your voice. The mic is dead, rendering cooperative gameplay a solitary experience. Frustration mounts. Communication crumbles. But fear not! We'll navigate this together. We'll troubleshoot this irritating issue. Let's get your voice back in action. This isn’t just a fix; it's a restoration of in-game camaraderie.
Unmasking the Culprit: Common Mic Malfunctions
Before we dive into complex solutions, let's diagnose the likely suspects. Sometimes, the fix is surprisingly simple. First, inspect the obvious. Is the microphone physically muted? Many laptops, including the Inspiron 15 7000, have a physical mute button. Accidentally hitting this innocent button can cause much consternation. Check for any small toggle switches. This might be located near the webcam. Next, examine your system settings. Windows audio settings are often the source of many problems.
Audio Settings: Your First Line of Defense
Head over to the Windows sound settings. Find them in the control panel or via the search bar. Look at the “Input” section. Is your microphone recognized here? If it is not, then Windows might not be detecting the microphone. This may require driver updates. If your microphone is present, it will probably be listed. Ensure it's selected as the default recording device. Moreover, check the microphone volume levels. Is the volume muted? Is it set too low to be heard? Adjust this setting accordingly. Also, test the microphone levels. Speak into the microphone. Observe the audio meters. The meters should respond to your voice. No response indicates a problem. If setting aren't the issue, then further investigation is required.
Driver Dilemmas: Resolving the Software Snags
Outdated or corrupted drivers can wreak havoc. Download the latest audio drivers. Visit the Dell support website. Enter your service tag or Inspiron 15 7000 model number. Download the most recent audio drivers. Install them. Restart your laptop. Many problems disappear following a straightforward reboot. You can also try uninstalling and reinstalling the drivers. This might resolve the issue. You can locate the device manager. Expand the "Sound, video, and game controllers" section. Right-click on your audio device. Select "Uninstall device". Then, restart your laptop. Windows should automatically reinstall the drivers.
Hardware Headaches: Pinpointing the Physical Problems
Sometimes, the issue lies in the hardware itself. Check the microphone jack. Is it clean and free of debris? Ensure the microphone port isn't damaged. Test a different microphone. If an external microphone works, then the issue is likely with the internal microphone. Although, the internal mic might require replacement. This can be a complex repair. Consider professional assistance if you're not comfortable opening your laptop.
Software Conflicts: Identifying Programatic Interference
Certain software programs can interfere with your microphone. Applications like Discord or TeamSpeak might have their own audio settings. Therefore, be sure to check these settings. Verify those the correct microphone is selected. Also, experiment with closing other applications. See if this improves microphone performance. Sometimes, background processes consume system resources. This can create audio issues.
BIOS Tweaks: Advanced Troubleshooting Steps
For more experienced users, the BIOS settings may provide some answers. Access your BIOS settings. This usually involves pressing a specific key (like F2 or Del) during startup. Check for audio-related settings. Ensure the internal microphone is enabled. Restore your BIOS to its default settings. This can sometimes resolve unexpected issues. Be extremely cautious when modifying BIOS settings. Incorrect changes can cause system instability. Only proceed if you're comfortable with this level of technicality.
The Final Check: Testing Your Microphone's Recovery
After implementing any of the above solutions, test your microphone. Record a voice memo within Windows. Alternatively, make a test call via a communication application. If your voice is clear, then congratulations! You win! If there's still no audio, revisit the previous steps. Take the time to meticulously re-evaluate each potential solution. Persistence usually pays off in these situations.
Preventative Measures: Keeping Your Mic Singing
To safeguard your microphone, practice some preventative maintenance. Keep your laptop clean. Dust and debris can accumulate in ports. They might cause audio issues. Regularly update your drivers. Keep your operating system updated too. Consider a robust antivirus program. This guards against potential software conflicts.
Wrapping Up: Your Voice, Your Victory!
Hopefully, these troubleshooting steps have helped you. You've successfully revived your Dell Inspiron 15 7000 microphone. Now you have the power to communicate effectively again. In this gaming world, being heard is essential. So, go forth and conquer. Remember, you're not alone in facing this issue. Many gamers encounter similar problems. Together, we have overcome the mute. Happy gaming!
Google's Down? Fix Your Laptop's Internet NOW!Dell Inspiron 15 7000 Mic Dead? FIX This Gaming Laptop Mic Problem NOW!
Alright, gamers, let’s be honest: there’s nothing more frustrating than jumping into a raid with your squad, ready to slay some digital dragons, only to realize your Dell Inspiron 15 7000’s microphone has decided to take a permanent vacation. “Mic dead?” you scream internally. “Not on my watch!” Well, we’ve all been there. That moment of panic when you can’t communicate, strategize, or just revel in the glorious chaos with your friends. Fear not, fellow digital warriors! We’re diving headfirst into the trenches to help you troubleshoot and, hopefully, resurrect that all-important mic. Think of us as your techy battle companions – we’ve got your back!
The Sound of Silence: Recognizing the Mic Problem
First things first: confirming the enemy. Is the mic actually dead, or are we dealing with a minor skirmish? This is crucial. Before you start tearing your hair out (or, you know, throwing your laptop across the room – we judge not!), let’s do some basic checks. Is it just your side, or can everyone not hear you? This helps narrow down the problem. Is the mute button on? (Yes, we’ve all been caught by that one!) Are you using the correct microphone input in your game or communication software (Discord, Teamspeak, etc.)? Consider it a preliminary scouting mission—gather intel before charging into battle.
Software Shenanigans: Diving into the Digital Realm
Okay, assuming the hardware isn’t the immediate culprit, let's explore the software side of things. Software problems are like sneaky ninjas; they can strike silently.
Check Your System Settings: This is Command Central!
- Windows Sound Settings: Right-click the sound icon in your system tray (the little speaker in the bottom right corner). Click "Open Sound settings." Select the "Input" section and confirm your microphone is selected and that the input level isn't set to zero. Adjust the volume, test your mic, and make sure it’s not muted. It's like making sure your weapons are loaded and ready.
- Device Manager: Search for "Device Manager" in the Windows search bar. Expand the "Audio inputs and outputs" section. Does your microphone show up? Is there a yellow exclamation mark or a red "X" on it? That's a sign something's amiss. Try right-clicking on your microphone and selecting "Update driver." This is like giving your computer a software upgrade.
- Privacy Settings: Go to “Privacy” in your Windows settings and make sure that apps are permitted to access your microphone. Your games (or your friends!) need permission to hear you.
Application-Specific Settings: Each game or communication app has its own audio settings. Double-check those! Make sure the correct microphone is selected and the input volume is reasonable. Think of this like calibrating your weapons before a big battle.
Hardware Hurdles: The Physical Examination
If the digital world is playing nice, let's get physical. Time to inspect the battlefield.
- The Headset or Microphone Itself: Try another microphone. This is the easiest way to see if the problem lies with the Dell Inspiron’s built-in microphone or the headset you’re using. Is it plugged in correctly? Is the headset/mic itself faulty? Sometimes, the simplest answer is the right one.
- The Jack (If Applicable): If you're using a headset with a 3.5mm jack, check the port on the laptop itself. Is it clean? Is it loose? Try wiggling the jack gently while testing the microphone. Does the sound cut in and out? This could indicate a loose connection. Think of it like inspecting your armor for potential weaknesses.
- Internal Microphone: The Dell Inspiron 15 7000 has a built-in microphone. Try testing it specifically within the device settings. If that doesn't work, you may need to repair it.
Driver Disasters and Quick Fixes
Drivers are the unsung heroes (or villains!) of the computer world. They connect your hardware to your software. A corrupt, outdated, or missing driver can absolutely kill your mic.
- Driver Updates: We touched on this earlier in Device Manager, however, it's more in-depth here.
- Automatic Update: Windows usually updates drivers automatically, but sometimes it needs a nudge. Go back to Device Manager, right-click your microphone, and select "Update driver." Choose "Search automatically for drivers."
- Manual Update: If the automatic update fails, you can try downloading the latest audio drivers from Dell's support website, specifically for your Inspiron 15 7000 model. You'll need your laptop's service tag to find the correct drivers.
- Driver Rollback: If the problem started after a driver update, try rolling back to a previous driver version. Right-click your microphone in Device Manager, select "Properties," then go to the "Driver" tab. If the "Roll Back Driver" option is available, try it.
The BIOS Battlefield: A Deeper Dive
Sometimes, the solution lies even deeper, within the BIOS (Basic Input/Output System) settings. This is the core software that runs when your computer starts up.
- Accessing the BIOS: You'll typically need to press a specific key (like F2, F12, Delete, or Esc) during startup to access the BIOS. The specific key varies depending on your laptop. Check your Dell Inspiron 15 7000 manual for the correct key.
- Audio Settings: Once in the BIOS, look for "Audio" or "Onboard Audio" settings. Make sure the audio device is enabled.
External Devices and Interference
Sometimes, the enemy isn't a direct problem but an interloper.
- USB Hubs: If you're using a USB microphone or headset connected via a USB hub, try plugging it directly into the laptop. Sometimes, hubs can cause interference or power issues.
- Other Devices & Interference: Make sure no other devices are causing trouble.
Cleanliness is Next to Godliness (and a Working Mic)
We’re talking about a digital hygiene check here.
- Clean the Jack: Use a can of compressed air to clean the audio jack on your laptop. Dust and debris can interfere with the connection.
- Software Conflicts: Are there any other programs running that might be interfering with the microphone? Close unnecessary applications.
- Restart and Refresh: The classic fix. Restarting your computer can resolve many temporary software glitches.
Advanced Troubleshooting: When Silence Speaks Volumes
If you've exhausted the basics, it's time to advance.
- System Restore: If you know when the problem started, you can try restoring your system to a previous point in time when the microphone worked correctly. However, this can remove installed programs.
- Factory Reset (Last Resort!): If all else fails, you may need to perform a factory reset. This wipes your hard drive and reinstalls Windows. Backup your important files first!
Contacting Dell Support: Calling in the Reinforcements
Sometimes, no matter how hard you try, the problem is beyond your control.
- Warranty Check: Does your Dell Inspiron 15 7000 have a warranty? If yes, contact Dell support. They might be able to fix it or offer a replacement.
- Describe the Problem: Be prepared to describe the troubleshooting steps you've already taken. This will help the support team diagnose the issue more quickly.
Preventative Measures: Keeping the Enemy at Bay
Once you've solved the problem, consider these tips to prevent future mic mishaps:
- Regular Driver Updates: Keep your audio drivers updated. Set your computer to check for updates automatically.
- Protect Your Ports: Be gentle with your audio jacks. Avoid yanking out the headset plug.
- Keep it Clean: Keep your laptop clean. Don't let dust and debris accumulate.
The Art of the Audio: Choosing the Right Microphone
Now, let’s be honest. The built-in microphone in a gaming laptop is never going to be the pinnacle of audio quality. Consider upgrading to a dedicated gaming headset or external microphone for a superior experience. It's like upgrading your wooden sword to a legendary blade.
Audio Recording Software Test: Is It Truly Working?
Once you think you’ve cracked the code, test it out!
- Quick Recording: Use the Voice Recorder app (built-in to Windows) to record a short message. Listen back to make sure your voice is clear and audible.
- Gaming Test: Launch your favorite game and test your microphone in a multiplayer environment.
The Microphone Market: Upgrading Your Arsenal
If you’re a serious gamer, consider enhancing your audio setup. An external microphone provides superior sound clarity.
- USB Microphones: Easy plug-and-play setup. Great for beginners.
- Gaming Headsets: Convenient and provide good audio isolation.
- XLR Microphones: For professional audio quality and a more advanced setup.
**Troubleshooting
Dell Latitude Keyboard Dead? FIX IT NOW! (Easy Steps)How To Fix Microphone Not Working on Dell Laptop
By Your Fix Guide How To Fix Microphone Not Working on Dell Laptop by Your Fix Guide
Fix DELL Laptop Audio Sound Not Working

By Murugan S Fix DELL Laptop Audio Sound Not Working by Murugan S
Test Microphone Dell Laptop Tutorial

By TechFixIT Test Microphone Dell Laptop Tutorial by TechFixIT

Title: Fix Microphone Not Working on Windows 10
Channel: The Geek Page
Fix Microphone Not Working on Windows 10 by The Geek Page
Working With Laptop
Here's the title: The Ultimate Guide to Baking the Perfect Chocolate Chip Cookie
The Ultimate Guide to Baking the Perfect Chocolate Chip Cookie
We've all been there: the craving hits, the mental image solidifies – the warm, gooey, melt-in-your-mouth deliciousness of a perfect chocolate chip cookie. But the reality doesn't always match the dream, does it? Sometimes it's a flat, crispy disc; other times, a dry, unsatisfying crumb. Fear not! This is your comprehensive guide, your roadmap to cookie nirvana. We'll dissect every aspect of the baking process, from ingredient selection to chilling strategies, ensuring you achieve chocolate chip cookie perfection, every single time. Prepare to elevate your baking game.
Ingredient Selection: The Foundation of Flavor
The quality of your ingredients directly translates to the final product. Neglecting this crucial step is akin to building a house on sand. Commit to the following for truly exceptional cookies:
Butter: The Unsung Hero. Unsalted butter is your best friend. It allows you to control the salt level meticulously, ensuring the other flavors aren't drowned out. European-style butter, boasting a higher butterfat content, yields a richer flavor and superior texture. Bring your butter to the perfect temperature – room temperature, about 65-70°F (18-21°C) – before beginning. It should be soft enough to indent slightly but not so soft that it's greasy.
Sugar: A Symphony of Granulation and Moisture. We'll use a duo of granulated sugar and brown sugar. Granulated sugar contributes to crispness and a slightly cracked top, while brown sugar (preferably light brown, though dark brown works if that's all you have) provides moisture, chewiness, and that signature caramel-molasses flavor. Be sure to pack your brown sugar; this accurate measurement is critical.
Eggs: Binding and Beyond. Eggs act as a binder, adding structure and richness. Use large eggs and, for an extra layer of richness, consider adding an extra egg yolk. This will further enhance the chewiness. Make sure your eggs are at room temperature, too; they'll incorporate more easily with the butter and sugar.
Flour: The Structural Backbone. All-purpose flour is the standard, but for a truly tender cookie, consider using a combination of all-purpose and cake flour. Cake flour has a lower protein content, resulting in a more delicate crumb. Measure your flour correctly – either by weight with a kitchen scale or by spooning it into your measuring cup and leveling it off with a knife. Avoid scooping directly from the bag; this can lead to over-measurement and dry cookies.
Chocolate: The Star of the Show. The type of chocolate you choose is a personal preference, but we advocate for a mix. Semisweet chocolate chips are a classic choice, providing a familiar and comforting sweetness. However, incorporating chunks of high-quality dark chocolate (around 60-70% cacao) will add a depth of flavor that elevates the experience. Consider adding a few chopped chocolate bars for a visual and textural delight.
Vanilla Extract: The Flavor Amplifier. Pure vanilla extract, not imitation, is essential. It enhances the sweetness and overall flavor profile wonderfully. Opt for a high-quality extract for the best results.
Baking Soda & Salt: The Supporting Cast. Baking soda provides lift and helps the cookies spread. Ensure it's fresh – check the expiration date! Salt balances the sweetness and enhances the other flavors. Use fine sea salt or table salt.
The Perfect Dough: A Step-by-Step Approach
Now that we've assembled our ingredients, let's craft the dough:
Creaming the Butter and Sugar. In a large bowl or the bowl of your stand mixer, cream together the softened butter and granulated and brown sugars. Cream on medium speed for 2-3 minutes until light and fluffy. This step incorporates air into the mixture, which is critical for a good cookie texture.
Adding the Eggs and Vanilla. Add the eggs one at a time, mixing thoroughly after each addition. Then, stir in the vanilla extract until combined. Avoid overmixing at this stage.
Incorporating the Dry Ingredients. In a separate bowl, whisk together the flour, baking soda, and salt. Gradually add the dry ingredients to the wet ingredients, mixing on low speed until just combined. Be careful not to overmix; this can develop the gluten and result in tough cookies.
Adding the Chocolate. Gently fold in the chocolate chips and chopped chocolate chunks. Ensure the chocolate is evenly distributed throughout the dough.
The Chilling Phase: Patience is a Virtue. This is arguably the most crucial step that many recipes gloss over. Cover the dough and refrigerate it for at least 30 minutes, or, ideally, for up to 24-36 hours. Chilling allows the flavors to meld and intensifies the complex taste. Chilling also firms up the dough, preventing excessive spreading during baking, leading to thicker, chewier cookies.
Baking for Brilliance: Mastering the Oven and Techniques
With our chilled dough, we approach the final stretch:
Preheating the Oven. Preheat your oven to 375°F (190°C). Using an oven thermometer ensures accurate temperature control, which is absolutely essential. If your oven runs hot or cold, adjust accordingly.
Scooping and Arranging the Dough. Use a cookie scoop or a spoon to portion out the dough onto baking sheets lined with parchment paper. Space the cookies at least 2 inches apart to allow for spreading. For a more rustic appearance, you can gently flatten the dough balls slightly.
Baking Time: Finding the Sweet Spot. Bake for 9-12 minutes, or until the edges are golden brown and the centers are still slightly soft. The exact baking time will vary depending on your oven and the size of your cookies. Keep a close eye on them, and rotate the baking sheet halfway through for even baking.
Cooling: The Final Touch. Allow the cookies to cool on the baking sheets for a few minutes before transferring them to a wire rack to cool completely. This allows them to set and prevents them from breaking apart.
Troubleshooting Common Cookie Challenges
Even the most skilled bakers encounter setbacks. Here's a guide to overcoming common cookie problems:
- Flat Cookies: This is often caused by over-soft butter, too much baking soda, or a dough that wasn't chilled long enough. Ensure you measure the ingredients accurately, especially the flour and baking soda, and refrigerate the dough long enough.
- Dry Cookies: This can be caused by over-baking, too much flour, or under-softened butter. Always use an oven thermometer, measure ingredients precisely, and monitor baking times.
- Tough Cookies: Overmixing the dough after adding the flour can develop the gluten and create tough cookies. Mix until just combined.
- Burnt Bottoms: Your oven might be too hot. Use an oven thermometer to check the accuracy of your oven's temperature or use a second baking sheet below the cookie sheet.
- Cookies Spreading Too Much: This could be because the dough was under-chilled or your butter was too soft.
Variations and Creative Flourishes: Elevating Your Cookie Game
Once you've mastered the basics, explore variations and personalize your cookies:
Add-ins: Incorporate other delicious additions like chopped nuts (walnuts, pecans, macadamia nuts), dried fruits (cranberries, cherries), or different types of chocolate, such as white chocolate or milk chocolate.
Flavor Extracts: Experiment with extracts other than vanilla, such as almond, maple, or coffee extract.
Sea Salt Sprinkle: A sprinkle of flaky sea salt on top of the cookies immediately after baking provides a perfect balance of sweetness and saltiness.
Brown Butter: For an even more sophisticated flavor, brown your butter before creaming it with the sugars. This process adds a nutty, complex flavor dimension.
Cookie Dough Ice Cream: Make your own chocolate chip cookie dough ice cream by reducing the amount of flour in the dough slightly and using a tablespoon to make small cookie dough balls. Freeze them. Once the ice cream is partly frozen, add them to your container.
Storage and Enjoyment: Preserving Perfection
Storage: Store baked cookies in an airtight container at room temperature. Properly stored, they should last for up to a week, though they're often gone much sooner!
Freezing: Freeze baked cookies in an airtight container or freezer bag for up to 3 months. Thaw at room temperature.
Serving: Warm cookies are the best. Reheat cookies in a low oven or microwave for a few seconds to restore their gooey, fresh-baked texture. Serve with a glass of cold milk or a cup of coffee.
This guide is your compass, your companion on the journey to chocolate chip cookie mastery. Armed with knowledge, dedication, and a dash of patience, you’ll be baking cookies that not only satisfy your cravings but also impress even the most discerning palates. Bake on, and savor every delicious moment.
