cooling fan not working laptop hp
Title: Hp Laptop Fan not Working l Mini Vlog l Day 537 shorts vlog minivlog
Channel: RaghuveerCV
Hp Laptop Fan not Working l Mini Vlog l Day 537 shorts vlog minivlog by RaghuveerCV
cooling fan not working laptop hp, hp laptop cooling fan not working 90b, hp laptop cooling fan not working correctly, hp laptop cooling fan not working windows 11, hp 2000 laptop cooling fan not working, hp envy laptop cooling fan not working, what causes a cooling fan not to working in hp laptop, cooling fan not working properly in hp laptop, laptop cooling fan not working, hp laptop says cooling fan not working properly
HP Laptop Fan Died? FIX IT NOW! (Emergency!)
HP Laptop Fan Failure: Averting Disaster!
Your HP laptop fan just quit, huh? That's a stressful situation. But, no need to panic just yet. We can get your laptop breathing easy again. Trust me; I've been there. This article is going to guide you. We'll troubleshoot and find solutions. So, let's dive in and tackle this problem together.
Recognizing the Silent Killer: Symptoms of Fan Failure
First, how do you know the fan gave up the ghost? Several telltale signs could point to this issue. If your laptop is suddenly running incredibly slow, take notice. This sluggishness can be a major clue. The system might be throttling itself due to overheating. Is your laptop unusually hot to the touch? That scorching heat is another critical indicator. Furthermore, listen carefully. Do you hear any unusual noises? A grinding, rattling, or even complete silence suggests problems. Moreover, if your laptop abruptly shuts down, the fan may be a culprit. These shutdowns often occur due to overheating to prevent damage. In essence, these symptoms often indicate fan failure.
Immediate Actions: What to Do Right Now
Okay, the fan's down. Now what? Time is of the essence. First, immediately shut down your laptop. Allow it to cool down. Overheating can damage components. Then, assess the situation. Try to determine the source of the issue. Next, find a cooler environment for your HP laptop. A well-ventilated space is crucial. Ensure your laptop is on a hard surface. Avoid placing it on soft surfaces like beds. These can block airflow and worsen the problem. Finally, if possible, avoid using the laptop until the issue is resolved. Consider backing up important data beforehand. It's always wise to prepare for the worst. Also, keep an eye on error messages. They sometimes offer clues.
Troubleshooting 101: Diagnosing the Problem
Alright, let's get our hands dirty. The first step is to confirm the fan is indeed the problem. Sometimes, other issues mimic fan failure. Therefore, we need to be sure. For instance, check the vents. Are they clogged with dust or debris? Use compressed air to clear them gently. In many cases, this simple task can solve the issue. Afterwards, if that does not help, inspect the fan's movement. Does it spin freely? If not, the fan motor may be seized. However, it could be something else. Next, consider checking the temperature sensors. They can provide more information. Furthermore, monitor your CPU and GPU temperatures. Numerous software tools, like HWMonitor, can assist. Also, check your BIOS settings for fan control options. You might be able to adjust them. Finally, run a diagnostic test. HP offers built-in diagnostics on some laptops. This usually helps uncover the root cause.
DIY Repairs: Simple Fixes You Can Try
Ready to try some fixes? A few simple steps may work. First, cleaning the fan is often the easiest solution. Carefully open your laptop. Locate the fan, and use compressed air to remove dust. Be extremely careful during this process. Next, if the fan seems stuck, try lubricating it. Use a small amount of specialized lubricant. However, avoid using excessive amounts of any type. Also, check the fan's connections. Ensure the power cable is securely plugged in. If the connection is loose, that may be the problem. Furthermore, consider updating your BIOS. Sometimes, this can improve fan control. After each step, test the fan. Does it start working? These DIY fixes might do the job. They are cost-effective and can address the problem quickly.
When to Call in the Professionals: Seeking Expert Help
Not comfortable with DIY? That's perfectly fine. Some repairs are best left to professionals. Consider professional help if any of the above steps fail. Specifically, if you don't feel comfortable opening your laptop, get help. A qualified technician can properly diagnose the issue. Also, if you're unsure about any step, seek expert help. They can safely replace the fan. They have the tools and expertise. They can quickly identify other underlying issues. Moreover, a professional can prevent further damage. Attempting to repair something you're not comfortable with can create bigger problems. Finally, sometimes components require replacement. In these cases, a professional's expertise becomes essential.
Preventive Measures: Keeping Your Fan Running Smoothly
Prevention is key. Therefore, take these steps to keep your fan healthy. First, regularly clean your laptop's vents. This is one of the most important things you can do. Also, use your laptop on hard, flat surfaces. The airflow is critical. Then, avoid using your laptop in dusty environments. Dust can quickly clog the fan. Moreover, be mindful of your laptop's temperature. Ensure it does not get too hot during use. Also, install a cooling pad for intensive use. These pads will help keep things cool. Finally, regularly update device drivers. They play a crucial role in overall performance. Regular maintenance will ensure your fan lasts longer.
Conclusion: Breathe Easy Again!
So, there you have it. We’ve covered everything from recognizing the problem to finding solutions. Remember, a dead fan is serious. But, it doesn’t have to be a disaster. You can now diagnose and potentially fix the problem. Or, you have a plan when you need professional help. Now you can breathe easy again. Your HP laptop is ready to work. It's time to face the day ahead. With this knowledge, your laptop should be fine. Good luck, and happy computing!
Laptop Keyboard Dead? FIX IT NOW! (Microsoft Support)HP Laptop Fan Died? FIX IT NOW! (Emergency!)
Hey there, fellow tech travelers! We've all been there. The dreaded moment when your trusty HP laptop starts sounding like a jet engine taking off, or worse, falls silent, and a hot, sluggish performance starts creeping in. You might be thinking, "Oh no, is my laptop fan dead?" Well, friend, if you suspect your HP laptop's fan has given up the ghost, you've landed in the right place. We're going to dive headfirst into this little crisis, armed with knowledge, a dash of humor, and a whole lot of practical advice to get your beloved machine back up and running smoothly. Think of me as your personal tech Sherpa, guiding you through the rocky terrain of laptop woes.
1. The Tell-Tale Signs: Is Your HP Laptop Fan Really Gone?
Before we rip open your laptop like it’s a Christmas present (though, sometimes, it feels like that!), let's be absolutely sure the fan is the culprit. Ignoring the symptoms can be a recipe for disaster – a bit like ignoring a leaky faucet. Let's pinpoint the clues:
- Overheating: This is the big one. If your laptop feels like a pizza oven, especially around the vents, you have a problem.
- Loud Buzzing or Whirring: A dying fan often makes awful noises. It might be a constant whine, a grinding sound, or intermittent bursts of noise. It’s like a grumpy hamster stuck in a wheel.
- Sudden Shutdowns or Freezes: Your laptop is smart. It knows it can't handle extreme heat, so it may shut down or freeze to prevent damage, acting like a safety mechanism.
- Slow Performance: Even if it's not overheating drastically, a dying fan can lead to your laptop running slower than usual. Think molasses in winter.
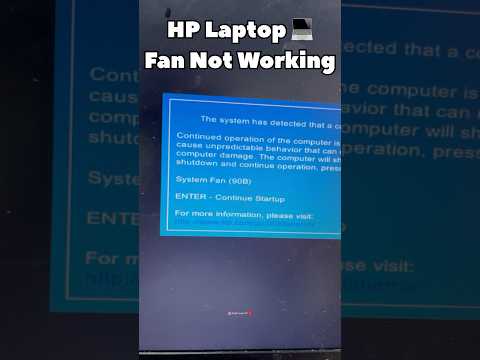
- Error Messages: Sometimes, your HP laptop might give you a heads-up with a warning message about fan failure.
2. Why Did My HP Laptop's Fan Croak? The Usual Suspects
Think of your laptop fan as a diligent worker. But even diligent workers can burn out. Here's a rundown of common issues:
- Dust Bunnies and Grime: This is enemy number one. Dust acts like a blanket, trapping heat and hindering airflow. It's like trying to run a marathon in a sauna.
- Old Age and Wear: Like any mechanical part, laptop fans have a lifespan. After years of spinning, the motor can wear out, leading to failure.
- Software Conflicts: Sometimes, software can push your fan to its limits, leading to premature aging or, in extreme cases, failure.
- Physical Damage: A drop, a spill, or even rough handling can damage the fan.
- Manufacturing Defects: Unfortunately, sometimes fans are just lemons.
3. Safety First! Before You Get Your Hands Dirty
Before we plunge into the repair, safety comes first! Unplug your laptop and remove the battery (if it's removable). This isn't just for safety; it also prevents accidental shorts if you happen to brush against the wrong component. Trust me, you’ll be glad you did this preventative measure. Think of it as putting on your seatbelt before driving.
4. A Deep Dive: Opening Up Your HP Laptop (Carefully!)
This is where it gets serious. Don't worry, we’ll take it slow. The specific steps depend on your HP laptop model, so consult the user manual or do a quick Google search for "HP (your model) laptop disassembly."
Here’s a general guide:
- Gather Your Tools: You’ll need a small Phillips head screwdriver, possibly a spudger or plastic opening tools to pry things open, and maybe a small brush or compressed air.
- Locate the Access Panel: Usually, there’s a panel on the bottom of the laptop that lets you access the fan.
- Unscrew and Unclip: Carefully remove the screws, taking notes where they go if possible.
- Gently Pry: Use a plastic tool to carefully separate the panel from the laptop case. Be patient, these things can be stubborn.
- Identify the Fan: Once inside, you should easily spot the fan.
5. The Dust Dilemma: Cleaning Your HP Laptop Fan
Dust is the bane of electronics. Let's evict those dust bunnies!
- Use Compressed Air: The best way to get rid of dust. Blast it from various angles without getting too close and breaking anything.
- Gentle Brushing: Use a soft brush to gently remove stubborn dust bunnies.
6. The Replacement Route: Buying a New HP Laptop Fan
If cleaning doesn't do the trick, it’s time for a new fan.
- Find the Right Fan: Search online with your HP laptop model number, looking for replacements.
- Installation Time: Once you have the new fan, carefully unscrew the old fan, take note how it’s wired, disconnect the cables, and install the new one.
7. Beyond the Fan: Checking the Heat Sink
The heat sink is your laptop's radiator. Sometimes, it can be clogged with dust or damaged, hindering its efficiency. Inspect it thoroughly while the laptop is disassembled.
8. Software Solutions: Tweaking Settings to Help
Even with a working fan, you can take steps to reduce heat.
- Update Drivers: Outdated drivers can cause issues.
- Limit Heavy Tasks: Avoid running multiple demanding applications simultaneously.
- Consider a Laptop Cooling Pad: These external pads provide extra cooling and help prevent overheating in the first place.
9. The Thermal Paste Tango: Re-Applying for Better Cooling
This is an advanced tactic. Thermal paste facilitates heat transfer between the CPU/GPU and heat sink. If you're comfortable, re-applying thermal paste can improve cooling. However, make sure you’re comfortable with the delicate task, otherwise, skip this step.
10. The "I Give Up" Option: When Professional Help is Smart
If you're not comfortable with any of the steps, or you've tried everything and the fan still won't cooperate, don't hesitate to take your laptop to a professional repair shop. It is better to be safe than sorry.
11. Preventative Measures: Keeping Your Fan Happy
Preventing fan death is easier than fixing it.
- Regular Cleaning: Every few months, carefully clean your laptop's vents.
- Proper Ventilation: Use your laptop on a hard, flat surface. Avoid using it on soft surfaces like beds or blankets, which block airflow.
- Monitor Temperatures: Use software to monitor your laptop’s temperatures and identify potential issues early.
12. Troubleshooting Tips: Common Problems and Solutions
Here's a quick troubleshooting guide:
- Fan Not Spinning at All: Check the power connection to the fan. Also, review if there is any damage.
- Loud, Grinding Noise: This usually suggests a bearing problem. Replace the fan.
- Fan Spins Intermittently: This can point to software issues. Try driver updates.
13. The DIY vs. Professional Debate: When to Call for Backup
There’s no shame in seeking professional help. If you're uncomfortable, don't have the right tools, or the repair seems complicated, a professional is the best route.
14. After the Fix: The Post-Repair Checklist
Once you've fixed the fan, do a thorough checkup.
- Test It: Run your laptop for a while to check the fan’s operation.
- Monitor Temperatures: Ensure it's running at optimal temperatures.
15. The Future of Your HP Laptop: Maintenance for Longevity
Regular maintenance is key. Think of it as your laptop's personal spa day! Perform regular cleanings, avoid extreme temperatures, and keep your software up-to-date for smooth operations.
Closing Thoughts:
So, there you have it! We’ve navigated the choppy waters of a dying HP laptop fan and come out the other side, hopefully with a working laptop in tow. Remember, a little bit of tech know-how, patience, and a dash of bravery can go a long way. And if all else fails, don't be afraid to seek professional help. Your laptop will thank you for it. Go forth and conquer those fan failures!
FAQs:
Q1: How long does an HP laptop fan usually last?
A1: Laptop fan life can vary depending on usage, environment, and model. However, most fans last between 3 to 5 years, although some can last longer with proper maintenance.
Q2: Can I replace the fan myself, or do I need a professional?
A2: Replacing the fan is often possible for DIY enthusiasts. As long as you're comfortable with basic computer repairs and disassembly, you can replace the fan yourself. If you’re not comfortable, seeking professional help is always a good idea.
Q3: What happens if I ignore a dying fan?
A3: Ignoring a dying fan can lead to overheating, which can damage critical components like the CPU and GPU. This could lead to performance issues, system crashes, and
13 Budget Laptops That'll SHOCK You (2019's BEST Kept Secrets!)Cara Memperbaiki Laptop HP 14s Kipas Heatsink Macet
By SYIFA service Cara Memperbaiki Laptop HP 14s Kipas Heatsink Macet by SYIFA service
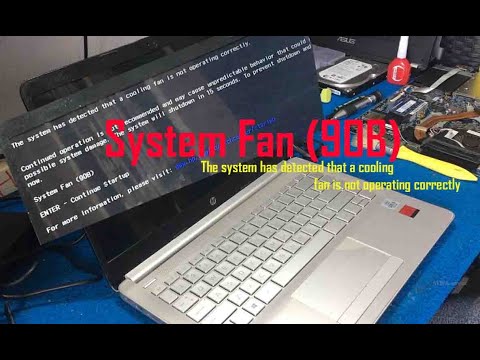
Cara Memperbaiki Laptop Hp System Fan Error Saat Dinyalakan

By Rupa Rupi Rdua Cara Memperbaiki Laptop Hp System Fan Error Saat Dinyalakan by Rupa Rupi Rdua
HP Laptop Fan 90B Error Fix The system has detected that a cooling fan not working properly Solved

By Whiszan Tech HP Laptop Fan 90B Error Fix The system has detected that a cooling fan not working properly Solved by Whiszan Tech
Title: HP 630 Laptop Fan Not Spinning and Overheating Problem Treatment at My Electronics Surgery.
Channel: Bst African Electronics Surgery
HP 630 Laptop Fan Not Spinning and Overheating Problem Treatment at My Electronics Surgery. by Bst African Electronics Surgery
Working With Laptop
The Ultimate Guide to Choosing the Perfect Hiking Boots for Your Next Adventure
Embarking on a hiking adventure is an experience filled with the promise of breathtaking vistas, the invigorating scent of pine needles, and the satisfaction of reaching a challenging summit. Yet, the joy of these experiences hinges significantly on a single, often overlooked piece of equipment: your hiking boots. Choosing the right boots is not simply a matter of following trends or selecting the flashiest design; it's a crucial decision that can make or break your comfort, safety, and enjoyment on the trail. This comprehensive guide delves into every facet of selecting the perfect hiking boots, ensuring you're well-equipped to conquer any terrain with confidence.
Understanding Hiking Boot Categories: A Foundation for Success
The world of hiking boots is vast, encompassing various categories designed to cater to specific hiking styles and terrains. Understanding these categories is the first step towards making an informed decision.
Lightweight Hiking Boots: Often referred to as trail running shoes on steroids, these boots prioritize agility and speed. They are ideal for well-maintained trails, day hikes, and those prioritizing a light pack. They feature flexible midsoles, breathable uppers, and typically offer less ankle support than heavier boots. Consider these for fastpacking adventures or casual walks on relatively even ground.
Midweight Hiking Boots: This versatile category is the workhorse of the hiking world. They provide a balance of support, durability, and comfort, making them suitable for a wide range of trails and backpack weights. These boots typically feature stiffer midsoles than lightweight options, offering improved stability on uneven terrain, and often include waterproof membranes. Excellent choices for weekend backpacking trips and general hiking on varied trails.
Heavyweight Hiking Boots: Designed for rugged, off-trail adventures, these boots offer maximum support, durability, and protection. They feature extremely stiff midsoles, robust uppers (often full-grain leather), and high-cut ankles for superior stability in challenging environments. These are the boots for mountaineering, extended backpacking trips with heavy loads, and traversing technical terrain.
Mountaineering Boots: The pinnacle of hiking boot technology, these boots are built for the most extreme conditions, including ice climbing and high-altitude mountaineering. They are incredibly rigid and insulated, featuring compatibility with crampons for use on snow and ice. Mountaineering boots are a specialized category reserved for experienced climbers.
Assessing Your Needs: Matching Boots to Your Adventures
Once you've familiarized yourself with the different boot categories, it's time to assess your personal hiking needs. Ask yourself these crucial questions:
What type of terrain will you be hiking on? Are you primarily sticking to well-maintained trails, or will you be venturing onto rocky, uneven ground? Will you be crossing streams or encountering wet conditions? The terrain dictates the level of support, durability, and waterproof protection required.
How long will your hikes be, and what weight will you be carrying? Day hikes with a light pack necessitate different boots than multi-day backpacking trips with a heavy load. Heavier loads demand more support and stability from your boots.
What time of year will you be hiking? Consider the weather conditions, including temperature, precipitation, and sun exposure. Your boots should provide adequate insulation for cold conditions, breathability for warm weather, and waterproof protection for wet environments.
How experienced are you as a hiker? Beginners may prefer boots with more ankle support for added stability, while experienced hikers may prioritize agility and flexibility.
Key Features and Materials: Decoding the Boot's Construction
Understanding the components of a hiking boot is crucial for making an informed decision. Here’s a breakdown of key features and materials:
Uppers: The upper is the visible portion of the boot, providing protection and support. Common materials include:
- Leather: Offers excellent durability, water resistance (when properly treated), and a comfortable fit. Full-grain leather is the most durable but requires more break-in time. Split-grain leather is lighter and more flexible.
- Synthetic Materials: Offer excellent breathability, water resistance (with waterproof membranes), and a shorter break-in period. Synthetic uppers are typically lighter than leather.
- Waterproof Membranes: Such as Gore-Tex, are designed to prevent water from entering the boot while allowing water vapor (sweat) to escape.
Midsole: The midsole provides cushioning and shock absorption. Materials include:
- EVA (Ethylene-Vinyl Acetate): Lightweight and offers good cushioning but can compress over time.
- PU (Polyurethane): More durable than EVA and offers better support and longevity.
- TPU (Thermoplastic Polyurethane): Extremely durable and provides excellent support.
Outsole: The outsole provides traction and durability. Materials include:
- Rubber: The most common material, offering excellent grip on a variety of surfaces. Different rubber compounds offer varying levels of stickiness and durability.
- Vibram: A renowned brand of rubber outsoles, known for their superior grip and durability.
Ankle Support: The height and structure of the ankle cuff provide varying degrees of support and stability. High-cut boots offer the most support, while low-cut boots prioritize flexibility.
Lacing Systems: Different lacing systems provide various levels of adjustability and support. Consider the speed and ease of use when choosing a lacing system.
The Fit Test: Ensuring a Comfortable and Secure Fit
No matter how well-designed a boot is, it's useless if it doesn't fit properly. The fit test is the most crucial step in the boot-buying process.
Visit a Specialist: Go to a reputable outdoor retailer with knowledgeable staff who can measure your feet and assess your gait.
Try Boots on at the End of the Day: Your feet tend to swell throughout the day, so trying on boots in the afternoon ensures a more accurate fit.
Wear the Socks You'll Hike In: Bring the socks you plan to wear on your hikes to ensure an accurate fit.
Size Up for Toe Room: Your toes should have about a thumb's width of space from the end of the boot. This prevents your toes from hitting the front of the boot on descents.
Heel Hold is Crucial: Ensure your heel is secure and doesn't lift excessively when you walk.
Test on an Incline: Most retailers have an incline ramp to test the boots' performance on uphill and downhill slopes.
Break-In Period: Allow time to break in your new boots before embarking on a long hike. Wear them around the house or on short walks to soften the leather or synthetic materials and mold them to your feet.
Care and Maintenance: Extending the Life of Your Boots
Proper care and maintenance are essential for extending the life of your hiking boots and keeping them performing at their best.
Clean Your Boots After Each Hike: Remove dirt, mud, and debris from the uppers and outsoles.
Dry Your Boots Properly: Allow your boots to air dry naturally. Avoid using direct heat, which can damage the materials. Remove the insoles to allow the inside to dry more quickly. Stuffing them with newspaper can also help absorb moisture.
Treat Leather Boots with Leather Conditioner: Apply leather conditioner to leather boots regularly to keep the leather supple and prevent cracking.
Re-Waterproof Regularly: Re-waterproof boots with a water repellent spray when the waterproof membrane is no longer effective.
Inspect for Damage: Check your boots for wear and tear regularly. Address any damage promptly to prevent it from worsening.
Beyond the Basics: Additional Considerations
Insoles: Upgrading your insoles can significantly improve comfort and support. Consider aftermarket insoles for added arch support or cushioning.
Footwear Brands: Research reputable hiking boot brands known for their quality and durability. Popular brands include Salomon, Merrell, Lowa, Vasque, and Scarpa.
Warranty: Check the manufacturer's warranty before making a purchase.
Price: Hiking boots can range in price. Set a budget and look for boots that offer the best value for your needs.
Read Reviews: Researching the experiences of other hikers with the boots you are interested in can be useful insight.
Conclusion: Invest in Your Footwear, Invest in Your Adventure
Choosing the perfect hiking boots is an investment in your comfort, safety, and overall hiking experience. By taking the time to understand the different categories, features, and fit requirements, you can confidently select boots that will enable you to conquer any trail and create lasting memories. Prioritize fit, consider the terrain, and maintain your boots diligently, and you'll be well-equipped to embrace the beauty and challenges of the great outdoors. With the right hiking boots, every step you take will be a step closer to experiencing the extraordinary.
