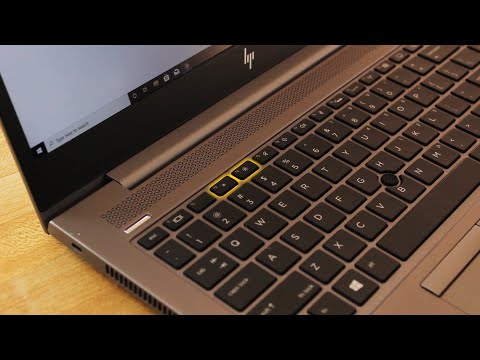
hp key board not working laptop

Title: How To Fix HP Laptop Keyboard Not Working in Windows 10
Channel: Cap Trong Nam - How To
How To Fix HP Laptop Keyboard Not Working in Windows 10 by Cap Trong Nam - How To
hp keyboard not working laptop, hp laptop keyboard key not working, hp notebook keyboard not working, why are my keys not working on my hp laptop, hp laptop h key not working, hp laptop function keys not working
HP Keyboard Nightmare? FIX Your Laptop's Dead Keys NOW!
Keyboard Catastrophe? HP Laptop Key Not Working? Breathe Easy!
It’s a heart-stopping moment. You reach to type, and…silence. That one crucial key, or perhaps several, simply refuse to cooperate. Your HP laptop keyboard has betrayed you. Don't panic! You're not alone in this digital drama. Furthermore, we're here to help you navigate this frustrating situation.
The Silent Treatment: Diagnosing Your Dead Keys
First, let’s play detective. We need to pinpoint the culprit. Is it a hardware issue, or a software glitch? Therefore, we will proceed systematically. Start by restarting your laptop. This often resolves minor software hiccups. Next, try the keys again. Still nothing? Then, investigate further.
Consider this scenario: are all the keys dead, or just a select few? If it’s the entire keyboard, the problem may be more significant. However, if just a few keys are unresponsive, the solution might be simpler. In addition, observe your keyboard’s behavior. Do the keys seem physically stuck? Or maybe they feel loose? These visual clues give valuable insights.
Software Shenanigans: Troubleshooting Your Operating System
Assuming a software issue, let's explore potential fixes. Update your operating system. Outdated software can cause all sorts of problems. Consequently, checking for updates is a good first move. Go to your settings and look for "Update & Security." Restart your laptop afterwards.
Also, consider your keyboard drivers. Are they up-to-date? Outdated or corrupted drivers can cause key malfunctions. You can update them through Device Manager. Search for "Device Manager" in the Windows search bar. Hence, expand the "Keyboards" section. Right-click your keyboard and select "Update driver."
Sometimes, a recent software installation can interfere. Did the key problem begin after installing a new program? If so, try uninstalling that program. See if that resolves the dead key issue. Moreover, system restore could be helpful. This reverts your system to a previous state, before the problem began.
Hardware Headaches: Cleaning and Inspection
Let's turn our attention to the physical keyboard. Dust, crumbs, and other debris are notorious keyboard saboteurs. Therefore, give your keyboard a thorough cleaning. Unplug your laptop or turn it off. Use compressed air to blow out any loose particles. Gently use a soft brush for tougher grime.
Next, inspect the affected keys. Are they physically damaged? Maybe a keycap has popped off. Carefully reseat it if possible. With the laptop off, try gently pressing the keys to see if the issue resolves. Subsequently, if liquid spillage occurred, act quickly. Turn off your laptop immediately. Then, dry the keyboard thoroughly. Contact a professional for assistance.
External Keyboard Savior: A Temporary Workaround
While troubleshooting, don’t let dead keys halt your work. Here’s a helpful tip: use an external keyboard. This is a quick and easy solution. Connect a USB keyboard to your laptop. You can continue your tasks without interruption. In the meantime, you can work on fixing the internal keyboard.
Advanced Tactics: Diving Deeper
If the basic steps fail, consider more advanced troubleshooting. Check your BIOS settings. Sometimes, keyboard functionality can be altered in the BIOS. Access the BIOS during startup. Find the relevant keyboard settings. Ensure the keyboard is enabled.
Also, try running hardware diagnostics. HP provides diagnostic tools for its laptops. You can access them during startup or from the HP Support Assistant. These diagnostics can identify hardware failures. However, this can sometimes be a bit complex.
Seeking Professional Help: When to Call in the Cavalry
If you've tried everything, it's time to seek professional assistance. A hardware issue might require repair or replacement. Contact HP support. Explain the problem in detail. They can provide further guidance. Don't hesitate to take your laptop to a qualified repair technician. They have the expertise and tools needed for complex repairs.
Prevention is Key: Maintaining Your Keyboard
Preventing future keyboard problems is vital. Clean your keyboard regularly. Avoid eating or drinking near your laptop. Protect your laptop from spills and impacts. Handle your laptop with care. Remember, these simple habits extend your laptop’s lifespan.
Concluding Thoughts: Back to Typing Bliss
Dead keys are frustrating, but they're often fixable. Following the steps above, you can often resolve the issue. Remember to be patient during troubleshooting. Don't give up! With a little effort, you’ll be typing smoothly again. Now, get back to work (or play!) and enjoy your fully functional keyboard.
Hotspot iPhone to Laptop FAIL? This ONE Trick Fixes It!HP Keyboard Nightmare? FIX Your Laptop's Dead Keys NOW!
Hey there, fellow HP laptop users! Ever been in the middle of typing something crucial, a brilliant idea sparking in your mind, only to have your “A” key suddenly go AWOL? Or, perhaps, the “Spacebar” decides it's taking an unannounced sabbatical? Yeah, we’ve all been there. It's the HP keyboard nightmare, a frustrating dance with dead keys that can turn a productive session into a maddening exercise in frustration. But before you hurl your beloved HP across the room (we've almost been tempted!), breathe. We're here to help you navigate this digital drama and get those keys clicking again. Let's dive in!
1. The Silent Sabotage: Understanding the HP Keyboard Killjoy
First things first: Let's figure out why this is happening. It’s like diagnosing a patient before prescribing the medicine. Dead keys aren’t just a cosmic joke; they're usually a symptom of something amiss. Several culprits can take the blame, from simple software glitches to hardware hiccups. Dust, crumbs, hair, and even tiny droplets of liquid can sneak their way under the keys, disrupting their connection. Software conflicts, outdated drivers, or even a rogue program can also wreak havoc on your keyboard's functionality. It's like a digital house of cards, where a single misstep can topple the whole structure.
2. Reboot 101: The Quickest Fix (Sometimes Miraculous!)
Okay, let's start with the absolute easiest fix: the good ol' reboot. Seriously! We’ve all heard it a million times, but it's often the first thing that works. Think of it as a digital "reset." Restarting your HP laptop closes all running processes and often clears any temporary software glitches that might be causing the issue.
- How To Do It: Click the Windows icon (usually in the bottom left corner), then the power icon, and select "Restart." Give it a few minutes to boot back up, and then test your keyboard. Cross your fingers!
3. The Driver Detective: Updating Your Keyboard Driver
Drivers are the unsung heroes of your computer. They're the software translators that allow your hardware (like your keyboard) to communicate with the operating system. Outdated or corrupted drivers can definitely be the root of the dead key problem. This is where the detective work begins:
- Step 1: Access Device Manager: Right-click the Windows icon and select "Device Manager."
- Step 2: Locate Your Keyboard: In the Device Manager, look for "Keyboards." Click the arrow to expand the list.
- Step 3: Update the Driver: Right-click on your keyboard (it might say something like "HID Keyboard Device") and select "Update driver." Choose "Search automatically for drivers." Windows will search for the latest driver and install it if found.
- Step 4: Restart Again: After the driver update, reboot your laptop and test your keyboard.
4. Keyboard Troubleshooter: Windows to the Rescue!
Windows actually has built-in troubleshooters that can help diagnose and fix common problems. It's like having a tech-savvy genie in a bottle!
- Step 1: Open Settings: Click the Windows icon and select "Settings."
- Step 2: Find Update & Security: Click on “Update & Security.”
- Step 3: Go to Troubleshoot: Select "Troubleshoot" from the left-hand menu.
- Step 4: Run the Keyboard Troubleshooter: Scroll down and find "Keyboard." Click on it, then click "Run the troubleshooter." Follow the on-screen instructions.
5. The Dust Bunny Rundown: A Gentle Keyboard Cleanup
Okay, let's get physical. Sometimes, the culprit is not digital; it’s downright physical. Dust, crumbs, and other debris can accumulate under your keyboard keys and interfere with their proper function. Think of it as a tiny, crumb-filled obstacle course for your signals.
- Method 1: The Air Blaster: Use a can of compressed air (available at most electronics stores) to blow out the dust and debris from under your keys. Make sure to hold the can upright and aim the nozzle at an angle.
- Method 2: The Soft Brush: Use a soft-bristled brush (a small paintbrush works well) to gently brush away any loose debris.
- Important Note: Turn off your laptop and unplug it before cleaning to avoid any electrical mishaps.
6. Sticky Situation? Cleaning the Keys with Isopropyl Alcohol
Sometimes, a sugary spill or a sticky residue is the troublemaker. In these cases, a gentle cleaning with isopropyl alcohol (rubbing alcohol) can work wonders.
- What You'll Need: Isopropyl alcohol (at least 70% concentration), cotton swabs, and a soft cloth.
- Step 1: Turn Off and Unplug: Always, always turn off and unplug your laptop.
- Step 2: Dampen the Swab: Dip a cotton swab in isopropyl alcohol, making sure it's damp rather than soaking wet.
- Step 3: Gentle Cleaning: Gently wipe around the affected keys, being careful not to let any liquid seep inside the keyboard.
- Step 4: Dry Thoroughly: Use a soft cloth to dry the keys completely before turning your laptop back on.
7. Software Conflict Detective: Unmasking the Culprit Programs
Sometimes, a software conflict is the issue. Certain programs might interfere with your keyboard's functionality. This can be tricky to diagnose, but here's how to approach it:
- Observe the Behavior: Does the problem start after you install a new program? Or does it happen only when a specific program is running?
- Close Suspects: Try closing any recently installed or suspected programs and see if the keyboard starts working again.
- Check Startup Programs: Some programs launch automatically when your laptop starts. They can interfere with your keyboard. Disable them. Restart your laptop.
8. HP Support Assistant: Your Built-in Helpdesk
HP laptops often come with a pre-installed application called the HP Support Assistant. This tool is a treasure trove of troubleshooting tips and resources.
- Access the Assistant: Search for “HP Support Assistant” in the Windows search bar and open it.
- Run Diagnostics: The assistant typically offers diagnostic tests that can identify hardware problems, including those related to your keyboard.
9. The BIOS Advantage: Checking Keyboard Settings in the BIOS
The Basic Input/Output System (BIOS) is a firmware that controls basic hardware functions during startup. Sometimes, keyboard settings might be tweaked within the BIOS.
- Accessing the BIOS: You usually access the BIOS by pressing a specific key during startup (like F2, F10, Delete, or Esc). The key varies depending on your HP model. Check your laptop's manual.
- Navigate and Check: Once in the BIOS, look for keyboard-related settings. They might be under "Boot Options" or "Advanced Settings." Make sure the keyboard is enabled.
10. The Deep Dive: Disassembling (With Caution!) and Cleaning
This step is not for the faint of heart. Disassembling your keyboard can be risky and could void your warranty. If you're not comfortable, do not attempt this. However, if you're tech-savvy or have nothing to lose, here’s a general guide:
- Research Your Model: Search online for a disassembly guide specific to your HP laptop model. This is crucial!
- Gather Tools: You'll need a small Phillips head screwdriver, a plastic pry tool (like a guitar pick or a spudger), and possibly a small container to hold screws.
- Take Pictures: Before disassembling anything, take photos of the keyboard and surrounding area. These will be invaluable for reassembly.
- Carefully Remove Keys: Gently pry up the keys using the plastic tool. Be extremely careful not to break any clips.
- Clean the Membrane: Once the keys are removed, you'll see a membrane underneath. Use a soft cloth and alcohol to gently clean the surface.
- Reassemble with Care: Put the keys back in their original positions, making sure they click into place.
11. External Keyboard Solution: A Temporary (or Permanent) Fix
If all else fails, and you absolutely need to use your laptop, consider using an external USB keyboard. This is a quick and easy fix that allows you to keep working while you troubleshoot the internal keyboard issue. Think of it as your trusty backup plan.
12. The Warranty Whisper: When to Seek Professional Help
If your laptop is still under warranty, it's time to contact HP support or visit an authorized service center. A professional can diagnose the problem and make the necessary repairs or replacements. Don’t void your warranty by trying to fix it yourself if you do not have to.
13. Before the Keyboard Dies: Preventive Measures
Prevention is better than cure, right? Here are some tips to keep your HP keyboard clicking along happily:
- Regular Cleaning: Wipe down your keyboard regularly with a soft cloth, especially after eating or drinking near it.
- Protective Cover: Consider using a keyboard cover to protect it from dust, spills
How To Fix HP Laptop Keyboard Not Working in Windows 10 Solved

By Tricknology How To Fix HP Laptop Keyboard Not Working in Windows 10 Solved by Tricknology
HP Keyboard Not Working - 6 Fix

By Tech Bachhal HP Keyboard Not Working - 6 Fix by Tech Bachhal
How to Troubleshoot a Keyboard in Windows 11 for HP Notebooks HP Support

By HP Support How to Troubleshoot a Keyboard in Windows 11 for HP Notebooks HP Support by HP Support
Title: HP Laptop Brightness Keys Not Working FIX
Channel: Graphically Challenged
HP Laptop Brightness Keys Not Working FIX by Graphically Challenged
Laptop Wifi Hotspot
HP Keyboard Nightmare? FIX Your Laptop's Dead Keys NOW!
Laptop keyboards, those indispensable interfaces between our thoughts and the digital world, are, unfortunately, prone to moments of utter silence. For HP laptop owners, the frustration of unresponsive keys is a familiar, often unwelcome, companion. We've all been there: halfway through an important email, a crucial report, or even a heated gaming session, and suddenly, a key or, worse yet, a whole section of the keyboard goes dark. The panic sets in. Don't despair! This isn't the end of the world. Before you resign yourself to an external keyboard or, worse, consider a complete laptop replacement, we will explore troubleshooting paths for fixing dead keys on your HP laptop.
Diagnosing the Keyboard's Ailments: A Systematic Approach
The first step in conquering your keyboard woes is accurate diagnosis. Is it a hardware issue, a software glitch, or a simple setting gone awry? Let's systematically investigate the possible culprits.
1. The Obvious First: Restart and Refresh
This might seem trivial, but too often, the simplest solutions are overlooked. A quick restart of your HP laptop can often resolve many minor software-related keyboard issues. This process clears the cache, reloads drivers, and essentially gives your system a fresh start. If the problem persists after a restart, move on to the next troubleshooting steps.
2. Driver Dilemmas: Updating and Reinstalling Keyboard Drivers
Outdated, corrupted, or improperly installed drivers are frequent offenders when it comes to keyboard malfunctions. Accessing your Device Manager is crucial here. Follow these steps:
- Open Device Manager: Right-click on the Start button (or press the Windows key + X) and select "Device Manager" from the menu.
- Locate the Keyboard: In the Device Manager window, expand the "Keyboards" section. You should see your HP laptop's keyboard listed (it might be described as "Standard PS/2 Keyboard," "HID Keyboard Device," or something similar).
- Update the Driver: Right-click on your keyboard and select "Update driver." Choose "Search automatically for drivers." Windows will attempt to find and install the most current driver.
- Reinstall the Driver: If updating doesn't work, try uninstalling and reinstalling the driver. Right-click on your keyboard again, select "Uninstall device," and confirm. Restart your laptop. Windows will automatically reinstall a generic driver upon restart. If the issue continues, sometimes you might need to download the latest drivers for your HP laptop from the official HP support website to resolve the problem.
3. Sticky Situation: Cleaning and Clearing Debris
Dust, crumbs, pet hair, and other assorted debris can wreak havoc on laptop keyboards. The keys themselves are often designed to be resilient; however, dirt accumulation underneath keys can prevent proper contact with the underlying circuits.
- Gentle Cleaning: Turn off your HP laptop and disconnect it from any power source. Use a can of compressed air (specifically designed for electronics) to blow out debris between the keys. Aim the nozzle at an angle to dislodge particles effectively.
- Keycap Removal (Caution Advised): If the compressed air isn't sufficient, you might consider carefully removing the keycaps. Use a thin, non-sharp tool to gently pry them off. Clean the keycaps individually and the area beneath with a cotton swab dipped in isopropyl alcohol. Allow everything to dry thoroughly before reassembling. Only attempt this if you are comfortable with delicate work. Take photos before removing keys, ensuring you can easily reassemble the keyboard.
4. Software Conflicts: System Checks and Troubleshooters
Sometimes, software conflicts or settings deep within a Windows system can suppress keyboard functionality.
- Run the Keyboard Troubleshooter: Windows has built-in troubleshooters designed to diagnose and fix common hardware and software problems. Go to Settings > Update & Security > Troubleshoot. Look for the "Keyboard" troubleshooter and run it.
- Check for Conflicting Software: Certain software programs, especially those designed for accessibility or custom keyboard layouts, can sometimes interfere with standard keyboard operation. Consider temporarily disabling any recently installed or suspicious software programs to see if the problem resolves.
5. Physical Examination: Hardware Problems
If software solutions don't deliver results, it's time to consider physical hardware problems.
- External Keyboard Test: Plug in an external USB keyboard. If the external keyboard works flawlessly, the problem most likely lies within the HP laptop's internal keyboard. Conversely, if the external keyboard also experiences the same issue, the fault may be with the computer's internal components.
- Check the Keyboard Connector: If you're comfortable with advanced troubleshooting (and have a basic understanding of electronics), you could carefully open your laptop to inspect the keyboard's connection to the motherboard. The flat, flexible cable (often called a ribbon cable) that connects the keyboard can sometimes become loose or damaged. However, we highly advise seeking professional assistance unless you have prior experience with these tasks.
6. The BIOS Factor: Confirming Keyboard Functionality at Startup
Another diagnostic step involves utilizing the BIOS (Basic Input/Output System) to confirm whether the keyboard itself is the source of the issue. When you switch on your HP laptop, promptly press the key that takes you to the BIOS setup menu (usually Delete, F2, F10, or Esc).
- Test in the BIOS: Once in the BIOS, navigate the menus using your keyboard. If the keys work correctly in the BIOS, then the problem is likely software-related within your operating system. If the keys are still unresponsive, it confirms a hardware problem.
Advanced Repair Techniques and When to Seek Professional Help
While the above steps will resolve many common keyboard issues, some problems require a more technical approach.
1. The Keyboard Connector (For Experienced Users Only)
As mentioned before, the flat ribbon cable connecting the keyboard to the motherboard is a common point of failure. Carefully inspect the connector on both the keyboard and the motherboard for any signs of damage or corrosion.
- Reseating the Cable (If Comfortable): If the cable seems loose, you might try carefully reseating it. Disconnect it first, then reinsert it firmly. Ensure it is correctly aligned.
- Cable Replacement or Motherboard Issues: If the cable is damaged, often the entire keyboard needs to be replaced. In some cases, the connector on the motherboard itself may be the culprit, which is a more complex repair and requires professional assistance.
2. Liquid Damage: The Perilous Spill
Liquid spills are a keyboard's worst enemy. Even a small amount of liquid can cause corrosion and short circuits.
- Immediate Action: If you spill liquid on your keyboard, immediately shut down the laptop and disconnect the power source. Turn it upside down to drain any liquid.
- Professional Assessment: Liquid damage almost always requires professional cleaning and inspection. Take your HP laptop to a qualified repair technician as soon as possible. They can disassemble the keyboard, clean the affected components, and assess the extent of the damage.
3. Keyboard Replacement: The Last Resort
If all other troubleshooting steps have failed, the keyboard itself may be defective.
- Identifying Your Keyboard Model: Replacing a keyboard requires finding the correct replacement. Check the bottom of your HP laptop for the model number. Then, search online for a replacement keyboard for your specific HP laptop model.
- Installation: Replacing a keyboard involves removing the old one and installing the new one. This process varies depending on your specific HP laptop model. Consult your laptop's service manual or look for detailed online guides.
- Seek Professional Help: If you're not comfortable with disassembling your laptop, it's time to take it to a repair shop.
Preventative Measures: Safeguarding Your Keyboard
Preventing keyboard problems is always more beneficial than attempting repairs. Here are some simple steps you can take to prolong the life of your HP laptop's keyboard.
- Keep it Clean: Regularly clean your keyboard using compressed air and a soft cloth.
- Avoid Food and Drinks: Refrain from eating or drinking near your keyboard.
- Use a Keyboard Cover: A keyboard cover provides an additional layer of protection against spills and debris.
- Handle with Care: Avoid placing heavy objects on your laptop keyboard.
- Update Your Software: Keep your operating system and drivers updated to avoid software-related issues.
Conclusion: Restoring Your Digital Harmony
Dealing with dead keys on your HP laptop can be incredibly frustrating, but, with the right troubleshooting steps, you can often restore your keyboard to its full functionality. We've provided a comprehensive guide—from the simple solution of a restart to in-depth hardware checks—to help you diagnose and fix the problem. Remember to approach each step systematically, be patient, and don't hesitate to seek professional help if you are not comfortable with any repair step. With a little persistence and these strategies, you can reclaim control of your HP laptop and return to effortlessly typing away towards your digital ambitions.
