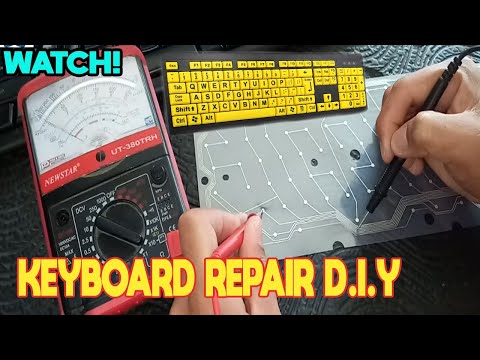
certain keys wont work on laptop

Title: SOLUTION Some Keys Not Working on Laptop Keyboard
Channel: Tech Express
SOLUTION Some Keys Not Working on Laptop Keyboard by Tech Express
certain keys wont work on laptop, keyboard won t work on laptop, why isn't my keys working on my laptop, why are my keys not working on my laptop
Laptop Keys Not Working? This SHOCKING Fix Will BLOW Your Mind!
Laptop Keys Gone AWOL? Prepare for a Tech Revelation!
Have you ever stared at your laptop screen, fingers poised, only to find your keyboard stubbornly refusing to cooperate? It's a frustrating experience. Furthermore, it can completely derail your workflow and leave you feeling utterly helpless. However, before you resign yourself to a costly repair or replacement, there’s good news. Thus, a potentially simple fix could be just around the corner.
The Keyboard Catastrophe: Recognizing the Symptoms
So, what exactly triggers this infuriating problem? Often, a malfunctioning keyboard manifests in several ways. First, some keys may stop responding altogether. You might find that the “A” key is suddenly unresponsive, or perhaps the number “5” has vanished. Equally, some keys might be sticky. Your keyboard may now start typing the same letter repeatedly. Additionally, ghost typing can occur, where characters appear on your screen without any input. In certain scenarios, your entire keyboard might become completely unresponsive. Therefore, identifying these symptoms is the first step to resolving the issue.
Troubleshooting Tango: Dance Through These Quick Steps
Fortunately, there are several quick troubleshooting steps that you can try. Initially, a simple reboot is often surprisingly effective. Just restarting your laptop can clear temporary glitches that might be causing the issue. Nevertheless, if a reboot doesn’t work, check the keyboard’s connection. If you're using an external keyboard, ensure it’s securely plugged into your laptop. Consider disconnecting and reconnecting the keyboard. After that, inspect the physical keys. Maybe there’s debris trapped beneath the keys. Carefully clean around the keys with compressed air. Ultimately, a thorough inspection can often reveal the culprit.
Driver Drama: A Potential Software Conflict
Beyond physical issues, software conflicts sometimes cause keyboard malfunctions. The keyboard’s drivers are the software programs that allow it to communicate with your operating system. Therefore, outdated or corrupted drivers can easily lead to problems. However, updating these drivers is usually straightforward. For instance, navigate to your device manager. Locate the keyboard device. Then, right-click on it and select “Update driver.” Consequently, the system will search for and install the latest drivers.
Sticky Situation: The Liquid Intrusion Mystery
One of the most common causes is liquid damage. Spilled coffee, soda, or even water can wreak havoc. These sticky fluids can seep into your keyboard, causing keys to stick or malfunction. So, what to do in this scenario? Immediately shut down your laptop and unplug it. Furthermore, try to dry the keyboard. You can invert your laptop. This position will allow excess liquid to drain. In short, the quicker you act, the better the chance of salvaging your keyboard.
The Shocking and Simple Solution: The Battery Trick
Here's the moment you've been waiting for, the mind-blowing fix! Ironically, sometimes the solution is incredibly simple. For some laptop models, the battery is directly connected to the keyboard's functionality. Hence, removing and re-seating the battery can sometimes solve the problem. But, before you start this process, you need to shut down your laptop. After that, disconnect the power adapter. Then, open up your laptop’s battery access panel. Carefully remove the battery. Wait a few minutes. Finally, reinstall the battery and power on your laptop. Consequently, this simple reset can miraculously revive your keyboard.
Beyond the Basics: When to Call in the Professionals
While many keyboard issues can be solved at home, some problems require expert intervention. If you've tried all of the above steps and your keyboard still refuses to work, it might be time to seek professional help. Similarly, this is particularly true if you suspect internal hardware damage. Repairing laptop keyboards can be complex. You'll likely encounter components like the motherboard. Don't hesitate to consult a qualified technician. They have the tools and expertise to diagnose and repair complex issues.
Preventative Measures: Safeguarding Your Keyboard
Prevention, as they say, is always better than cure. Therefore, consider some preventative measures. First, avoid eating or drinking near your laptop. Crumbs and spills are the keyboard’s enemies. Regularly clean your keyboard. Use compressed air to remove dust and debris. In addition, consider a keyboard cover. These covers provide an extra layer of protection against spills and dust. Moreover, learning these preventive measures may avoid a future problem.
Final Thoughts: Typing with Triumph
Keyboard issues can be incredibly frustrating. However, don't despair. Because, as we've explored, there are many steps you can take to diagnose and rectify the problem. From simple reboots and driver updates to the surprising battery trick, these solutions can get you typing in no time. If you're facing keyboard challenges, remember these tips. Embrace the troubleshooting process. Finally, get ready to type your way back to productivity and triumph!
Dell Laptop Scroll Wheel Disaster: SHOCKING Fix Inside!Laptop Keys Not Working? This SHOCKING Fix Will BLOW Your Mind!
Hey there, fellow digital adventurers! Ever felt that gut-wrenching panic when you're staring at your laptop screen, ready to unleash a torrent of brilliance (or just finish that email), only to discover… your keyboard has decided to stage a full-blown rebellion? Keys are unresponsive, your cursor is stubbornly refusing to budge, and you're mentally calculating how much that new laptop is going to set you back. Trust me, we've all been there. The good news? Before you start pricing out new tech, there's a SHOCKING fix that might just save the day (and your wallet). Prepare to have your mind blown!
1. The Silent Tragedy: Recognizing the Keyboard Catastrophe
Let's face it, a malfunctioning keyboard is a modern-day tragedy. It's like having a car with a flat tire – you can limp along, but it's a painfully slow and frustrating experience. The most obvious sign? Well, the keys don't work! But sometimes, the symptoms are sneakier. Maybe only some keys are affected. Perhaps certain keys are acting like they've had way too much caffeine, repeating endlessly. Whatever the specifics, the bottom line is: your keyboard is not cooperating. Don't panic! We're going to tackle this head-on.
2. Preliminary Investigations: Before the Big Guns Come Out
Okay, before we start disassembling your precious laptop like it's a kid's toy, let's do some basic troubleshooting. Think of this as the sheriff checking the crime scene before calling in the detectives.
- Restart the Beast: This is the tech equivalent of "Have you tried turning it off and on again?" It's simple, it's often surprisingly effective, and it's the first thing we always try. A simple restart can clear out temporary glitches that might be causing the problem.
- External Keyboard Test: Plug in a USB keyboard (or use a Bluetooth one if you have that setup) and see if that works. If the external keyboard is fine, it points the finger directly at your built-in laptop keyboard.
- Driver Check: Go into your Device Manager (you can usually find this by searching for it in your Start menu) and look for any yellow exclamation marks next to 'Keyboard' or 'HID Keyboard Device'. This means there’s a driver issue. Try updating the drivers or, if that doesn't work, uninstalling and reinstalling them.
- Sticky Keys? Make sure the 'Sticky Keys' and 'Filter Keys' features aren't accidentally enabled. These can inadvertently lock up keyboard functions.
3. The Culprit Unveiled: Dust, Crumbs, and the Enemy Within
If the basic troubleshooting steps didn't work, then we have to delve a bit deeper. The most common villains in this keyboard drama are:
- Dust and Debris: That delicious snack you enjoyed while working? Yeah, a tiny fraction of it probably made a home inside your keyboard. Crumbs, dust, hair – they can wreak havoc.
- Liquid Spill (The Silent Killer): A single drop of coffee, water, or, God forbid, soda can cause a short circuit. Even a small spill can be catastrophic.
- Loose Connections: Inside your laptop, there are delicate connectors that link the keyboard to the motherboard. These can sometimes come loose, causing keys to malfunction.
4. The Shocking Solution: Compressed Air – The Superhero of Keyboards
Here it is, the fix that sounds almost too good to be true. But trust me, it often works wonders! The secret weapon? Compressed air. Think of it as a tiny, high-powered vacuum for your keyboard.
Here’s the step-by-step guide:
- Power Down & Disconnect: Completely shut down your laptop and unplug it from the power source. This is crucial for safety.
- Angle Matters: Hold your laptop at a slight angle (around 45 degrees) to allow loose debris to fall out rather than deeper in.
- Give it a Blast: Take your can of compressed air and, using short, controlled bursts, direct the air between the keys. Focus on the keys that aren’t working or are behaving strangely.
- Repeat & Rotate: Work your way across the entire keyboard, spraying at different angles. You can also try rotating your laptop while spraying to shake loose any trapped debris.
- The Waiting Game: Allow the laptop to sit for a few minutes after you've finished spraying, to ensure everything is dry and clear.
- Power Up & Test: Plug your laptop back in, power it up, and test those keys! Fingers crossed!
5. Beyond Air: Advanced Keyboard Cleaning Methods
Sometimes, compressed air just isn't enough. If you've tried the air blast and some keys are still being stubborn, here are a few alternative approaches:
- Gentle Brush: Use a soft-bristled brush (like a clean toothbrush) to gently dislodge any stubborn debris. Be extremely delicate to avoid damaging the keys.
- Isopropyl Alcohol (Advanced): For sticky residue (perhaps from a tiny sugary spill) and if you're comfortable with it you can use a cotton swab dipped in isopropyl alcohol (90% or higher concentration is ideal). Make sure to squeeze out any excess liquid so it doesn't get inside. Apply carefully around the affected keys. Let it dry completely before powering on. This is a more advanced technique, so proceed with caution.
- Keycap Removal (For the Brave): Only if confident, you can carefully remove the keycaps (the plastic bits you actually press) on your keyboard. There are often tiny clips underneath, so do your research on how to remove them safely for your specific laptop model. Once the keycaps are off, you can clean the area underneath more thoroughly. Be extremely careful not to break any of the clips!
6. The Liquid Spill Saga - What To Do Immediately
A liquid spill is a whole different level of urgency. Time is of the essence! Here’s what to do:
- Act Fast: Immediately shut down your laptop. Unplug it. Turn it upside down to drain out any liquid.
- Disassembly (If Comfortable): If you're comfortable and confident, you can try to disassemble the bottom plate to allow the inside to dry more thoroughly.
- Dry it Out: Let your laptop dry completely in a well-ventilated area. Leave it for several days (yes, days!) before attempting to power it on.
- Professional Help: If you're not comfortable disassembling, or the damage seems extensive, take it to a professional repair shop. They have the expertise to clean and assess the damage properly.
7. Hardware Headaches - When It's Time For Replacement
Sometimes, despite our best efforts, the keyboard has given up the ghost. If the above steps haven't resurrected your keys, it might be a hardware issue:
- Keyboard Failure: The keyboard itself might have reached the end of its lifespan.
- Motherboard Problems: In extreme cases, a failing keyboard could indicate problems with the motherboard, especially if the keyboard's connector is damaged.
8. The DIY Replacement Route: A Cost-Effective Option
If your keyboard is the culprit, the good news is that replacing it yourself is often a viable and cost-effective option. Many laptops have replaceable keyboards, and you can find replacements online. However:
- Research is Key: Make sure you buy a keyboard that’s specifically designed for your laptop model.
- Follow Instructions: Watch videos and carefully follow the instructions for your model, as laptop designs vary.
- Patience is a Virtue: Take your time and be patient. Don't force anything!
9. The Professional Touch: When to Call in the Experts
Sometimes, the best course of action is to seek professional help.
- Complex Issues: If the problem is extensive or you can't pin it down, a repair shop can diagnose the problem accurately.
- Liquid Damage: As mentioned, liquid damage often requires professional cleaning and repair.
- Motherboard Concerns: If you suspect motherboard issues, you'll definitely need a qualified technician.
10. Prevention is Better Than Cure: Keyboard Care Tips
Here are some simple steps you can take to protect your laptop keyboard from future woes:
- Eat Away From Your Laptop: This is the easiest thing to do.
- Invest in a Keyboard Cover: These are inexpensive and offer excellent protection against spills and debris.
- Regular Cleaning: Give your keyboard a quick blast with compressed air and wipe it down with a damp cloth regularly.
11. The Power of Proper Posture: Ergonomics and Keyboard Health
Believe it or not, your posture can affect your keyboard's longevity!
- Good Ergonomics: Work in a way that promotes good posture. Sit up straight with your wrists straight.
- External Keyboard: Consider using an external keyboard and mouse if you spend long hours typing.
12. Keyboards and the Warranty: Does It Cover This?
Check your laptop’s warranty to see if
Acer Laptop Mouse Nightmare? Fix Your Windows 7 Woes NOW!How to Fix Some Keys Not Working on Laptop Keyboard Keyboard Not Working

By Tech White How to Fix Some Keys Not Working on Laptop Keyboard Keyboard Not Working by Tech White
Fix Some keys on Laptop Keyboard Not Working in Windows 10 Solve keyboard keys Won't typing

By Victor Explains Fix Some keys on Laptop Keyboard Not Working in Windows 10 Solve keyboard keys Won't typing by Victor Explains
Fix Some Keys Not Working on Laptop Keyboard Keyboard Not Working on Windows 10 Solved

By Tweak Library Fix Some Keys Not Working on Laptop Keyboard Keyboard Not Working on Windows 10 Solved by Tweak Library
Title: SOME KEYS NOT WORKINGFUNCTIONING KEYBOARD REPAIR
Channel: Botatoyz Idea
SOME KEYS NOT WORKINGFUNCTIONING KEYBOARD REPAIR by Botatoyz Idea
My Laptop Work
Laptop Keys Not Working? This SHOCKING Fix Will BLOW Your Mind!
Have you ever found yourself staring at a frozen screen, your fingers flying across the keyboard, only to have your efforts met with utter silence? The frustration of unresponsive laptop keys is a universal experience, a digital hiccup that can bring productivity to a screeching halt. We've all been there, frantically mashing keys, convinced a vital document or email is about to evaporate before our very eyes. But what if we told you that the solution might be simpler, and far less intimidating, than you think? Let's dive into the world of malfunctioning keyboards, exploring the usual suspects and, most importantly, uncovering a surprising fix that might just restore your sanity.
Diagnosing the Digital Dilemma: Pinpointing the Problem
Before we deploy any radical solutions, we must accurately diagnose the root cause. The problem isn't always hardware-related. Sometimes the issue lies within the software, a simple glitch that mimics a more severe problem. We'll explore a few key areas to help us arrive at the best solution quickly.
The Software Specter: Ruling Out Glitches and Conflicts
One of the first places to check is the operating system itself. A software conflict, a corrupted driver, or even a minor system glitch can manifest as unresponsive keys. Here's how to cautiously navigate this digital minefield:
Restarting the System: Yes, the classic “turn it off and on again” approach. Often, a simple restart is all that is needed to refresh the operating system, clearing temporary files and resolving minor software hiccups. Give this a try first.
Driver Dilemmas: Updating or Rolling Back: Your keyboard relies on drivers to communicate with your operating system. Outdated or corrupted drivers can cause key malfunctions. Let's look at Device Manager. Right-click on the Windows button (or use the search bar) and find Device Manager. Expand the "Keyboards" section. Right-click on your keyboard and choose "Update driver." If that doesn't work, try rolling back the driver to its previous version. This might be a simple fix.
Sticky Keys and Filter Keys: Deactivating Accessibility Features. Windows includes accessibility features like Sticky Keys (designed for users who struggle with simultaneous key presses) and Filter Keys (designed to filter out brief or repeated keystrokes). Sometimes these settings, unintentionally activated, can lead to seemingly unresponsive keys. Search for "Sticky Keys" or "Filter Keys" in the Windows search bar and ensure these are disabled.
Hardware Hurdles: Exploring the Physical Realm
Assuming a software glitch isn't to blame, it's time to investigate the physical components of your laptop. The following are common culprits:
External Keyboard Test: If possible, connect an external keyboard to your laptop. If the external keyboard functions correctly, this is strong evidence that the trouble lies with the internal keyboard. This is a crucial step in the diagnostic process.
The Keycap Capers: Examining Physical Obstructions. Dust, crumbs, and other debris can easily find their way under keycaps, causing keys to become unresponsive. Take a close look at the affected keys. Carefully use a can of compressed air to dislodge any trapped particles. If the debris persists, consider gently removing the keycap (consult online tutorials specific to your laptop model) and cleaning the area underneath with a soft brush or cotton swab.
The Cable Conundrum: Checking Internal Connections. In some laptop models (particularly older ones), the keyboard is connected to the motherboard via a ribbon cable. Over time, this cable can become loose or damaged. This is a more advanced troubleshooting step, requiring some technical knowledge or the assistance of professional laptop repair services. If you are comfortable opening your laptop (and have the necessary tools), carefully check the connection of the keyboard cable to the motherboard. Be extremely cautious.
The SHOCKING Solution: A Clean Sweep and a Bold Step
Now, for the unexpected solution (as promised): A thorough cleaning paired with a very specific and precise adjustment. Yes, you understood correctly. Now you're probably thinking, "I've cleaned my keyboard a million times!" But hear us out. Regular cleaning is obviously important, but this approach dives deeper to uncover the true answer.
The Art of the Deep Clean: Beyond the Surface
We’re not talking about the usual dusting and wipe. This demands a more targeted cleaning approach, focused on potential contamination that might be affecting the responsiveness of your individual keys.
Power Down and Prepare: Before beginning any cleaning, power down your laptop AND disconnect it from any power source. This minimizes the risk of electrical shock and prevents accidental key presses from interfering with the process.
The Precision Tool Kit: Gather your supplies: a can of compressed air, a small, soft-bristled brush (a clean paintbrush works wonders), isopropyl alcohol (90% or higher concentration), cotton swabs, and a microfiber cloth.
Compressed Air Assault: The First Line of Defense: Begin by using the compressed air. Hold the nozzle a couple of inches away from the keyboard and systematically blast air between and around each key. Focus on the keys that aren't working. Aim for all those hard-to-reach areas.
The Gentle Brushdown: Next, use the soft-bristled brush to loosen any stubborn debris. Gently brush around the keys, dislodging any particles that the compressed air may have missed. Be patient and detailed.
Isopropyl Alcohol Treatment: The Targeted Approach: Dampen a cotton swab with isopropyl alcohol. Do not saturate the swab; the goal is to apply a small amount of cleaning solution. Carefully clean around the key stems of the non-responsive keys. Isopropyl alcohol evaporates quickly and is generally safe for electronics. Allow the area to dry completely before moving on.
Microfiber Finish: Wipe the entire keyboard surface with a clean microfiber cloth. This will remove any remaining residue and help restore the keyboard's finish.
The Bold Adjustment: The Hidden Reset
Now, for the element that most people overlook. It’s an unconventional step, but one that often yields remarkable results. We will perform a very specific reset.
The Power Cycle Reset: This involves completely discharging any static electricity buildup within the laptop. Here's the process:
- Power Down Completely: As before, ensure your laptop is powered off and disconnected from the power source.
- Remove the Battery: If your laptop has a removable battery, take it out. If not, skip this step.
- Press and Hold the Power Button: Press and hold the power button for 30-60 seconds. This action forces any residual power stored in the capacitors to drain, effectively resetting the system.
- Reassemble and Test: Replace the battery (if you removed it), reconnect the power adapter, and power on your laptop. Test your keyboard immediately.
Why This Works: Unmasking the Culprits
The combination of a deep clean and the power cycle reset addresses two primary, yet often overlooked, issues:
- Debris and Contamination: The deep clean meticulously removes the accumulated dust, crumbs, and other debris that can interfere with key contact and responsiveness.
- Static Electricity Buildup: The power cycle reset clears any static electricity buildup within the circuitry. This static can sometimes interfere with key signals, causing keys to behave erratically or not at all; static electricity is a very common and a prevalent issue that can affect your device.
Beyond the Fix: Proactive Prevention
Once you've resolved the issue, you will be able to type with ease. But the battle against unresponsive keys is an ongoing one. Here’s how to reduce the likelihood of future problems:
- Regular Cleaning Ritual: Make keyboard cleaning a regular habit. A quick wipe-down with a microfiber cloth after each use can prevent dust and debris from accumulating.
- Protective Measures: Investing in a Keyboard Cover: For those who eat and drink near their laptops (we all do sometimes!), consider investing in a keyboard cover. These covers offer an added layer of protection against spills, crumbs, and other potential hazards.
- The Art of Proper Ventilation: Make sure your laptop has adequate ventilation. Excessive heat can damage internal components, including the keyboard. Avoid using your laptop on soft surfaces like beds or couches, which can block air vents.
When to Seek Professional Help
While the steps outlined above address the most common causes of unresponsive keys, sometimes the problem may be more complex. If these fixes fail, or if you suspect a hardware malfunction such as a damaged keyboard, you should consider professional repair.
- Recurring Issues: If the problem keeps happening, even after you have addressed the steps presented above.
- Spill Damage: If the keyboard was exposed to any liquids.
- Physical Damage: If you notice any physical damage.
Conclusion: A Keyboard Reborn
Unresponsive laptop keys can be a source of immense frustration, but with a little patience, the right tools, and the steps detailed above, you can often restore your keyboard to its former glory. Remember, the key to success lies in a combination of careful diagnosis, thorough cleaning, and, often, a surprising reset. Don't let a malfunctioning keyboard slow you down. Armed with this knowledge, you can reclaim your productivity and type with confidence.
