mouse pad isn't working on dell laptop

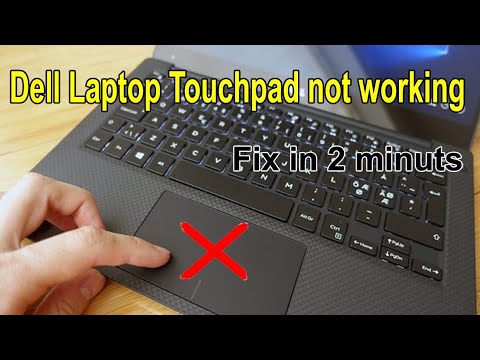
Title: FIX Dell Laptop Mouse TOUCHPAD Not WORKING Inspiron Latitude XPS G G15 15 17 16 Series Stop Trackpad
Channel: Helping Hermit
FIX Dell Laptop Mouse TOUCHPAD Not WORKING Inspiron Latitude XPS G G15 15 17 16 Series Stop Trackpad by Helping Hermit
touch pad is not working on dell laptop, touchpad isn't working on dell laptop, mouse touchpad is not working in dell laptop
Dell Laptop Mousepad DEAD? This SHOCKING Fix Works!
Dell Laptop Mousepad Woes? Conquer the Frustration!
Ever found yourself staring at a seemingly lifeless Dell laptop mousepad? The cursor stubbornly refusing to cooperate, the touchpad unresponsive to your frantic finger taps? It is a frustrating experience. We have all been there. But before you resign yourself to an external mouse or a costly repair, hold on. There's a chance, perhaps a strong one, that you can revive your trusty Dell laptop mousepad with a few simple tricks.
Is Your Dell Mousepad Really Dead? A Quick Diagnosis
Before you start any troubleshooting, ensure your mousepad is truly defunct. Because, sometimes, the fix is simpler than you think. Furthermore, verify that the mousepad hasn’t been accidentally disabled. Look for an Fn key combination, like Fn + Fx (where x is a function key with a touchpad icon). Try pressing this combination. Now, move your finger across the pad. Is the cursor moving? Fantastic. If not, proceed to the next step.
Software Solutions: Your First Line of Defense
Often, the problem lies within the software. Because, drivers can become corrupted, or settings can go awry. Fortunately, these issues are often easily resolved. First, navigate to your Dell's support page. Search for your specific laptop model. Then, download the latest touchpad drivers. After the download is complete, install them. Reboot your laptop. Afterward, test your mousepad again. If it’s still unresponsive, explore the Windows settings.
Delving Deeper into Windows Settings
Within Windows, access the mouse settings. You can find this by searching for "mouse settings" in the Windows search bar. Or, go through the Control Panel. Once the mouse settings window appears, search for “additional mouse options”. Next, look for a tab typically labeled "Dell" or "Touchpad settings". Carefully examine these settings. Make sure your touchpad is enabled. Furthermore, verify that the sensitivity and other parameters align with your preferences. If changes were made, apply them and test.
Unveiling Hardware Hiccups: The Physical Checkup
Sometimes, the fault isn't with software. Instead, there could be damage to the hardware. It is a sad, but true reality. So, inspect the mousepad's surface physically. Look for any obvious obstructions. Clean the surface using a soft, lint-free cloth. Dust, debris, or even a stray crumb can interfere with the sensor. Still no luck? Consider opening the laptop to inspect the internal connections.
Disassembly with Caution: A Delicate Operation
This step should only be attempted if you feel comfortable working with electronics. It requires some technical skill. First, turn off your laptop and unplug the power adapter. Next, consult your Dell laptop's service manual. You can usually find this online. The manual will provide detailed instructions on disassembling your particular model. Locate the mousepad's cable connection. If it's loose, gently reseat it. However, be incredibly gentle. Furthermore, inspect for any visible damage to the cable. If the cable is damaged, you may need to replace it.
The BIOS: A Last Resort Configuration
Occasionally, the issue might stem from a BIOS setting. Accessing the BIOS differs depending on your laptop model. Typically, you'll need to press a specific key, such as F2, F12, or Del, during startup. Consult your Dell laptop's documentation. Once in the BIOS, look for settings related to your touchpad or pointing device. Ensure the touchpad is enabled within the BIOS configuration. If needed, reset the BIOS to the default settings. Save your changes and restart your laptop.
External Devices: A Temporary, But Perhaps Necessary, Solution
While you're troubleshooting, you can also use an external mouse. This allows you to keep working while you determine the underlying cause. Even if the issue is ultimately irreparable, a mouse provides a temporary solution. Consider this a backup plan. After all, a broken mousepad shouldn't halt your productivity.
When to Seek Professional Help
If you've exhausted all these steps, it's time to seek the advice of a professional. This could be a local computer repair shop. Or, you could contact Dell's customer support. Don't hesitate to get help. They often have specialized tools and expertise to diagnose more complex issues. Moreover, they can also determine whether a repair is feasible. Sometimes, a hardware replacement might be the only option.
Preventative Measures: Keeping Your Mousepad Alive and Kicking
To prevent future problems, practice good laptop hygiene. Avoid placing objects on your laptop's keyboard or mousepad. Additionally, keep liquids away from your laptop. Perform regular software updates, including drivers. Regularly back up your data. These simple habits can help to prolong the life of your mousepad and your laptop itself.
Conclusion: Hope Springs Eternal for Your Dell Mousepad
A dead Dell laptop mousepad can be a major inconvenience. However, don't despair. Because, with a little troubleshooting, you might be able to revive it. Try the software solutions. Inspect the hardware. Explore the settings. Sometimes, you just have to try different things. In many cases, a simple fix is all that's needed. With this guide, you can increase your chances of restoring functionality. Ultimately, you can be back to navigating your laptop with ease.
HP Laptop HDMI Nightmare? FIX It NOW!Dell Laptop Mousepad DEAD? This SHOCKING Fix Works!
Hey there, tech adventurers! Ever find yourself in the middle of something super important, maybe a crucial presentation or a late-night gaming session, only to have your Dell laptop mousepad suddenly decide it's taking a permanent vacation? Talk about a digital nightmare! We've all been there, staring at that unresponsive rectangle, feeling the frustration simmer. (Seriously, it’s like your trusty sidekick suddenly abandoned you in the middle of a quest.) Well, breathe easy, because we're diving deep into the mystery of the dead Dell laptop mousepad, and, more importantly, how to resurrect it! This isn't about generic fixes; we're talking about practical, often overlooked solutions that actually work. Let's get this show on the road and get that cursor moving again!
Why Did My Dell Laptop Mousepad Suddenly Die?! Unraveling the Mystery
Before we get to the heroic fixes, let's first understand why this digital mutiny might be occurring. Think of it like diagnosing a sick friend – you gotta know their history! There are several culprits, from simple software glitches to sneaky hardware woes.
- Software Shenanigans: Sometimes, it's just a hiccup in the operating system. A driver might be corrupted, or the touchpad could be accidentally disabled. These are usually the easiest fixes, thank goodness!
- Driver Drama: Drivers are the communication bridge between your laptop and its hardware. If they're outdated, damaged, or incompatible, the mousepad throws a tantrum.
- Hardware Headaches: Sadly, sometimes it is a hardware issue. This could be anything from a loose connection to a fried mousepad component. Fingers crossed it's not this one!
- Accidental Settings: Let's face it, we’ve all been there. Did you accidentally disable the touchpad in the settings? Happens more often than you think!
Unveiling the SHOCKING Fixes: A Step-by-Step Guide to Revival
Alright, enough suspense! Let's get to the good stuff – the solutions! We'll approach these in order of simplicity, starting with the quick wins and progressing to more involved troubleshooting. Consider this your personal tech rescue mission.
Check Your Settings: The Quickest Win
Believe it or not, this is often the culprit. A rogue keystroke or a misplaced click can disable your touchpad.
- Search the Settings: Click the Windows icon (usually in the bottom left), or use the Windows key, and type "Touchpad settings." Open the settings that pop up.
- Enable or Disable: There should be a simple toggle switch to enable or disable the touchpad. Make sure it's turned on!
- Check for Accessories: Sometimes, plugging in an external mouse can automatically disable the touchpad. Disconnect any external mice and see if it returns.
Driver Detective: Updating and Reinstalling the Driver
Drivers are the lifeblood of your hardware, as we mentioned. If they're acting up, you need to intervene.
- Device Manager: Right-click the Windows icon (or press the Windows key + X). Select "Device Manager." This is your control center for all things hardware.
- Locate the Mousepad: Expand the "Mice and other pointing devices" section. You should see your touchpad listed, likely as something like "Dell Touchpad" or "HID-compliant mouse."
- Update Driver: Right-click on your touchpad device and choose "Update driver." Select "Search automatically for drivers." Windows will try to find the latest and greatest drivers.
- Manual Reinstall (If Update Fails): If the automatic update doesn’t work, right-click the touchpad device again and choose "Uninstall device." Then, restart your laptop. Windows should automatically reinstall the driver upon startup. If not, visit Dell's support website and download the latest driver for your specific laptop model.
Power Cycling Your Laptop: A Digital Reset Button
It's the ultimate troubleshooting classic: rebooting.
- Shut Down (Properly): Don’t just close the lid! Click "Shut down" from the Start menu.
- Remove the Battery (If Possible): If your Dell laptop has a removable battery, power it off, and remove the battery for at least 30 seconds. (Note: Many modern laptops have internal batteries, so this step might not be applicable.)
- Power On: Wait a few seconds and then start the laptop again. This can often clear temporary system errors.
The BIOS Rescue: Deep Dive Troubleshooting (For the Brave!)
This one is a bit more advanced, but trust us, it can be worth it.
- Accessing the BIOS: The BIOS (Basic Input/Output System) is the fundamental software of your computer. To get to it, you usually need to press a specific key during startup (often Del, F2, F12, or Esc). The exact key varies by model. Check your Dell laptop's manual for details.
- BIOS Configuration: Once in the BIOS, look for a setting related to the touchpad or pointing device. Make sure it's enabled. Some BIOS settings also allow you to do a factory reset.
- Save and Exit: Carefully save any changes you make and exit the BIOS. Your laptop will reboot.
Physical Inspection: Checking for Loose Connections (The Hands-On Approach)
If you’re comfortable with a little tech surgery, this might be the next step. Warning: Only attempt this if you're comfortable working with electronics and have the right tools!
- Power Off and Unplug: Always disconnect the power adapter and power off your laptop completely before opening it up.
- Find a How-To: Search online for a guide on how to disassemble your specific Dell laptop model. Be extremely careful and take pictures as you go so you know how to reassemble it.
- Locate the Touchpad: Find the touchpad's cable. This usually connects to the motherboard.
- Check the Connection: Gently disconnect and reconnect the cable. Make sure it's seated firmly. Look for any signs of damage or corrosion.
- Reassemble and Test: Carefully reassemble your laptop. Power it on and check the touchpad.
Preventing Future Mousepad Meltdowns: Proactive Maintenance Tips
Okay, your mousepad's working! Fantastic! But how do you prevent this from happening again? Here are some pro-tips for keeping your touchpad happily scrolling along:
- Keep Drivers Updated: Regularly check for driver updates through Device Manager or Dell's support website.
- Clean Your Touchpad: Use a microfiber cloth to gently wipe away dust and grime. Avoid using liquids directly on the touchpad.
- Protect From Overheating: Make sure your laptop has adequate ventilation. Don't block the vents. Extreme heat can damage components.
- Avoid Physical Damage: Be careful not to drop your laptop or put excessive pressure on the touchpad.
- Regular Backups: While not directly related to the touchpad, backing up your data is always a good idea. That way, even if something does go wrong, your important files are safe.
When to Call in the Pros: Recognizing the Limits of DIY
Sometimes, no matter what you try, the issue persists. Here are some signs that it's time to seek professional help:
- The Touchpad is Physically Damaged: Obvious cracks, swelling, or other physical damage.
- You've Tried Everything: You've worked through all the troubleshooting steps, and still nothing.
- You're Not Comfortable with Hardware: If you're not comfortable opening your laptop, don't!
- Warranty Concerns: Your Dell laptop may still be under warranty. Contacting Dell support is the best course of action in this case.
Beyond the Mousepad: Exploring Alternative Input Methods
Let's be honest. A dead mousepad can be incredibly frustrating. But you're not completely stranded!
- External Mouse: The simplest solution. Get yourself a trusty USB or Bluetooth mouse.
- USB Keyboard with Mouse: This is a good option for a more permanent setup, especially if you value full-sized keys.
- Use the Touchscreen (If Applicable): If your Dell laptop has a touchscreen, you can use it to navigate.
- Keyboard Shortcuts: Become a keyboard shortcut ninja! Learn the common shortcuts for tasks you perform frequently.
The Ultimate Truth: Can a Mousepad REALLY Die… Permanently?
Sadly, yes. While we've covered numerous troubleshooting steps, there's always a chance the touchpad is beyond repair. This could be due to internal damage, component failure, or age. But don’t despair! Even if the mousepad is permanently deceased, there are still ways to keep your laptop humming along as we’ve just discussed.
Closing Thoughts: You've Got This!
We've navigated the treacherous waters of the dead Dell laptop mousepad together, armed with knowledge and a can-do attitude. Remember, tech problems are often solvable with a little patience and the right approach. We hope these fixes have helped you bring your mousepad back to life. And if not, remember the alternatives! Happy computing, and may your cursor always be swift!
FAQs
**1
Asus Laptop Speakers DEAD? FIX This NOW!Dell Laptop Touchpad Not Working Updated 2024

By Tech White Dell Laptop Touchpad Not Working Updated 2024 by Tech White
dell keyboard and mouse pad not working
By PRADHUMAN NEPALIA dell keyboard and mouse pad not working by PRADHUMAN NEPALIA
How to fix Laptop mouse touchpad not working Dell Laptop Touchpad Not Working Updated 2024
By Learning Earning Fun How to fix Laptop mouse touchpad not working Dell Laptop Touchpad Not Working Updated 2024 by Learning Earning Fun

Title: Dell latitude e6410 mouse cursor unstable or auto move issue quick fix
Channel: KH COMPUTERS
Dell latitude e6410 mouse cursor unstable or auto move issue quick fix by KH COMPUTERS
Wifi Not Found
Dell Laptop Mousepad DEAD? This SHOCKING Fix Works!
Navigating the digital landscape with a faulty mousepad on your Dell laptop can be a frustrating experience, severely impacting productivity and hindering your ability to interact seamlessly with your device. The seemingly simple act of clicking, dragging, and scrolling becomes a Herculean task, transforming your workflow into a series of irritating interruptions. We've all been there: the cursor freezes, the clicks fail to register, and the once-familiar touch becomes unresponsive. But before you resign yourself to the inconvenience of an external mouse or, worse, contemplate a costly repair, there’s a high probability that a series of simple, often overlooked solutions can breathe new life into your Dell laptop’s mousepad. This article will guide you through a detailed exploration of common issues and provide actionable steps to restore functionality and reclaim your laptop experience.
Troubleshooting the Dell Laptop Mousepad: Initial Diagnostics
Before diving into complex solutions, a thorough diagnostic process is essential. Begin by confirming the obvious: Is the mousepad physically clean? Accumulated dust, debris, and even tiny particles can interfere with the sensors, leading to erratic behavior or complete unresponsiveness. Use a soft, lint-free cloth to gently wipe the mousepad surface. Avoid harsh chemicals or excessive moisture, as these can cause further damage.
Next, scrutinize the touchpad's settings within your operating system. Windows, for example, provides comprehensive control over mouse settings. Access the “Mouse settings” through the Windows search bar. Within this menu, carefully examine the touchpad settings. Ensure the touchpad is enabled and not accidentally disabled. Certain settings may even inadvertently alter the touchpad’s sensitivity or responsiveness. Experiment by adjusting these settings. If the touchpad is disabled, enabling it is the most fundamental step. A simple toggle switch often controls the touchpad’s on/off state. Verify this first.
Furthermore, consider the possibility of a software conflict. Have you recently installed any new applications or drivers? Sometimes, software updates or new installations can inadvertently disrupt the proper functioning of the touchpad. In this case, consider uninstalling the software and rebooting the system. If the problem ceases, the recently installed software was the source of the issue.
Hardware Considerations: Physical Damage, Internal Connections
While software often provides the initial source of the problems, don’t underestimate the possibility of hardware issues. Physical damage, even seemingly minor, can render the mousepad useless. Inspect the mousepad's surface for any cracks, dents, or signs of impact. While the mousepad itself is usually protected, excessive force on the palm-rest area can damage the internal components.
Internal connections are essential. Though invasive, the possibility of a loosened or disconnected cable within the laptop must be considered. This typically involves opening the laptop's chassis. This, however, is a delicate process and must be done carefully. Before proceeding, disconnect the power adapter and remove the battery to prevent any electrical hazards. Refer to your Dell laptop's service manual or search online for a guide specific to your model. Locate the touchpad’s connection cable. It should be securely attached to both the touchpad and the motherboard. If it appears loose, gently reseat the cable. This simple action often resolves connection-related issues.
Driver Issues and Software Conflicts: A Deep Dive
Driver compatibility plays a crucial role in the proper functioning of your Dell laptop’s mousepad. Outdated, corrupted, or missing drivers are frequent culprits.
To address this, access the “Device Manager” through the Windows search bar. Locate the "Mice and other pointing devices" section. Expand this option to view the listed devices. Right-click on your touchpad (usually listed as something like "HID-compliant mouse" or specific to your Dell model; look for the touchpad’s brand, such as Synaptics) and select “Update driver.” Choose the "Search automatically for drivers" option. Windows will then search for and install the latest drivers. If this doesn't work, manually updating the driver may be necessary. In the "Device Manager", right-click on the same touchpad entry, select "Update driver," and then select "Browse my computer for drivers".
Explore the driver installation files. Often, Dell provides specific driver updates through its website. Navigate to the Dell support website, enter your Service Tag or model number, and download the latest touchpad drivers for your operating system. Running the downloaded executable file will initiate the driver installation process. After installation, restart your laptop.
Software conflicts can arise from many sources. Recently installed software might have modified touchpad settings. Try system restore if the problem began after installing application. Open “System Restore” through the Windows search bar. Select a restore point prior to the onset of the touchpad issues. This will revert your system to a previous configuration, potentially resolving any software conflicts.
BIOS and Firmware: The Hidden Components
Beyond your operating system and software, investigate your laptop's BIOS (Basic Input/Output System) and accompanying firmware. These low-level components control the hardware’s fundamental functions.
Accessing the BIOS varies depending on your Dell model. Typically, you will need to press a specific key (such as F2, F12, or Del) during startup. The Dell logo will usually provide a prompt. Within the BIOS settings, search for an option related to the touchpad. Verify that the touchpad is enabled in the BIOS. If disabled, enable it and save the changes before exiting the BIOS.
Firmware updates are sometimes required to optimize device functionality. Check Dell's support website for firmware updates specific to your laptop model. Download the correct firmware update (be extremely cautious, as an incorrect firmware update can render your laptop inoperable). Run the firmware update executable, following the on-screen instructions carefully. Be patient and do not interrupt the process, as this can damage your laptop. Restart your system once the firmware has been updated.
Advanced Troubleshooting and When to Seek Professional Help
If standard troubleshooting steps fail, advanced techniques may be required. These may include advanced driver manipulations and hardware tests. The goal is to isolate the root cause of the problem.
Consider running a diagnostic test provided by Dell. Many Dell laptops come with built-in diagnostics. You can access these by turning on the computer and pressing a specific key (often F12) to enter the boot menu. Select the diagnostic option. The diagnostic test will assess various hardware components, including the touchpad, and identify any potential problems.
If the touchpad consistently fails to respond despite these measures, it may be a hardware defect. In this case, reaching out to Dell support or a certified repair technician is the most suitable option. Do not attempt to repair the touchpad yourself if you are not comfortable with hardware repairs. Improper handling can lead to further damage and void any warranty. Seek professional advice for a proper diagnosis and recommend solutions. Sometimes, the mousepad is irreparably damaged. In that case, you may need to replace the entire touchpad assembly or, as a last resort, the whole laptop if the repair costs are too high.
Preventative Measures and Long-Term Care for Your Dell Laptop Mousepad
Maintaining the longevity of your Dell laptop’s mousepad is a proactive approach. Certain habits can significantly reduce the likelihood of future issues.
Regularly clean the mousepad surface. Utilize a soft, lint-free cloth to remove dust, and debris. Avoid abrasive cleaning agents that could damage the surface.
Protect your laptop from extreme temperatures and humidity. These factors can affect the performance of electronic components.
Avoid excessive force or pressure on the mousepad. Gentle usage minimizes wear and tear.
Update drivers. Keep your touchpad drivers current. As we have discussed earlier, updated drivers are crucial for optimal performance and compatibility.
Handle your laptop carefully. Avoid dropping it or subjecting it to physical shocks, as these can damage internal components.
By following these practices, you can enhance the lifespan of your Dell laptop’s mousepad and maintain a smooth and responsive user experience.
