laptop hdmi not working

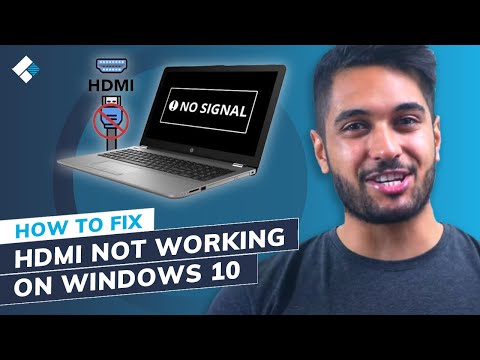
Title: 2023 NEW How to Fix HDMI Not Working on Laptop Windows
Channel: Wondershare Recoverit Data Recovery
2023 NEW How to Fix HDMI Not Working on Laptop Windows by Wondershare Recoverit Data Recovery
laptop hdmi not working, laptop hdmi not working on tv, laptop hdmi not working on monitor, laptop hdmi not working reddit, laptop hdmi not working windows 11, laptop hdmi not working after update, laptop hdmi not showing, asus laptop hdmi not working, acer laptop hdmi not working, laptop hdmi sound not working on tv
Laptop HDMI Nightmare? FIX It NOW!
HDMI Havoc? Resurrect Your Laptop's Display (Without the Tears!)
Let's be honest; the HDMI connection blues are a universal laptop struggle, right? You eagerly anticipate projecting that dazzling presentation, streaming your favorite show, or even just extending your workspace. However, instead, you’re met with a frustrating black screen, flickering images, or, worse, a complete lack of response. Frustrating, isn't it? But don’t despair! You're not alone. This happens, frequently, despite the technology's promise of seamless connectivity. So, put down the remote, and let’s troubleshoot.
The HDMI Hang-Up: Unmasking the Culprits
Before we jump to solutions, a bit of sleuthing is in order. First, let’s consider the usual suspects. Is it the cable itself? These connections are often the weak link. Additionally, a damaged or faulty HDMI cable can be the source of the problem. Furthermore, your laptop's HDMI port is another potential troublemaker. This port is vulnerable to dust, debris, and physical damage. Therefore, check its condition visually.
Perhaps the issue lies within your display device. Is your monitor, projector, or TV properly powered on and set to the correct input source? These seemingly simple oversights trip us all up, once in a while. Consider also the laptop's settings. Incorrect display settings can cause a lot of problems.
Step-by-Step Rescue Mission: Troubleshooting Tactics
Okay, time for some tactical maneuvers. Firstly, ensure the easy checks are completed. After that, let's dive into the more involved remedies. Start with the basics.
- Cable Capers: Experiment with a different HDMI cable. A new, high-quality one can remarkably improve your experience. The solution could be that simple.
- Port Patrol: Examine your laptop's HDMI port. Use a flashlight to look for any obstructions. Carefully clean any dust or debris with compressed air. Doing this can work wonders.
- Reboot Ritual: Sometimes, a simple restart is the magic trick. Reboot both your laptop and the display device. It's a classic fix for a reason.
- Source Savvy: Confirm the display device is set to the correct input source. This can be a regular misstep.
Unlocking the Display Destiny: Software & Driver Solutions
If the hardware checks don't yield results, the root of the issue might be in the software. Let's explore these avenues.
- Driver Detective Work: Outdated or corrupted display drivers are common culprits. Go to your laptop manufacturer's website. Download and install the latest drivers for your graphics card. Moreover, this can frequently resolve the issue.
- Display Settings Deep Dive: Right-click anywhere on your desktop. Then, select "Display Settings" (Windows) or "System Preferences" > "Displays" (Mac). Ensure your external display is detected. Now, try detecting it manually if needed. Adjust the resolution and display mode to match your requirements.
- Duplicate or Extend?: Ensure your display mode is correctly configured. Duplicate mode mirrors the laptop screen. Extend mode provides an expanded workspace. You can change this in your display settings.
- Windows Key + P: A quick shortcut. This brings up the display mode options. Select the desired mode.
Advanced Arsenal: Escalating the HDMI Effort
At this point, if you are still facing problems, It is time to advance your approach. It's time to get slightly more serious.
- Check the Connection: While seemingly obvious, make sure the connection is secure. Wiggle the HDMI cable at both ends. Does it seem loose? This could cause intermittent connection problems.
- External Displays: If possible, test the connection with another display. This helps determine if the issue is your laptop, the display device, or the cable.
- BIOS Check: It’s worth examining your laptop's BIOS. Sometimes, display settings are configured incorrectly in the BIOS. Proceed with caution. Consult your laptop's manual.
- Power Supply: Ensure your laptop is connected to a reliable power source. Insufficient power can sometimes affect HDMI output.
Final Resort: Seeking Expert Intervention
If all efforts have been exhausted without positive results, it might be time to concede defeat. At that point, it is time for professional assistance.
- Tech Support Troubleshoot: Reach out to your laptop manufacturer's tech support team. Provide them with a detailed account of your troubleshooting steps. They have access to specialized diagnostic tools.
- Local Laptop Doctor: Locate a reputable computer repair shop. A technician can diagnose the problem. They can also perform hardware repairs if necessary.
- HDMI Port Replacement: If your laptop's HDMI port is damaged, it may need replacing. This is a repair best left to professionals.
HDMI Harmony: Conclusion and Continued Connectivity
HDMI connectivity issues can be incredibly annoying. Nevertheless, with a methodical approach, you can often resolve them. So, go forth and troubleshoot. Don't panic. First, start with the basics. Then, work your way through the troubleshooting steps. As a result, hopefully, you'll get your external display working. Your viewing experience is waiting. Remember that patience is key. Persistence, combined with these troubleshooting tips, should restore your laptop's HDMI functionality. Get back to enjoying your content, and good luck!
Work From Home Laptop: Escape the 9-to-5 Grind & Earn BIG!Laptop HDMI Nightmare? FIX It NOW!
Ever been there? You’re all set for a movie night, a crucial work presentation, or even just a casual gaming session. You meticulously connect your laptop to your TV or external monitor via HDMI, anticipating a seamless, high-definition experience. And then…nothing. Or worse, a garbled mess of fuzzy pixels, intermittent audio, or a flat-out refusal to display anything at all. We’ve all faced the laptop HDMI nightmare, that frustrating moment when technology throws a tantrum just when you need it most. But don’t despair! We’ve been there, wrestled with the digital demons, and emerged victorious. This isn't just a run-of-the-mill troubleshooting guide; it’s a survival manual, a roadmap to reclaiming your visual freedom. So, grab your popcorn, settle in, and let's banish those HDMI gremlins for good!
1. The HDMI Headache: Understanding the Core Problem
Before we start flinging solutions like confetti, let’s take a moment to understand why this technological temper tantrum might be happening. Think of HDMI as the digital equivalent of a superhighway, carrying both audio and video signals from your laptop to your display device. This highway, however, has its own set of rules, potential roadblocks, and occasionally, surprise construction zones. The core problem? A disconnect, a miscommunication, or a simple malfunction somewhere along that digital highway. It could be as simple as a loose cable or as complex as a driver compatibility issue. Like diagnosing a medical condition, understanding the symptoms is the first step to a cure. We'll break down the common culprits, so you can pinpoint your specific problem.
2. Cable Calamities: The Obvious Suspects (and Why They Matter!)
Okay, let's start with the easy stuff – the low-hanging fruit. Often, the solution is staring you right in the face. The HDMI cable itself is frequently the root of the problem. Is the cable securely plugged into both your laptop and the display? It sounds obvious, but we’ve all been guilty of a hasty connection. Think of it like plugging in a lamp; if it's not plugged in, you won't get light.
- Check the Connections: Ensure both ends of the HDMI cable are firmly seated. Wiggle them gently. A loose connection can easily disrupt the signal.
- Cable Quality Matters, Sometimes: A high-quality HDMI cable is essential, especially if you're aiming for 4K resolution or running long cable lengths. Think of it like a water hose – a thin, flimsy one might leak, while a robust one delivers the flow efficiently. Cheap cables can be prone to signal degradation.
- Try a Different Cable: This is the quickest troubleshooting step. Swap out the current cable with a known working one. Does it work now? If so, you've isolated the culprit.
3. Display Device Dilemmas: Are Your TV or Monitor the Issue?
Sometimes, the blame lies not with your laptop but with the display device itself. Your TV or monitor could be the problem child! Let's look at some possible scenarios:
- Input Selection: Is the display device set to the correct HDMI input? This is where we've all made the mistake. Double-check the input source using your TV or monitor's remote.
- Resolution and Compatibility: Your TV or monitor might not support the resolution or refresh rate your laptop is trying to output. Check your display settings (we’ll get to those later).
- Hardware Failure: In rare cases, the HDMI port on your TV or monitor could be faulty. Test your laptop with a different display to rule this out. If it works on another display, the problem is likely with the original one.
4. The Driver Dance: Unlocking the Power of Your Graphics Card
Your graphics card drivers are the software that tells your laptop how to communicate with external displays. They're like the translators in a diplomatic meeting, making sure everyone understands each other. Outdated or corrupted drivers can lead to serious HDMI hiccups.
- Update Your Drivers: This is often the magic bullet. Go to your laptop manufacturer's website or the website of your graphics card manufacturer (Nvidia or AMD are the big players) and download the latest drivers for your specific model.
- Uninstall and Reinstall Drivers: Sometimes, a fresh install is needed. Uninstall the existing drivers completely and then reinstall the latest version. This is the digital equivalent of a clean slate.
- Roll Back Drivers (If Needed): Sometimes, a recent driver update can cause problems. If the issue started after an update, try rolling back to a previous version.
5. Display Settings Detective Work: Fine-Tuning the Output
Your laptop’s display settings control how it sends the video signal. These settings can be a minefield, but we'll navigate them together.
- Access Display Settings: Right-click on your desktop and select "Display Settings" (Windows) or "System Preferences" > "Displays" (Mac).
- Multiple Displays: Make sure your laptop is detecting the external display. Sometimes you need to select "Detect" or "Identify" to force it to recognize the connection.
- Resolution and Refresh Rate: Experiment with different resolutions and refresh rates. Choose a setting compatible with both your laptop and your display. This is like matching the right song to the right party – it has to fit!
- Duplicate or Extend: Choose to either duplicate your laptop's display on the external screen (showing the same image on both) or extend your desktop, giving you more screen "real estate."
6. The Power of Power: Ensuring Everything is Powered Up!
This might seem ridiculously obvious, but it's worth mentioning. Make sure both your laptop and external display are plugged into working power outlets. A drained laptop battery or a display without power will obviously result in nothing displayed. It's like trying to drive a car without fuel – you won't get very far.
7. Reboot Revelation: The Simple Yet Effective Fix
Sometimes, the simplest solution is the best. A simple reboot of your laptop can often resolve HDMI connection issues. It's like hitting the reset button, clearing out any temporary glitches or conflicts. And it’s always worth a shot!
8. Audio Adventures: Solving Sound Synchronization Woes
HDMI carries both video and audio signals, so problems with sound can often accompany video issues.
- Select the Correct Audio Output: In your laptop's sound settings (accessed through the system tray or control panel), make sure the HDMI output is selected as your default audio device.
- Check Volume Levels: Double-check that the volume on both your laptop and the external display are turned up.
- Driver Compatibility: Ensure your audio drivers are up-to-date.
9. Device Compatibility: The HDMI Standard Evolution
HDMI has gone through several versions (1.4, 2.0, 2.1, etc.). These newer versions offer better performance. Check to ensure your laptop and display support a compatible version. You may not always see the version number listed.
10. Windows Troubleshooter: Your Digital Detective!
Windows has a built-in troubleshooter for hardware and devices.
- Run the Troubleshooter: In Windows, go to Settings > System > Troubleshoot and run the Hardware and Devices troubleshooter. It might identify and fix the problem automatically.
11. Mac-Specific Solutions: Tailoring to The Apple Ecosystem
If you’re a Mac user, the HDMI headaches are similar, but the repair process is a slightly different flavor.
- Check your Display settings: Similar to Windows, make sure your external display is recognized, and the appropriate resolution is selected.
- Use Apple’s Display Preferences: Access these settings through the Apple menu (top-left corner) > System Preferences > Displays. Try detecting displays or adjusting settings.
- Restart or Reset: If it's still not working, restart your Mac.
12. Third-Party Software Conflicts: Identifying Potential Culprits
Sometimes, third-party software can interfere with HDMI output. Consider the following:
- Disable Unnecessary Software: Close any programs that might be interfering with your display function, such as screen recording software or virtual display drivers.
- Clean Boot: Perform a clean boot (Windows) to start your computer with only essential services. This can help identify if a specific software is causing the issue.
13. The HDMI Port Itself: Assessing Physical Condition
Sometimes the problem is in the hardware.
- Examine the Port: Inspect the HDMI port on your laptop. Are there any bent pins or debris?
- Professional Repair: If the HDMI port itself is damaged, it may require professional repair.
14. Advanced Troubleshooting Techniques: For the Tech Savvy
If you're comfortable diving deeper, here are a couple of advanced techniques.
- BIOS Updates: Ensure your laptop's BIOS is up to date. A corrupted or out-of-date BIOS can sometimes cause issues.
- Check for Hardware Conflicts: Review your Device Manager (Windows) for any exclamation marks or errors that might indicate hardware conflicts.
15. Preventing the Nightmare: Proactive HDMI Health
Prevention is always better than cure. By following a few best practices, you can minimize the chances of future HDMI headaches.
- Handle Cables Gently: Avoid bending or twisting your HDMI cables excessively.
How to Fix HDMI Not Working on Laptop Windows 11

By Ground Zero How to Fix HDMI Not Working on Laptop Windows 11 by Ground Zero
How to Fix HDMI Not Working on Laptop Windows 10 5 Methods
By Wondershare Recoverit Data Recovery How to Fix HDMI Not Working on Laptop Windows 10 5 Methods by Wondershare Recoverit Data Recovery
How to Fix HDMI Not Working in Windows 11 NEW 2025

By TechFixIT How to Fix HDMI Not Working in Windows 11 NEW 2025 by TechFixIT

Title: Laptop not detecting your monitor Heres how to fix it Asurion
Channel: Asurion
Laptop not detecting your monitor Heres how to fix it Asurion by Asurion
Wifi On Laptop
Laptop HDMI Nightmare? FIX It NOW!
Have you ever been utterly defeated by the simple task of connecting your laptop to a TV or projector? The scenario is practically universal: You eagerly anticipate sharing a presentation, streaming a movie, or simply enjoying a larger screen experience, only to be met with a frustrating wall of technical difficulties. No signal. Flickering images. Distorted audio. The dreaded HDMI "no connection" message. We understand your pain. We've been there, wrestled with the cables, and navigated the labyrinthine settings menus. That's why we've compiled this comprehensive guide, a roadmap to banishing the HDMI demons and reclaiming your viewing experience. Prepare to bid farewell to the frustration and greet smooth, seamless connectivity.
Understanding the HDMI Landscape: A Foundation for Troubleshooting
Before we plunge into the solutions, let's establish a solid foundation. HDMI (High-Definition Multimedia Interface) is a sophisticated technology designed to transmit both audio and video signals digitally. This elegance, however, can occasionally translate to complexity. Several factors can contribute to HDMI connection problems: the cable itself, the laptop's HDMI port, the display device (TV, projector, monitor), and the settings across both devices. A thorough understanding of these elements is crucial for effective troubleshooting. We also need to acknowledge that the HDMI protocol has evolved over time, with different versions (HDMI 1.4, 2.0, 2.1) offering varying levels of bandwidth and features. Compatibility between devices with different HDMI versions is usually backward-compatible, but the supported features are going to be based on the lowest version supported by each device.
The Prime Suspect: The HDMI Cable and Its Cousins
Let's begin with the apparent culprit: the HDMI cable itself. A cheap, poorly-made cable is often the source of many frustrations. These cables might appear to function initially, but they are prone to signal degradation, particularly over longer distances. Consider these factors when evaluating your cable:
- Cable Quality: Invest in a cable from a reputable manufacturer. Don't be tempted by the cheapest option. Look for cables that are shielded and designed for high-speed data transmission. This is critical for supporting higher resolutions and refresh rates.
- Cable Length: The longer the cable, the more potential for signal loss. If you're connecting across a significant distance, consider an active HDMI cable with built-in signal amplification. These types of cables are very good if you are dealing with longer-distance connections.
- Physical Condition: Examine the cable ends for any damage, bends, or loose connections. Even a slight imperfection can disrupt the signal. The connector should fit snugly into both the laptop and the display device.
Verifying the Laptop's HDMI Port: A Critical Evaluation
The HDMI port on your laptop is another area that demands careful scrutiny. It can be the source of numerous connection failures.
- Physical Inspection: Carefully examine the port for any physical damage such as bent pins, debris, or obstructions. Use a flashlight if necessary to get a closer view. If the port appears damaged, it might require professional repair.
- Driver Updates: Ensure that your laptop's graphics drivers are up to date. Outdated drivers are a common cause of display issues. Visit your laptop manufacturer's website or the website of your graphics card manufacturer (e.g., NVIDIA, AMD, Intel) to download and install the latest drivers. Perform a driver update.
- Port Conflicts: In rare instances, other devices connected to your laptop can interfere with the HDMI signal. Try disconnecting any unnecessary peripherals (e.g., USB hubs, external hard drives) and see if the HDMI connection improves. Start with a hard reset of the laptop.
Mastering the Display Device: Deciphering Your TV or Projector
The display device (TV, projector, or monitor) is often another hidden obstacle to a successful HDMI connection. Incorrect settings on the display can result in lost signals.
- Input Selection: Double-check that you've selected the correct HDMI input on your TV or projector. Use the remote control to cycle through the input options until you find the one that corresponds to the port you're using on the display device. It could be that your display is not compatible with the input.
- Resolution and Refresh Rate: Experiment with different display resolutions and refresh rates on your laptop. Right-click on your desktop, select "Display settings," and adjust the resolution and refresh rate until you find a combination that works with your TV or projector. 1080p at 60Hz is a good place to start. Other combinations may also be useful depending on the TV.
- EDID Issues: EDID (Extended Display Identification Data) is a set of data that a display device communicates to the source device (your laptop) to identify its capabilities. Sometimes, EDID issues can prevent a proper connection. This can often be resolved by cycling the power on both the laptop and the external display device. Also, make sure that both devices are powered on before connecting the HDMI cable.
- Firmware Updates: Ensure that your TV or projector's firmware is up to date. Visit the manufacturer's website to check for firmware updates and download the latest version.
Deciphering the Hidden Settings: Delving into Laptop Display Settings
Your laptop's display settings are often the key to resolving perplexing HDMI issues.
- Duplicate vs. Extend: In your display settings, you'll find options for "Duplicate these displays" (mirroring your screen) or "Extend these displays" (creating a second screen). Experiment with both options. Sometimes, one option works while the other does not.
- Multiple Displays: If your laptop is connected to multiple displays, make sure that the external display is correctly identified in the display settings. You can usually identify the display by its name or serial number.
- Brightness and Contrast: Occasionally, the brightness or contrast settings on your laptop may affect the image displayed on the external screen. Adjust these settings to find the optimal picture quality.
Audio Troubleshooting: Ensuring Sound Synchronization
HDMI carries both video and audio signals. Audio problems are as frustrating as video problems, often a result of incorrect audio settings.
- Sound Output Selection: In your laptop's sound settings, make sure that the HDMI device is selected as the default audio output. Right-click on the speaker icon in your system tray, select "Open Sound settings," and choose the appropriate output device.
- Driver Issues: Similar to video drivers, outdated audio drivers can cause issues. Update your laptop's audio drivers, using the same methods mentioned earlier.
- Volume Levels: Ensure that the volume levels on both your laptop and the display device are turned up. Check the mute settings on both devices as well.
Advanced Troubleshooting Techniques: Unveiling the Hidden Solutions
If the usual methods fail, there are some advanced troubleshooting techniques that you can try.
- Different HDMI Port: If your laptop has multiple HDMI ports, try plugging the cable into a different port. This eliminates the remote possibility of a port-specific issue. Use a different port and then try again.
- Different HDMI Cable: Test the HDMI cable with another device. If the same problem occurs with the other device, the cable is likely the culprit.
- Try a Different Display Device: Connect your laptop to a different TV, projector, or monitor. This can help determine whether the issue lies with your laptop, the original display device, or the cable.
- Check for Software Conflicts: In rare cases, certain software applications can interfere with HDMI connectivity. Try temporarily disabling any recently installed software or updates to see if that resolves the problem.
- Reset Your Display Settings: Reset your computer's display settings to their factory defaults. In Windows, this can often be found using the troubleshooting tools.
Preventative Measures: Proactive Strategies for Future Success
Once you've successfully resolved your HDMI issue, consider implementing these preventative measures to minimize future problems.
- Regular Cable Checks: Periodically inspect your HDMI cables for damage and replace them if necessary.
- Driver Maintenance: Regularly update your laptop's graphics and audio drivers.
- Cable Management: Keep your cables organized to prevent accidental damage.
- Proper Storage: When not in use, store your HDMI cables in a safe and dry location.
With these steps, you should be well-equipped to tackle any laptop HDMI nightmare. Remember to approach the troubleshooting process systematically, checking each potential source of the problem. With a little patience and persistence, you can restore your viewing experience and enjoy smooth connectivity for all your display needs.
