charger for laptop not working

Title: How to FIX Any Laptop Not Charging while plugged in
Channel: GMODISM
How to FIX Any Laptop Not Charging while plugged in by GMODISM
charger for laptop not working, hp charger for laptop not working, charger for acer laptop not working, wifi adapter for laptop not working, ethernet adapter for laptop not working, wireless adapter for laptop not working, charger dell laptop not working, power adapter laptop not working, asus charger laptop not working, lenovo charger laptop not working
Laptop Charger DEAD? 😱 This FIX Will SHOCK You!
My Laptop Charger's Officially Gone Kaput! Now What?
The dreaded moment arrived. My laptop screen flickered then faded to black, signaling the demise of my trusty charger. Panic momentarily seized me. Where would I get my daily dose of digital life? Before I spiraled into a tech-induced abyss, I knew I had to act fast. Thankfully, I’d recently stumbled upon some potential solutions.
Diagnosing the Digital Lifeline's Demise: More Than Meets the Eye
First, breathe. Don't assume the worst. A dead charger often presents itself with similar issues. Consequently, take a moment to assess the situation methodically. Did the charger completely fail, or is it simply not charging correctly? Check the obvious: is it plugged in? The outlet may be the issue, so test it with another device, like a lamp. Another quick check is the power brick itself. Is the light illuminated?
Beyond the simple stuff, examine the cable. Look for any obvious signs of damage, like fraying or kinks. Gently wiggle the cable at both ends. Frequently, a damaged cable is the true culprit. Perhaps the connection to your laptop's charging port is the problem. This may be loose or full of dust and debris. Therefore, cleaning the port may become your next step.
Troubleshooting Tactics: Is Your Charger Worth Saving?
Now, let’s delve into some potential fixes. These may save you a trip to the store. First, consider the possibility of a loose connection within the charger itself. This problem tends to surface with frequent use. Disassembling a charger can be risky. However, proceeding with caution is viable. Ensure you disconnect it from the power source. Take your time.
If you see loose wires, try carefully re-soldering them. Be extremely cautious around electrical components. If you're uncomfortable with this, seeking expert help is best. The alternative is potentially shocking. Furthermore, try resetting the charger by unplugging it from both the wall outlet and your laptop. Wait a few minutes, then plug everything back in. This simple act can often resolve minor glitches.
The Mysterious Case of Voltage and Amperage: Delving Deeper
If your charger is still failing, then understanding the voltage and amperage specifications is key. These are usually printed on the charger itself. You’ll also find these specifications on your laptop's battery. Make sure the replacement charger matches these specs. Anything less could be ineffective. Anything more could potentially damage your laptop.
Additionally, consider a universal charger. These adaptable chargers can handle different voltages and tips. They offer a versatile solution, especially if you own multiple devices. However, always verify compatibility before purchasing a universal charger. Therefore, read reviews and ensure it fits your needs.
Beyond the Charger: The Battery's Role in the Equation
Before you blame the charger entirely, consider the laptop battery. How old is it? Battery degradation is a natural process. Over time, batteries lose their ability to hold a charge. Moreover, the battery itself might have failed. Try removing the battery, if possible, then running the laptop with only the charger. This could help isolate the problem.
If the laptop works without the battery, then the battery is likely dead. You will need to find a replacement. However, if it remains unresponsive, then the charger might be the issue. Alternatively, internal components could be the problem. In this event, professional assistance is a smart idea.
The Power of Prevention: Extending Your Charger's Lifespan
Knowing the remedies is wonderful. However, preventatives are equally important. Therefore, you can take several steps to prolong your charger's life. First, always unplug the charger when not in use. This prevents unnecessary wear and tear. Also, avoid bending or pulling the cable.
Also, store the charger in a safe place when you travel. Use a protective case or sleeve. Such protection will shield it from potential damage. Additionally, avoid extreme temperatures. Excessive heat or cold can degrade the charger's components. Finally, use a surge protector. This protects against power surges that could damage your charger and laptop.
Shopping for the Savior: Choosing a Replacement Wisely
If repairs fail, then it's time to shop for a replacement. First, always purchase from a reputable source. This ensures you get a genuine charger. Avoid cheap imitations. They may damage your laptop. Also, check reviews before purchasing anything online. Genuine products are often more costly. However, they are usually worth the investment.
Furthermore, think about your needs. Do you need a standard charger, or a fast-charging model? Considering your daily habits is crucial. Do you travel often? A compact charger might be ideal. Finally, explore your options. Consider your budget and necessary features.
The Final Verdict: Back in Business (Hopefully!)
Hopefully, these tips have helped you resurrect your dead charger. Now, you can get back to your digital life. As always, safety is paramount. If you're uncomfortable with any repairs, consult with a professional. With the right approach, you can overcome this common tech hurdle. Enjoy your revived laptop!
Dead Laptop? This SHOCKING Trick Will Make You $$$!Laptop Charger DEAD? 😱 This FIX Will SHOCK You!
Hey everyone, it’s me! Ever had that heart-stopping moment staring at your laptop, desperately trying to coax it to life, only to discover… nothing? You plug in the charger, the little light doesn't blink, and your screen stays stubbornly dark. Panic sets in, right? We've all been there. And honestly, sometimes that feeling that your trusty laptop charger has kicked the bucket can be incredibly frustrating. But before you rush out to buy a new one – and potentially waste money – let's take a deep breath and explore some solutions. Trust me, we're not just talking about the typical "plug it in again" advice. We're going to dive deep, and by the end of this, you'll hopefully be able to revive your charger and get back to what you love doing.
1. The Dreaded Black Screen: Is It REALLY the Charger?
Let’s be brutally honest with ourselves. Before we go blaming the charger, let's make sure the problem lies with the charger. Sounds obvious, but trust me, it's often the simplest things we miss in our rush to solve a problem. Think of it like trying to diagnose a car's engine without checking the gas tank.
Check the Power Source: Is the outlet working? Plug something else into the same outlet – a lamp, your phone charger, anything! This simple test rules out a blown fuse or a power outage as the culprit. You wouldn't believe how often this is the actual problem.
The Wall Adapter's Tale: Examine the power brick (the big, rectangular thingy) itself. Is the cable securely plugged into both the adapter and the laptop? Is there any visible damage to the cable or the adapter? A frayed cable is like a broken promise – it's not going to deliver the power you need.
Laptop's Power Port Inspection: Carefully look at the charging port on your laptop. Is it damaged? Are there any bent pins? Sometimes, a little debris can prevent a good connection. A quick blast of compressed air (carefully, people!) can work wonders here.
2. The Charger Cable Chronicles: A Tangled Web of Problems
Now, let's assume the outlet is fine, but the laptop still doesn't charge. Time to cast a skeptical eye on the cable itself. Think of your charger cable as a lifeline. It’s the bridge between your laptop and the electrical grid.
The Bend Test: Gently bend the cable near the connectors (where it plugs into the adapter and your laptop). Do you see any flickering of the light on the charger? This could indicate a break or a short within the cable. Cables are, after all, often the weak link.
The Visual Inspection: Run your fingers along the entire length of the cable. Are there any bulges, cuts, or cracks? Even a slight imperfection can disrupt power flow. A cable that looks like it's been through a war zone is probably no longer reliable.
The Replacement Strategy (for Cables Only): If you suspect the cable is the issue, you might be able to find a replacement cable without replacing the entire power brick. If the adapter side is a standard connection and the laptop end is the same, this could save you a ton of money and is often easier than replacing the whole charger.
3. Adapter Anatomy: Peeling Back the Power Brick
Okay, if the cable seems fine, it's time to move on to the heart of the matter: the adapter itself. This is where things get a little more… technical. But don't panic! We'll keep it simple.
The LED Light: The Messenger… sometimes: Does the LED light on the adapter illuminate when plugged in? If it doesn't, this is a strong indicator that the adapter itself is the problem. But a lit light doesn't necessarily mean everything's perfect. It only means it's getting some power.
The Smell Test (Proceed with Caution!): Seriously. Sniff the adapter. If you detect a burning smell, unplug it immediately and consider it a goner. This is a sign of internal damage and could pose a fire hazard.
External Inspection: Look for cracks, bulges, or anything else that looks out of the ordinary. Damage to the exterior can be a sign of internal component failure.
4. The Battery Bust: A Charged Situation… Maybe Not?
Sometimes, the charger isn't the problem – it's the battery itself. A dead or degraded battery can appear to be a charger issue.
Battery Age Assessment: How old is your laptop battery? Batteries degrade over time. After a few years, their ability to hold a charge diminishes. Think of it like an old racehorse – it just doesn’t run as fast anymore.
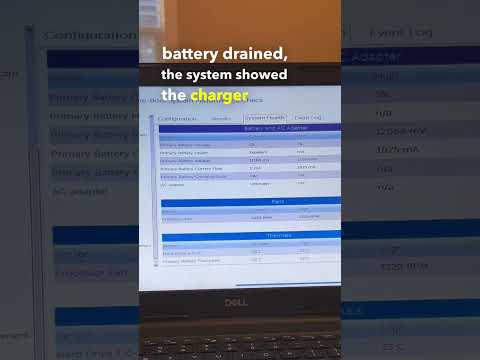
Battery Health Check (Software): Most laptops have built-in software or utilities that allow you to check your battery's health. This will give you an idea of how much capacity the battery still has. A quick Google search for your laptop model and “battery health check” will usually point you to the right direction.
The "Charge Without Battery" Test (If possible): If your laptop allows it, try removing the battery and plugging in the charger directly. If the laptop powers on, it strongly suggests the battery is the culprit. Be cautious; many modern laptops don't allow this.
5. Troubleshooting the Power Port on Your Laptop: A Delicate Dance
The charging port itself, as we touched on earlier, can be a source of problems. It’s the point of contact; the final link in the chain,
Visual Examination (Again): Grab a small flashlight and carefully examine the power port on your laptop. Be on the lookout for bent or broken pins, debris, and anything that looks out of place.
Gentle Cleaning: Using a toothpick or a non-conductive tool, carefully try to dislodge any debris. Don't use metal objects; you could cause a short circuit!
Professional Repair (If needed): If the port is physically damaged, it's best to take your laptop to a qualified repair technician. Trying to fix a damaged port yourself can easily make things worse.
6. The Compatibility Quandary: Are You Using the Right Charger?
This might seem obvious, but it's worth mentioning! Using the wrong charger can damage your laptop or simply prevent it from charging.
Voltage and Amperage Match: Check the specifications on both your laptop and the charger. The voltage and amperage must match, or your laptop may not charge or potentially be damaged. This is critical.
Connector Type: Make sure the charger's connector fits your laptop's charging port. Different laptops use different connector shapes and sizes. It's like trying to fit a square peg in a round hole!
Genuine vs. Third-Party Chargers: While third-party chargers can work, they may not always be as reliable as the original charger. Make sure any third-party charger you use is specifically designed for your laptop model.
7. The Overheating Offense: Cooling Down the Situation
Sometimes, a charger or laptop can shut down due to overheating. Think of them as having a fever.
Check for Blockage: Does anything obstruct the vents on your laptop? Ensure proper ventilation.
Temperature Checks: Have you left your laptop in a hot car or in direct sunlight? Overheating can damage components and/or prevent proper charging.
Let it Rest: Let your laptop and charger cool down before trying again. This can be a simple solution to an overheating problem.
8. Software Shenanigans: When the Operating System Plays the Blame Game
Sometimes, the problem might not be hardware at all. The operating system itself can cause charging issues.
Software Updates: Ensure your operating system and drivers are up to date. Outdated software can sometimes interfere with the charging process.
Driver Issues: Check your power management drivers. Outdated or corrupted drivers can prevent your laptop from charging properly.
Power Plan Check: Examine your power plan settings. Ensure the power plan isn’t configured to prevent charging.
9. The Power Outlet Predicament: Troubleshooting the Wall
We already briefly checked the outlet, but let's dig a little deeper.
Try A Different Outlet: Sometimes, an individual outlet can be faulty, even if others in the room work. Try plugging the charger into a different outlet.
Power Strip Paradox: If you're using a power strip, try plugging the charger directly into the wall outlet to eliminate the power strip as a potential problem.
Voltage Variations: Some older buildings or areas with unstable power might experience voltage fluctuations. If you suspect this is the case, consider using a surge protector.
10. The Battery's Behavior: Understanding Its Quirks
Our laptop batteries themselves can sometimes be the issue or contribute to a charging problem.
Charging Cycles: Over time, batteries degrade. Consider their charge cycles as a "life expectancy." After a certain number of cycles, the battery capacity slowly reduces.
Full Charge: Yes or No: Some batteries are designed to be fully discharged and recharged infrequently by the user. This can help improve battery health
This Laptop Won't Charge shorts pc computer pcrepair dell
By Matt's Computer Services This Laptop Won't Charge shorts pc computer pcrepair dell by Matt's Computer Services
Plugged In, Laptop Battery Not Charging Windows 1011 Solution 2 Methods

By Microsoft Sarker Plugged In, Laptop Battery Not Charging Windows 1011 Solution 2 Methods by Microsoft Sarker
Hp 840 G5 - not charging but working on the battery - ISL 9538H diagnose steps

By Electronics Repair School Hp 840 G5 - not charging but working on the battery - ISL 9538H diagnose steps by Electronics Repair School
Title: What To Do If Your Laptop Is Plugged In But Not Charging
Channel: PCMag
What To Do If Your Laptop Is Plugged In But Not Charging by PCMag
Laptop Working
Laptop Charger DEAD? 😱 This FIX Will SHOCK You!
We've all been there. The dreaded moment. You reach for your laptop, eager to dive into work, catch up with friends, or lose yourself in a good movie, only to find the screen stubbornly refusing to illuminate. The culprit? A lifeless laptop charger. Panic sets in. Deadlines loom. Entertainment is on hold. But before you resign yourself to a day of frustration, take a deep breath. We’re here to help you bring that charger back to life. In many cases, a seemingly defunct charger can be resurrected with a few simple troubleshooting steps. Forget expensive replacements; often, a little detective work is all that's needed. Let's uncover the secrets to diagnosing and fixing your laptop charger.
Preliminary Checks: The First Line of Defense Against Charger Catastrophe
Before reaching for screwdrivers or replacement parts, conduct a series of basic checks. These preliminary steps can often reveal the root cause of the problem and save you valuable time and money.
- Examine the Power Outlet: Start with the most obvious. Plug your charger into a different outlet, ideally one you know is functioning correctly. A faulty outlet is a common culprit. Test the outlet with another device, such as a lamp or a phone charger, to eliminate any doubt.
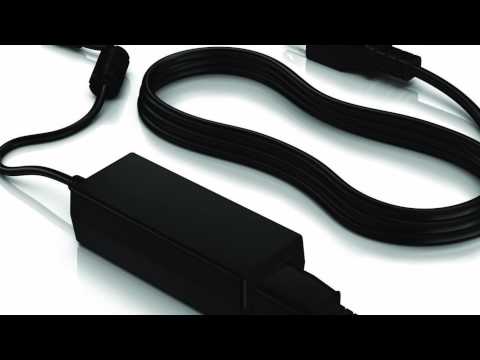
- Inspect the Wall Adapter: Carefully examine the wall adapter (the brick) for visible damage. Look for cracks, bulges, or any signs of overheating, such as discoloration or a burning smell. If you notice any of these, the adapter is likely faulty and should be replaced immediately. Safety first!
- Check the DC Connector and Cable: This is the cable that plugs into your laptop. Inspect the connector for any bent or broken pins. Also, scrutinize the cable itself for any cuts, frays, or kinks, especially near the connector and the adapter. These are common stress points.
- The Laptop's Power Port: A Hidden Villain: The charging port on your laptop can also be the source of your woes. A faulty port can prevent the charger from delivering power effectively. Look inside the port for any debris, bent pins, or corrosion. Use a flashlight to get a clear view.
- The Battery Health: Is Your Battery the Problem? A failing or dead battery can sometimes mimic charger issues. If your battery is old or has a history of problems, it might not be able to hold a charge properly, making you think the charger is dead. Try removing the battery (if possible) and plugging in the charger to see if the laptop powers on.
Advanced Diagnostics: Delving Deeper into the Charger's Demise
If the preliminary checks yield no answers, it’s time to dig deeper. These advanced diagnostic steps require a little more technical know-how, but they can often pinpoint the specific issue.
- The Multi-Meter: Your Electrical Detective: A multimeter is an invaluable tool for diagnosing electrical problems. Set the multimeter to measure DC voltage and test the output of your charger. Place the multimeter probes on the appropriate terminals of the DC connector (be careful not to short anything out). A working charger should output the voltage specified on the charger’s label (e.g., 19V). If the voltage is significantly lower or nonexistent, the charger is likely faulty.
- The Cable is the Culprit: Checking for Continuity : Sometimes the cable itself is the problem. Use the multimeter's continuity setting (often represented by a speaker icon) to check the cable. Place one probe on the positive terminal of the DC connector and the other on the positive terminal on the adapter. Repeat for the negative terminals. If the meter doesn’t beep or show continuity, the cable is broken.
- Dust and Debris: The Silent Killers Within the Adapter: Dust and debris can accumulate inside the power adapter and cause shorts or impede airflow, leading to overheating and failure. Carefully dismantle the adapter (use caution and unplug it first!). Using a small brush and compressed air, meticulously clean the internal components. Be very careful not to damage any of the components.
- Component Level Inspection: The Resistor's Role: Look for burn marks, or bulging capacitors inside the adapter. These components are often the first to fail. A resistor might look like a tiny cylinder with colored bands. A burned resistor can signal a deeper issue. Replacing these components can be tricky and require soldering expertise.
- Software-Related Issues: The Operating System's Influence: In rare cases, software can interfere with the charging process. Check your laptop's power settings. Ensure that power-saving modes aren’t overly aggressive, preventing proper charging. Update your laptop's BIOS and drivers to the latest versions, as they can sometimes resolve charging-related issues.
DIY Repairs: Bringing the Charger Back to Life (With Caution!)
Attempting repairs yourself can save money, but it's essential to proceed with caution. Always unplug the charger from the wall before attempting any repairs. If you're not comfortable working with electronics, it's best to seek professional help.
- Replacing the DC Cable: If the cable is the problem, replacing it is often the simplest fix. You can purchase replacement cables online or at electronics stores. Cut the old cable near the adapter, strip the wires, and connect the new cable, ensuring correct polarity (+ and -). Solder the connections for a secure bond, then insulate them with heat shrink tubing.
- Resoldering Loose Connections: Over time, solder joints inside the adapter can crack, causing intermittent or complete failure. Carefully inspect the solder joints with a magnifying glass. If you find any cracks, resolder them. Use a soldering iron with a fine tip and appropriate solder for electronic components.
- Component Replacement: The Advanced Challenge: Replacing internal components like capacitors or resistors requires soldering expertise and a good understanding of electronics. Identify the faulty component, purchase a replacement with the same specifications, and carefully solder it into place.
- Heat Dissipation Issues: Improving Airflow If the adapter is overheating, consider improving ventilation. Place it on a non-obstructed surface. Avoid covering the adapter while it is plugged in. Some adapters may benefit from small heat sinks attached with thermal adhesive.
When to Call in the Professionals: Knowing When to Throw in the Towel
While many charger problems can be fixed, some situations require professional intervention:
- Beyond Your Skill Level: If you're not comfortable working with electronics or soldering, it's best to seek professional repair.
- Extensive Internal Damage: If the adapter has suffered severe internal damage, such as burned components or short circuits, the repair might be too complex or expensive.
- Safety Concerns: If you're unsure about the safety of a repair, or if you notice any signs of arcing or sparking, stop immediately and consult a professional.
- Warranty Considerations: If your charger or laptop is still under warranty, attempting to repair it could void the warranty. Contact the manufacturer or an authorized service center.
Preventative Measures: Protecting Your Charger From Future Failure
Prevention is always better than cure. Take these steps to prolong the life of your laptop charger:
- Gentle Handling: Avoid bending or kinking the cable. Store your charger in a safe place to prevent physical damage.
- Proper Storage: Unplug the charger when not in use. Wrap the cable loosely to avoid straining the internal wires.
- Clean Environment: Regularly clean the charging port and adapter to remove dust and debris.
- Surge Protection: Use a surge protector to protect your charger and laptop from power surges.
- Avoid Overheating: Position your charger in a well-ventilated area, and avoid covering it with anything while it's in use.
By following these steps, you can often revive a dead laptop charger and save yourself the expense of a replacement. Remember to prioritize safety, and don't hesitate to seek professional help if you're unsure about any of the repair steps. With a little patience and persistence, you can bring that charger back to life and get back to what matters most.
