razer blade laptop keyboard not working

Title: How To Fix Replace Keyboard Key - Razer Blade Gaming Laptop Computer
Channel: PC Monkey
How To Fix Replace Keyboard Key - Razer Blade Gaming Laptop Computer by PC Monkey
razer blade laptop keyboard not working, razer blade keyboard not working, razer laptop keyboard not working
Razer Blade Keyboard DEAD? FIX This NOW!
Razer Blade Keyboard Calamity? Don't Panic, Here's the Rescue Plan!
The heart of your Razer Blade machine – the keyboard – has gone silent. The dread washes over you, doesn’t it? Your productivity screeches to a halt. Suddenly, everything feels a bit… lifeless. But hold on! Before you resign yourself to an eternity of on-screen keyboards and external peripherals, let’s breathe. We'll tackle this issue head-on. More importantly, we'll do it together.
Diagnosis: Pinpointing the Keyboard's Ailments
First things first, we need to figure out what's actually wrong. Is it a temporary glitch, or something more serious? Consequently, several potential culprits could be at play here.
- The Obvious Suspects: Has anything physically happened to the keyboard? Did you spill a beverage? Did something fall on it? Examine the keys for any obvious damage or stuck debris. Therefore, sometimes, the solution is remarkably simple.
- Driver Drama: Your keyboard drivers are the software gatekeepers, communicating between your keyboard and the operating system. Corrupted or outdated drivers can be the primary cause of failure.
- Software Shenanigans: Is there a software conflict? Certain programs might interfere with keyboard functionality, even if it seems improbable.
- Hardware Hell: It's the worst-case scenario. Your keyboard could have a physical problem. This could be a faulty connection or, sadly, complete component failure.
Troubleshooting Tactics: Bringing Your Keyboard Back to Life
Now, let's get our hands dirty and attempt a keyboard resurrection! As a result, here’s a step-by-step plan to get you back in the game.
- The Reboot Remedy: Start with the simplest solution. Restart your Razer Blade laptop. Often, this clears out temporary glitches. In addition, this takes just a few seconds.
- Driver Detox: Head into your Device Manager. Locate your keyboard, typically listed under "Keyboards." Right-click on the Razer Blade keyboard and select "Update driver." If that fails, try uninstalling and reinstalling the driver. After that, restart again.
- Software Sleuthing: Consider the software you recently installed. Uninstalling questionable applications may resolve the issue. In addition, it's a good practice anyway.
- External Keyboard Test: Connect an external keyboard. If it functions, then the core problem is most likely within your Razer Blade’s internal keyboard.
- BIOS Bliss: Check the BIOS settings for your keyboard. Some settings can disable it. Access BIOS during startup (usually by pressing Del, F2, or Esc keys repeatedly). Thus, ensure your keyboard is enabled.
- Razer Synapse Check: Make sure Razer Synapse, the software that controls your Razer peripherals, is up-to-date. This offers essential updates.
- Inspect the Connections: Open up your Razer Blade if you are comfortable doing so. Ensure the keyboard cable is securely connected to the motherboard. Be cautious. Therefore, take necessary precautions.
Deep Dive: Advanced Fixes for Persistent Problems
When standard troubleshooting doesn’t yield results, we proceed further. The following tactics are a bit more intricate, so read them carefully.
- System Restore: If you recently made significant changes, try a System Restore. Thus, you can go back to a point before the keyboard troubles began.
- Clean Boot: Perform a "clean boot" to determine if background processes are causing the problem. This helps you identify software conflicts.
- Hardware Check: If all else fails, it might be a hardware issue. Contact Razer support. Your Razer Blade might be under warranty.
- Consider Professional Repair: If you're not comfortable opening your laptop, and the tips above fail, it’s time for professional help. A specialist can diagnose and repair hardware problems.
Prevention is Key: Maintaining Keyboard Health
Preventative measures can keep your keyboard operational. It is important to implement the following strategies.
- Regular Cleaning: Dust and debris accumulate over time. Clean your keyboard regularly with compressed air and a soft brush.
- Liquid Vigilance: Keep liquids away from your laptop. Spills are keyboard killers.
- Gentle Touch: Avoid excessive force when typing. It reduces wear and tear.
- Software Updates: Regularly update your drivers and software to avoid conflicts and ensure compatibility.
The Ultimate Goal: Texting Again!
The prospect of a dead Razer Blade keyboard can be disheartening. But resist the urge to despair. Instead, go through the steps. With a little patience and some troubleshooting, you can restore the functionality you need. You will be happily typing again in no time.
This One Weird Trick Doctors Hate! (Lose Weight FAST!)Razer Blade Keyboard DEAD? FIX This NOW!
Okay, let's be real for a second. Seeing that dreaded "keyboard doesn't respond" message on your sleek, expensive Razer Blade is like finding out your favorite coffee shop ran out of your go-to latte – pure, unadulterated heartbreak. We’ve all been there, haven't we? That moment of panic, followed by the mad scramble for a spare keyboard (or, in my case, the desperate attempt to type with a virtual one). Trust me, we feel your pain. But don't toss that beautiful piece of tech out the window just yet! We're going to walk through a bunch of potential fixes, and hopefully, bring your Razer Blade keyboard back from the digital graveyard. Think of this as your ultimate "keyboard resuscitation" guide.
1. The Initial Check: Are We Really Dead?
Before we get too deep into the troubleshooting trenches, let's do a quick reality check. Is the keyboard actually dead, or are we dealing with something simpler? This is like checking to see if your car is out of gas before you call the mechanic.
- Power Up First: Make sure your Razer Blade is fully powered on. Sounds obvious, but hey, we've all been there!
- External Keyboard Test: Plug in an external keyboard. If that works, then it's definitely the internal keyboard that's giving you grief. If the external keyboard also doesn't work, the problem could be something more significant, pointing towards the laptop's USB ports or internal connections (but don't panic, we'll get to that too).
- Reboot and Retry: A simple reboot can often work miracles. Think of it as a digital reset button. Sometimes, all your Razer Blade needs is a fresh start.
2. Basic Software Solutions: The Low-Hanging Fruit
Okay, if the initial check reveals the keyboard is indeed the culprit, let's start with some easy fixes that might just save your day. These are the software-related solutions, the digital equivalent of trying to jiggle the handle before calling a locksmith.
- Driver Check and Update: Outdated, corrupted, or missing keyboard drivers are a common culprit. Here's how to check and update them:
- Go to Device Manager (search for it in the Windows search bar).
- Expand the "Keyboards" section.
- Right-click the Razer Blade keyboard entry and select "Update driver." Let Windows search automatically.
- If that doesn't work, try uninstalling the driver and then rebooting your laptop. Windows should automatically reinstall it.
- Razer Synapse Troubles: Razer Synapse is the heart and soul of your Razer Blade experience, but like a temperamental artist, it can sometimes misbehave.
- Make sure Synapse is up-to-date. Updates often include bug fixes and performance improvements.
- Try closing and reopening Synapse.
- Sometimes, reinstalling Synapse can solve the problem.
3. Delving Deeper: Advanced Software & Configuration
If the basic software solutions haven't done the trick, it's time to roll up our sleeves and get a little more involved. This is where things start to feel like you're actually fixing something, not just hoping for the best.
- Check Windows Updates: Sometimes, a faulty Windows update can mess with drivers. Make sure you've installed all the latest Windows updates. Go to Settings > Update & Security > Windows Update and check for updates.
- Compatibility Mode: In some rare cases, a game or application might be interfering with the keyboard's performance. Try running your Razer Synapse software in compatibility mode with an older version of Windows. Right click on the Razer Synapse application, go to 'Properties' and change the Compatibility settings.
- Keyboard Troubleshooter: Windows has a built-in keyboard troubleshooter. Go to Settings > Update & Security > Troubleshoot and run the keyboard troubleshooter.
4. Hardware Interventions: The Surgical Approach
Okay, now we're getting serious. If the software solutions haven't worked, it's possible there's a hardware issue. This isn't as scary as it sounds. It's like having to change a lightbulb – a little bit more involved, but still manageable.
- External Peripheral Conflicts: Disconnect all unnecessary peripherals (printers, external hard drives, etc.). Sometimes, a conflicting device can cause problems.
- Physical Inspection (Carefully!): This is where things get a little tricky. We strongly advise you to do this cautiously or seek professional help.
- Power Down and Unplug: Before doing anything, make sure your Razer Blade is powered off and unplugged.
- Open the Bottom Panel: This usually involves removing screws. Refer to your Razer Blade's manual for specific instructions.
- Check Keyboard Connection: Locate the ribbon cable connecting the keyboard to the motherboard. Make sure it's securely plugged in. Sometimes, a loose connection is all it takes.
- Clean the Keyboard: With the bottom panel open, you can also clean the keyboard. Use compressed air to remove any dust or debris that might be affecting the keys.
- Seek Professional Repair: If you're not comfortable opening your laptop or if you suspect a deeper hardware issue (e.g., liquid damage), it's best to take it to a qualified repair technician.
5. The BIOS Blues: Could This Be The Root?
Sometimes, the issue isn't with the software or the keyboard itself, but with the BIOS (Basic Input/Output System). The BIOS is the firmware that controls your computer's hardware, so it's like the director of the entire operation. Problems here can lead to keyboard issues.
- BIOS Update: Check for a BIOS update on Razer's website. Updating the BIOS can sometimes fix keyboard compatibility issues. Follow the instructions carefully when updating the BIOS, as this is a sensitive process.
- BIOS Settings Check: Enter the BIOS setup (usually by pressing a key like Delete, F2, or F12 during startup). Make sure the keyboard is enabled in the BIOS settings. The BIOS can be accessed by pressing a key while the laptop is starting.
6. Liquid Damage? The Ultimate Nightmare
Let's face it: spills happen. If your Razer Blade has encountered liquid, the keyboard (and other components) could be damaged. Water and electronics do not mix.
- Act Immediately: If a spill occurs:
- Turn off your laptop immediately.
- Unplug it from the power source.
- Remove the battery (if possible).
- Try to dry the laptop as best as you can with towels. Do not use any heat sources!
- Professional Help is Vital: Liquid damage often requires professional cleaning and repair. Take your Razer Blade to a repair shop ASAP. The longer you wait, the more damage can occur.
7. User Error & Other Common Culprits
While we've covered the major suspects, let's not forget some simple things that might be causing trouble.
- Sticky Keys: Sometimes, a single sticky key can make the entire keyboard appear unresponsive. Physically clean the keys with compressed air or a keyboard cleaner.
- Incorrect Language Settings: Double-check that your keyboard language settings in Windows are correct. A mismatch can make your keys appear to do the wrong thing.
- Third-Party Software Interference: Some software, particularly those designed for keyboard customization, can sometimes interfere with the keyboard's functionality. Try uninstalling such applications to see if it helps.
8. The Razer Blade Specifics: What Makes It Different?
The Razer Blade is a premium laptop with some unique features. This means some of the troubleshooting steps might be slightly different.
- Razer Support: Razer's support website is a valuable resource. Check for specific troubleshooting guides related to your Razer Blade model.
- Warranty: If your Razer Blade is still under warranty, contact Razer support for assistance. They might be able to offer a repair or replacement.
- Research specific reports: Search for issues about the keyboard on your specific Razer Blade model in online forums. Other users might share a similar problem and provide their solution.
9. Preventing Future Keyboard Calamities
Okay, we've fixed the problem, but let's prevent it from happening again, shall we?
- Regular Cleaning: Dust and debris can accumulate under the keys, affecting performance. Clean your keyboard regularly.
- Gentle Handling: Avoid excessive force or rough treatment of the keyboard.
- Protective Measures: Consider using a keyboard cover to prevent spills and debris from entering the keyboard.
- Keep Synapse Updated: Make sure that your Synapse software is always up to date.
10. Keyboard Light Issues: RGB Drama?
Does your keyboard light up? Yes? Great, that's a positive sign. No? It could be a sign of another, separate issue:
- Synapse RGB Settings: Ensure that the RGB lighting is enabled.
- Check Individual key Settings: Confirm that individual keys are not set to be muted.
- Check the Keyboard's lights settings in the BIOS.
- Uninstalling and Installing the software again.
Laptop's Blue Sync Broken? This SHOCKING Fix Works!
Razer blade 17 keyboard problem

By Kaiser Razer blade 17 keyboard problem by Kaiser
Razer blade touchpad not clicking - Repair

By svetnovinek.cz Razer blade touchpad not clicking - Repair by svetnovinek.cz
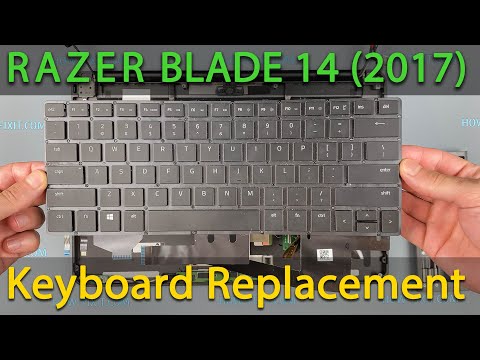
Razer Blade 14 Keyboard Replacement
By How-FixIT Razer Blade 14 Keyboard Replacement by How-FixIT

Title: Razer Blade 15 2018 Advanced Keyboard Replacement
Channel: How-FixIT
Razer Blade 15 2018 Advanced Keyboard Replacement by How-FixIT
Laptop Wifi Connect
Razer Blade Keyboard DEAD? FIX This NOW!
A chilling silence descends. The once-familiar click and clack of your Razer Blade keyboard, the symphony of your digital endeavors, has vanished. You stare at the unresponsive keys, a digital tomb of potential. But fear not, fellow Razer Blade aficionado, for we shall delve into the abyss of keyboard woes and emerge victorious. This isn't just about getting your keyboard working again; it's about reclaiming the battlefield, the creative canvas, the digital frontier that your Razer Blade empowers. Let's get your mechanical marvel back to its former glory.
Diagnosing the Digital Death: Initial Troubleshooting Steps
Before we launch into the complex maneuvers of hardware resuscitation, we need to assess the situation. Think of this as the pre-flight checklist, ensuring we address the most common, and fortunately, easily rectifiable issues first.
Power Play: The Simplest Solution
It sounds elementary, but start here. Is your Razer Blade plugged in securely? Double-check the power brick connection to both the laptop and the wall outlet. A loose connection is the digital equivalent of a phantom limb – you think it’s connected, but it isn't. Also, check if your Razer Blade is on and see the Razer Logo light up.
USB Shenanigans: External Keyboard Check
If the keyboard is integrated into your Razer Blade, then it is not considered an external keyboard. However, if you have an external keyboard, confirm the issue isn't with a USB port. Try plugging in another USB device, such as a mouse or flash drive. If other devices are recognized, the USB ports may be functional, ruling out a simple port failure. If your external keyboard is not working either, then the issue might be with your laptop. But if the external keyboard works, follow all the instructions.
The Restart Ritual: A Digital Refresh
A simple restart can often work wonders. This clears temporary glitches and resets the system, often solving software conflicts that might be wreaking havoc on your keyboard. Don’t just shut down; perform a full restart.
Driver Drama: Updates and Rollbacks
Outdated or corrupted drivers are the enemy of a functional keyboard. Head to the Device Manager (search for it in the Windows search bar). Expand the "Keyboards" section. You should see your Razer Blade keyboard listed.
- Update Drivers: Right-click your Razer Blade keyboard and select "Update driver." Choose "Search automatically for drivers." Let Windows do its thing.
- Rollback Drivers: If the problem started recently, you might try rolling back the driver to a previous version. Right-click the keyboard, select "Properties," go to the "Driver" tab, and click "Roll Back Driver."
Razer Synapse Rebirth: Software Conflicts
Razer Synapse, the software that controls your Razer Blade's functions and customization, can sometimes introduce compatibility issues. Ensure that you have the latest version. Check for any recent updates to the Synapse software. If you did, reinstall it via Razer's website. Sometimes a corrupted Synapse installation can cause issues.
BIOS Blues: A System Check
Rarely, a BIOS issue can affect keyboard functionality. Access your Razer Blade's BIOS settings (usually by pressing Del, F2, or another key during startup – consult your Razer Blade's documentation for the specific key). Look for keyboard-related settings and ensure they are enabled. Resetting the BIOS to default settings might also help.
Delving Deeper: Advanced Troubleshooting Techniques
If the initial skirmishes have failed to yield results, we move into more advanced tactical maneuvers. Prepare to roll up your sleeves; the diagnosis becomes more intricate.
Key Cap Capers: Partial Failures
Sometimes, individual keys fail, leading to a partial keyboard malfunction. This could be due to debris, spilled liquids, or physical damage. Examine the keycaps.
- Keycap Removal: Gently pry off the affected keycaps using a keycap puller tool (available online or at electronics stores). If you do not have a keycap puller tool, use something similar, like tweezers or a small flathead screwdriver. Be extremely careful not to damage the key switches underneath.
- Cleaning Crusade: Use a can of compressed air to blow out any dust or debris from under the key. You can also use a small brush to carefully clean the key switches.
- Reassembly Ritual: Carefully reattach the keycaps, ensuring they snap securely back into place.
Spill Saga: The Liquid Enemy
If liquid made its way onto your keyboard, immediate action is crucial. This is the digital version of a five-alarm fire.
- Instant Disconnect: Immediately shut down your Razer Blade and unplug it from any power source.
- Inversion and Drainage: Carefully turn the laptop upside down, and let the liquid drain.
- Dry-Out Duration: Allow the keyboard to dry completely for at least 24-48 hours, ideally in a well-ventilated area. Rice is a myth.
- Professional Intervention: If the damage seems extensive, or you suspect liquid has reached internal components, seek professional repair.
Hardware Hell: Keyboard Cable Kinks
If the keyboard is integrated, a damaged ribbon cable connecting the keyboard to the motherboard could be the culprit. This often requires a professional repair.
System Scan: Malware Matters
Malware can sometimes interfere with keyboard functionality. Run a full system scan using your antivirus software. Remove any detected threats.
Operating System Overhaul: The Nuclear Option
If all else fails, a Windows reinstall might be the only answer. Before you take this step, back up all your important data. A clean Windows installation wipes the slate clean, eliminating software conflicts and driver issues.
The Path to Repair: Professional Interventions and Support
Sometimes, the digital ailment runs too deep for a home remedy. Recognizing when to enlist professional help is a sign of wisdom, not failure.
Razer's Reach: Customer Support Access
Razer's customer support channels are your first line of defense. Explore their website for support resources, troubleshooting guides, and contact options.
Warranty Warrants Action: Claiming Protection
If your Razer Blade is still under warranty, contact Razer support immediately. Provide detailed information about the issue, and they may offer repair or replacement options.
Third-Party Guardians: Authorized Repair Centers
If your Razer Blade is out of warranty, search for authorized Razer repair centers in your area. These professionals have the tools and expertise to diagnose and repair hardware issues.
DIY Demise: Risk Assessment
Consider your technical skills and comfort level before attempting any advanced repair procedures. If you're not confident, it's best to leave it to the professionals. Attempting a repair and causing further damage can void any remaining warranty or make it more costly to repair.
Preventative Measures: Keyboard Care for the Future
Once your Razer Blade keyboard is resurrected, adopt these practices to prevent future issues.
Protective Armor: Keyboard Covers
Use a keyboard cover to shield your keyboard from dust, spills, and debris.
Cleaning Calendar: Regular Maintenance
Regularly clean your keyboard. Use compressed air to remove dust and debris. Use a soft cloth and a mild cleaning solution to wipe down the keycaps.
Liquid Lockdown: Vigilant Precautions
Avoid eating or drinking near your Razer Blade. If a spill does occur, act quickly and decisively.
Firmware Fortitude: Software Updates
Keep your Razer Blade's software, including drivers and Razer Synapse, up to date.
With dedication, patience, and the right approach, you can conquer the digital death of your Razer Blade keyboard. Each step you take is a step toward reclaiming your digital domain, ensuring your creative flow and gaming prowess remain unhindered. Now go forth, armed with knowledge, and restore your keyboard to its rightful place – as the gateway to your digital world.
