why won't my laptop charger work
Title: What To Do If Your Laptop Is Plugged In But Not Charging
Channel: PCMag
What To Do If Your Laptop Is Plugged In But Not Charging by PCMag
why won't my laptop charger work, why won't my charger charge my laptop, why doesn t my laptop charger work, why won't my hp laptop charger work, why won t my dell laptop charger work, what to do when my laptop charger is not working, why is my laptop charger not working
Laptop Charger DEAD? This SHOCKING Trick Will Fix It!
Revive Your Laptop: The Unexpected Fix for a Dead Charger!
Life throws curveballs, doesn't it? Your laptop charger, a lifeline to productivity and entertainment, suddenly gives up the ghost. The screen flickers, the battery indicator plunges, and panic sets in. Don't despair! Before you rush to the store for a replacement, let's explore a secret weapon. This shockingly simple trick might just breathe life back into your defunct charger.
The Cliffhanger: Is Your Charger Truly Dead?
Before declaring your charger officially deceased, consider the possibilities. It is crucial to eliminate any other potential culprits. For example, are you absolutely certain the outlet itself is functioning? Sometimes, the simplest solutions are the easiest to overlook. Quickly, try plugging another device into the same outlet. If it works, you know the outlet is fine. Now, let's check the charger itself.
The Investigative Phase: Pinpointing the Problem's Source
Often, the problem isn't the charger's core components failing. Furthermore, it could be a more subtle issue. The connection points, the small metal pins that interface with your laptop, are particularly vulnerable. Furthermore, dust, debris, or even slight bends can disrupt power transfer. Before you assume the worst, give these areas a thorough inspection.
The Secret Weapon: The Wiggle Test and Beyond
Here's where the clandestine maneuver comes into play. Gently wiggle the charger's plug where it connects to your laptop. Simultaneously, observe the laptop's power indicator. Does it flicker or momentarily show signs of life? If so, congratulations! You've likely identified a loose connection. Next, wiggle the power brick where it connects to the charging cable. You could find a similar outcome.
Troubleshooting Tactics: A Series of Strategic Moves
Now that you've identified the potential problem, you need to take action. First, turn off your laptop and disconnect the charger. Then, using a non-conductive tool like a toothpick or a plastic pen cap, gently clean the charging port on your laptop. Remove any visible debris that could be hindering a good connection. Secondly, inspect the charger's plug. Look for dirt, bent pins, or any signs of damage. Next, carefully try to straighten any bent pins if they are bent at all. Now, plug the charger back in. See if the connection seems more secure.
Beyond the Basics: Unconventional Repairs
If the wiggle test provided a glimmer of hope, it gives you something to work with. In some cases, a slightly loose connection can be improved. One trick involves strategically placing a small piece of folded paper or cardboard between the plug and the port. This can help create a firmer fit. However, use this method cautiously, as you don't want to damage the port. Furthermore, if the issue is the power brick connection, a gentle twist or adjustment of the cable can sometimes resolve it.
Precautionary Measures: Avoiding Future Failures
Prevention is always better than a cure. To preserve your charger’s lifespan, make it a habit to care for it. Always unplug the charger by grasping the plug, not the cable. Avoid bending or crimping the cable excessively. Store both the charger and the cable in a clean, dry location. Also, when traveling, safely bundle the cable. Doing so will prevent the charger from undergoing unnecessary stress, and the cable will last longer.
When to Admit Defeat: Recognizing the Inevitable
If all else fails, it might be time to accept the inevitable. If the wiggle test doesn’t work and you've cleaned everything carefully, your charger might truly be beyond repair. At this stage, a replacement becomes the most practical solution. Fortunately, laptop chargers are relatively inexpensive. Also, they are readily available online or at electronics stores.
Conclusion: A Lasting Legacy for Your Laptop
In conclusion, a dead laptop charger can be a frustrating experience. However, before you surrender to despair, try this shocking trick. Often, a simple adjustment or a thorough inspection can restore power. Remember to be patient, methodical, and cautious. By taking these steps, you will have successfully completed your task. You might just breathe new life into your beleaguered charger. If not, then, at least you have tried, and you now know the outcome. Now, go forth and conquer that dead charger!
Laptop Sound DEAD? FIX This NOW!Laptop Charger DEAD? This SHOCKING Trick Will Fix It!
Hey there, fellow tech travelers! Ever stared at your lifeless laptop, willing it to spring back to life, only to be met with the dreaded, silent, blinking light of death? We've all been there. That moment when your charger gives up the ghost, leaving you tethered to the wall (or worse, completely cut off!), can be a true digital downer. But before you resign yourself to a new charger (and the associated cost), let's explore something a little… different. We're going to dive into a surprisingly simple trick that might just resurrect your fallen charger. Ready? Let's get started!
1. The Unexpected Crisis: Your Laptop Charger's Sudden Demise
Imagine this: you're in the middle of a crucial online meeting, crafting the perfect email, or finally finishing that epic novel when… poof… darkness. Your laptop's battery indicator plunges into the red, and the charger – your lifeline to productivity – seems to have vanished into the digital ether. It's a mini-apocalypse, isn't it? The sudden absence of power can trigger feelings of helplessness, frustration, and a burning desire to throw something (don’t do it!). But before you reach that point, take a deep breath. We might just be able to pull a rabbit out of a digital hat.
2. Troubleshooting 101: Has Your Charger Really Checked Out?
Before we jump to conclusions, let's do a quick check-up. It's like when your car sputters – you wouldn't immediately assume the engine's gone, right? First, make sure the charger is securely plugged into both the wall socket and your laptop. A loose connection is a common culprit. Next, inspect the charging cable for any visible damage – kinks, frays, or breaks. These can be the digital equivalent of a broken bone. If everything looks shipshape, try a different outlet. Sometimes, the problem lies not in the charger, but in the supply. Believe me, I've wasted hours fiddling with “faulty” chargers, only to discover the issue was a blown fuse in the wall!
3. Unveiling the Mystery: Why Do Laptop Chargers Fail?
Why do these little power bricks decide to call it quits? Well, they are, after all, constantly working, like tiny workaholics. They're subjected to a lot of wear and tear. Here are a few common reasons:
- Overheating: Prolonged use, especially during demanding tasks, can lead to overheating. Think of it like running a marathon; your charger needs to cool down too.
- Power Surges: A sudden surge in voltage can fry sensitive components within the charger. It’s like a digital lightning strike.
- Physical Damage: Dropping the charger, bending the cable, or yanking it out abruptly can all cause internal damage. I’ll admit, I’ve had a few accidental "yank-and-pull" moments myself.
- Age: Like anything, chargers have a lifespan. After years of faithful service, they eventually wear out.
4. The SHOCKING Trick: The Restart Method (And What to Expect)
Okay, here's the moment of truth. The "shocking" trick. We're not talking about electrocution (phew!), but a surprisingly simple method that can sometimes revive a dead charger. It's like giving your charger a digital defibrillator.
What you'll need:
- Your dead charger
- A bit of patience
The Process:
- Unplug everything: Disconnect the charger from both the laptop and the wall.
- Let it sit: Leave the charger unplugged for at least 15-30 minutes. This gives the internal components time to reset. Think of it as a mental reset for your charger.
- Plug it back in: Plug the charger into the wall outlet first.
- Test the Connection: Connect the charger to your laptop.
- Observe: Watch your laptop screen for signs of life.
What to Expect:
- Success!: If the trick works, your laptop should start charging. Celebrate with a happy dance!
- Partial Success: Your laptop might charge, but slowly. This could indicate a weakened charger.
- Failure: Sadly, the trick might not work. This means you might be looking at a replacement.
Important Note: This trick isn't a guaranteed fix. It's more like a digital Hail Mary pass.
5. Why Does This Trick Actually Work? (The Techie Explanation)
The "restart" method works because it allows the charger's internal components to reset. Sometimes, a power surge or minor electrical fault can cause the charger to enter a "locked" state. Unplugging it entirely removes the power source, allowing any residual charge to dissipate and the system to reboot. This is similar to restarting your computer to fix a software glitch.
6. Is It Safe? (Addressing Your Concerns)
Yes, in most cases, this method is safe. You're simply unplugging the charger, giving it time to cool down, and plugging it back in. There's no risk of electrocution or damaging your laptop. However, if your charger has visible damage, such as frayed wires, it's best to err on the side of caution and replace it.
7. Prevention is Key: Protecting Your Charger's Lifespan
Wouldn't it be great if we could prevent our chargers from dying in the first place? Well, we can certainly extend their lifespan with a few simple steps. Here are some top tips:
- Avoid Extreme Temperatures: Don't leave your charger in direct sunlight or in a hot car.
- Handle with Care: Avoid bending or kinking the charging cable.
- Unplug When Not in Use: This prevents unnecessary wear and tear.
- Use a Surge Protector: This shields your charger (and your laptop!) from power surges.
- Clean Regularly: Dust and debris can accumulate on your charger, so wipe it down periodically.
8. The Power of a Replacement: When to Say Goodbye.
Sometimes, despite our best efforts, the charger is really, truly dead. Facing the inevitable is never fun, but knowing the signs of a charger that is on its final voyage can save you from further frustrations.
- Consistently Failing: If the trick doesn't work or the charger consistently fails to provide power, it's time to shop for a new one.
- Severe Physical Damage: If the cable is significantly damaged, the risk of electrical issues increases. Put your safety first.
- Excessive Heat: If the charger gets extremely hot when in use, it is on its way out.
9. Finding Your Replacement: The Quest for the Perfect Charger.
Finding a suitable replacement charger can feel like navigating a confusing maze. But don't panic! Here's what you need to know:
- Voltage and Amperage: Look for the input and output voltage and amperage specifications on your old charger. You'll need to match those numbers (or find a charger that is compatible).
- Connector Type: Make sure the new charger has the same connector type as your laptop. They're not all created equal.
- Brand Matters: Consider purchasing a charger from a reputable brand, even if it costs a little more. Quality and safety are important.
10. Online vs. Offline: Where to Buy Your Replacement Charger.
Do you want to buy your new charger online or in a physical store? Each has its own pros and cons.
- Online Shopping: Offers more options and potentially lower prices. However, you can't physically inspect the charger before buying.
- Local Stores: Provides the opportunity to examine the charger, seek advice from a sales associate, and get the charger immediately. But the selection may be smaller, and the prices may be higher.
11. Budget-Friendly Options: Saving Money Without Sacrificing Quality.
Chargers can be expensive. But this should not stop you from purchasing a replacement. Here are some tips to save money:
- Consider Third-Party Chargers: Third-party chargers can be more affordable than brand-name options, but make sure that you select a reputable brand.
- Look for Sales and Discounts: Shop around and compare prices.
- Check for Refurbished Chargers: These can be a cost-effective alternative.
12. Extending Battery Life: Keeping Your Laptop Alive Longer.
Your charger is important, but what about your laptop's battery? Here are a few tips that can help make your battery last longer.
- Adjust Screen Brightness: Reducing the brightness can save battery power.
- Close Unused Applications: Close the applications that you are not using.
- Enable Power Saving Mode: This helps to optimize battery usage.
- Avoid Extreme Temperatures: Be aware that high and low temperatures reduce battery life.
13. The Evolution of Charging: USB-C and Beyond.
Charging technology is constantly evolving. USB-C chargers are becoming increasingly common. USB-C chargers offer features like:
- Faster Charging: USB-C chargers can deliver more power.
- Universal Compatibility: You can use a USB-
How to FIX Any Laptop Not Charging while plugged in

By GMODISM How to FIX Any Laptop Not Charging while plugged in by GMODISM
Dell Inspiron won't charge cheap easy fix tech pc technology shorts

By Salem Techsperts Dell Inspiron won't charge cheap easy fix tech pc technology shorts by Salem Techsperts
Laptop Battery Stuck at 0 Fix Plugged In But Not Charging - All Brands SOLVED

By Tech2AI Laptop Battery Stuck at 0 Fix Plugged In But Not Charging - All Brands SOLVED by Tech2AI

Title: Laptop Battery Not Charging Plugged In, Not Charging Solution 8 Fixes
Channel: Online Info Studio
Laptop Battery Not Charging Plugged In, Not Charging Solution 8 Fixes by Online Info Studio
Wifi Not Found
Laptop Charger DEAD? This SHOCKING Trick Will Fix It!
We’ve all been there: the dreaded moment when your laptop screen flickers, the battery icon screams RED, and your charger… well, it seems lifeless. A dead charger can feel like a digital death sentence, especially when deadlines loom and vital projects depend on your portable powerhouse. But before you rush out to buy a replacement, before you resign yourself to hours of frustrating downtime, understand this: your charger might not be truly dead. There's a very good chance the problem is easily fixable.
Unmasking the Usual Suspects: Common Laptop Charger Failures
Before we get to the "shocking trick," let’s delve into the primary culprits that often lead to a perceived charger demise. Understanding these common failure points allows us to diagnose the real problem and avoid unnecessary expenses. Many times, the issue isn't the charger itself, but something far simpler.
- The Power Outlet: This might seem obvious, but often, it’s the first thing overlooked. A faulty outlet, a tripped circuit breaker, or even a loose connection can all prevent your charger from receiving power. Always test the outlet with another device known to be functioning, such as a lamp or another electronic device.
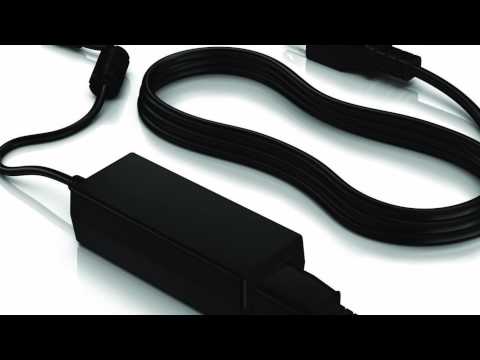
- The Power Cord: The detachable power cord that connects the charger brick to the outlet is surprisingly fragile. Over time, repeated bending, twisting, and pulling can damage the internal wires, leading to an intermittent or complete loss of power. Inspect the entire length of the cord for visible damage like fraying, cracks, or exposed wires.
- The Charger Brick (AC Adapter): This is the heart of the system, converting AC power from the outlet to the DC power your laptop requires. Internally, the brick houses delicate components susceptible to overheating, power surges, and general wear and tear. Physical damage, such as drops or impacts, can also cause problems.
- The Laptop's Charging Port: The port on your laptop where the charger plugs in can become clogged with dust, debris, or even experience physical damage from accidental impacts or rough handling. Bent or broken pins within the port can prevent a proper connection, leading to charging failures.
- The Battery Itself: In rare instances, the laptop's battery itself might be the issue. A severely depleted or damaged battery might fail to accept a charge, even if the charger is functioning correctly. While this is less common, it's worth considering as a potential cause.
The Shocking Trick: Reviving a Seemingly Dead Laptop Charger
Now, for the moment you've been waiting for: the unconventional, yet often highly effective, technique that can resurrect a seemingly dead laptop charger. This method focuses on addressing a common issue that often mimics a complete charger failure: the buildup of static electricity and residual current.
Warning: Always disconnect your laptop charger from both the power outlet and your laptop before attempting this technique. We are dealing with electricity, and caution is crucial.
The Steps:
Gather Your Materials: You’ll need a clean, dry cloth (microfiber is ideal), a can of compressed air, and (optionally) a non-metallic, blunt object, such as a plastic toothpick.
Inspect the Charger and Cables: Carefully examine the power cord and the charger brick for any obvious signs of damage. If you see exposed wires, significant fraying, or physical damage, discontinue the process immediately and prioritize replacement.
Unplug Your Charger: Disconnect the charger from the wall outlet and your laptop.
The Static Discharge: This is the core of the trick.
- Gently wipe down the charger brick and both ends of the power cord with the clean, dry cloth. This helps to remove superficial dust and debris.
- Focus on the prongs of the plug that goes into the outlet. Sometimes, a tiny amount of residue can accumulate.
- Next, and this is critical, firmly grasp the plug end that goes into your laptop. Hold this end for a few minutes. Ensure you have clean and dry hands.
- For the charger's DC connector that plugs into your laptop, inspect it for any debris or dust. Use the compressed air to blow out any potential obstructions. You can use the toothpick very gently to remove any stubborn particles. Avoid applying excessive pressure.
The "Reset" and Reconnection: Plug the charger back into the wall outlet. Let it sit for a few minutes. Plug the charger into your laptop.
Test and Observe: Monitor your laptop's charging indicator. Does the charging light illuminate? Does the battery icon display the charging status? If charging is working, great! Allow the laptop to charge for a longer period, and you may want to remove the charger.
Troubleshooting Beyond the "Shocking Trick"
If the "shocking trick" doesn’t work the first time, don't despair. There are other troubleshooting steps to explore.
- Try a Different Outlet: As mentioned earlier, the problem might reside within the power source itself. Switch to a different outlet known to be functioning correctly to eliminate this variable.
- Inspect the Laptop's Charging Port: Use a flashlight to carefully examine the charging port on your laptop. Look for any obstructions, bent pins, or debris that might be preventing a proper connection. Use compressed air to gently remove any dust or debris. Handle this step with particular care.
- Test with a Known-Good Charger (If Available): If you have access to a compatible charger (borrowed from a friend, for example), test your laptop with it. This will help you definitively determine whether the issue lies with the charger or the laptop itself.
- Check the Battery: Consult your laptop's documentation or manufacturer's website for information on battery health. Some laptops have diagnostic tools that can assess the battery's condition. In some cases, replacing a faulty battery is the only solution.
- Consult a Professional: If all else fails, it's time to seek professional help. A qualified electronics repair technician can diagnose the problem, repair the charger (if possible), or recommend a suitable replacement.
Preventative Measures: Extending the Lifespan of Your Laptop Charger
Preventing charger failure is always preferable to fixing it. Implementing these simple measures can significantly extend the lifespan of your charger and minimize the risk of future problems:
- Handle with Care: Avoid bending, twisting, or pulling the power cord unnecessarily. When disconnecting the charger, grasp the plug, not the cord.
- Proper Storage: When not in use, store your charger in a cool, dry place. Avoid exposing it to extreme temperatures or direct sunlight.
- Surge Protection: Use a surge protector or Uninterruptible Power Supply (UPS) to protect your charger (and laptop) from power surges and voltage fluctuations.
- Clean Regularly: Occasionally wipe down the charger brick and power cord with a clean, dry cloth to remove dust and debris.
- Avoid Overheating: Ensure the charger has adequate ventilation. Don't cover it with blankets or place it in enclosed spaces while in use.
The Power of Knowledge: Empowering Yourself Against Charger Failure
A non-functioning laptop charger can be a major inconvenience. By understanding the common causes of failure, employing our "shocking trick," and following preventative measures, you can drastically reduce the chances of experiencing this frustrating situation. Remember, armed with the right knowledge and techniques, you can often bypass the need for an immediate, costly replacement. You’re now equipped to troubleshoot the issue, potentially saving yourself time, money, and the stress of digital downtime.
