b n spacebar not working dell laptop

Title: Backspace key is not working on your Laptop
Channel: Facts
Backspace key is not working on your Laptop by Facts
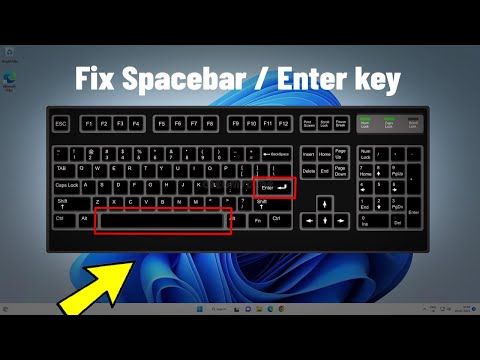
Dell Laptop Spacebar Nightmare? FIX IT NOW!
Dell Laptop Spacebar Spazzing Out? Breathe Easy, We've Got Solutions!
Let’s be honest. There is nothing more frustrating than a sticky or unresponsive spacebar. You’re typing away, lost in thought, and suddenly, nothing. Or worse, everything! Your Dell laptop spacebar is acting up. You're staring at a jumbled mess of words. It is a common Dell laptop issue. But don't panic! This is definitely fixable.
The Spacebar Tango: Unpacking the Mystery
So, what causes this infuriating spacebar behavior? It could be anything. Dust and debris can accumulate beneath the key. Therefore, it obstructs its proper function. Liquids can seep in. Then, they create sticky residue. Sometimes, it’s a simple software glitch. Other times, it’s a physical hardware problem. Furthermore, repeated use over time can wear down the key's mechanisms. Consequently, this leads to inconsistent performance. In addition, it might be a manufacturing flaw. However, we'll investigate each possibility.
Step 1: The Digital Dusting - Quick Software Checks
First, let's eliminate the easy stuff. It is always a good starting point. First, restart your Dell laptop. A simple reboot resolves numerous temporary software problems. Then, check for recent Windows updates. Outdated drivers sometimes muck things up. Next, run a diagnostic test through Dell's SupportAssist software. This can identify hardware issues. So, it is a worthwhile step. After that, ensure your keyboard drivers are up-to-date. Go to Device Manager. Check for any yellow exclamation points. These flags indicate driver problems. Finally, scan your system for malware. Malware can sometimes interfere with keyboard functionality.
Step 2: The Physical Examination - Getting Hands-on (Carefully!)
Assuming the software side is fine, let's get physical. Before you do anything, power down your laptop. Then, unplug the power adapter. After that, lay your Dell laptop flat on a stable surface. Now, gently inspect the spacebar. Does it feel loose? Is it wobbly, or sticking down? Try a small amount of compressed air. Direct short bursts around the spacebar. This will dislodge any trapped debris. Next, if you feel comfortable, try removing the keycap. Use a thin, plastic tool. It will help you avoid damaging anything. Gently pry the keycap off. Be careful! Many Dell laptops use a scissor-switch mechanism. These are delicate. Once the keycap is off, you'll see the switch beneath. Here, you can clean around the switch. A cotton swab dipped in isopropyl alcohol works wonders. Again, be gentle! Finally, reassemble the keycap. Make sure it clicks back into place securely.
Step 3: The Deep Clean - Addressing Stubborn Issues
Still having issues? The situation may require more work. If there's a sticky residue, you might need a more thorough cleaning. Grab that isopropyl alcohol again. Dip a cotton swab. Subsequently, carefully clean around the spacebar switch. Allow it to dry completely. Further, consider using a keyboard cleaning kit. These kits often include specialized brushes and cleaning solutions. Moreover, if you’re comfortable, consider disassembling the keyboard. Consult your Dell laptop’s service manual. It provides detailed instructions. Alternatively, bring it to a qualified technician. Trying this without the necessary experience could result in more significant problems.
Step 4: Beyond Cleaning - Hardware Woes and Replacement Options
Sometimes, the spacebar malfunctions are beyond cleaning. Damage occurs. The switch itself may be faulty. In this case, replacement is the best option. First, research replacement keycaps. Find the correct model for your Dell laptop. Many online retailers offer replacement keycaps at reasonable prices. Then, consider replacing your entire keyboard. Replacing your keycaps might not be sufficient for a complete fix. This is a more involved process. You'll need some technical skills. Otherwise, you can employ a professional. Furthermore, if your laptop is still under warranty, contact Dell support. They might replace the keyboard for free. Also, consider a USB keyboard. This can be a short-term fix. In the long term, it is not ideal.
Step 5: Prevention is Key - Safeguarding Your Spacebar
Preventing future spacebar problems is possible. First, avoid eating or drinking near your laptop. Crumbs and spills are the enemy. Then, regularly clean your keyboard. Use compressed air. Wipe down the keys with a microfiber cloth. Also, consider using a keyboard cover. Covers protect against dust and spills. They are an excellent preventative measure. Consequently, treat your laptop with care. Avoid dropping or banging it. Ultimately, be mindful of your typing technique. Avoid excessive force on the spacebar.
The Final Frontier: Typing Bliss (Again!)
Dealing with a malfunctioning spacebar is annoying. It disrupts your workflow. The good news is, with a little patience and these troubleshooting steps, you can likely fix it yourself. From simple software checks to careful physical cleaning and, as a last resort, replacement, you can bring your Dell laptop spacebar back to life. Remember to be gentle. Be patient. You will have your typing comfort restored. So, get typing!
Lenovo Laptop Camera Nightmare? FIX IT NOW!Dell Laptop Spacebar Nightmare? FIX IT NOW!
Hey there, fellow Dell laptop users! Ever felt like your spacebar is playing a game of hide-and-seek with your keystrokes? You type a sentence, hit space, and… nothing? Or maybe it's a constant, involuntary spacebar spamming spree, turning your carefully crafted emails into gibberish? Annoying, right? We've all been there. I remember the first time it happened to me – I was trying to write an urgent email, and my spacebar went AWOL. Pure, unadulterated frustration! But fear not, because we're diving deep into this spacebar saga and, together, we’re going to fix it. Consider this your definitive guide to conquering the Dell laptop spacebar nightmare.
1. The Spacebar Saga: Why This Tiny Key Causes Such Big Headaches
Let's be honest, the spacebar is the workhorse of the keyboard. It's the unsung hero, the punctuation's partner-in-crime, and the space between our thoughts and the digital world. When it malfunctions, it’s like the engine of your car suddenly deciding it doesn’t want to start. But why does this seemingly simple key give us so much trouble? Well, it's a lot more complex than it seems. Think of it like a miniature seesaw, finely balanced and constantly under pressure. Over time, dust, debris, wear and tear, and even the occasional spilled coffee can wreak havoc.
2. Is It Hardware or Software? The Diagnostic Dance
Before we start tearing things apart (unless you’re comfortable doing that!), we need to diagnose the problem. Is this spacebar sabotage a physical ailment, or is it a digital glitch? This is where some detective work comes into play. Here's how to play "keyboard detective":
- The External Keyboard Test: Plug in an external keyboard. Does the spacebar behave normally there? If yes, then the problem is almost certainly with the laptop's built-in keyboard. If the external keyboard also has issues, the problem might be software or even a deeper system-level issue.
- The On-Screen Keyboard: Access your on-screen keyboard (usually found in your operating system's accessibility settings). Does its spacebar work smoothly? This can help pinpoint whether the issue is solely hardware-related.
- The Startup Ritual: Does the spacebar misbehave right from the start, or does it only act up after the operating system has fully loaded? If it's from the get-go, it leans toward a hardware issue.
3. Cleaning Up the Mess: Dust Bunnies and Crumbs, Beware!
This is often the easiest fix, and the first place to start. Our keyboards are a magnet for… well, everything. Dust, crumbs, pet hair, and who knows what else. Taking a deep breath and cleaning can make a world of difference.
- The Gentle Approach: Use a can of compressed air, held at a slight angle, to blow out debris from under and around the spacebar. Don't get too close, as the force could dislodge the key itself.
- The Sticky Situation: If your spacebar is sticky, a slightly damp (not wet!) cotton swab can be used to gently clean around the key. Be extremely careful not to let any liquid seep into the keyboard.
- The Professional Route: If you're the cautious type, you can take it to a professional repair shop. They can give it a thorough cleaning and assess any potential damage.
4. The Sticky Spacebar Solution: When Things Get Clingy
Sometimes, it’s not just dust. It’s the “sticky residue” from that rogue coffee spill or those late-night snacks. A sticky spacebar feels like trying to type in quicksand. Here's the breakdown:
- Power Down: Before you even think about touching it, completely shut down your laptop and unplug it. Safety first!
- The Swab Strategy: Dip a cotton swab in isopropyl alcohol (90% or higher, if possible). It evaporates quickly and is less likely to damage components.
- The Gentle Scour: Very gently clean around the spacebar, focusing on the edges and any areas where the key seems to stick.
- The Drying Time: Let it dry completely for at least an hour, maybe longer, before turning your laptop back on.
5. The Keycap Chronicles: Removing and Replacing (With Caution!)
This is a little more advanced, but sometimes the spacebar keycap itself (the plastic top of the key) is the problem. Maybe it's warped, or the little clips that hold it in place are broken. This is where things can get tricky. Consider this option carefully.
- The Research Phase: Before you do anything, search YouTube for videos on how to remove the spacebar keycap on your specific Dell laptop model. Each model is slightly different. Knowing exactly what to expect will save you a lot of frustration.
- The Plastic Spudger: Use a plastic spudger (a thin, non-scratching tool) or a similar thin tool to gently pry up the keycap. Start on one side and work your way around.
- The Cleaning Crew: Once the keycap is off, clean around the key's mechanism, being very careful not to damage anything.
- The Reassembly Dance: Carefully align the keycap and press it back into place. You should feel a slight click when it's properly seated.
6. The Software Shenanigans: Driver Issues and Settings
Sometimes, the problem isn't physical; it's digital. A buggy driver or an odd keyboard setting can cause spacebar woes.
- Driver Detective: Go to Device Manager (search for it in the Windows search bar) and look for your keyboard under "Keyboards." Right-click and select "Update driver."
- The Uninstall Option: If updating doesn't work, try uninstalling the keyboard driver and restarting your laptop. Windows will often reinstall the driver automatically.
- The Sticky Keys Check: Make sure Sticky Keys (a Windows accessibility feature) isn't accidentally enabled. This can sometimes cause unusual keystroke behavior. Or a simple Restart may fix it.
7. BIOS Blues: Investigating Embedded Settings
Less common, but still a possibility, the problem could be within your laptop's BIOS (Basic Input/Output System) settings.
- The BIOS Entry: Restart your laptop and repeatedly press the key to enter BIOS setup (usually Delete, F2, or F12 – check your Dell manual).
- The Keyboard Inspection: Within the BIOS settings, see if there are any keyboard-related options or diagnostics.
- The Defaults Reset: If you're comfortable, try resetting the BIOS to its default settings. Keep in mind as you do this, that it will erase any personal changes you've made.
8. The Hardware Hardware Issues: When the Key Is Beyond Repair
If all else fails, it’s possible the spacebar itself is damaged. This is usually the most inconvenient, but most obvious, sign.
- The Replacement Route: If you're comfortable doing it, you can order a replacement keyboard for your Dell laptop and install it yourself. YouTube is your friend here. Again, research your model and watch a tutorial before you start.
- The Professional Touch: If you aren't comfortable with replacing the keyboard, take it to a reputable repair shop. They will be able to diagnose and repair the damage.
- The Cost Consideration: Be prepared to compare the cost of repair to the value of your laptop. In some cases, it might be more cost-effective to buy a new or refurbished one.
9. Prevention is Key: Habits to Save Your Spacebar
Okay, you've fixed the problem. Great! But how do you prevent it from happening again?
- The Dust Ditch: Regular dusting is your friends. Use a soft brush or a can of canned air to remove dust and debris from your keyboard.
- The No-Food Zone: Avoid eating or drinking near your laptop. Trust me, spilled liquids and food particles are spacebar killers.
- The Covering Crusade: Consider using a keyboard cover, especially if you tend to eat by your computer or work in dirty environments.
10. Dell Laptop Specifics: Tailoring the Solution
Dell laptops come in many shapes and sizes. While the general principles of cleaning and troubleshooting still apply, there might be Dell-specific nuances.
- Model-Specific Guides: Search online for guides specific to your Dell laptop model. They may provide helpful tips or point out potential problems.
- Dell Support: Don't hesitate to consult Dell's support website or contact their customer service for assistance.
- The Warranty Check: Check your Dell laptop's warranty. It might cover keyboard problems.
11. Avoiding the Pitfalls: Common Mistakes to Sidestep
- The Overzealous Cleaning Caper: Don't use too much liquid or abrasive cleaners.
- The Forceful Removal: Don't force anything. If something feels stuck, stop and reassess.
- The DIY Disaster: If you're not comfortable working on electronics, don't try to disassemble your laptop. You could make
Cara Memperbaiki Spasi tidak berfungsi di Windows 10

By Nam Anh Cap Cara Memperbaiki Spasi tidak berfungsi di Windows 10 by Nam Anh Cap
Spacebar Atau tombol Enter Tidak Berfungsi di Windows 1110 Fix Spacebar Or Enter key Not Working
By Victor Explains Spacebar Atau tombol Enter Tidak Berfungsi di Windows 1110 Fix Spacebar Or Enter key Not Working by Victor Explains
Dell laptop keyboard not working Why is my Dell keyboard not typing

By Suraj Computers Dell laptop keyboard not working Why is my Dell keyboard not typing by Suraj Computers

Title: Cara Memperbaiki Ganti Tombol Keyboard - Laptop Dell Masuk Spasi Backspace Shift Tombol Besar
Channel: PC Monkey
Cara Memperbaiki Ganti Tombol Keyboard - Laptop Dell Masuk Spasi Backspace Shift Tombol Besar by PC Monkey
Laptop Wifi Connect
Dell Laptop Spacebar Nightmare? FIX IT NOW!
The relentless click, click, click of a well-used keyboard is the soundtrack to productivity for millions. But what happens when one key, the mighty spacebar, betrays its fundamental purpose? It sticks, it doesn't register, it becomes a frustrating impediment to the smooth flow of thought and text. If this sounds familiar, especially if you are a Dell laptop owner, then you've likely encountered the dreaded Dell laptop spacebar nightmare. Fear not! We understand the frustration, and we're here to guide you through a comprehensive, actionable plan to resolve this common and, admittedly, annoying problem. This isn't just about fixing a spacebar; it's about reclaiming your digital workspace and restoring the joy of effortless typing.
Understanding the Culprit: Common Causes of Spacebar Malfunctions
Before plunging headfirst into solutions, let's dissect the usual suspects. Identifying the root cause is paramount to ensuring a lasting fix. Several factors contribute to spacebar woes, each with its own set of diagnostic clues.
Debris and Contamination: This is the most frequent offender. Crumbs, dust, pet hair, and other microscopic invaders find their way beneath the keycap, interfering with the key's mechanical action. Over time, this buildup can become significant, causing the spacebar to stick or fail to register keystrokes.
Mechanical Wear and Tear: Like any mechanical component, the spacebar, and the supporting mechanisms beneath it, are susceptible to wear and tear. The small plastic components that make up the key's structure can break or become misaligned after prolonged use. The spacebar, particularly, is susceptible to this given the amount of pressure it is subject to.
Software Conflicts and Driver Issues: While less common than physical causes, software can sometimes play a role. Outdated or corrupted keyboard drivers can occasionally lead to erratic behavior, including non-responsive keys.
Liquid Damage (The Unforgiving Foe): Spilled liquids, even seemingly benign ones like water, can wreak havoc on a laptop keyboard. Liquids seeping beneath the keycaps can corrode internal components, short-circuit electronics, and cause widespread malfunction. If liquid damage is suspected, immediate action is critical (more on that later).
Step-by-Step Troubleshooting: Your Road to a Functional Spacebar
Armed with an understanding of potential causes, we can now move on to practical solutions. Follow these steps systematically, starting with the simplest and progressing to more advanced techniques.
Step 1: The Gentle Clean: Keyboard Dust Removal
Before resorting to more invasive measures, try a gentle cleaning. This is often sufficient to remove minor debris that may be hindering the spacebar.
- Power Down: Turn off your Dell laptop and disconnect it from the power source. This is crucial for safety and to prevent accidental keystrokes while cleaning.
- Gentle Air Blast: Use a can of compressed air, holding the nozzle at a slight angle to the spacebar, to dislodge any loose debris. Direct the air in short bursts, paying particular attention to the edges of the key.
- Inverted Shake: Turn the laptop upside down and gently shake it. This helps dislodge any loosened particles that may have accumulated beneath the keycaps.
- Soft Brush Advantage: Employ a soft-bristled brush, like a small paintbrush or a keyboard cleaning brush, to gently sweep away any remaining debris around the spacebar.
Step 2: Keycap Removal and Deep Cleaning (Use With Caution)
If the gentle clean doesn't work, the next step involves removing the spacebar keycap for a more thorough cleaning. This is where things get a bit more involved, so proceed with care.
- Identify the Mechanism: Dell laptops use various keycap attachment methods. Some have simple clips, while others utilize a more complex scissor mechanism. Research your specific Dell model to understand the keycap removal process. Online resources, including YouTube videos, are invaluable.
- Delicate Levering: Using a thin, non-marring tool (a plastic spudger, a guitar pick, or even a small flathead screwdriver wrapped in tape), gently pry the keycap from its base. Insert the tool under the edge of the keycap and apply gentle, even pressure.
- Scissor Mechanism Awareness: If your laptop utilizes a scissor mechanism, be extra cautious. These small plastic components are delicate and can easily break. Note how the keycap is attached before removing it. Take pictures to ensure ease of reassembly.
- Thorough Cleaning: Once the keycap is removed, clean the keycap itself with warm, soapy water. Allow it to dry completely before reassembly. Use a small brush and compressed air to remove any debris from the spacebar's base and the underlying mechanism. Rubbing alcohol can be used for stubborn grime.
- Reassembly Precision: Align the keycap with its base and press down firmly until it clicks into place. If you have a scissor mechanism, carefully align the hinges correctly.
Step 3: Software Solutions: Driver Updates and Diagnostics
While less common, software issues can sometimes contribute to spacebar problems. Therefore, it’s worth checking your drivers.
- Driver Update Exploration: Navigate to the Device Manager in Windows (search for it in the Start menu). Expand the "Keyboards" section. Right-click on your keyboard device and select "Update driver." Choose the option to search automatically for updated driver software.
- Manufacturer Websites: If the automatic update finds nothing, visit the Dell support website and search for your specific laptop model. Download and install the latest keyboard drivers from the manufacturer's website.
- Diagnostic Tests: Some Dell laptops have built-in diagnostic tools that can test the keyboard's functionality. Consult your laptop's manual or the Dell support website for instructions on running these tests.
Step 4: The Final Resort: Professional Repair or Keyboard Replacement
If you've exhausted the above steps, and your Dell laptop spacebar continues to misbehave, it's time to consider more advanced options.
- Professional Assessment: Take your laptop to a reputable computer repair shop. A qualified technician can diagnose any internal damage and recommend the best course of action.
- Keyboard Replacement Consideration: In some cases, especially if liquid damage is suspected or if other keys are also malfunctioning, keyboard replacement may be the most sensible solution. This can often be done relatively inexpensively.
- DIY Keyboard Swapping (If You’re Comfortable): Replacement keyboards are available online, and many Dell models have relatively straightforward keyboard replacement procedures. However, this requires some technical skill and the right tools. Proceed with caution. Dell support will be helpful.
Preventative Measures: Keeping Your Keyboard Happy
Once you've fixed your spacebar, the goal is to keep it working smoothly. Implement these preventative measures to minimize the risk of future problems.
- Regular Cleaning Routine: Make keyboard cleaning a habit. Perform the gentle air blast routine every week or two to prevent debris buildup.
- Protective Measures: Consider using a keyboard cover, especially if you frequently eat or drink near your laptop. Covers can act as a barrier against spills and debris.
- Gentle Typing Habits: While a robust Dell keyboard can handle heavy use, avoid excessive force when pressing the spacebar.
- Liquid Spill Protocol: If you spill liquid on your keyboard, immediately shut down your laptop, disconnect it from the power source, and wipe up any visible liquid. Then, promptly consult a professional repair technician. Delays significantly increase the risk of permanent damage.
Conclusion: Reclaiming Your Productivity
A malfunctioning spacebar can transform a simple task into a frustrating ordeal. By understanding the causes and applying the troubleshooting steps outlined above, you can effectively address the Dell laptop spacebar nightmare. Remember, consistency and preventative maintenance are key to keeping your keyboard in top condition. With a little effort, you can reclaim your digital workspace and restore the joy of effortless typing. Now, go forth and conquer your typing, one space at a time!
