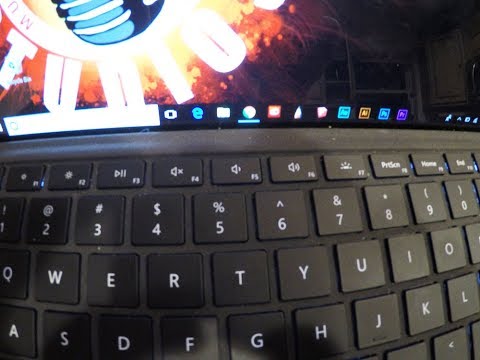
dell laptop top keys don't work

Title: If Function keys do not work on the Laptop F1 - F12
Channel: Simple Tech
If Function keys do not work on the Laptop F1 - F12 by Simple Tech
Dell Laptop Keys Not Working? This SHOCKING Fix Will Save You!
Dell Laptop Keys Gone Rogue? A Lifeline You Won't Believe!
Ever stared at your Dell laptop, fingers poised, only to find your keys stubbornly unresponsive? The frustration is palpable, isn't it? You depend on these tools every day. It's a digital nightmare, truly. But before you panic, before you consider expensive repairs, breathe easy. There's a solution, and it's easier than you think.
The Silent Sabotage: Unveiling the Culprit
Let's get straight to the point. What causes this infuriating problem? It's often a simple issue. Dust, crumbs, and even tiny particles can wreak havoc. These insidious intruders find their way beneath the keys. They then interfere with the delicate mechanisms hidden underneath. Over time, this builds up. It obstructs the electrical connections. This, in turn, stops the keys working. Alternatively, maybe it's software. Maybe a driver has gone rogue. Or maybe the operating system has a minor glitch. Regardless, the answer isn’t always complex.
First Responder: A Gentle Cleaning Ritual
Before diving into anything drastic, we must try the obvious. This is usually the best place to begin anyway. Grab a can of compressed air. These are readily available and inexpensive. Carefully angle the nozzle. Now, aim it between the keys. Give each key a gentle blast. Be thorough here. This can dislodge debris. Continue this process, methodically working across the keyboard.
After that, grab a soft brush. A small paintbrush works wonders. Gently brush around the keys. This helps loosen stubborn particles. It's important to avoid abrasive cleaners. You could damage the delicate keys. Keep it gentle, keep it consistent. The goal is simple: remove the obstructions.
Digging Deeper: Software Solutions and Driver Dilemmas
If a simple cleaning doesn't work, don't despair. There's a software aspect that can be causing this. The drivers can sometimes be the root of the problem. They are what allow your keyboard to communicate with your device. They can get corrupted. They can also become outdated. Here's how to address them. First, go to your Dell support website. Type in your model. Now, download the latest keyboard drivers from there. Install them carefully.
Also, consider running the Windows troubleshooter. This is built into the operating system. It's designed to identify and fix common issues. Access it through the settings. Then, search for "keyboard troubleshooter" or "troubleshooting". It will guide you through the process.
The Ultimate Reset: A Keyboard Factory Refresh
Here's an option you can consider. Sometimes, a simple restart is all it takes. Restarting your laptop resets the system. It also clears any temporary glitches. In most instances, it works. If a reboot doesn't help, there’s another step you can try. You can also try a full system reset, as a final resort. This is more involved. It will erase all your data. Make sure you back up all important files. You should back them up before proceeding.
If you're hesitant about a full reset, there are other options. Consider checking for any recent software updates. Sometimes, updates can cause conflicts. These can create these issues.
The Hardware Hiccup: When Things Get Physical
Sometimes it's not software. Sometimes it's a deeper physical issue. Check the keyboard cable. This connects the keyboard to the motherboard. Over time it can loosen. To access the keyboard cable, you may need to remove the keyboard from the laptop. Consult your Dell laptop manual. Or, search online for the specific model. You can find video tutorials. They often show how to safely disassemble your model. At this point, be cautious. If you are uncomfortable disassembling your laptop, then seek professional help.
Preventative Measures: Protecting Your Precious Keys
Prevention is better than cure, surely. Take steps to protect your keyboard. First, invest in a keyboard cover. It'll act as a shield from debris. Regularly clean your keyboard. A simple wipe-down with a microfiber cloth. It removes surface dirt.
Another great tip is to avoid eating or drinking near your laptop. Crumbs and spills are keyboard's enemies. So, stay vigilant. Careful handling of the machine helps too. You should close the lid when you're not using it. This way, you can prevent dust accumulation.
When to Call in the Cavalry (and Repair Experts!)
Despite your best efforts, the problem might persist. There are times when professional help is needed. If these quick fixes fail, it's time to consider professional assistance. It could be a hardware issue. The keyboard could need replacing. An internal component may have failed.
Also, if you have any technical expertise, attempt repairs. Otherwise, contact Dell support. Their technicians are equipped to handle complex issues. Sometimes, your laptop may still be under warranty. In this case, you should contact them.
The Bottom Line: Hope and Help for Your Dell Keyboard
Dealing with a malfunctioning keyboard is frustrating. But don't lose heart. In most situations, a fixable solution exists. Start with the basics: cleaning and software checks. These are often enough to restore functionality. However, remember, you can also find professional support. You should seek out help when needed. Your Dell laptop is a valuable tool. Hopefully, you can use these tips to bring those keys back to life. Your typing experience should be seamless.
Google Mini Laptop Casting FAIL? This SHOCKING Fix Works!Dell Laptop Keys Not Working? This SHOCKING Fix Will Save You!
Hey there, fellow tech travelers! Ever been in that heart-stopping moment when your Dell laptop keys suddenly decide to stage a rebellion? Panic sets in, right? You imagine deadlines slipping, important emails unwritten, and your digital life crumbling around you. Trust me, we’ve all been there. I remember vividly, stuck on an important essay deadline, and my 'e' key decided to take a permanent vacation. The sheer frustration… well, let's just say I understand your pain. But breathe easy, because what seems like a catastrophic meltdown often has a surprisingly simple solution. Let's dive in and get those keys clacking again!
1. The Dreaded Keyboard Drought: Why Are My Dell Keys Giving Me the Silent Treatment?
Before we unleash the superhero fix, let's play detective. Understanding why your Dell laptop keys are acting up is half the battle. Is it a hardware glitch? A software snafu? Or something else entirely? Think of it like a car – you wouldn't just start changing parts without knowing the underlying issue, would you? Common culprits range from simple dust accumulation to more complex driver conflicts. Let's unravel some of the most frequent keyboard calamities.
2. Dust Bunnies and Debris: The Silent Saboteurs of Your Keyboard
Imagine a tiny, sneaky army of dust particles and crumbs waging war on your precious keyboard. Yep, that's a reality! These tiny invaders can sneak their way under the keys, hindering their movement and ultimately preventing them from registering your keystrokes. Think of it like trying to walk through mud – your keys are struggling to function. Regular cleaning is your first line of defense here.
3. Software Glitches: When Drivers Go Rogue
Sometimes, the problem isn't physical; it's digital. Think of your keyboard's driver as the translator, converting your key presses into on-screen action. If this translator gets corrupted or outdated, your keys might go haywire. Outdated Windows updates, driver conflicts, or even corrupted system files can wreak havoc.
4. Hardware Woes: The Key's Last Stand (and What to Do About It)
Okay, let's be real. Sometimes, the issue is a bit more serious. Occasionally, a key might physically break, a connector might become loose, or the keyboard itself might be damaged. This often happens after a spill (coffee, I see you!), a drop, or just plain wear and tear.
5. The Shocking Fix: A Simple Restart Can Work Wonders!
I know, I know… it sounds basic, but trust me. A simple restart is surprisingly effective in resolving many keyboard issues. Think of it as a digital "reset." It clears temporary files, reloads drivers, and can often fix those pesky software hiccups. This is always the first thing we try. You’d be surprised!
6. Deep Cleaning: Unearthing the Buried Keystrokes
Time to grab your cleaning supplies! You'll need a can of compressed air (essential!), a soft brush (like a paintbrush), and maybe some isopropyl alcohol and cotton swabs. Turn off your laptop and unplug it. Then, gently use the compressed air to blast away dust and debris from under and around the keys. Use the brush to loosen stubborn particles. For sticky keys, lightly dampen a cotton swab with isopropyl alcohol and gently clean the affected keys. Be gentle!
7. Driver Detective: Updating and Troubleshooting Keyboard Drivers
If a restart didn’t solve the issue, let’s delve into drivers. Navigate to your Device Manager (search for it in the Windows search bar). Look for "Keyboards" and expand the section. Right-click on your keyboard and select "Update driver." Choose "Search automatically for drivers." If that doesn’t work, try uninstalling the driver and restarting your computer. Windows will often reinstall the driver automatically.
8. Keyboard Troubleshooter: Windows' Secret Weapon
Windows offers a built-in keyboard troubleshooter. Access it through the Windows search bar by typing "troubleshoot settings." Click on "Keyboard" and run the troubleshooter. It might identify and automatically fix any known driver or software issues. It's like having a built-in tech support guru.
9. Hardware Check: Is the Connection Loose?
For laptops with removable keyboards, carefully check the keyboard connection. Open the laptop following the manufacturer’s instructions (always unplug your laptop first!). Look for the keyboard ribbon cable – it's usually a flat, wide cable. Make sure it's securely connected to the motherboard. If it's loose, gently reseat it. Be careful, it can be quite fragile.
10. External Keyboard Test: A Crucial Diagnosis
Here’s a quick diagnostic trick: plug in an external USB keyboard. If the external keyboard works flawlessly, the problem likely lies within your laptop’s keyboard. If the external keyboard also has issues, the problem might be with your system settings or software. This is a critical step!
11. Sticky Keys? The Antidote
Sticky keys can be the bane of a writer's existence. To manage these, use the isopropyl alcohol solution mentioned earlier. Gently clean around the affected keys. Avoid pouring liquids directly onto the keyboard. For extra stubborn keys, you might need to remove the keycap (use a small, flat tool). Be careful not to damage the key mechanism underneath!
12. BIOS/UEFI Settings: Checking for Keyboard Functionality
Sometimes keyboard functionality can be affected by BIOS/UEFI settings (the pre-boot settings). Access your BIOS/UEFI setup (usually by pressing a key like Del, F2, or F12 during startup – check your Dell's manual for the correct key). Navigate through the settings and look for keyboard functionality options. Make sure your keyboard is enabled.
13. The Last Resort: Dell Support and Repair Options
If all else fails, it may be time to reach out to Dell support. They can help diagnose the problem further and provide repair options. Your laptop might still be under warranty, so don’t hesitate to check! You might also be able to find local repair shops specializing in Dell laptops.
14. Preventing Future Keyboard Crises: Proactive Protection
Prevention is key! Regularly clean your keyboard to prevent dust build-up. Avoid eating or drinking near your laptop. Consider using a keyboard protector to shield against spills and debris. Develop good typing habits and avoid excessive force when pressing keys.
15. The Ultimate Victory: Celebrating Your Restored Keyboard!
Congratulations! You’ve successfully navigated the keyboard crisis. Whether you fixed it yourself or sought professional help, it's a victory! Now, go forth and write those emails, finish those projects, and enjoy the smooth, satisfying click of your restored Dell laptop keys.
Now, take a deep breath and recognize that, even when technology throws you a curveball, there’s often a simple solution within reach. We hope this guide has empowered you to tackle those keyboard woes with confidence. Remember there's no issue you cannot mitigate, even if it takes a restart or a bit of digging!
FAQs:
My keyboard is completely unresponsive. What should I do first? Restart your laptop. This simple step often resolves many keyboard issues. After that, attempt to plug in an external USB keyboard to rule out a hardware failure or software glitch.
I spilled liquid on my keyboard. What should I do immediately? Immediately shut down and unplug your laptop. Turn it upside down to drain the liquid. Then, carefully clean the affected keys. Consider taking it to a professional repair shop if the spill appears extensive.
How do I update my keyboard drivers? Go to Device Manager (search for it in the Windows search bar). Expand the "Keyboards" section, right-click on your keyboard, and select "Update driver." Choose "Search automatically for drivers."
My keys are typing the wrong characters. What could be the issue? Check your keyboard language settings in Windows. You might have accidentally switched to a different language layout. Also, ensure that the Num Lock key is not accidentally enabled.
Is it possible to replace the keyboard on my Dell laptop? Yes, in most cases, you can replace the keyboard. This can be done at home (if you're comfortable with disassembling your laptop) or by a professional repair service.
1) Principal Keywords: Dell Laptop Keys Fix 2) SEO Headline: Dell Keys Not Working? This Simple Fix Works! 3) Pathway: Laptop/Keys/Fix 4) Meta Summary: Dell laptop keys acting up? Don't panic! This guide offers a SHOCKING fix and easy solutions to get your keyboard working again. 5) Image Alt Text: Close-up of a Dell laptop keyboard with a key being pressed, illustrating the problem of keys not working.
Zoom Crashing? Fix Your Laptop's Zoom Issues NOW!Dell laptop keyboard not working Why is my Dell keyboard not typing

By Suraj Computers Dell laptop keyboard not working Why is my Dell keyboard not typing by Suraj Computers
Fix In 3 Seconds - Volume Control Keys, Mute Button Not Working Microsoft Surface Pro Windows
By Mechanical Mike Fix In 3 Seconds - Volume Control Keys, Mute Button Not Working Microsoft Surface Pro Windows by Mechanical Mike
Volume Button Not Working - Reverse Function Keys and Multimedia Keys F1-F12

By Filip Tech Volume Button Not Working - Reverse Function Keys and Multimedia Keys F1-F12 by Filip Tech

Title: How to LockUnlock Function Keys in Dell Inspiron 15,3000 Series LaptopmacniteshvirulshortsDell
Channel: Mac Nitesh
How to LockUnlock Function Keys in Dell Inspiron 15,3000 Series LaptopmacniteshvirulshortsDell by Mac Nitesh
Working With Laptop
Dell Laptop Keys Not Working? This SHOCKING Fix Will Save You!
Is your Dell laptop suddenly rebelling? Are keys refusing to cooperate, leaving you staring at a blank screen, frustration slowly building? You're far from alone. This is a surprisingly common issue that plagues Dell laptop users, and, happily, it's often something you can resolve yourself without rushing to a costly repair shop. We will guide you through several troubleshooting steps, offering a comprehensive plan that, if followed carefully, will restore your Dell laptop's keyboard to its former glory.
The Initial Assessment: Pinpointing the Problem
Before we delve into solutions, let's determine the nature of the problem. Is it a single key acting up, or is the entire keyboard unresponsive? Does the issue present consistently, or does it come and go seemingly at random? Knowing the answers will help us narrow down the potential causes and choose the most appropriate fix.
Start by restarting your Dell laptop. This simple action often resolves minor software glitches that might be interfering with keyboard function. If the keyboard works during the boot-up process (e.g., you can enter your BIOS settings), but stops responding once Windows loads, the problem is highly likely software-related. Conversely, if the keyboard remains unresponsive throughout the entire process, the issue is more likely hardware-oriented.
Step 1: The Software Sanctuary – Driver Dilemmas
One of the most frequent culprits in keyboard malfunctions is corrupted or outdated drivers. These essential software components act as translators between your operating system and your keyboard. If they're not functioning correctly, the keys may not transmit your input effectively.
Accessing Device Manager: Press the Windows key and the "R" key simultaneously to open the Run dialog box. Type "devmgmt.msc" (without the quotes) and press Enter. This will open Device Manager, your central hub for managing hardware.
Navigating the Keyboard Section: In Device Manager, locate the "Keyboards" section. It might be expanded by default; if not, click the arrow to reveal the keyboard entries. You should see your keyboard listed here – it might be generically labeled as "Standard PS/2 Keyboard" or something similar.
Updating the Driver: Right-click on your keyboard entry and select "Update driver." Choose the option to "Search automatically for drivers." Windows will then attempt to find and install the latest driver from online sources.
Uninstalling and Reinstalling: If updating doesn't work, try uninstalling the driver. Right-click on the keyboard entry again and select "Uninstall device." Restart your laptop. Windows should automatically reinstall the driver upon reboot, often resolving compatibility errors.
Step 2: The Hardware Hurdle – Physical Examination and Cleaning
Sometimes, the issue is not software-based but rather arises from physical obstructions or damage. Dust, debris, and even spilled liquids can wreak havoc on keyboard functionality.
Gentle Cleaning: Start by turning off your laptop and unplugging the power adapter. Use a can of compressed air to carefully blow out any dust and debris that might be lodged between the keys. Hold the can at an angle to avoid spraying liquid into the keyboard.
Keycap Inspection: If specific keys are malfunctioning, carefully inspect the keycaps themselves. Gently pry them off (using a specialized keycap puller, if you have one, will minimize the risk of damage) and examine the switches underneath. Look for anything that might be preventing the key from making proper contact, such as crumbs or solidified spills.
Cleaning Underneath: If you discover any debris, use a soft brush (like a paintbrush) and a small amount of isopropyl alcohol (also known as rubbing alcohol) to clean the switch mechanism. Be gentle, and let everything dry completely before reassembling the keycap.
Spill Damage Protocol: If you suspect liquid has been spilled on the keyboard (even a tiny amount), immediately shut down the laptop, unplug the power adapter, and, if possible, disconnect the battery. Turn the laptop upside down and allow any liquid inside to drain. It's also best to consult a professional if any liquid has entered the laptop.
Step 3: BIOS Blues and Other Software Conflicts
Beyond driver issues, other software conflicts or incorrect BIOS settings can also cause keyboard problems.
BIOS Examination: Restart your Dell laptop and repeatedly press the key to enter the BIOS setup (usually F2, F12, Delete, or Esc – the correct key is typically displayed on the startup screen). Once in the BIOS, navigate through the settings (using your keyboard, ideally) to find keyboard-related options. Ensure that the internal keyboard is enabled. Also, verify that the "Num Lock" key is not accidentally turned on.
Safe Mode Boot: Boot your laptop into Safe Mode. This starts Windows with a minimal set of drivers and services. If the keyboard works in Safe Mode, it strongly suggests a conflict with a third-party software program or driver loaded during normal boot.
Identifying Conflicting Software: If the keyboard works in Safe Mode, boot back into normal Windows mode. Start by uninstalling any recently installed software, especially anything related to keyboard customization, gaming, or accessibility. Alternatively, perform a System Restore to a point before the keyboard problem started. To do this, search for "Create a restore point" in the Windows search bar and follow the on-screen prompts.
Step 4: External Keyboard Test and Port Check
If internal troubleshooting hasn't yielded results, let's consider external hardware.
External Keyboard Test: Connect a USB keyboard to your Dell laptop. If the external keyboard functions flawlessly, this suggests the issue is isolated to your laptop's internal keyboard. This helps confirm that the problem doesn't lie in the laptop’s operating system.
Port Inspection: Examine the USB ports on your laptop. Check for any visible damage, such as bent pins or obstructions. Clean the ports with compressed air if necessary.
USB Device Conflicts: In rare cases, if you're using a USB hub, the hub itself might be interfering with the keyboard's function. Connect the keyboard directly to the laptop's USB port, bypassing the hub to determine if the hub is the culprit.
Step 5: The Ultimate Solution: Repair or Replacement Considerations
If you've exhausted all of these troubleshooting steps and your Dell laptop keys are still not working, it is likely a hardware fault requiring professional attention.
Professional Diagnosis: Contact a qualified laptop repair technician or Dell support. They can diagnose the problem more accurately and determine whether the keyboard needs repair or replacement.
Keyboard Replacement Cost: Replacing a laptop keyboard often costs between $50 to $200, depending on the model and the complexity of the repair.
DIY Replacement: If you are comfortable with electronics, you might consider replacing the keyboard yourself. However, this can be a delicate procedure, and incorrect handling can lead to further damage. There are often guides online that may help.
Warranty Check: Before pursuing repair or replacement, check your Dell laptop's warranty. If the laptop is still covered under warranty, the repair may be free of charge.
This comprehensive guide provides a detailed roadmap to diagnose and resolve Dell laptop keyboard issues. By systematically working through these steps, you dramatically increase your chances of restoring the functionality of your keyboard and saving yourself the expense of costly repairs. Remember to approach troubleshooting methodically, document your steps, and be patient. Your Dell laptop's keyboard is likely just a few steps away from perfect working order.
