hp laptop wifi and ethernet not working

Title: Fix HP Laptop Wi-Fi is Not Working Problem in Windows 1087
Channel: FIXsage
Fix HP Laptop Wi-Fi is Not Working Problem in Windows 1087 by FIXsage
hp laptop wifi and ethernet not working, hp laptop wireless internet not working, hp laptop internet not working, hp laptop ethernet not working, laptop wifi and ethernet not working, hp laptop ethernet port not working
HP Laptop WiFi & Ethernet DEAD? FIX IT NOW!
HP Laptop WiFi & Ethernet Blues? Don't Panic! Solutions Await
So, your HP laptop’s internet connection has gone AWOL. The dreaded WiFi icon now sports a forlorn "X," and plugging in that Ethernet cable yields nothing but silence. Deep breaths, friend. It’s frustrating, absolutely. But before you chuck your laptop across the room, know this: there's a good chance we can get you back online. We'll navigate this together.
Is it Really Dead? Troubleshooting the Obvious First
Before declaring digital death, let's establish the basics. Firstly, is your wireless switch turned on? That little hardware button, often on the side or above the keyboard, can be the culprit. Secondly, double-check your router and modem. Are they powered on? It might sound simple, but sometimes the simplest solutions are the best. In addition, check the physical connection. Is the Ethernet cable securely plugged into both your laptop and the router?
Furthermore, try restarting your laptop. It's the tech support mantra, for a reason! Then, restart your router and modem as well. Wait a few minutes for them to fully reboot. After that, see if the connection magically reappears. If not, let’s dive deeper.
Driver Dilemmas: The Silent Killers of Connectivity
Drivers are the unsung heroes (or villains) of your laptop's hardware. They translate commands between your operating system and your WiFi/Ethernet adapters. Outdated, corrupted, or missing drivers frequently cause connectivity problems.
Now, accessing your device manager is crucial. You can usually find it by searching in the Windows search bar. Expand the "Network adapters" section. Look for any devices with a yellow exclamation mark. That indicates a driver issue. Right-click those problematic devices, and select "Update driver." Choose "Search automatically for drivers." Windows will attempt to install the latest version. Alternatively, you can visit the HP support website. Locate the drivers for your specific laptop model. Download and install the most recent drivers.
However, sometimes, the automatic update fails. In such cases, consider uninstalling and reinstalling the driver manually. Restart your laptop after the installation. Check again! You'll want to verify that the driver is correctly installed now.
Network Adapter Woes: Diagnosing the Invisible
Still no luck? Let’s troubleshoot your actual network adapters. They may need some TLC.
Open the same device manager. Right-click your WiFi and Ethernet adapters. Select "Properties." In the "Advanced" tab, you'll find various settings. Explore those settings. You might have to experiment based on your network setup. For instance, some settings might be causing conflicts.
Next, go back to the "Properties" window. Click the "Driver" tab. If the "Roll Back Driver" button is available, try it. It will revert to a previous driver version. This is useful if a recent update triggered the issue.
Windows Troubleshooter: Your Built-In Detective
Windows has a built-in network troubleshooter. It's a surprisingly effective tool. It’s like having a digital detective at your fingertips.
Access it by searching for "Network troubleshooter" in the search bar. Run it. The troubleshooter will automatically scan for, and attempt to fix, common network problems. Even more, the troubleshooter often provides helpful advice.
External Interference: Navigating the Wireless Maze
Wireless signals are delicate creatures. They're easily disrupted. Other electronic devices can interfere with your WiFi signal. Microwave ovens, cordless phones, and even other WiFi routers can cause interference. Try moving your laptop closer to your router. If possible, try changing your router's channel settings. You can usually find this option in your router's configuration page.
Furthermore, check for physical obstructions. Walls, metal objects, and even certain furniture can weaken the signal. Try relocating your router to a more open space.
Firewall Frustrations: When Security Blocks You
Your firewall, while essential for security, can sometimes block legitimate network traffic. It could be preventing your laptop from connecting.
Check your firewall settings (Windows Defender Firewall). Make sure your WiFi and Ethernet adapters are allowed to communicate. Although this is less likely, you can temporarily disable your firewall. Test your internet connection. However, re-enable it immediately after testing. Disabling your firewall is a security risk.
Hard Reset: A Last Resort Approach
If all else fails, consider a hard reset of your network settings. This will wipe your network configuration. Be sure to back up any important network passwords or settings.
Open Command Prompt as an administrator. Type the following commands, pressing Enter after each one:
netsh winsock resetnetsh int ip resetipconfig /releaseipconfig /renewipconfig /flushdns
Restart your laptop afterward. Hopefully, this clears any persistent network glitches.
The Ultimate Test: Connecting to Another Network
To definitively diagnose the problem, try connecting your laptop to another WiFi network, or using a different Ethernet connection. If it works perfectly fine elsewhere, the issue lies with your home network, your router, or your internet service provider. If the problem persists, the issue is likely with your laptop's hardware or software.
When to Call for Professional Help
If you've exhausted all these troubleshooting steps, it might be time to seek professional assistance. The problem could involve faulty hardware or more complex software issues. Contacting HP support, or a local computer repair technician, might be necessary. Don't be afraid to reach out. They will have advanced diagnostic tools.
Conclusion: Staying Connected is Key
Losing internet connectivity can be incredibly frustrating. However, with a little patience and these troubleshooting steps, you can often fix the problem. Remember to approach each step methodically. If one solution doesn't work, move on to the next. Finally, don't be afraid to ask for help. Keeping your HP laptop connected to the digital world is essential. Now, go forth and conquer those connectivity issues!
Razer Core X: The Ultimate Laptop Upgrade? (Shocking Results Inside!)HP Laptop WiFi & Ethernet DEAD? FIX IT NOW!
Alright folks, let's be honest, there's nothing quite like the icy grip of internet deprivation when you're staring down a deadline or just trying to binge-watch your favorite show. And when your HP laptop decides to stage a full-blown network blackout, it's enough to trigger a minor technological meltdown, right? Well, fear not, because we've all been there. Whether it's the dreaded WiFi signal vanishing into thin air or your Ethernet cable refusing to cooperate, we're going to dig in and get your HP laptop connected again, pronto! Think of this as your emergency internet rescue mission, your personal guide to vanquishing the connectivity gremlins.
1. The Initial Panic: Recognizing the Symptoms
First things first, let's establish what we're dealing with. Is it a complete and utter internet blackout, or just a minor blip on the radar? Is your WiFi icon displaying that dreaded "No internet" message, or is your Ethernet connection refusing to light up? The symptoms might include:
- No WiFi Networks Appearing: You're staring blankly at a barren WiFi list, devoid of your home network and any others nearby.
- Limited Connectivity: You connect to your WiFi, but the internet is slower than a snail on molasses, or websites won't load.
- Ethernet Cable Blues: The Ethernet cable is plugged in, the little light on your port isn't glowing, and your laptop is stubbornly refusing to recognize the connection.
- Error Messages Galore: You're bombarded with cryptic error messages like "No internet connection," "Unable to connect," or similar tech gibberish.
If any of these resonate, then you're in the right place. Let's get troubleshooting! We'll approach this systematically, like detectives on a digital case, leaving no stone (or setting) unturned.
2. Rebooting: The Universal Fix (Sometimes)
Ah, the classic! Before we dive into the deep end, let's start with the technological equivalent of "Have you tried turning it off and on again?" Rebooting your HP laptop is the digital equivalent of a good night's sleep for your machine. This simple step can often clear out minor glitches and refresh the system.
- Restart Your Laptop: Do a complete shutdown and restart. Don't just put it to sleep.
- Restart Your Router and/or Modem: Unplug your router and modem from the power outlet, wait a minute, then plug them back in. This refreshes your internet signal from the source.
Sometimes, this is all it takes. If only life were always this straightforward!
3. Checking the Obvious: Physical Connections
Now, let's get physical. Sometimes, the most obvious solutions are the ones we overlook.
- WiFi Button: Make sure your WiFi is turned on. Some HP laptops have a physical button or a key combination (often Fn + the WiFi icon key) to toggle WiFi on and off.
- Ethernet Cable Inspection: If you're using an Ethernet cable, ensure it's securely plugged into both your laptop and your router. Is it frayed or damaged? Try a different cable.
- Distance and Obstacles: Are you too far from your router? WiFi signals, like whispers, get weaker the farther they travel. Are there thick walls or appliances (microwaves, for example) interfering with the signal?
Think of your network connection like a water pipe. If there's a kink (a loose cable, a bad connection), or if the pipe is blocked (interference), the water (internet) won't flow.
4. The Device Manager: Your Hardware’s Report Card
The Device Manager is your HP laptop's internal diagnostic tool. It's where you can check the status of all your hardware, including those pesky network adapters.
- Press the Windows Key + X: This will open the Power User menu.
- Select "Device Manager": A new window will open, listing all your hardware.
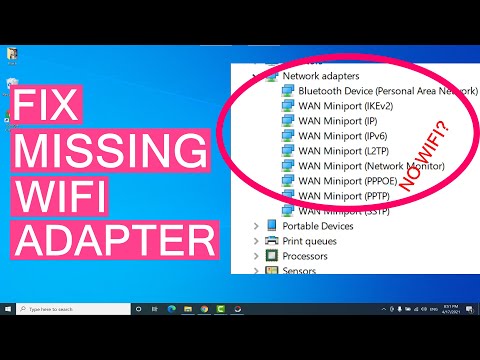
- Expand "Network Adapters": This is where your WiFi and Ethernet adapters live.
- Look for Errors: Are there any yellow exclamation marks or red crosses next to the adapters? These indicate problems.
- Right-click on your WiFi or Ethernet adapter: Choose "Update driver." Windows will search for and install the latest drivers.
- If the driver update fails, try "Uninstall device" and then restart your laptop: Windows will often automatically reinstall the driver upon restarting.
The Device Manager is the doctor, diagnosing the patient (your network adapters). If there's a problem, the symptoms should be clear, and the steps we've suggested can heal the problem.
5. Network Troubleshooter: Windows’ Built-In Helper
Windows has a built-in network troubleshooter that can often automatically diagnose and fix common connection problems.
- Click on the WiFi icon (or the Ethernet icon) in your system tray (usually in the bottom right corner of your screen).
- Click on "Troubleshoot problems."
- Windows will attempt to diagnose and fix any network issues.
This is like having a digital handyman, trying to patch up the problems for you. Give it a whirl; you might be surprised!
6. Driver Issues Demystified: The Heart of the Matter
Drivers are essentially the software that allows your hardware to communicate with your operating system. Outdated or corrupted drivers are a common culprit behind network connection problems.
- Update Drivers (Again): We've already touched on this, but it's worth repeating. Go back to the Device Manager (as described in section 4) and make sure your network adapter drivers are up to date.
- Download Drivers from HP’s Website: Sometimes, the drivers provided by Windows aren't the latest or most suitable for your specific HP laptop model. Visit the HP support website, search for your laptop model, and download the latest drivers for your WiFi and Ethernet adapters. Always make sure you download from the OFFICIAL website; avoid third-party sites.
Think of drivers as the translators between your laptop's hardware and the language it understands. Without the right translator, communication (connection) fails.
7. Checking Your IP Address: A Crucial Number
Your IP address is your unique digital footprint on the network. Sometimes, there can be conflicts or issues with the IP address configuration that can cause connection problems.
Open Command Prompt: Search for "cmd" in the Windows search bar, then press Enter.
Type "ipconfig /all" and press Enter. This will display detailed network information.
Check the following:
- IPv4 Address: This is your laptop's IP address. If it starts with "169.254," it likely means your laptop is not obtaining a valid IP address from the router.
- Default Gateway: This is your router's IP address. Ensure this is correct.
- DNS Servers: These are the servers that translate website names into IP addresses. They should be configured correctly.
Renew Your IP Address: In the Command Prompt, type "ipconfig /release" and press Enter, then type "ipconfig /renew" and press Enter. This will attempt to obtain a new IP address from your router.
The IP address is the address label on your virtual mailbox. If the label is wrong or missing, your mail (internet traffic) can't be delivered.
8. Resetting Your Network Settings: A Bold Step
If all else fails, resetting your network settings can often resolve persistent connection issues. This will reset your network adapters to their default settings.
- Go to Settings > Network & Internet > Status.
- Scroll down and click on "Network reset."
- Click "Reset now." Be warned, this will delete your saved WiFi passwords, so make sure you have those handy! After the restart, you will need to reconnect to your WiFi networks, and enter the passwords again.
Think of this as a digital factory reset for your network settings. It clears out old configurations and attempts to start fresh.
9. Router Troubles: The Source of the Signal
Sometimes, the problem isn't with your laptop, but with your router.
- Restart Your Router: We mentioned this earlier, but it's worth repeating. Unplug your router and modem, wait a minute, and plug them back in.
- Check Your Router's Settings: Log into your router's settings (you'll usually access this by typing your router's IP address into a web browser, like 192.168.1.1 or 192.168.0.1 – check your router's manual). Look for settings that might be blocking your laptop from connecting (e.g., MAC address filtering).
- Check for Firmware Updates: Outdated router firmware can cause connectivity issues. Check your router's settings for firmware updates and install them if available.
The router is the gateway to your internet connection. If the gateway isn't working right, nothing gets through.
10. Antivirus and Firewall Interference: Digital Gatekeepers
Your antivirus software and firewall are essential for protecting your computer, but they can sometimes interfere with your network connection.
- Temporarily Disable Your Antivirus Software:
Ethernet Cable Connected but no Internet Access FIX 2025

By Etechniz Ethernet Cable Connected but no Internet Access FIX 2025 by Etechniz
How to FIX Missing Network Adapter Problem in Windows 78.110 Fixed wireless Adapter
By Technical worktips How to FIX Missing Network Adapter Problem in Windows 78.110 Fixed wireless Adapter by Technical worktips
Memperbaiki WiFi yang Tidak Muncul di Pengaturan Windows 11 Memperbaiki WiFi yang Hilang

By Sandeep Singh Memperbaiki WiFi yang Tidak Muncul di Pengaturan Windows 11 Memperbaiki WiFi yang Hilang by Sandeep Singh
Title: How To Fix Wireless Adapter Missing In Windows 10 Get WiFi Adapter Back
Channel: Sandeep Singh
How To Fix Wireless Adapter Missing In Windows 10 Get WiFi Adapter Back by Sandeep Singh
Wifi On Laptop
HP Laptop WiFi & Ethernet DEAD? FIX IT NOW!
The frustration of a non-functional internet connection is universally understood. Whether you are a student tackling an urgent assignment, a professional navigating crucial deadlines, or simply seeking entertainment in the digital realm, internet connectivity is a fundamental requirement of the modern laptop experience. This article is designed to provide clear, concise, and actionable solutions if your HP laptop is exhibiting symptoms of WiFi or Ethernet failure. We will walk you through a systematic troubleshooting process, equipping you with the knowledge to diagnose and resolve these common connectivity issues.
I. Initial Diagnosis: Identifying the Core Problem
Before diving into solutions, a proper diagnosis is paramount. We must first identify the specific nature of the problem. Is it a complete failure, where neither WiFi nor Ethernet is functioning? Or is one working while the other falters? Observing the symptoms meticulously significantly narrows the scope of potential causes and points us towards the most effective remedies.
A. WiFi Failure: Recognizing the Signs
- No Available Networks: Your laptop actively searches for WiFi networks, but fails to detect any. Verify that your router is powered on and broadcasting a signal. Review physical obstructions that could impede signal strength.
- Limited Connectivity: The adapter detects available networks, but displays a "Limited" or "No Internet" status. This signals a problem with the connection to the internet, not necessarily the network itself.
- Intermittent Drops: The WiFi connection repeatedly drops, requiring reconnection or rebooting your laptop. This points to a possible driver issue, signal interference, or router instability.
- Slow Speeds: While connected, internet browsing and downloads are significantly slower than expected. This could signify interference, distance from the router, or throttling issues.
B. Ethernet Failure: Pinpointing the Issues
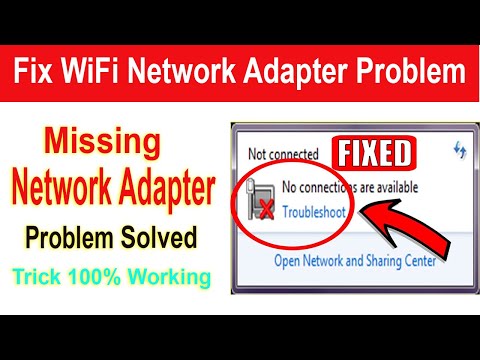
- No Connection: The Ethernet cable is plugged in, but there is no indication of network activity. The network icon in the system tray displays a red "X" or a blank Ethernet symbol.
- Limited Connectivity: Similar to WiFi, the Ethernet connection shows a "Limited" or "No Internet" status, suggesting a problem with the actual connection, possibly the computer’s IP addressing.
- Unstable Connection: The Ethernet connection drops frequently; the laptop might disconnect and reconnect at short intervals. This signifies a potentially faulty cable or a problem with a network device.
- Slow Speeds: Though connected, network speeds are significantly decreased. This could be caused by cable issues, or configuration problems.
C. Cross-Referencing: Both Failures
If both WiFi and Ethernet are concurrently failing, the problem is likely either software-related or due to a hardware malfunction, such as a faulty network adapter or a critical system issue.
II. Software Solutions: Addressing Common Problems
The majority of WiFi and Ethernet issues in modern laptops stem from software-related problems. We will cover the most typical solutions, beginning with the simplest methods.
A. Driver Updates: The Cornerstone of Connectivity
Outdated, corrupted, or missing network drivers are the primary causes of connectivity problems. Updating the drivers is a crucial step.
- Device Manager: Access the Device Manager (search in the Windows search bar). Expand "Network adapters."
- Locate Adapters: Identify your WiFi and Ethernet adapters. They are typically labeled with the manufacturer, such as "Intel," "Realtek," or "Broadcom."
- Update Drivers: Right-click each adapter and select "Update driver." Choose "Search automatically for drivers." Windows will attempt to locate and install the latest drivers.
- Manual Update (if needed): If automatic updates fail, download the latest drivers from the HP support website. Search for the support page specifically using your laptop model number. Install the downloaded drivers manually.
B. Network Troubleshooter: Windows' Automated Assistant
Windows incorporates a built-in network troubleshooter designed to identify and resolve common connectivity problems.
- Access Troubleshooter: Right-click the network icon in the system tray (near the clock) and choose "Troubleshoot problems."
- Follow Prompts: The troubleshooter will guide you through a series of tests and attempt to correct any detected issues.
C. Network Reset: Restoring Default Settings
A network reset restores all network settings to their default configurations, potentially resolving complicated issues that arise from an incorrect configuration.
- Open Settings: Go to Settings (search in the Windows search bar).
- Network & Internet: Click on "Network & Internet."
- Advanced network settings: Click on "Network reset."
- Reset Now: Click "Reset now" and confirm the action. This will require a system restart.
D. Firewall and Antivirus Interference: Ensuring Unblocked Traffic
Firewall and antivirus software can sometimes interfere with network connections, blocking legitimate traffic.
- Check Firewall: Temporarily disable your Windows Firewall or any third-party firewalls you might be using. Test your internet connection.
- Check Antivirus: Similar to firewalls, temporarily disable your antivirus software. Test your connection.
- Whitelist: If the connection works after disabling the firewall or antivirus, configure these programs to allow the necessary network traffic.
III. Hardware Troubleshooting: Inspecting Physical Connections and Components
If software solutions fail, hardware issues might be the cause of the problem. We will address the most common hardware-related issues.
A. Ethernet Cable and Port Inspection:
- Cable Examination: Ensure the Ethernet cable is securely plugged into both your laptop and the router or modem. Test with a known-good cable to eliminate cable malfunction.
- Port Inspection: Examine the Ethernet port on your laptop for any physical damage, such as bent pins or debris. If the port is damaged, contact HP support or consider professional repair.
- Testing on Another Device: Connect the same Ethernet cable to another device (laptop, desktop) to verify the port actually works.
B. WiFi Adapter Examination:
- Physical Inspection: While the WiFi adapter is generally an integrated component, ensure that the physical WiFi hardware switch on the laptop is in the "On" position. Located on the side or front of the laptop.
- Antenna Integrity: Ensure the laptop's antennas, typically found on the screen bezel, are intact. Damage can severely degrade WiFi signal strength.
C. BIOS/UEFI Settings: Configuring Network Adapters
Some motherboards allow users to enable or disable built-in devices, including network adapters, via the BIOS/UEFI settings.
- Access BIOS/UEFI: Restart your laptop and press the appropriate key (Del, Esc, F2, F12, etc.) during startup (refer to your HP laptop's manual for the specific key).
- Navigate to Network Settings: Locate the section related to the network adapters (Integrated Devices, Onboard Devices, etc.).
- Enable Adapters: Ensure that the WiFi and Ethernet adapters are enabled. Save the changes and exit the BIOS/UEFI.
D. Hardware Malfunction: When to Seek Professional Help
If all the above steps have been exhausted, and WiFi and Ethernet still are not working, it may be the result of a hardware failure.
- Internal Examination: If you're comfortable, and have the expertise proceed by opening the laptop case. Visually inspect the network card for any damage.
- Component Replacement: If you have the necessary skills, you may consider replacing the network adapter.
- Professional Assistance: In many cases, it is best to contact HP support for repair options or consider taking the laptop to a qualified technician.
IV. Advanced Troubleshooting: Delving Deeper
If standard procedures fail, advanced methods are sometimes needed.
A. Network Adapter Power Cycle: A simple method sometimes works.
- Open Device Manager: Go to Device Manager (search in the Windows search bar).
- Disable Network Adapter: Right-click the network adapter you want to reset.
- Enable Network Adapter: Restart the laptop and re-enable the adapter.
B. System Restore: Reverting to a Previous State
System Restore attempts to revert the laptop to a date prior to when the problem started.
- Open System Restore: Search for "Create a restore point" and open the window.
- Select a Restore Point: Click "System Restore" and choose a restore point that precedes the onset of connectivity issues.
- Follow the Prompts: Follow the instructions to restore your operating system to the selected restore point, which will require a restart.
C. Resetting Your Router/Modem: This will reconfigure network settings.
- Locate Reset Button: Identify the reset button on your router or modem. It is often a small, recessed button.
- Press the Button: Using a paperclip or other small object, press and hold the reset button for 10-15 seconds. Be aware that this will erase your configuration settings, and you might need to configure your Wi-Fi credentials/password.
- Restart: Restart the router and the laptop and then attempt to connect.
V. Preventing Future Problems
Preventative maintenance can significantly reduce the likelihood of future connectivity issues.
- Regular Driver Updates: Regularly check for and install updated network device drivers. The HP website has dedicated support for drivers.
- Keep Your System Clean: Install an updated antimalware
