dell laptop volume shortcut keys not working
Title: Fix In 3 Seconds - Volume Control Keys, Mute Button Not Working Microsoft Surface Pro Windows
Channel: Mechanical Mike
Fix In 3 Seconds - Volume Control Keys, Mute Button Not Working Microsoft Surface Pro Windows by Mechanical Mike
DELL Laptop Sound DEAD? Fix Your Volume Keys NOW!
DELL Laptop Sound Apocalypse? Rescue Your Audio Right Now!
The silence is deafening, isn't it? You flick the switch, load your favorite tunes. Zero sound emanates from your DELL laptop. Suddenly, your digital world is mute. Frustration boils. Before you chuck your laptop across the room, let's explore swift solutions. Trust me; we'll bring your audio back to life, stat!
Is Your Volume Key a Villain? A Troubleshooting Symphony
First and foremost, let's tackle the obvious. Believe it or not, problems can be remarkably simple. Your volume keys might be the culprits. Give them a solid check. Are they stuck? Are they functioning correctly? Sometimes a simple restart can perform wonders. It frequently clears minor glitches. Consequently, this is our starting point.
Secondly, inspect your keyboard. Check for any debris hindering the keys. Furthermore, try pressing the volume up, down, and mute keys. Observe if their on-screen indicators change. This will reveal if the issue is with the key itself. In the event the volume keys act strange, proceed to the next step.
Check Your System's Audio Settings: A Deep Dive
Now, we’ll migrate to the digital realm. Your operating system is the conductor. The audio settings are its musical scores. Explore the system tray. Locate the speaker icon. Click it with your mouse. Make sure the volume isn't muted or set to a ridiculously low level. Often a quick adjustment can fix the issue.
Furthermore, click on the speaker icon. Then, click on the "Open Volume Mixer" option. You should see a list of applications. Also, ensure each application has its volume unmuted. Also, check that the volume levels are not set too low. These details can make a difference. So pay close attention.
Next, scrutinize your audio output device. Sometimes your laptop might default to an external device. Think about headphones or Bluetooth speakers. Right-click on the speaker icon. Select "Playback devices." Confirm your built-in speakers are selected as the default. Consequently, that’s the solution if the wrong device is selected.
Driver Drama: The Silent Performance
Drivers are essential. They're the translators. They ensure your hardware and software communicate effectively. Outdated or corrupted drivers can cause audio issues. Therefore, we’ll give them our full attention.
First, access the Device Manager. Press the Windows key + X. Choose "Device Manager" from the menu. Locate "Sound, video, and game controllers." Click the arrow to expand this section. Right-click on your audio device (typically Realtek High Definition Audio or similar). Select "Update driver." After that, search automatically for driver updates. Follow the on-screen prompts.
If updating the driver fails, consider uninstalling and reinstalling it. Right-click on the audio device. Select "Uninstall device.” Next, restart your laptop. Windows should automatically reinstall the driver. Provided that doesn’t correct the problem, move on.
Hardware Hiccups: When the Problem Goes Deeper
Let's reluctantly accept the possibility of hardware issues. However, let's proceed with caution! Hardware problems typically include the speakers or sound card.
First, inspect the speakers themselves. Are they producing any crackling noises? Do they sound distorted? External speakers would be beneficial. Connect a pair of headphones. If the sound works through the headphones, the problem is likely with the laptop's internal speakers.
Then again, if no sound emits from the headphones, the issue could be with the sound card. To check the sound card, perform a system restore. Restore your computer to a time when audio was working. Consider this as a last resort.
In addition, contact Dell support. They can offer specialized assistance. They may suggest diagnostics or hardware repairs. Furthermore, they are the experts.
Software Conflicts: The Sound of Silence
Even software can introduce gremlins. Software conflicts are possible. This can often result in silence.
First, consider recently installed software. Did you recently install any new audio programs? They may be interfering. Try uninstalling any recently installed software.
Secondly, scan the device using a robust malware scanner. Malware can sometimes cause audio problems. Ensure your device is pristine and free from infection.
Finally, if problems persist, consider a system restore. Restore your device to a time when your audio was functioning. Moreover, backing up your data before doing so is extremely important.
The Final Encore: Victory for Sound!
We've navigated the cacophony of potential issues. From the simplest volume keys to hardware diagnostics. You are now equipped with the knowledge to address your DELL laptop’s audio woes.
By following these steps, you'll reclaim your sound. The symphony of your digital life will return. Remember patience. Be thorough. Soon, your laptop will sing again. You'll savor the sweet sound of success. So, go forth and conquer the silence!
Work Bag Laptop Women's: The Ultimate Chic & Functional Carry-All You NEED!DELL Laptop Sound DEAD? Fix Your Volume Keys NOW!
Alright, fellow tech travelers! Ever felt that sinking feeling when you boot up your Dell laptop, ready to jam to your favorite tunes or dive into a crucial conference call, only to be met with…silence? Crickets. We’ve all been there. It's like your digital companion has suddenly gone mute, leaving you stranded in a world of muted meetings and unheard audiobooks. Fear not, because this isn't the end of your sonic adventure. We’re going to diagnose and, more importantly, fix that Dell laptop sound dead situation. Think of this as your personal, friendly guide to getting your audio back on track.
1. The Silence of the Lambs (and Your Laptop): Recognizing the Problem
First things first: let's confirm we actually have a problem. This might sound obvious, but trust us, sometimes the simplest solutions are the most overlooked.
- Check the Obvious: Is your volume muted? (Duh, you might say! But seriously, double-check that mute button.) Is the volume turned all the way down?
- External Speakers/Headphones: Try plugging in external speakers or headphones. If you get sound through those, the issue is likely with your laptop's internal speakers. If that is silent too, we're potentially looking at a more systemic problem.
- Restart: The classic IT solution! Seriously though, a simple restart can often magically fix temporary glitches. Think of it like giving your laptop a digital reset button.
2. The Volume Key Vigil: A Quick Checkup
Let’s zero in on those vital volume keys – the unsung heroes (or villains, depending on the situation) of your audio experience.
- Function Keys Fiddling: Most Dell laptops use function keys (F1, F2, etc.) in combination with the "Fn" key to control volume. Press Fn + the volume up key. See if you can witness a volume level increasing on the screen.
- Physical Key Check: Is one of the volume keys stuck? Give them a gentle press. Maybe debris (crumbs? pet hair?) has decided to take up residence.
- Driver Dilemma: Sometimes, outdated or corrupted drivers are the silent saboteurs behind audio woes. We'll tackle those later.
3. The Audio Device Audition: Exploring Your Playback Devices
Your Dell laptop needs to know where to send the sound. Think of it like postal address and the recipient of the sound message.
- Sound Settings Detective Work: Right-click the speaker icon in your system tray (bottom right of the screen). Select "Open Sound settings," then “Manage sound devices”.
- Playback Pilgrimage: Under "Playback," make sure your internal speakers are selected as the default device. If they aren't listed, they aren't even trying to play sounds.
- Testing, Testing…: Click on your internal speakers and hit "Test." If you hear sound, great! If not, then we need further investigation.
4. The Driver Doctor: Fixing the Unseen Culprit
Drivers: Those small software programs that act as translators between your hardware and your operating system. Corrupted or outdated drivers are a common cause of audio problems.
- Device Manager Decryption: Press the Windows key + X and click "Device Manager." This is where the driver diagnostic happens.
- Sound, Video, and Game Controllers: Expand this section. Look for any devices marked with a yellow exclamation point or a red "X." This signifies a problem.
- Driver Update Intervention: Right-click on the problematic device and choose "Update driver." Select "Search automatically for drivers." Windows will attempt to find and install a new driver. If it fails, you might need to download the latest drivers from the Dell support website (more on that later).
5. The Dell Driver Download Dance: The Ultimate Driver Solution
Dell provides a wonderful online resource with the correct updated drivers. If you're having problems with drivers, this is where you go.
- Dell Support Safari: Head to the official Dell support website (support.dell.com).
- Model Identification: Type in your Dell laptop model number. You can usually find this on a sticker on the bottom of your laptop or within the system information.
- Driver Download Destination: Navigate to the "Drivers & Downloads" section. Select your operating system. Then, find the audio drivers (usually under "Audio" or "Sound"). Download and install them. Following all prompts to install the required driver.
6. BIOS Basic Input/Output System: The Low-Level Launchpad
The BIOS can sometimes affect audio functionality. It manages some of the lowest-level settings of your laptop.
- BIOS Boot-Up Blitz: Restart your laptop and enter the BIOS setup (usually by pressing F2, Del, or Esc during startup). The key to get into the BIOS varies depending on your model.
- Audio Configuration Countdown: Navigate through the BIOS menus to find audio settings. Ensure the audio is enabled. Sometimes this setting gets disabled.
- Reset and Reboot: Save your changes and reboot your laptop. Hopefully, you will now hear your laptop sound!
7. The Troubleshooter Tango: Windows' Built-in Fix-It Guy
Windows includes built-in troubleshooters to diagnose and resolve common issues.
- Troubleshooting Expedition: Type "troubleshoot" in the Windows search bar and select "Troubleshoot settings."
- Audio Troubleshooter Tussle: Find and run the "Playing Audio" troubleshooter. Windows will attempt to diagnose and fix any audio problems.
- Magic Wand Outcome: Follow the on-screen prompts. This is the easiest method and may resolve any simple malfunctions.
8. The Audio Enhancement Elimination: Taming the Sound Effects
Sometimes, audio enhancements can interfere with your sound. We want to make sure we remove them from the equation.
- Sound Control Panel Conquest: Right-click the speaker icon in the system tray > "Sounds."
- Playback Device Examination: Select your default playback device (internal speakers) and click "Properties."
- Enhancements Elimination: Go to the "Enhancements" tab and disable any audio enhancements. Click "Apply" and test your sound.
9. The Software Conflict Confrontation: Closing Unnecessary Apps
Certain software applications play a role in sound malfunction, and closing them will provide a proper analysis of the situation.
- Resource Hogging Reckoning: Open Task Manager (Ctrl + Shift + Esc). Investigate any resource-intensive processes.
- Identify Culprits: Identify possible culprits that affect sound performance, such as sound applications.
- Close Problematic Programs The process of ending these programs should start with closing them; test to see if sound has returned.
10. The Hardware Hijack: Internal Speaker Inspection (Advanced)
Note: This step involves opening your laptop, which can void your warranty. Proceed with caution.
- Tech Adventure Advisory: If all else fails, a hardware issue might be the cause. This involves opening up your laptop.
- Speaker Symbiosis: Examine the internal speakers. Look for any loose connections or physical damage.
- Professional Progression: If any is found, it's best to take your laptop to a qualified technician for repair.
11. Audio Codec Configuration: Ensuring The Sound Speaks
Your audio codecs are like the language translators your computer uses to deliver sound. Ensure they are installed and working correctly.
- Codec Code Breakers: Search online and discover the codes related to your audio requirements.
- Codec Installation Invasion: Download and install a suitable audio codec.
- Test The Translation: Test the sound. Check if you're now receiving sound.
12. System File Scan: Detecting and Repairing Corrupted Files
Corrupt system files can cause numerous problems, including audio issues. Let's find any broken files
- The Checkup Checklist: Open Command Prompt as an administrator. Type
sfc /scannowand hit Enter. - System Scan Surveillance: The System File Checker will scan your system files and try to repair any corrupted ones.
- Reboot and Recover: Restart your laptop after the scan is complete.
13. External Device Interference: Disconnect and Troubleshoot
Sometimes, external devices can interfere with audio output.
- Detach Discovery: Disconnect all unnecessary external devices (printers, external hard drives, etc.).
- Test and Evaluate: Test sound. If sound returns, the issue was with the device.
- Isolate and Troubleshoot: Reconnect devices one by one to pinpoint the culprit.
14. Windows Update Wonderland: The Latest Security Updates
Make sure you're running the latest version, which will often contain the most up-to-date drivers and fixes.
- Update Acquisition: Go to Windows Update (Settings > Update & Security > Windows Update).
- Install All Available Updates: Install any available updates.
- Final Reboot Ritual: Restart your computer after installing the updates and test the sound.
15. The Ultimate Recovery: Factory Reset (Last Resort)
This is the nuclear option. It will erase everything on your computer, but it might solve the most stubborn audio issues.
- Backup Brigade: Back up all of your important files
Volume Button Not Working - Reverse Function Keys and Multimedia Keys F1-F12

By Filip Tech Volume Button Not Working - Reverse Function Keys and Multimedia Keys F1-F12 by Filip Tech
Function key for Brightness not working on Windows 1110

By TheWindowsClub Function key for Brightness not working on Windows 1110 by TheWindowsClub
how to volume up and down in laptop shortcut keys volume increase in keyboard shortcut key

By Tonich how to volume up and down in laptop shortcut keys volume increase in keyboard shortcut key by Tonich

Title: Dell Laptop function key problem fix Fn Key Not work solution
Channel: K C Meena RPF
Dell Laptop function key problem fix Fn Key Not work solution by K C Meena RPF
My Laptop Work
DELL Laptop Sound DEAD? Fix Your Volume Keys NOW!
Have you ever been engrossed in a captivating movie, a crucial virtual meeting, or your favorite music, only to be abruptly jolted by the chilling silence emanating from your Dell laptop? That awful moment when sound vanishes, leaving you stranded in a world of mute disappointment, is something we understand all too well. The good news is, you're far from alone, and in most cases, the culprit isn't a catastrophic hardware failure. It's often a surprisingly simple issue – and in a vast number of instances, the solution lies directly at your fingertips. Let’s get your audio back to life quickly and efficiently.
Identifying the Silent Culprit: A Preliminary Diagnostic
Before we dive into the fixes, let’s pinpoint the source of your sonic void. A swift diagnosis will save valuable time and effort. The first and most obvious check: Is your system muted? This may seem rudimentary, but the mute button is a frequent offender. Locate the volume icon in your system tray (usually in the bottom-right corner) and ensure it doesn’t have a red "muted" symbol. Click the icon and drag the volume slider to a reasonable level. If the icon displays a speaker with a line through it, the system is muted; click the icon to unmute. If the volume slider is completely at the bottom, raising it will fix the problem.
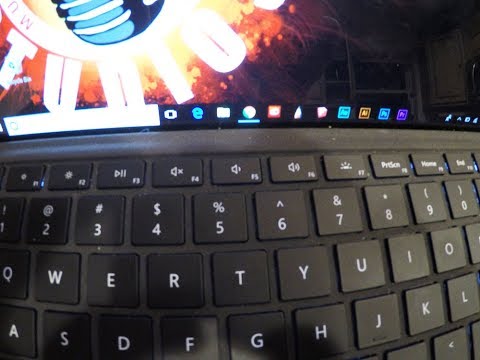
Next, examine your volume keys. Most Dell laptops have dedicated volume buttons on the keyboard. These are often located along the top row, typically labeled with speaker icons and a plus (+) for increasing volume and a minus (-) for decreasing volume. Other Dell models place the volume controls along the side of the laptop. Ensure these keys are not inadvertently set to mute the volume. Press the volume up key several times and see if audio returns.
Unveiling the Volume Keys: Hardware and Software Harmony
Faulty volume keys can sabotage your entire audio experience. Both hardware and software can control your volume keys.
Hardware Malfunctions and Hardware Checks:
Sometimes, physical problems are to blame. Inspect the volume keys themselves. Are they sticky, unresponsive, or physically damaged? If they feel sticky or are malfunctioning, try gently cleaning them. A small can of compressed air can effectively remove dust and debris that might be interfering with their functionality. If the keys are damaged or unresponsive, there might be a hardware issue. In this case, you may need to contact Dell support or repair your laptop to replace the volume keys.
Software Conflicts and Driver Updates:
Software plays a critical role in this issue. Over time, drivers can become outdated, corrupted, or even incompatible with the operating system. Outdated realtek audio drivers can cause sound problems.
- Driver Check: To check and update your audio drivers, follow these steps:
- Right-click on the "Start" button and select "Device Manager".
- In the Device Manager window, expand the "Sound, video, and game controllers" section.
- Right-click on your audio device (e.g., "Realtek Audio") and select "Update driver".
- Choose "Search automatically for drivers" to let Windows search for the best driver. Otherwise click on “Browse my computer for drivers” and navigate to the folder with the downloaded drivers.
- If an update is found, install it and restart your computer.
- If the automated search doesn't find anything, you can visit the Dell support website and download the latest audio drivers specifically for your laptop model.
- Driver Rollback: If you recently updated your drivers and the problem began afterward, consider rolling back to the previous version:
- In the Device Manager, right-click on your audio device and select "Properties".
- Go to the "Driver" tab.
- If the "Roll Back Driver" button is active, click it. This will revert to the previously installed driver.
- Driver Uninstall and Reinstall: In some cases, a complete reinstall of the audio driver may be necessary:
- In the Device Manager, right-click on your audio device and select "Uninstall device".
- Restart your computer. Windows should automatically attempt to reinstall the drivers. If not, download the latest drivers from the Dell website and install them manually.
Troubleshoot the Audio Output Devices
Dell laptops use different audio output devices, and the wrong device could be selected.
- Default Device Selection: Make sure that the right audio device is selected as the default.
- Right-click the volume icon in your system tray and select "Open Sound settings".
- In the "Output" section, ensure that the correct audio device (e.g., your speakers, headphones) is selected.
- If multiple devices are listed, try selecting each one to see if audio is restored.
- Testing the Device: Perform a test to check the selected device. Once you’ve selected your device navigate to device properties.
- In "Sound settings," click on the selected output device.
- Click on "Test". You should hear a test tone. If you don’t hear a test tone, then there may be a hardware problem.
Sound Diagnostics in the Windows Operating System
Windows has an integrated troubleshooting tool that can automatically attempt to fix any associated problems.
- Using the Troubleshooter: The Windows troubleshooter can be a quick and easy fix.
- Right-click on the volume icon in your system tray.
- Select "Troubleshoot sound problems".
- Follow the on-screen prompts, and let the troubleshooter scan for issues and attempt to resolve them.
- Restart your computer after the troubleshooting process.
BIOS Settings and Audio Configuration
Sometimes, the problem doesn't lie in Windows. BIOS settings can also affect audio output.
- Accessing the BIOS: To access the BIOS settings:
- Restart your Dell laptop.
- As it boots, repeatedly press the appropriate key to enter the BIOS setup. Common keys include F2, F12, Delete, or Esc. The specific key varies depending on your laptop model. Consult your Dell laptop manual if you are unsure.
- Audio Settings within BIOS: Once in the BIOS, look for settings related to sound, audio, or integrated devices.
- Ensure that the audio device is enabled.
- There may be options to adjust audio settings or restore default settings. Resetting the BIOS to defaults can often resolve conflicts or misconfigured settings.
- Save your BIOS settings and restart your computer.
Dell's Own Support Tools and Troubleshooting
Dell provides excellent support and diagnostic tools.
- Dell SupportAssist: Dell SupportAssist is an application pre-installed on many Dell laptops. It can automatically scan your system for hardware and software issues, including audio problems. Run a hardware diagnostic test through SupportAssist.
- Dell's Online Resources: Visit the Dell support website and enter your Service Tag or laptop model to access specific troubleshooting guides, driver downloads, and support documentation for your device.
- Contacting Dell Support: If all else fails, don't hesitate to contact Dell's customer support. They can provide personalized assistance and guide you through further troubleshooting steps, potentially involving remote diagnostics or hardware repair. Make sure you provide as much detail as possible when explaining your problem. Describe the troubleshooting steps you already performed and when it began.
The Last Resort: Hardware Inspection
If you've exhausted all software and key-related troubleshooting methods, and you still have a deafening silence, a closer look at the hardware might be required.
- External Speakers or Headphones: Try connecting external speakers or headphones to your laptop's audio jack. If you hear sound through external devices, it indicates that the internal speakers are likely the source of the problem.
- Internal Speaker Check: If you suspect internal speaker issues, the problem might be more complicated. A hardware issue may be the underlying cause. In this case, consulting a professional is highly recommended.
- Visual Inspection: Examine all ports and connections on your laptop. Are the audio jacks clean and free of debris? Are any cables loose or damaged?
- Professional Assistance: When dealing with hardware issues, it’s best to consult a qualified professional. Dell's authorized repair centers can diagnose and fix hardware problems.
Conclusion: Reclaiming Your Audio
Losing sound on your Dell laptop can be frustrating, but it's fixable most of the time. By systematically checking your volume keys, drivers, BIOS settings, and Windows audio configuration, you can often restore the audio. Use the advice provided as a guide and remember to be methodical. If the problem persists, don't hesitate to seek professional help. With a little patience and perseverance, you’ll be back to enjoying your music, movies, and meetings in no time.
