f keys don't work on laptop

Title: If Function keys do not work on the Laptop F1 - F12
Channel: Simple Tech
If Function keys do not work on the Laptop F1 - F12 by Simple Tech
f keys don't work on laptop, function keys don t work on laptop, f buttons don t work on laptop, why don t my f keys work on my laptop
Laptop Keys Dead? This SHOCKING Fix Will Save You!
Laptop Keys Gone Rogue? Don't Panic! A Lifeline Awaits!
Have you ever stared, utterly deflated, at a keyboard that refuses to cooperate? That sinking feeling when your laptop keys decide to stage a digital rebellion? It's frustrating. But, more importantly, it can be fixed! Believe me, I understand the sheer panic. Perhaps your “a” key is stuck, or the enter key is unresponsive? Then, breathe easy. There might be a solution that's simpler than you think.
The Keyboard Calamity: Recognizing the Enemy
First, let's acknowledge the problem. Your laptop keys are dead. What does that even mean? Well, it translates to a modern-day tragedy. You can't type. You can't work. You can't connect. You are essentially cut off. It’s a complete digital roadblock. Consequently, you are locked out.
However, before you start envisioning a complete laptop overhaul, consider a range of issues. Could it be a software glitch? Is there a hardware malfunction? More often than not, the culprit is far less dramatic. In fact, it's frequently something you can resolve. Similarly, it's often something you can manage with ease.
Troubleshooting Tango: Dancing Around the Problem
Now, for the fun part: the troubleshooting dance. First, try the simplest solution. This is also known as the "turn it off then on again" method. Rebooting your laptop can magically resolve many issues. After all, it's a well-known fix. Then, restart your device.
After the reboot, test the keyboard. Are the keys working? If not, let's move on. Secondly, make absolutely certain you understand its purpose. External factors can also be the cause. Take a closer look at the keyboard. Is it clean? Is there any debris?
Furthermore, check the keys themselves. Crumbs, dust, or other small particles can get lodged beneath the keys. These particles can prevent them from functioning correctly. Therefore, you will need to clean your keyboard. Moreover, it's a pretty simple process.
The Cleaning Crusade: Reclaiming Your Keys!
Ready to get cleaning? Here’s how. First, turn off your computer and unplug it. This is purely a safety measure. Then, consider the tools. You'll need some key supplies. A can of compressed air is your best weapon. Also, a soft brush or a cotton swab will prove helpful.
To begin, carefully angle the can of compressed air. Direct the air along the rows of keys. Focus on any keys that are unresponsive. In addition, make sure to get under the edges of each key. Next, use your brush to gently sweep away any remaining debris. As a result, any trapped particles should be dislodged.
Finally, if your keys remain unresponsive, you can try using a cotton swab. Lightly dampen it with isopropyl alcohol. Gently clean around the edges of the affected keys. Then, let it dry thoroughly before you turn your laptop back on. After all, patience is a virtue. Then, give the keyboard another test.
Software Showdown: Rooting Out the Digital Demons
So still nothing? Let's move on to software solutions. Your keyboard might be facing a software conflict. Moreover, this sometimes occurs with driver issues. Firstly, access your device manager. From there, find your keyboard.
Next, right-click on the keyboard entry. Select "Update driver." Moreover, allow Windows to search for the latest drivers automatically. In case the driver is already up-to-date, consider uninstalling and reinstalling the keyboard driver. Also, this will refresh its configuration.
Furthermore, consider checking keyboard settings. Sometimes, accidental changes can disable keys. Therefore, go to Settings > Ease of Access > Keyboard. Here, you can make sure keyboard features are turned on. Consequently, your keyboard should be functional again.
Hardware Hurdles: When Things Get Serious
Unfortunately, sometimes the issue is hardware. Perhaps there's internal damage. Or maybe the keys have experienced mechanical failure.
If you're comfortable with it, you can try opening your laptop. However, be very careful. Laptop components are fragile. If you are not comfortable with this, consider professional repair. A technician can diagnose the problem. Then, they can potentially replace the keyboard. Therefore, they will have the expertise to do so.
The Final Victory: Typing Triumph!
Ultimately, if you've followed these steps, congratulations. You've hopefully conquered your keyboard woes. Now you can go back to work. The journey is over. You have your keys back! Remember, technology can be unpredictable. But don’t despair. So, keep these tips in mind for next time. Moreover, keep typing!
Laptop DVD Drives: The Ultimate Guide (Secrets Revealed!)Laptop Keys Dead? This SHOCKING Fix Will Save You!
Ever stare at your laptop, a digital paperweight mocking your every attempt to type? That frozen cursor, the unresponsive keys – it's enough to make you want to chuck the whole thing out the window, isn't it? I've been there. We've all been there. It's a modern-day tragedy, a tech-induced frustration that can derail your productivity faster than you can say "Ctrl+Alt+Delete." But before you resign yourself to the dreaded fate of buying a new laptop (or, worse, becoming a touchscreen-only devotee), let's dive into some solutions. Trust me; we're going to resurrect those dead keys and breathe life back into your beloved machine.
1. The Dreaded Key Massacre: Understanding the Problem
Before we start slinging fixes, let's understand the enemy. Why are your laptop keys rebelling? The reasons are as varied as our personalities (and our typing habits!). From spilled coffee to dust bunnies accumulating under the keys, the culprits are numerous. Sometimes it's a software glitch, a rogue driver causing havoc, or even a hardware failure lurking beneath the surface. It's like a detective story, and your laptop is the crime scene.
Think of your keyboard like a delicate ballet. Each key is a dancer, flawlessly executing its assigned move. When one falters, the whole performance suffers. And just like a dancer's performance, the more you type, the more likely a key is to get injured.
2. The Simple Solutions: The First Line of Defense
Alright, detective, let's start with the obvious. The first step in any tech troubleshooting endeavor? Check the power! (Make sure the machine is actually on and that the battery's charged!)
Now, let's get into the basics.
- Restart, Restart, Restart: Seriously, this is the digital equivalent of "have you tried turning it off and on again?" A simple restart can often clear temporary glitches and breathe new life into your keyboard.
- Check the Keyboard: Is your keyboard actually a physical keyboard? External keyboards can be a source of issues. Make sure it's properly connected, the cable isn't frayed, and that the batteries are working.
- The Sticky Situation: Did you spill anything on your keyboard? Coffee, soda, even that innocent cup of water can wreak havoc. If so, gently clean the keys with a slightly damp (not dripping!) cloth. Avoid excessive moisture.
- The Caps Lock Check: Is the Caps Lock key stealthily engaged, making your typed words appear in all capital letters? A simple tap usually fixes this. A simple check, but a very common error.
3. The Driver Debugging: Are Your Drivers the Villains?
Drivers, those little software packages that allow your computer to "talk" to its hardware, can sometimes be the root of the problem. Think of them as the translators between your keyboard and your laptop. If the translator isn't up to snuff, things will get lost in translation.
- Updating Your Drivers: The easiest fix? Update your keyboard drivers. Open Device Manager (search for it in the Windows search bar), find your keyboard, right-click, and select "Update driver." Let Windows do its thing.
- Rollback to the Rescue: If the issue started after a driver update, roll back to the previous version. In Device Manager, you'll find an option to do this.
- Uninstall and Reinstall: If all else fails, try uninstalling your keyboard driver and then reinstalling it. This forces the computer to re-establish the connection.
4. Software Sabotage: Identifying and Resolving Software Conflicts
Sometimes, the cause isn't hardware, but software. A program running in the background could be interfering with your keyboard's functions.
- The Clean Boot Approach: Perform a clean boot to start Windows with a minimal set of drivers and startup programs. This helps isolate the offending software. Search "[your operating system] clean boot" for detailed steps.
- Antivirus Antics: Some antivirus programs can sometimes clash with keyboard functionality. Temporarily disable your antivirus (and be careful!). If your keyboard works, you've found the culprit.
- Check for Malware: Run a full scan of your computer using your antivirus software. Malware can sometimes wreak havoc on your system, including your keyboard.
5. Hardware Hurdles: When the Problem is Physical
If the software solutions fail, we might be looking at a hardware problem. This is where it gets a bit more complicated, but don't panic yet!
- External Keyboard Test: Plug in an external USB keyboard. Does that work? If yes, it's highly likely the problem is internal.
- Inspect the Keyboard: Carefully examine the keys for any physical damage – are any keys physically stuck, loose, or visibly damaged?
- The Internal Cleaning Ritual: This one is for the brave. You can use compressed air to blow out dust and debris from under the keys. Turn off and unplug your laptop. Using a small screwdriver or a keycap puller (available online), you can carefully remove the keycaps themselves. Be gentle!
6. The Liquid Logic: Dealing with Spills (Fast!)
Spilled coffee or soda is a keyboard's worst nightmare. But it's not always a death sentence if you act fast.
- Immediate Response: Unplug your laptop immediately and turn it upside down to drain any liquid.
- Dry-Out Time: Let your keyboard dry completely. This could take several days, maybe longer. Patience is key.
- Professional Help: If the spill was substantial, consider taking your laptop to a professional repair service. They have the tools and expertise to clean your keyboard thoroughly.
7. Diagnosing with Diagnostics: Using Built-in Tools
Windows often has built-in tools that can help diagnose keyboard problems.
- The On-Screen Keyboard: Access the on-screen keyboard (search for it in the Windows search bar) and use your mouse to type. If the on-screen keyboard works, the issue is most likely a hardware problem, or a driver issue.
- Hardware Troubleshooter: Go to Settings > Update & Security > Troubleshoot > Keyboard. Let Windows run its diagnostic checks and see if it identifies any problems.
8. The Sticky Key Solution: Unsticking the Keys That Stick
Keys that are stuck down can be incredibly frustrating. Here's how to deal with it.
- Isopropyl Alcohol: Remove the keycap and use a cotton swab dipped in isopropyl alcohol (rubbing alcohol) to clean around the key switch. Be careful not to use too much liquid.
- Compressed Air Again: Give the key switch a blast of compressed air to dislodge any trapped debris.
- Key Cap Removal: if you know how, you may want to carefully remove the Keycap by using a key cap puller for detailed internal cleaning. And be sure to return it back in its place.
9. The BIOS Blues: Checking Your BIOS Settings
Sometimes, the problem lies within your computer's BIOS (Basic Input/Output System). This is the fundamental software that starts your computer when you turn it on.
- Access the BIOS: Restart your computer and repeatedly press the key that accesses the BIOS (usually Del, F2, or F12 - it will tell you on screen during bootup).
- Keyboard Settings: Look for any keyboard settings that could be affecting the functionality. Ensure that the keyboard is enabled.
10. The Keyboard Replacement Option: When to Face Reality
Sometimes, no amount of tinkering will bring those keys back to life. In such instances, you may need to consider replacing the keyboard or, if it's a more serious fault, sending it in for repair.
- Keyboard Replacement: Laptop keyboards are often designed to be replaced. You can find replacement keyboards online and often replace them.
- Professional Repair: If you're not comfortable with replacing the keyboard yourself, take your laptop to a professional repair service.
11. Warranty Worries: Does Your Warranty Offer a Lifeline?
Before you dive into any do-it-yourself repairs, check your laptop's warranty.
- Check the Coverage: See if keyboard issues are covered under your warranty. Repairing your device yourself, might void your warranty.
- Contact the Manufacturer: If your laptop is under warranty, contact the manufacturer for support.
12. The Peripherals Power Play: Using External Gadgets
In the interim, while you're troubleshooting solutions, use these alternatives.
- External Keyboard: You can always plug in an external keyboard through a USB port.
- On-Screen Keyboard: Utilize the on-screen keyboard to type until the original is fixed.
13. The Software Solution: Mapping Your Keyboard
If certain keys are not working but some are, you might be able to remap the faulty keys to other keys using software.
- The Key Mapper Application: Download a key mapping application.
- Remap the Keys: Remap the bad key to another one.
14. Prevention is Key: Tips for a Happy Keyboard Life
Once you've fixed your keyboard, don't let it happen again!
- Regular Cleaning: Dust and debris are the silent killers of keyboards. Regularly clean your keyboard.
- Protective Measures:
Fixing the function keys on an Asus laptop in 10 seconds F1-F12

By Simple Tech Fixing the function keys on an Asus laptop in 10 seconds F1-F12 by Simple Tech
How To Unlock Keyboard on Laptop & PC Windows

By Your Fix Guide How To Unlock Keyboard on Laptop & PC Windows by Your Fix Guide
Fix100Brightness Button Not Working in Laptop Fn Key's Not workingmacniteshkeyboardtricks2023

By Mac Nitesh Fix100Brightness Button Not Working in Laptop Fn Key's Not workingmacniteshkeyboardtricks2023 by Mac Nitesh
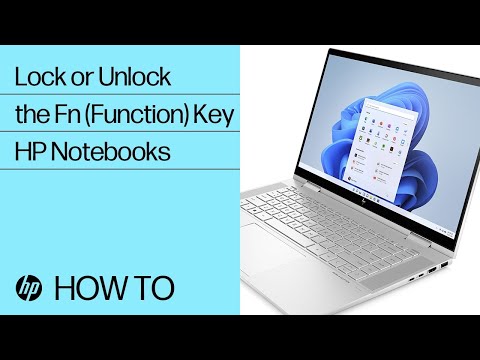
Title: How to Lock or Unlock the Fn Function Key on an HP Notebook HP Support
Channel: HP Support
How to Lock or Unlock the Fn Function Key on an HP Notebook HP Support by HP Support
Laptop Wifi Connect
Laptop Keys Dead? This SHOCKING Fix Will Save You!
Have you ever faced the heart-stopping moment when your laptop keys refuse to respond? You frantically hammer away at the keyboard, only to be met with a blank screen and a rising tide of panic. We've all been there. Perhaps you're mid-sentence, composing a crucial email, or even battling goblins in your favorite RPG. Whatever the task, a malfunctioning keyboard transforms our indispensable laptops into cumbersome paperweights. But before you resign yourself to a costly repair or, worse, a complete system replacement, take a deep breath. There's a good chance the solution is simpler than you think. This guide will walk you through a series of proven fixes, revealing the most common culprits behind dead laptop keys and, crucially, how to bring them back to life. Prepare to be amazed – and relieved.
Diagnosing the Problem: Pinpointing the Culprit
Before launching into a flurry of repair attempts, a little detective work is essential. Identifying the source of the keyboard malfunction drastically increases your chances of a quick and successful resolution. Is it a single key, a specific row, or the entire keyboard that’s gone silent? This basic observation provides invaluable clues.
1. The Single Key Dilemma: If one solitary key refuses to cooperate, the issue often centers on debris accumulation or simple mechanical failure. Tiny crumbs, dust particles, and even pet hair can wedge themselves beneath the keycap, obstructing the switch's delicate workings. The switch itself, a tiny, spring-loaded mechanism, can also suffer mechanical failure, especially after years of constant use.
2. The Row or Column Conundrum: When an entire row or column of keys ceases functioning, the problem is more likely a circuit-related issue. The keyboard's internal circuitry connects each key to the motherboard. Damage to the flexible ribbon cable carrying these connections, or a fault within the keyboard controller, can lead to widespread key failures.
3. The Total Keyboard Tragedy: Complete keyboard failure necessitates a more thorough investigation. It could be a software glitch, a driver conflict, or, in some cases, a hardware defect. A faulty connection between the keyboard and the motherboard, a damaged keyboard ribbon cable, or a problem with the keyboard controller are all potential causes.
Software Solutions: Quick Fixes for Common Glitches
Before diving into hardware repairs, let’s explore the software realm. Many keyboard problems stem from easily resolved software conflicts or misconfigurations.
1. The Reboot Ritual: This might seem incredibly basic, but a simple restart often works wonders. Restarting your laptop clears temporary files and resolves minor software glitches that might be interfering with the keyboard's operation.
2. Driver Drama: Updating and Reinstalling: Keyboard drivers are the software intermediaries that translate your keystrokes into actions your computer can understand. Outdated or corrupted drivers can lead to keyboard malfunctions. To update your drivers, follow these steps:
- Windows:
- Right-click on the "Start" menu and select "Device Manager."
- Expand the "Keyboards" section.
- Right-click on your keyboard device (it might simply be called "Keyboard" or something similar) and select "Update driver." Select "Search automatically for drivers."
- If that doesn't work, try uninstalling the driver by right-clicking and selecting "Uninstall device." Then, restart your laptop, and Windows will attempt to reinstall the driver automatically.
- macOS:
- macOS typically manages keyboard drivers automatically. However, if you're experiencing issues, try restarting your Mac. If the problem persists, consider a system software update, which may include driver updates.
3. Sticky Keys and Filter Keys: Deactivating Annoying Accessibility Features: Windows and macOS offer accessibility features designed to help users with motor impairments. While helpful, these features can sometimes interfere with regular keyboard use.
Sticky Keys: Designed to let you press modifier keys (Shift, Ctrl, Alt, and the Windows key/Command key) separately, instead of simultaneously. Sometimes these are enabled unintentionally, leading to confused input. To disable them:
- Windows: Press the Shift key five times. A prompt will appear. Choose "Turn off Sticky Keys." You can find these settings in the "Ease of Access" settings.
- macOS: Go to "System Preferences" > "Keyboard" > "Modifiers Keys." Consider disabling "Sticky Keys" if enabled, ensuring it doesn't interfere with your typing.
Filter Keys: Filters repeated keystrokes or accidental presses. This feature can sometimes be overzealous. To disable them:
- Windows: Go to "Ease of Access" settings and select "Keyboard settings." Under "Use Filter Keys," ensure it is turned off.
- macOS: Filter Keys are not explicitly available, but investigate under accessibility settings if you suspect a similar function is causing issues.
Hardware Hacking: Resurrecting Your Keyboard's Secrets
If software solutions fail, it's time to investigate the hardware. Don't worry, we'll take it slowly, step-by-step, ensuring you understand each procedure.
1. The Keycap Cleanse: A Deep Dive into Keycap Care: This is often the simplest and most effective hardware fix. Grab a small, non-scratching tool, such as the handle of a small paintbrush, and a can of compressed air.
- Preparation: Shut down your laptop and disconnect it from the power source.
- The Keycap Removal: Carefully pry off the keycap of the malfunctioning key. Use a flat-head screwdriver (wrapped in a soft cloth to prevent scratches) or, ideally, a keycap removal tool (available at most computer stores or online). Be gentle!
- The Cleaning Ritual: Use compressed air to blast away any debris from the key switch (the tiny mechanism beneath the keycap). Focus on the area around the switch and under the keycap itself.
- The Keycap Reassembly: Carefully align the keycap and press down firmly until it clicks back into place. Test the key.
- The Keycap Rescue (for stubborn grime): If the single key issue persists, you might need to remove the entire keycap. Use a soft brush or cotton swab dipped in isopropyl alcohol (ensure the laptop is powered off and disconnected!) to clean the switch. Let the alcohol completely evaporate before replacing the keycap.
2. The External Keyboard Test: Isolating the Problem: Connect an external USB keyboard to your laptop. Does the external keyboard work? If so, you've narrowed the problem down to the laptop's internal keyboard. If the external keyboard also malfunctions, the issue might be with your operating system or software.
3. The Ribbon Cable Revelation: Inspecting the Connection: The keyboard connects to your laptop's motherboard via a delicate ribbon cable. This cable can become dislodged or damaged.
- Preparation:
- Turn off and unplug your laptop.
- Remove the battery (if easily accessible). Refer to your laptop's manual for instructions on accessing the keyboard.
- The Disassembly: Depending on your laptop model, you'll need to remove the keyboard bezel (the plastic frame around the keyboard) and potentially the keyboard itself.
- The Ribbon Cable Check: Locate the ribbon cable connection on the motherboard. Disconnect the cable by gently lifting the small plastic locking mechanism. Look for any signs of damage to the cable: tears, fraying, or water damage.
- The Reconnection: Carefully re-insert the ribbon cable, ensuring it's firmly seated in the connector. Secure the locking mechanism.
- The Assembly: Reassemble your laptop. Power it on and test the keyboard.
4. The Keyboard Replacement Crossroads: Knowing When to Seek Professional Help: Sometimes, the damage is beyond repair. If the keyboard is beyond repair, replacement is the only option. However, before embarking on this journey, consider these points:
- The Cost Factor: Replacing a keyboard can range from relatively inexpensive (especially for older laptops) to quite pricey.
- The Skill Set: If you are comfortable with basic computer repair, you can often replace the keyboard yourself. However, if you're not comfortable with disassembling your laptop, seek professional help.
- Professional Repair: A qualified technician can quickly diagnose and repair the keyboard or replace it if needed.
Preventative Measures: Keeping Your Keys Alive and Thriving
Once you've resurrected your laptop keys, you'll want to protect your investment. Here are some essential preventative measures:
1. Keyboard Covers: A Shield of Protection: A keyboard cover is a thin silicone or plastic sheet that fits over your keyboard, providing a barrier against dust, spills, and other debris. They're inexpensive and readily available for most laptop models.
2. Regular Cleaning: The Hygiene Habit: Make cleaning your keyboard a regular habit. Use compressed air to blow away dust and debris regularly.
3. The Food and Drink Ban: A Simple Rule: Avoid eating or drinking near your laptop. Spills are a primary cause of keyboard damage.
4. Careful Handling: A Gentle Touch: Avoid slamming your laptop or dropping it. These impacts can damage the keyboard's internal components.
5. Software Updates: Stay Current: Keep your operating system and drivers up-to-date. Software updates often include bug fixes and improvements that can prevent keyboard issues.
By following these steps, you
