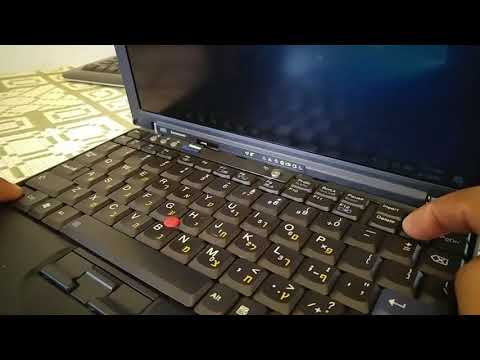
brightness button not working thinkpad laptop

Title: WINDOWS 10 Brightness Control Not Working QUICK FIX NO RESTART
Channel: Cretizer
WINDOWS 10 Brightness Control Not Working QUICK FIX NO RESTART by Cretizer
brightness button not working lenovo thinkpad, brightness button not working in lenovo laptop, why my laptop brightness button is not working, why is the brightness not working on my laptop
ThinkPad Brightness Button Broken? FIX IT NOW! (Easy Steps!)
ThinkPad Brightness Blues? Breathe Easy: Quick Fixes for Dim Days!
Your ThinkPad screen glaring so dimly it’s practically a black mirror? Frustrating, right? Trust me, I understand your pain. It’s a common issue, and before you resign yourself to squinting at your screen forever, let's investigate some simple solutions. Because, honestly, a functional brightness button is a productivity game-changer. Let’s dive in!
Keyboard Shortcuts: Your Initial Lifesavers
First things first: have you actually tried the seemingly obvious? We often overlook the simplest fixes. Therefore, before dismantling your machine, consider your keyboard. Most ThinkPads (and, indeed, almost all laptops) utilize function keys. These are the little icons usually running along the top row of your keyboard. Look closely. In most cases, the brightness controls are located here.
Specifically, search for a sun icon, likely with an up and down arrow. This should be combined with the "Fn" key. Typically, you press and hold the "Fn" key, and then tap the corresponding brightness key. So, try it. Try holding the "Fn" key and pressing the up arrow key. Does your screen brighten? If yes, then the key is functional. The brightness button might still be broken. But it is an easy fix to change the Fn key. After all, you might resolve the issue. Also, consider pressing the down arrow key. This works in the same way. If this works, congratulations! You've solved the problem.
Driver Dilemmas: Are Your Updates Up-to-Date?
Still dim? Okay, let's troubleshoot further. Sometimes, the issue relates to outdated or corrupted display drivers. These little programs tell your computer how to communicate with your screen. Consequently, outdated drivers will create issues. In other words, they may cause a problem.
Here's how to check and update them:
- Open Device Manager: Right-click the Windows Start button in the lower-left corner, select "Device Manager." Alternatively, type "Device Manager" into the search bar and select the app.
- Expand "Display adapters": Click the little arrow next to it. Now, this will expose your graphics card (usually Intel, NVIDIA, or AMD).
- Right-click your display adapter: Select "Update driver." Then, choose "Search automatically for drivers." Windows will search for the best drivers.
- Restart your ThinkPad: After the update completes, restart your laptop.
Therefore, if updates aren't the issue, the problem has to be somewhere else. Often, outdated drivers create brightness troubles.
Power Plan Problems: Optimizing Your Brightness Settings
Sometimes, the brightness setting isn't broken, but the power plan might be limiting your output. Windows power plans control how your laptop manages power usage. They also include brightness levels.
Here's how to adjust your power settings:
- Go to Control Panel: Search for "Control Panel" in the Windows search bar.
- Select "Power Options": You can find this under "Hardware and Sound."
- Choose your power plan: Select "Change plan settings" next to your active power plan.
- Adjust the brightness: Drag the brightness slider to your desired level. Also, ensure that the plans fit the needs.
So, if your brightness is low on battery but higher when plugged in, you'll want to configure the settings individually. In other words, modify the settings. It can be a solution.
BIOS Blues? Check Your Basic Input/Output System
If the above steps don't work, it's time to delve a little deeper. Your BIOS (Basic Input/Output System) settings control your hardware. Sometimes, the brightness setting's in there.
Here’s what you should do:
- Restart your ThinkPad: During startup, repeatedly press the appropriate key to enter the BIOS. Common keys are F2, F10, F12, Del, or Esc. The key varies by model.
- Navigate the BIOS menu: Then, look for options related to display or brightness. These will be the most important options.
- Adjust any relevant settings: Save the changes and reboot your ThinkPad.
However, proceed with caution. Incorrect BIOS adjustments can cause problems. Therefore, double-check before confirming changes.
Hardware Headaches: Could It Be a Faulty Button?
In the rare case that none of these software solutions work, it’s possible the brightness button itself is faulty. This is an unfortunate outcome but not insurmountable!
There are a few options if you are sure that the button is bad:
- Contact Lenovo Support: First, contact Lenovo support. Moreover, describe your problem. Perhaps they have a solution.
- Professional Repair: Consider taking your ThinkPad to a qualified repair technician. They can replace the button.
- External Keyboard Solution: The simplest option, in the meantime, is to use an external keyboard.
Indeed, a broken button is discouraging. However, it doesn't mean that your laptop is useless. Because there are solutions, you can manage this problem.
Final Thoughts: Bright Days Ahead!
So, don’t despair! We've run through several solutions. Hopefully, one of the above steps has helped you. If not, don’t give up. There are always solutions. Because, fixing a ThinkPad brightness button might require some troubleshooting. Furthermore, with a little patience, you can restore your screen to its former glory. It will soon light up your life. Good luck and happy computing!
Acer Laptop Touchpad Nightmare? FIX It NOW!ThinkPad Brightness Button Broken? FIX IT NOW! (Easy Steps!)
Hey fellow ThinkPad enthusiasts! Ever found yourself squinting at your screen, desperately trying to adjust the brightness but hitting a dead-end? Yeah, we've all been there. That little brightness button on your awesome ThinkPad goes rogue, and suddenly your vibrant work setup transforms into a dim, shadowy cave. Frustrating, right? Don't worry, though. We're going to walk you through fixing the ThinkPad brightness button issue, step-by-step, so you can get back to enjoying your crisp, perfectly lit screen in no time. Consider this your personal ThinkPad rescue mission, and we're the intrepid guides.
Decoding the Darkness: Why Your Brightness Button Betrayed You
Before we dive into fixing the problem, let's play detective for a moment. Why does this happen? The causes of a broken brightness button are as varied as the landscapes on your favorite travel wallpaper. It could be as simple as a software glitch, a driver issue, or something a little trickier, like a hardware malfunction. Think of it like a tangled wire in your headphones – sometimes a quick untwist fixes it, other times, you need to replace the whole thing.
Step 1: The Simplest Fixes: Restart and Refresh!
Okay, let's start with the easy wins. Think of this like checking if your car is plugged into the wall before calling a mechanic.
- Restart Your ThinkPad: This is the digital equivalent of a good night's sleep. A simple reboot can often clear out minor software hiccups and refresh the system. Give it a go; it often works like magic.
- Check for Windows Updates: Is your Windows up-to-date? Microsoft constantly releases updates that fix bugs and improve performance. These updates can sometimes resolve driver conflicts that might be causing the brightness issue. Go to Settings > Update & Security > Windows Update and see what’s cooking.
Step 2: The Driver Dilemma: Updating and Troubleshooting
Drivers are the language your hardware speaks to your software. If the "translator" (the driver) isn't working right, the brightness controls won't respond.
- Update Your Display Drivers: Go to Device Manager (search for it in the Windows search bar). Expand "Display adapters," right-click on your graphics card (e.g., Intel HD Graphics or NVIDIA GeForce), and select "Update driver." Choose "Search automatically for drivers." Fingers crossed!
- Roll Back Your Display Drivers: Did the problem start after a recent driver update? Sometimes, newer isn't better. Go back to Device Manager, right-click your graphics card, select “Properties,” go to the “Driver” tab, and try “Roll Back Driver.”
- Uninstall and Reinstall Display Drivers: A more drastic measure, but it can work wonders. In Device Manager, uninstall your graphics card driver. Then, restart your ThinkPad, and Windows should (hopefully) reinstall the driver automatically. If not, you can download the latest driver from the manufacturer's website (Intel, NVIDIA, or AMD, depending on your ThinkPad's graphics card).
Step 3: Power Plan Problems (and How to Outsmart Them)
Your power plan settings can sometimes mess with brightness controls. Think of it as your ThinkPad’s energy-saving mode interfering with your visual enjoyment.
- Check Your Power Plan: Go to Control Panel > Hardware and Sound > Power Options. Make sure your power plan isn’t set to something that automatically lowers the brightness. Click "Change plan settings" and then "Change advanced power settings" to adjust the screen brightness settings for both on battery and plugged in.
- Reset Your Power Plan Settings: If you've messed around with these settings, a reset might be the ticket. Choose the default power plan for your ThinkPad and see if that fixes things.
Step 4: The Function Key Fury: Making Sure It’s Enabled
Your brightness controls are often linked to function keys (Fn + a brightness key). Let's make sure those keys are cooperating.
- Test the Fn Key: Press the Fn key (usually near the Ctrl key) and the brightness up/down keys (often with a sun icon). Does anything happen? If not, there might be a driver issue or a problem with the Fn key itself.
- Check the BIOS: Accessing the BIOS is like going under the hood of your car. Restart your ThinkPad and press the appropriate key to enter the BIOS setup (usually Del, F2, or F12). Look for settings related to the Fn key and function key behavior. Ensure they are enabled correctly. Be careful here, and don't change anything you aren't sure about!
Step 5: The Hardware Headache: When Things Get Serious
If none of the above steps work, we might be dealing with a hardware issue. This is where things get a bit more complicated.
- External Monitor Test: Connect an external monitor to your ThinkPad. If the brightness controls work on the external monitor, the problem likely lies with your laptop's screen or its connections.
- Internal Screen Connection: Very carefully (and only if you are comfortable with it), you could open your ThinkPad (after disconnecting the battery) and check the connections to the display panel. Sometimes, a loose connection can cause the issue. Disclaimer: Opening your ThinkPad may void its warranty. If you're not comfortable with this, consult a professional.
Step 6: Leveraging the Windows Mobility Center
Windows Mobility Center gives some basic options for brightness, among other system controls. If available on your version of Windows, it's worth a shot.
- Open Windows Mobility Center: Search for it in the windows search. If the brightness slider works in the mobility center, that should indicate that the system is capable of controlling brightness, allowing you to focus on the hardware and/or keyboard issues.
Step 7: Third-Party Software Solutions: A Digital Lifeline
If you're comfortable with it, a software solution could work.
- Brightness Control Software: Various third-party apps let you control your screen brightness. A quick search online will reveal some options. This offers a temporary alternative, but address the root issue is still the best approach.
Step 8: The Ultimate Test: Reaching Out for Help
If you've exhausted all these steps, it's time to seek professional help.
- Lenovo Support: Contact Lenovo support directly. They might have specific troubleshooting steps or be able to help you with a repair or replacement.
- Local Computer Repair: A local computer repair shop can diagnose the problem and offer expert advice.
Step 9: Preventative Measures: Keeping Your Brightness Button Happy
Now that you've hopefully fixed the problem, let’s discuss how to prevent a repeat performance.
- Keep Your Drivers Updated: Regular driver updates are your best defense against software-related brightness button issues.
- Protect Your ThinkPad: Treat your ThinkPad with the care it deserves. Avoid extreme temperatures, spills, and physical damage.
- Avoid Questionable Software: Be wary of the software you install. Some programs can interfere with system functionality.
Step 10: Alternative Brightness Adjustment Methods
If the brightness button is consistently problematic, remember the workarounds:
- Use the Windows Settings: Right-click on the desktop, select "Display settings," and adjust the brightness slider.
- Keyboard Shortcuts: While some models don't work, some ThinkPads have accessible brightness adjustment shortcuts.
Step 11: Unveiling The Function Key Magic: A Deep Dive
Many ThinkPads use function keys combined with other keys for extra commands, and brightness is often one of them.
- Function Key Synergy: Most ThinkPads use the Fn key in combination with the up and down arrow keys, or dedicated sun symbol keys, to control screen brightness.
- Configuring the Fn keys: Many ThinkPads have BIOS settings to switch the order they function. For example, swap the Fn function so the Fn key doesn't have to be pressed at all.
Step 12: When Brightness is More Than Just Light: Eye Strain and Ergonomics
A properly adjusted screen brightness isn't just about visibility; it is about your health.
- Protecting Your Eyes: Adjust your brightness to match the ambient light in the room. Too bright, and you'll strain your eyes; too dim, and you'll have to work harder to see.
- Ergonomic Setup: Position your ThinkPad so the top of the screen is at or slightly below eye level. This and proper brightness are critical for comfortable, all-day computing.
Step 13: The Hidden Settings: Unleashing the Full Power of Your Display
Your ThinkPad's display has many under-the-hood settings that could be causing problems.
- Color Calibration: Go to your display settings and check the color calibrations.
- Adaptive Brightness: This clever feature changes your screen brightness depending on ambient lighting, and can sometimes cause problems. Try turning it off.
Step 14: Troubleshooting Beyond the Brightness Button: Examining the Bigger Picture
Sometimes the problem isn't the brightness button itself, but the system around it.
- Hardware Malfunction: If you've tried everything, it is possible the backlight system of the screen is failing.
- Operating System Issues: On occasion, a faulty Windows install can cause several problems.
Function key for Brightness not working on Windows 1110

By TheWindowsClub Function key for Brightness not working on Windows 1110 by TheWindowsClub
Lenovo ThinkPad X60 screen brightness - How to bright screen
By E.S.P.C CMPUTERS Lenovo ThinkPad X60 screen brightness - How to bright screen by E.S.P.C CMPUTERS
how to adjust Brightness in laptop with keys how to use brightness keys in laptop

By Tonich how to adjust Brightness in laptop with keys how to use brightness keys in laptop by Tonich

Title: Cant Adjust Brightness on Windows 10 Brightness Control Not Working
Channel: Tech White
Cant Adjust Brightness on Windows 10 Brightness Control Not Working by Tech White
Laptop Working
ThinkPad Brightness Button Broken? FIX IT NOW! (Easy Steps!)
Is your ThinkPad's brightness stubbornly stuck, refusing to dim or brighten your screen as needed? A frustrating problem, indeed. But worry not; we've encountered this issue before, and we've compiled a series of meticulously tested solutions to get you back in control of your display's luminosity. Let's embark on this troubleshooting journey together, armed with knowledge and practical, actionable steps.
Understanding the Problem: Why Your Brightness Controls Might Fail
Before diving into fixes, it's helpful to understand the potential culprits behind unresponsive brightness controls. Common causes include:
- Driver Issues: Outdated, corrupted, or improperly installed display drivers are frequent offenders. ThinkPad laptops, with their often-complex configurations, are particularly susceptible to driver-related problems.
- BIOS or Firmware Glitches: The Basic Input/Output System (BIOS) and other firmware components control fundamental hardware operations. Occasionally, these can malfunction, impacting brightness functionality.
- Operating System Conflicts: The operating system, whether Windows or another OS, plays a crucial role in managing hardware. Conflicts within the OS can sometimes interfere with brightness adjustments.
- Hardware Malfunctions: Though less common, a physical issue with the brightness control keys or the display itself can be the root cause. We'll address this possibility.
- Power Plan Settings: Your active power plan within Windows can significantly influence brightness levels. Aggressive power-saving configurations may override your desired settings. Finally, an incorrect default power plan will be the reason.
Step 1: The Simplest Fixes First – Software Tweaks
Begin with the easiest, non-invasive solutions. These steps often resolve the issue quickly.
A. Restart Your ThinkPad: A simple restart can often resolve temporary software glitches. Close all applications, save your work, and reboot your ThinkPad. This clears the system’s memory and reinitializes various components.
B. Check the Brightness Keys (and their companions): Ensure you're pressing the correct keys. On most ThinkPads, these are typically function keys (Fn keys) combined with key combinations (usually F5 and F6) for brightness up and down. Double-check these keys aren’t accidentally disabled within the BIOS or through a utility. Also, check if any other keys are not working, because it may be a malfunction of the internal keyboard.
C. Adjust Brightness via the Action Center/Quick Settings: Windows' Quick Settings panel (accessed via the system tray) often includes a slider for brightness control. Try adjusting the brightness from there. This can help isolate whether the problem lies specifically with the physical keys.
Step 2: Dive into Display Driver Solutions
Display driver problems are exceedingly common. We'll explore several approaches to resolve these.
A. Update Your Display Driver: Navigate to the Device Manager (search for "Device Manager" in the Windows search bar). Expand the "Display adapters" section. Right-click on your graphics card (e.g., Intel HD Graphics, NVIDIA GeForce) and select "Update driver." Choose "Search automatically for drivers." Windows will then search for and install the latest available driver. Restart your ThinkPad after the update.
B. Reinstall Your Display Driver: If updating doesn't work, try reinstalling the driver. In Device Manager, right-click on your graphics card, select "Uninstall device," and confirm the uninstall. Restart your ThinkPad. Windows should automatically attempt to reinstall the driver upon boot. If not, you can manually download the latest driver from the Lenovo support website (see section on Lenovo Support).
C. Roll Back Your Display Driver: If the problem started recently, a driver update might be the culprit. Go back to the Device Manager. Right-click on your graphics card, select "Properties," go to the "Driver" tab, and click "Roll Back Driver" if the option is available.
Step 3: Delving into Power Plan Settings – A Crucial Adjustment
Windows Power Plans influence everything. Incorrect settings can disable brightness controls.
A. Access Power Plan Settings: Search for "Power & sleep settings" in the Windows search bar and open it. Select “Additional power settings."
B. Verify Active Power Plan: Examine the currently active power plan (e.g., Balanced, Power Saver, High Performance). Consider switching to a different plan. For example, the “Power Saver” plan often aggressively dims the screen to conserve energy.
C. Customize Your Power Plan: Click “Change plan settings” next to your selected power plan, then "Change advanced power settings." Expand "Display." Ensure the "Turn off display after" setting isn't overriding your desired brightness level. Adjust the “Dim display after” settings, too, ensuring they allow for brightness adjustments.
D. Restore Default Power Plan Settings: If customizations are proving problematic, consider restoring your active power plan to its default settings. This can help untangle any overly aggressive power-saving configurations. Click "Restore default settings" within the advanced power settings.
Step 4: BIOS/Firmware Checks and Updates
BIOS updates can sometimes resolve underlying hardware communication problems that affect brightness.
A. Access the BIOS: The method for accessing the BIOS varies by ThinkPad model. Typically, you must press a key (usually F1, F2, or Del) during the boot process. Consult your ThinkPad's user manual for the specific key.
B. Examine BIOS Settings: Within the BIOS, look for settings related to display or power management. Ensure that any brightness control or power-saving features aren't inadvertently enabled to a point that is causing issues.
C. Update the BIOS (With Caution): BIOS updates can fix hardware-related issues, but they carry a risk. Ensure you have a stable power supply during the update. Find the BIOS update for your specific ThinkPad model on the Lenovo support website. Follow the instructions carefully.
Step 5: Lenovo Vantage and Other Utilities – Leveraging Lenovo's Tools
Lenovo provides several utilities designed to optimize your ThinkPad's performance and settings.
A. Lenovo Vantage: Lenovo Vantage is a key utility for managing your ThinkPad. Download and install it from the Microsoft Store if you don’t have it already. Within Lenovo Vantage, check for updates (including driver updates), and examine the display settings. There may be controls for brightness and screen optimization.
B. Other Lenovo Utilities: Explore other Lenovo-specific utilities that might relate to display settings. If you have pre-installed software, look to see if it has any settings.
Step 6: The Nuclear Option - OS Reinstallation (Last Resort)
If all other solutions fail, consider reinstalling your operating system.
A. Back Up Your Data: Prior to the reinstallation, back up all critical data to an external drive or cloud storage. This process will erase your current installation.
B. Create Installation Media: Download the latest Windows ISO from Microsoft's website and create bootable installation media (e.g., a USB drive) using the Media Creation Tool.
C. Perform a Clean Installation: Boot from the installation media, and perform a clean installation of Windows. During the installation, ensure you select the correct partitions to install Windows on. After the installation, reinstall your drivers.
Step 7: Isolating Hardware Issues - A Careful Examination
If software solutions consistently fail, a hardware problem is more probable.
A. External Monitor Test: Connect an external monitor to your ThinkPad. If the brightness controls work on the external monitor, the problem likely lies with the ThinkPad's display panel or its internal connections.
B. Physical Inspection (for Experts): Check the following; only if you are confident in your electronics skills.
- Keyboard Cable: Disconnect and reconnect the keyboard cable within the ThinkPad.
- LCD Cable: Carefully inspect the LCD cable that connects the display panel to the motherboard. Check for any loose connections or damage.
C. Professional Repair If you suspect a hardware issue and are not comfortable performing internal repairs, seek professional assistance. Contact a reputable computer repair shop or Lenovo's authorized service center.
Step 8: Leveraging Lenovo Support – The Official Help
For further assistance, utilize Lenovo’s resources.
A. Lenovo Support Website: The Lenovo support website is a treasure trove of information. Start by entering your ThinkPad's serial number or model number to access specific resources for your device.
B. Driver Downloads: Download the latest drivers for your ThinkPad, including display drivers, from the Lenovo support website.
C. User Forums: The Lenovo support forums offer a community of users who may have encountered similar problems and can offer valuable insights.
D. Contact Lenovo Support: If you've exhausted all troubleshooting steps, and are still unable to resolve the issue, contact Lenovo's customer support. Be prepared to provide detailed information about the steps you've taken, your ThinkPad's model and serial number, and a clear description of the problem.
Maintaining Your ThinkPad: Preventative Measures
Prevent future brightness problems.
- Regular Updates: Keep your operating system, drivers, and BIOS updated.
- Cleanliness: Avoid extreme temperatures and humidity. Regularly clean your ThinkPad's vents to prevent overheating.
- Power Considerations: Use the appropriate power adapter. Avoid using cheap third-party adapters, as these can sometimes cause issues with power management.
- Vantage Monitoring: Check Lenovo Vantage's updates regularly.
By systematically working through these steps, you're well
