how to get your mac laptop keyboard to work
Title: I broke my MacBook's F key
Channel: Bog
I broke my MacBook's F key by Bog
how to get my macbook pro keyboard to work, how to get macbook keyboard to work, why is my laptop keyboard not working mac
Mac Keyboard DEAD? FIX It NOW! (Easy Steps!)
Mac Keyboard Troubles? Don't Panic! Quick Fixes to Get Typing Again.
Ever stared at a blank Mac screen, desperately wanting to type, only to find your keyboard stubbornly unresponsive? That sinking feeling is all too familiar! However, before you resign yourself to a frantic Apple Store visit or expensive repairs, breathe easy. More often than not, a dead Mac keyboard has a surprisingly simple solution. This guide will walk you through potential fixes, getting you back to productivity (or fun!) in no time. Therefore, let's dive in!
Is It Really Dead? The Initial Checks
First, before anything else, confirm the keyboard is truly dead. Ensure it’s not a momentary glitch. Moreover, it is always best to be thorough. Try these quick checks:
- Restart Your Mac: This age-old trick works wonders. Sometimes, a simple restart clears temporary software hiccups. To clarify, give it a shot.
- Check the Connector (If Applicable): If you are using an external keyboard, ensure it's properly connected. Ensure the USB cable is securely plugged into both your Mac and the keyboard. In other words, wiggle the cable slightly to see if the connection is loose.
- Battery Check (Wireless Keyboards): For wireless keyboards, low batteries are the most common culprits. Replace the batteries with fresh ones. Double-check the power switch is turned on. Hence, these steps are essential.
- Try Another USB Port (If External): Sometimes, a faulty USB port can cause issues. Switch the cable to another port on your Mac.
- Check for Software Updates: Sometimes, your Mac might need an update. Consequently, check to see if new versions need to be installed.
Troubleshooting Steps for a Non-Responsive Keyboard
Assuming the basic checks didn't work, it's time to investigate further. Following these steps in order can help identify the root cause. Then, solve the problem quickly.
Bluetooth Connection Issues (Wireless Keyboards): Is your wireless keyboard refusing to connect? Therefore, this could stem from Bluetooth complications. Head to System Preferences, then Bluetooth. Ensure Bluetooth is on, and your keyboard is paired. If not, try deleting and re-pairing the keyboard. Also, keep the keyboard close to your Mac. This improves connectivity. Furthermore, check for interference from other Bluetooth devices.
Keyboard Shortcuts & Input Sources: Accidental presses of keyboard shortcuts can sometimes lock you out of typing. Be careful, but explore this possibility. Also, check your input sources by clicking on the keyboard icon (usually in the menu bar). Make sure the correct language is selected. Sometimes, the wrong input source locks the keyboard.
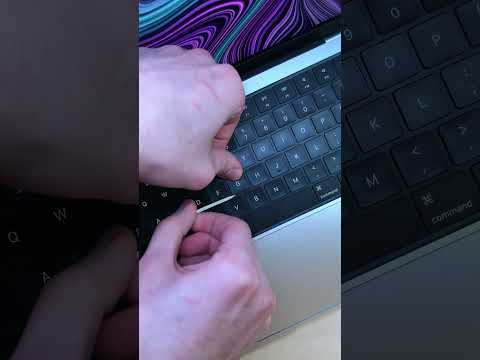
Clean the Keyboard: Dust, crumbs, and other debris can wreak havoc on your keyboard. This is especially true for older keyboards. Turn off your Mac. Then, carefully turn the keyboard upside down and gently shake it. Also, use compressed air to dislodge any stubborn particles.
Reset Your Mac's NVRAM/PRAM: This is a more advanced troubleshooting step. NVRAM (Non-Volatile Random-Access Memory) stores certain settings. Resetting it can resolve some keyboard issues. Shut down your Mac completely. Then, turn it back on while immediately holding down the Option, Command, P, and R keys. Continue holding the keys until you hear the startup chime a second time. Next, release the keys and let your Mac boot up.
Software Conflicts and Further Investigation
If the above steps still haven't resolved the issue, the problem could relate to software or hardware problems.
- Check for Conflicting Apps: Certain apps can interfere with keyboard functionality. In other words, consider which apps you recently installed. Try launching your Mac in Safe Mode (hold the Shift key during startup). If the keyboard works in Safe Mode, a third-party app is likely the culprit.
- Run Apple Diagnostics: Apple provides built-in diagnostics to check for hardware problems. To use it, turn off your Mac. Then, turn it back on and immediately press and hold the D key. The diagnostics will run and identify any hardware issues.
- Reinstall the macOS: As a last resort, reinstalling the macOS can fix underlying software problems. However, be sure to back up your data first. This wipes your computer.
- Hardware Malfunctions: If all else fails, the keyboard may have a hardware fault. Consider taking your Mac to an Apple Store or authorized repair shop. They can diagnose the issue and provide repair options.
Preventative Measures: Keeping Your Keyboard Happy
Prevention is always better than cure. Likewise, taking care of your keyboard helps extend its life and avoid future problems.
- Regular Cleaning: Clean your keyboard often. Use a soft cloth or compressed air to remove dust and debris.
- Avoid Liquids: Keep liquids away from your keyboard. Spills can cause serious damage.
- Use a Keyboard Cover: A keyboard cover can protect against spills and dust.
- Gentle Use: Avoid banging on the keys or using excessive force.
Conclusion: Typing Triumph Awaits!
Dealing with a dead Mac keyboard is frustrating. However, hopefully, this guide helps you regain control. From simple restarts to more advanced troubleshooting steps, you have multiple options. So, work through the steps, remain patient, and get back to typing. Hopefully, your keyboard will be working like new. Good luck, and happy typing!
HP Laptop Mouse Nightmare on Windows 8? FIX IT NOW!Mac Keyboard DEAD? FIX It NOW! (Easy Steps!)
Hey there, fellow Mac users! Ever stared at your beautiful, sleek MacBook or iMac, only to be met with the dreaded silence of a dead keyboard? It’s a heart-stopping moment, I know. You reach for the keys, hit the "A," and… nothing. Panic sets in. Deadlines loom. Your carefully crafted witty email needs writing. Don't sweat it! We’ve all been there, and trust me, in many cases, it’s a fixable situation. Think of it like a minor hiccup on the road to creative genius. We're going to explore why your Mac keyboard might be MIA and, more importantly, how to revive it! Let's jump right in and bring those keys back to life, shall we?
1. The Silence of the Keys: Understanding the Problem
Before we start frantically clicking and restarting, let's take a moment to understand what might be going on. Just like when your car won't start, there are many potential culprits. The problem could range from something simple, like a stuck key, to something a bit more complex, like a software glitch or hardware failure. Knowing the potential causes will help us troubleshoot more effectively. Think of it as a detective prepping to solve a case!
2. The Obvious Suspects: Quick & Dirty Checks
Let's start with the easy stuff. These are the quick wins that often solve the problem.
- Is it Plugged In? (For External Keyboards): Sounds silly, I know, but sometimes the simplest solution is the one we overlook! Double-check that your external keyboard is securely connected, whether it’s wired or wireless.
- Battery Check (Wireless Keyboards): Running on a wireless keyboard? Make sure the batteries aren't dead. Swap them out for fresh ones. Trust me, I spent a whole afternoon once thinking my keyboard was broken, only to realize the batteries were just that depleted.
- The Power Button: This is for external keyboards. Is it switched on? Did you accidentally bump the power switch on the side? It happens!
- Restart Your Mac: The classic "have you tried turning it off and on again?" routine. This often works wonders by clearing out minor software glitches. Restarting closes all processes and refreshes the system.
- Bluetooth Problems? (Wireless Keyboards): Check that Bluetooth is enabled if you are using a wireless keyboard. Go to System Preferences (or System Settings in newer macOS versions) -> Bluetooth. Ensure Bluetooth is ON and that your keyboard is connected. Sometimes a simple disconnect and reconnect fixes the issue. Consider it a digital reset button for your keyboard.
3. Stuck in the Mud: Dealing with Sticky Keys
Sticky keys are like tiny little rebellious soldiers, refusing to cooperate. This is one of the most common issues.
- Visual Inspection: Grab a flashlight and give your keyboard a good once-over. Look for crumbs, dust bunnies, or anything that might be obstructing the keys. I've found everything from tiny pet hairs to rogue coffee granules lodged in my keyboard!
- Gentle Cleaning: Use compressed air to blow out any debris. Angle the can slightly to avoid blowing dust deeper into the keyboard. Avoid using excessive force, as you don't want to damage the keys.
- The "Repeat" Test: If you notice a key feels sticky, try gently pressing and releasing it repeatedly. Sometimes, this simple action breaks the bond.
4. Software Shenanigans: Troubleshooting System-Level Issues
Sometimes, the problem isn't physical; it's software-related.
- Check System Preferences/Settings: Head back to System Preferences (or System Settings) and click on "Keyboard." Make sure the settings are correct. Check the "Modifier Keys" and ensure they are set as you expect.
- Software Conflicts: Occasionally, third-party software can interfere with your keyboard's functionality. Try closing unnecessary applications and see if that helps.
- Safe Mode: Restart your Mac in Safe Mode. This loads only essential system components and can help determine if a third-party app is causing the issue. To enter Safe Mode, restart your Mac and immediately hold down the Shift key until you see the Apple logo.
- Check for Updates: Outdated software can sometimes cause issues. Make sure your macOS is up-to-date by going to System Preferences/Settings -> Software Update.
5. Advanced Troubleshooting: Diving Deeper When Necessary
If the basic troubleshooting doesn't work, we might need to get a little more techy. Don’t worry; it's not brain surgery!
- Reset the SMC (System Management Controller): The SMC controls various hardware functions, including the keyboard. The procedure for resetting the SMC varies depending on your Mac model (with or without a T2 security chip). Search online for specific instructions for your Mac.
- Reset NVRAM/PRAM: NVRAM (Non-Volatile Random Access Memory) stores certain settings related to your Mac. Resetting it can sometimes resolve keyboard issues. To reset NVRAM/PRAM, restart your Mac and immediately hold down the Option, Command, P, and R keys until you hear the startup chime again.
- Test in Another User Account: Create a new user account and log in. This can help determine if the issue is specific to your user profile or system-wide. If the keyboard works in the new account, the problem lies within your original user profile.
- External Keyboard Test: If you have an external keyboard, connect it. If it works, you've narrowed down the problem to the built-in keyboard.
6. Hardware Issues: When to Seek Professional Help
Sometimes, despite all our efforts, the problem is hardware-related. This is when it's time to call in the experts, or, you know, Apple.
- Liquid Damage: If you've spilled liquid on your keyboard, it's crucial to get it professionally cleaned and repaired as soon as possible. Liquid damage can cause corrosion and short circuits.
- Physical Damage: If the keyboard has suffered physical damage (dropped, stepped on, etc.), it's likely a hardware issue.
- Keyboard Failure: If none of the previous steps work, it's possible the keyboard has simply failed.
7. Preventing Future Keyboard Calamities
Prevention is key! Here are some simple tips to keep your keyboard happy:
- Regular Cleaning: Dust and crumbs are your keyboard's worst enemies. Clean it regularly with compressed air or a soft cloth.
- Protective Covers: Consider using a keyboard cover, especially if you tend to eat or drink near your Mac.
- Proper Storage: When not in use, store your keyboard in a safe place to prevent damage.
- Gentle Usage: Don't hammer away at the keys. Type gently, like you're caressing the words onto the screen.
8. The Importance of Backup: Safeguarding Your Work
While we are addressing the keyboard, it is a good time to think about the rest of your data! If your keyboard is dying, what else could fail?
- Time Machine: Apple’s built-in backup solution is a lifesaver. Set it up to automatically back up your Mac to an external drive. That way, even if the worst happens (keyboard failure, hard drive crash, etc.), you can restore your data.
- Cloud Storage: Use cloud storage services like iCloud Drive, Dropbox, or Google Drive to back up important files.
- External Drive: Always back up to an external drive.
9. Using the On-Screen Keyboard: A temporary Solution
If your keyboard is completely unresponsive, don't despair! You can use the on-screen keyboard to navigate your Mac and type. It can seem slow at first, but it can be a lifesaver in a pinch!
- Accessing the On-Screen Keyboard: Go to System Preferences (or System Settings) -> Accessibility -> Keyboard. Then, turn on the "Show Keyboard" option.
- Key Commands: Remember essential keyboard shortcuts and commands that can be used without the physical keyboard
10. Exploring External Alternatives: A Temporary, or Permanent change
If your built-in keyboard is beyond repair, or while it is being repaired, an external keyboard is a great solution.
- Wired or Wireless: Both types of external keyboards are supported.
- Ergonomics: Choose an ergonomic keyboard to reduce stress.
- Customization: Some keyboards have USB ports for extra functionality and can have additional features you may enjoy.
11. The DIY Repair Route
For those who are tech-savvy and comfortable with disassembling electronics, there are resources available online for DIY keyboard repairs. Proceed with caution, and be aware that you do so at your own risk!
- Online Tutorials: YouTube and various tech websites offer tutorials on Mac keyboard repair.
- Replacement Parts: You can purchase replacement keys or even complete keyboard assemblies online.
- Tools: You will need the right tools, such as tiny screwdrivers and a spudger.
12. What to Do If You're Still Under Warranty
If your Mac is still under warranty or AppleCare, DO NOT attempt any DIY repairs. Take it to Apple or an authorized service provider.
- Apple Support: Contact Apple Support
How to Fix Keyboard Macbook Not Working Repair Keys

By iSolution How to Fix Keyboard Macbook Not Working Repair Keys by iSolution
How to Remap Windows Keyboard Modifier Keys in MacOS Easy Tutorial

By Extremely Simplified How to Remap Windows Keyboard Modifier Keys in MacOS Easy Tutorial by Extremely Simplified
Windows Keyboard on a Mac

By Peter Kos Windows Keyboard on a Mac by Peter Kos

Title: 7 Ways To Fix a Mac Keyboard That Is Not Working Correctly
Channel: macmostvideo
7 Ways To Fix a Mac Keyboard That Is Not Working Correctly by macmostvideo
Wifi On Laptop
Mac Keyboard DEAD? Reviving Your Input Device: A Comprehensive Troubleshooting Guide
Encountering a non-responsive Mac keyboard can be a frustrating experience, instantly transforming a productive workflow into a standstill. Fear not! This guide provides a comprehensive, step-by-step approach to diagnosing and resolving keyboard issues, getting you back to typing with ease. We'll explore a spectrum of potential causes and meticulously detail the most effective solutions, ensuring you're equipped to handle any keyboard malfunction. Let's dive in!
1. Initial Assessment: Identifying the Problem and Gathering Information
Before launching into a fix, the first vital step is a calm and collected assessment. This preliminary stage involves observing the keyboard's behavior and gathering crucial information that will guide the troubleshooting process.
- Observe the Symptoms: Is every key unresponsive, or are only specific keys malfunctioning? Does the keyboard light up, or is it completely dark? Does the keyboard emit any unusual sounds? Are you using a built-in keyboard (on a MacBook, for instance) or an external keyboard? The answers to these questions will help narrow down the possible causes.
- Note Recent Changes: Have you recently installed any new software, updated your operating system, or connected any new hardware? These changes can sometimes introduce conflicts that affect peripheral devices like keyboards.
- Document the Model: Knowing your Mac model (e.g., MacBook Pro 16-inch, iMac 27-inch) and the specific keyboard model (if external) is critical. This information is often needed to find specific troubleshooting steps and replacement parts if necessary.
- Check the Connection: For external keyboards, make sure the keyboard is securely connected to your Mac, either via USB or Bluetooth. Try a different USB port, or if using Bluetooth, make sure Bluetooth is enabled on your Mac.
2. The Elementary Checks: Basic Troubleshooting Steps to Start With
Sometimes, the solution is simpler than expected. Let’s go through some basic checks that could potentially solve the problem.
- Restart Your Mac: This is often the first and most effective solution. A simple restart can resolve temporary software glitches that might be interfering with keyboard functionality. Click the Apple menu in the upper-left corner of your screen and select "Restart."
- Check Keyboard Battery (Wireless Keyboards): If you're using a wireless keyboard, ensure that the batteries are correctly installed and have sufficient charge. Replace the batteries with new ones, even if they are seemingly still working.
- Inspect the USB or Lightning Cable (Wired Keyboards): Ensure the cable is securely plugged into both the keyboard and your Mac. Try a different USB cable, and if possible, test the keyboard with a different computer to rule out a hardware issue.
- Clean the Keyboard: Dust, crumbs, and other debris can get lodged under the keys and interfere with their function. Gently clean your keyboard using compressed air and a soft brush.
3. Advanced Troubleshooting: Diving Deeper Into the Cause
If the elementary steps fail, it’s time to move ahead to these advanced techniques to find the cause of the issue.
- Software Conflicts: The Root of the Problem
- Safe Mode Start-up: Booting your Mac in Safe Mode can help determine if the problem lies within installed software or drivers. Restart your Mac, and immediately press and hold the Shift key until the login window appears. This will disable non-essential software and extensions. If the keyboard works in Safe Mode, then a third-party app might be the culprit.
- Identify Problematic Apps: After exiting Safe Mode, you can identify the conflicting app by process of elimination. Disable or uninstall recently installed software, especially apps related to keyboard customization or input methods.
- Check for Updates: Ensure your operating system, system drivers, and installed software are up to date. Outdated software can sometimes conflict with hardware functionality. The Software Update option can be found in System Preferences.
- Input Source Settings:
- Verify Input Source: Ensure the correct input source is selected in System Preferences > Keyboard > Input Sources. If you accidentally selected the wrong input source (like a foreign language keyboard layout), your keys may appear to be malfunctioning.
- Add Input Source If Necessary: If you use multiple keyboard layouts, verify that your preferred layout is selected. If you are missing a keyboard layout, add it using the "+" button in Input Sources settings.
- Accessibility Settings:
- Examine Accessibility Settings: Accessibility settings on your Mac can interfere with keyboard functionality. Go to System Preferences > Accessibility and check for any enabled features that might impact keyboard behavior, such as "Sticky Keys" or "Slow Keys." Disable these features if necessary.
- Screen Keyboard: Go to System Preferences > Accessibility > Keyboard and make sure the "Show Accessibility Keyboard" is not checked unexpectedly, because it might interfere with the Keyboard.
- Bluetooth Troubleshooting (For Wireless Keyboards)
- Reconnect the Bluetooth Device: Go to System Preferences > Bluetooth and ensure Bluetooth is enabled. If your keyboard is not listed, try to connect it. If it’s listed but not connected, click "Connect." If it still isn't working, remove the keyboard and pair it again.
- Bluetooth Interference: Bluetooth signals can be susceptible to interference. Try moving your keyboard and Mac closer to each other, or avoid placing your keyboard near other devices that use Bluetooth or Wi-Fi, such as a microwave, wireless router, or other wireless gadgets.
4. Hardware Issues: When the Problems Go Deeper
If the troubleshooting steps do not result in finding the malfunction, It’s time to consider that there might be damage to your computer or keyboard.
- External Keyboard Hardware Tests:
- Test the Keyboard on Another Mac: If you have access to another Mac, connect your external keyboard and see if it works. This will help determine if the problem is with the keyboard or with your original Mac.
- Check for Physical Damage: Carefully inspect the keyboard for any signs of physical damage, such as spilled liquids, cracked keys, or dented casing. If any damage is found, it might be necessary to repair or replace the keyboard.
- Internal Keyboard Hardware Tests:
- Run Apple Diagnostics: For built-in keyboards, run Apple Diagnostics (formerly known as Apple Hardware Test) to check for any hardware-related issues on your Mac. To do this, shut down your Mac. Then, turn it back on and immediately press and hold the "D" key until the diagnostics start.
- Key Replacement and Repairs:
- Individual Key Replacement: Some mechanical keyboards allow for individual key replacement. If only a few keys are malfunctioning, replacing the individual key switches might be a cost-effective solution.
- Professional Cleaning: Accumulated dirt and debris can compromise the keyboard functionality. Getting your keyboard professionally cleaned by a specialist could be a possible solution depending on your keyboard.
- Contact Apple Support or Visit an Authorized Service Provider If you've tried all the troubleshooting steps and the keyboard still isn't working, it may be necessary to contact Apple Support or visit an authorized service provider for assistance.
5. Preventing Future Keyboard Issues: Proactive Measures
After successfully restoring your keyboard’s functionality, it's crucial to adopt preventative measures to minimize the risk of future malfunctions.
- Regular Maintenance:
- Regular Cleaning: Make keyboard cleaning a regular part of your computer maintenance routine.
- Periodic Updates: Keep your operating system and software up to date to address security vulnerabilities and compatibility issues.
- Protective Measures:
- Keyboard Covers: Use a keyboard cover to protect your keyboard from dust, spills, and other debris.
- Safe Environment: Avoid eating or drinking near your keyboard to prevent crumbs and spills from damaging the keys.
- Backups and Data Security:
- Regular Backups: Regularly back up your data to prevent data loss if your Mac experiences hardware failure or other issues.
- Data Encryption: Consider encrypting your hard drive to protect your data in case of theft or loss.
By carefully following these steps, you can diagnose and resolve Mac keyboard issues with confidence, restoring your productivity and ensuring a smooth computing experience. Remember patience and method—they are essential for successful troubleshooting.
