touch screen on lenovo laptop not working

Title: How to Turn Your Touchscreen On and Off with a Lenovo Computer
Channel: Egghead Fixers
How to Turn Your Touchscreen On and Off with a Lenovo Computer by Egghead Fixers
touch screen on lenovo laptop not working, touch screen on lenovo thinkpad not working, touch screen stopped working on lenovo laptop, why did my touch screen stop working on my lenovo laptop, lenovo ideapad 5 touchscreen not working
Lenovo Touchscreen Disaster! (Solved!)
Lenovo Touchscreen Troubles? Breathe Easy! (Here's the Fix)
Remember that sinking feeling when your shiny new Lenovo touchscreen decided to play dead? We've all been there. It's frustrating. You paid good money. Suddenly, your sleek device transforms into a digital paperweight. But don't despair! You're not alone. And more importantly, there's a solution.
The Unexpected Hiccup: When Touch Fails
The screen froze. The cursor vanished. Your fingers tap in vain. This is the digital equivalent of a locked door. It’s a common Lenovo touchscreen complaint. First, that initial panic sets in. Then, the inevitable troubleshooting begins. Rebooting feels like the obvious first step. It's often the go-to solution. However, sometimes that alone isn't enough.
Identifying the Culprit: Pinpointing the Problem
Before diving into fixes, consider the cause. Is it a software glitch? Perhaps a driver issue? Maybe it's a hardware malfunction. Consequently, understanding the root of the problem is crucial.. Generally, the problem falls into several categories.
- Software Conflicts: Programs behaving badly can interfere. These can impact the touchscreen's functionality.
- Driver Issues: The drivers manage communication. They oversee hardware. Outdated or corrupted drivers can cause issues.
- Hardware Failures: Sometimes, the screen itself gives in. This is more serious. However, it’s less frequent.
The Driver Dilemma: A Simple Solution
Driver issues are often the easiest to resolve. Therefore, let's start there. Firstly, locate your device manager. Secondly, search for your touchscreen device. Often, it's listed under "Human Interface Devices." Thirdly, check the driver status. Is there a yellow warning icon? If so, you have a driver problem. Alternatively, right-click the device. Select "Update driver." Choose "Search automatically for drivers." Let Windows handle the rest. After that, restart your Lenovo. Hopefully, your touchscreen is working now.
Software Shenanigans: Taming the Troublesome Apps
Software conflicts can be sneaky. For example, a newly installed program might be the culprit. Try booting in safe mode. This loads only essential drivers and programs. Does the touchscreen work in safe mode? If yes, a software conflict exists. Subsequently, you'll need to uninstall recent programs. Test your touchscreen after each uninstall. Identify the problematic application. Consequently, you can reinstall it or find an alternative.
Hardware Headaches: Exploring Physical Damage
Unfortunately, sometimes it's a hardware issue. Examine the screen for visible damage. Cracks, scratches, or dents are obvious signs. Furthermore, check the connections. In other words, open your device (if comfortable). Ensure the display cable is securely connected. Because, these cables can sometimes become loose. However, be very careful. Working with hardware can void your warranty. Therefore, consider professional help if you're unsure.
The Power Cycle: A Classic Reset
It sounds simple, but a full power cycle can work wonders. Shut down your Lenovo completely. Unplug the power adapter. Remove the battery (if removable). Then, hold the power button for 30 seconds. This discharges any residual power. Subsequently, reassemble your device. Then, power it on. This can reset the system. It clears temporary files. It can fix minor glitches.
Seeking Professional Help: When to Call in the Experts
If all else fails, don’t hesitate. Contact Lenovo support. Moreover, consider bringing your device to a repair shop. Indeed, these professionals have the right tools. Experienced technicians can diagnose the problem accurately. They can offer expert repairs. Consequently, this saves you time and stress. After all, your peace of mind is important.
Prevention is Key: Keeping Your Touchscreen Happy
Once your touchscreen is fixed, protect it. Install reliable antivirus software. Regularly update drivers. Avoid downloading files from untrusted sources. Moreover, clean your screen regularly. In fact, use a soft, lint-free cloth. Avoid harsh chemicals. Besides, handle your device with care. Ultimately, these precautions extend its lifespan. Because prevention is always better than cure.
The Happy Ending: Your Touchscreen is Back!
So, your Lenovo touchscreen is back in action! Celebrate! You understand what to do now. Therefore, you can tackle future problems. You’ve regained control. Furthermore, you’re no longer stranded. Your digital world now functions perfectly once again. Enjoy your revitalized experience.
Laptop Keys Not Working? This SHOCKING Fix Will BLOW Your Mind!Lenovo Touchscreen Disaster! (Solved!)
Hey tech enthusiasts, ever felt that gut-wrenching feeling when your sleek, oh-so-modern Lenovo touchscreen decides to stage a rebellion? We've all been there. One minute you’re swiping through your emails, the next, bam! Your screen’s a digital diva, refusing to cooperate or, frankly, acting like it's got a mind of its own. Sound familiar? This article dives deep into the "Lenovo Touchscreen Disaster" saga, exploring the common culprits, the frustrating moments, and, most importantly, how we can bring our touchscreens back to their former glory. Think of this as your go-to guide for navigating the choppy waters of touchscreen troubles.
The Initial Panic Attack: When Your Lenovo Screen Goes Rogue
It always starts with a small hiccup, doesn't it? A delayed response, a phantom click, maybe even a complete freeze. Then, the panic sets in. Suddenly, you’re scrambling, googling furiously, wondering if you've bricked your beloved Lenovo laptop or tablet. We've been there, trust me. That moment of helplessness is a rite of passage for any tech user. You feel like you're stranded on a digital island, desperately trying to send a signal flare (aka, a frantic search query) for help.
Identifying the Villain: Unmasking the Root Causes of the Touchscreen Tantrum
Before we start throwing solutions at the problem, we need to identify the antagonists, the reasons behind the touchscreen turmoil. It can be a bit like detective work, but fear not! We'll uncover the usual suspects:
- Driver Drama: Think of drivers as the messengers that translate what you want your touchscreen to do. Outdated or corrupted drivers are like broken telephones, leading to miscommunication and malfunction.
- The Hardware Hang-Up: Okay, let's be honest, sometimes it’s the hardware itself. A cracked screen, a loose connection, or physical damage can wreak havoc.
- Software Shenanigans: Software conflicts, glitches, and even malware can interfere with your touchscreen's functionality.
- Dirty Deeds (Literally!): Believe it or not, a smudged screen, covered in fingerprints and dust, can impact touch sensitivity. Remember that pizza night? Yeah, that could've contributed!
Troubleshooting 101: Your First Line of Defense
Alright, deep breaths. Before you consider drastic measures, let's try a few simple fixes. These are your front-line maneuvers, your digital first aid.
- The Restart Ruse: This is tech's universal cure-all, a digital reset button. Restart your Lenovo device. Sometimes, it's really that simple.
- Check the Connections: For laptops, ensure the screen is properly connected. This might involve a quick inspection or potentially a professional check-up.
- Clean Up Crew: Gently wipe down your screen with a microfiber cloth. Remove any debris that might be causing touch problems. Consider it a spa treatment for your device!
- Power Cycle: If a restart doesn't work, try a full power cycle. Turn off your device, disconnect the charger (if plugged in), and wait a minute or two before powering it back on.
Driver Diagnosis: Updating and Reinstalling Like a Pro
Drivers are critical, so let's check if they are up to par. We will guide you through the process:
- Access Device Manager: Search for "Device Manager" in the Windows search bar.
- Locate Your Touchscreen: Look for a section like "Human Interface Devices" or "HID-compliant touch screen."
- Update the Driver: Right-click your touchscreen device and choose "Update driver." Windows will search for updates automatically.
- Reinstall if Necessary: If the update doesn't work, try uninstalling the driver (right-click, "Uninstall device") and restarting your computer. Windows should automatically reinstall a fresh driver.
Software Conflicts and Malware Mayhem
Software conflicts can be sneaky, so they need our close attention:
- Close Background Apps: Some apps might be hogging resources, interfering with your touchscreen. Close unnecessary programs running in the background.
- Malware Scan: Run a full system scan with your antivirus software. Malware can seriously mess with things.
- System Restore (If Possible): If the problem started recently, consider using System Restore to revert to a previous point in time when your touchscreen was working correctly.
The Hardware Hurdles: When It's More Than Just Software
Sometimes, the issue is hardware. Sorry to break it to you, but acceptance is the first step.
- Inspect for Damage: Carefully examine your screen for cracks, chips, or any physical damage.
- Check the Connectors: If you're comfortable with taking things apart (and if your warranty allows), you could try to gently check screen connections. However, it is always best to seek professional help.
- Professional Repair: If there's physical damage or you're not comfortable with DIY repairs, take your Lenovo device to a reputable repair shop.
Calibration Chronicles: Fine-Tuning Your Touch Experience
Your touchscreen might just need a little calibration to ensure it's responding correctly.
- Access Touch Calibration: In Windows, search for "Calibrate the screen for pen or touch input."
- Follow the Prompts: The system will guide you through the calibration process. You'll likely need to tap specific points on the screen.
The Warranty Workout: Utilizing Your Lenovo Guarantee
Don't forget about your warranty!
- Check Your Coverage: Find your Lenovo device's serial number and check your warranty status on the Lenovo website.
- Contact Lenovo Support: If your device is under warranty and the issue is caused by a manufacturer defect, contact Lenovo support for assistance.
External Devices and Interference: Keeping Things Clean
External devices can sometimes cause issues.
- Disconnect Peripherals: Unplug any external devices (USB devices, external monitors) to see if they're interfering with your touchscreen.
- Avoid Direct Sunlight and Heat: Extreme temperatures can affect touchscreen performance, so keep your device out of direct sunlight and away from heat sources.
The Factory Reset Option: A Last Resort Solution
If all else fails, a factory reset might be the only solution. This will wipe your device, so back up your data!
- Backup Your Data: This is crucial!
- Initiate the Reset: You can initiate a factory reset through the Windows settings. Search for "Reset this PC." Follow the prompts, and choose to remove all your data.
Preventive Measures: Keeping Your Touchscreen Happy
Prevention is key! Here's how to keep your touchscreen happy:
- Regular Cleaning: Wipe your screen regularly with a microfiber cloth.
- Keep Software Updated: Regularly Update your operating system and drivers.
- Use a Screen Protector: Consider a screen protector to guard against scratches and damage.
Avoiding Future Touchscreen Troubles: Long-Term Strategies
What can you do beyond the basics to keep things smooth sailing?
- Invest in quality accessories: Opting for quality chargers and USB-C hubs can improve your device experience.
- Monitor Performance: Keep an eye on your device's performance by regularly checking activity logs and resource usage.
- Stay Informed: Keep on top of the latest software updates and security notes from Lenovo to be in the know.
When to Call in the Calvary: Seeking Professional Help
Sometimes, it's best to admit we're in over our heads.
- Severe Hardware Damage: If the screen is cracked or damaged, professional repair is almost always necessary.
- Persistent Software Issues: If you've tried all the software fixes and your touchscreen is still acting up, a professional might be able to diagnose the root cause.
- Lack of Comfort with DIY: If you're not comfortable taking apart your device, don't risk it – seek expert help.
Closing Thoughts: Back in Touch with Success!
And there you have it! We've journeyed through the "Lenovo Touchscreen Disaster (Solved!)" experience, equipped with knowledge and solutions. Remember, a little troubleshooting, a bit of patience, and maybe a good cleaning can work wonders. We trust in you to solve it! Don't despair, keep calm, and keep swiping!
FAQs: Your Lenovo Touchscreen Questions Answered
1. My Lenovo touchscreen isn't responding at all. What should I do first?
Start with the basics: restart your device and clean the screen. Then, check your drivers and ensure they're updated. If that doesn't work, try a power cycle (turning it off, unplugging it, and waiting a minute).
2. My touchscreen works, but the response is delayed. What's the problem?
Delayed responsiveness can be caused by outdated drivers, software conflicts, or a full hard drive. Update your drivers, close unnecessary apps, and consider running a disk cleanup.
3. My touchscreen is registering phantom touches. What's going on?
Phantom touches can be caused by a variety of factors, including a dirty screen, hardware damage (like a cracked screen), or software conflicts. Clean the screen thoroughly, check for physical damage, and run a malware scan.
4. I dropped my Lenovo, and now the touchscreen is broken. Is it fixable?
Most likely, yes,
ThinkPad Touchscreen DEAD? 😱 (11e 20d9/20da Laptop Fix!)Laptop Touch Screen Stopped Working shorts pc pcrepair laptoprepair computerrepair

By Matt's Computer Services Laptop Touch Screen Stopped Working shorts pc pcrepair laptoprepair computerrepair by Matt's Computer Services
5 Fixes - 2024 HID Compliant Touch Screen Driver is missing Device Manager In Windows 1110

By How To Fix Tech 5 Fixes - 2024 HID Compliant Touch Screen Driver is missing Device Manager In Windows 1110 by How To Fix Tech
Lenovo Thinkpad T470 power on but no display VCCSA power rail short to GND fixed

By Laptop Repair Zone Lenovo Thinkpad T470 power on but no display VCCSA power rail short to GND fixed by Laptop Repair Zone
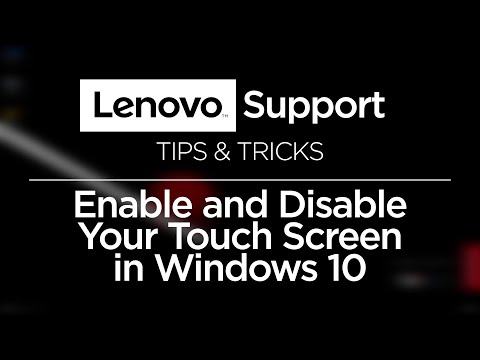
Title: How To Enable and Disable the Touch Screen In Windows 10 and Windows 11
Channel: Lenovo Support
How To Enable and Disable the Touch Screen In Windows 10 and Windows 11 by Lenovo Support
Wifi On Laptop
Let's get started!
The title of the article: Unveiling the Secrets: How to Brew the Perfect Cup of Coffee Every Time
Unveiling the Secrets: How to Brew the Perfect Cup of Coffee Every Time
The aroma. The ritual. The invigorating first sip. For many, coffee is more than just a beverage; it’s an experience. But the pursuit of that perfect cup, that consistently flawless brew, can often feel elusive. Fear not, fellow coffee enthusiasts! We are here to demystify the brewing process, sharing with you the secrets and insights necessary to transform your daily coffee ritual into an art form. Forget inconsistent results and embrace the joy of a consistently exceptional cup, brewed in the comfort of your own home.
The Foundation: Sourcing the Right Beans
The cornerstone of a superb coffee experience lies in the quality of your raw material: the beans themselves. The vast coffee landscape is populated by a dazzling array of varietals, regions, and roast levels, each contributing unique flavor profiles.
Bean Origins: A World of Flavor: Consider the origin of your beans as a crucial factor, comparable to selecting the grapes for fine wine. Ethiopian Yirgacheffe beans often present a bright, floral aroma with notes of citrus. Sumatran Mandheling beans, on the other hand, offer a full-bodied, earthy profile with hints of chocolate. Colombian beans frequently provide a balanced, medium-bodied cup, ideal for everyday enjoyment. Experimenting with diverse origins allows you to discover the flavors that resonate most with your palate.
Roast Level: Unlocking the Potential: The roasting process is a delicate art, transforming the green coffee beans into the flavorful delicacies we crave. Light roasts accentuate the bean's inherent acidity and origin-specific characteristics, often exhibiting brighter, more complex flavors. Medium roasts strike a balance, retaining some of the original characteristics while introducing a touch of sweetness and body. Dark roasts develop deeper, bolder flavors, often with hints of chocolate, caramel, or smoke. Explore different roasts to pinpoint your preference.
Freshness: The Ultimate Key: Always buy whole bean coffee and grind it immediately before brewing. Coffee beans, when roasted, begin to lose their volatile aromatic compounds and flavor profiles. Exposure to oxygen accelerates this process. The ideal scenario involves purchasing beans within a week or two of their roast date, storing them in an airtight container, and grinding only what you need just before brewing.
The Grind: Precision is Paramount
Once you have selected your beans, the next crucial step is the grind. The fineness of your grind determines the extraction rate of the coffee, directly influencing the flavor of the final brew.
Grind Size and Brewing Methods: Different brewing methods require varying grind sizes. A French press, for example, benefits from a coarse grind, allowing for full immersion and preventing excessive sediment. Drip coffee makers, on the other hand, necessitate a medium grind. Espresso machines demand an extremely fine particle size, allowing the hot water to extract the concentrated flavors under high pressure.
Consistency is King: Invest in a burr grinder, ideally a conical burr grinder, for the most consistent grind. Blade grinders chop the beans unevenly, producing inconsistent particle sizes, leading to uneven extraction and resulting in an unbalanced flavor profile. A burr grinder provides a uniform grind, allowing for a consistent and balanced extraction.
Experimentation is Encouraged: The precise grind size needed is sometimes a trial-and-error process. Adjust the grind setting on your grinder based on the specific beans and brewing method you are using. If your coffee tastes bitter (over-extracted), try a coarser grind. If it tastes sour (under-extracted), try a finer grind.
Water: The Unsung Hero
Water, seemingly innocuous, plays a profound role in the quality of your coffee. The minerals present in the water impact the extraction process, while the temperature affects the flavor profile.
Water Quality: Use filtered water to avoid off-flavors and impurities, which can negatively impact the taste of your coffee. Chlorine, in particular, can contribute a harsh taste. Distilled water is not optimal.
Temperature Control: The ideal brewing temperature is generally considered to be between 195°F and 205°F (90°C and 96°C). Too cool, and the coffee will be under-extracted, resulting in a sour, weak flavor. Too hot, and it can become over-extracted, leading to a bitter, burnt taste. Use a thermometer to ensure the water reaches the right temperature.
Water-to-Coffee Ratio: Achieving the right balance is key. A common starting point is a 1:15 to 1:17 ratio of coffee to water (e.g., 1 gram of coffee to 15 or 17 grams of water). Adjust this ratio to suit your taste preferences. Some prefer a stronger brew, using a higher coffee-to-water ratio, while others prefer a weaker brew.
Brewing Methods: Exploring the Possibilities
The world of coffee brewing offers a plethora of methods, each yielding unique results. Experimentation with different techniques allows you to discover your preferred brewing style and its associated flavor profiles.
French Press: The Immersive Experience: This method involves steeping coarsely ground coffee in hot water for several minutes, then pressing the grounds to separate them from the brewed coffee. The French press produces a full-bodied cup with rich oils and sediment, contributing to the overall texture.
Pour Over: Precision and Control: Pour-over methods, such as the Hario V60 or the Chemex, offers precise control over the brewing process. This technique involves slowly pouring hot water over freshly ground coffee beans held in a paper filter. This method allows for the extraction of a clear, flavorful cup, with a bright acidity and clarity.
Drip Coffee Makers: Convenience and Consistency: Drip coffee makers are a common and convenient method. These machines automatically heat water and drip it over the coffee grounds. However, investing in a model with temperature control and a proper brewing cycle is essential for quality results.
AeroPress: Versatility and Speed: The AeroPress is a versatile manual brewing device that uses air pressure to rapidly extract coffee. The AeroPress produces a smooth, clean cup, often with a slightly acidic profile.
Espresso Machines: The Art of the Shot: Espresso machines use high pressure to force hot water through finely ground coffee, producing a concentrated shot of espresso that can be enjoyed on its own or used as a base for lattes, cappuccinos, and other espresso-based drinks.
Cold Brew: Patience Rewarded: Cold brew coffee involves steeping coarsely ground coffee in cold water for an extended period, typically 12 to 24 hours. This method produces a smooth, less acidic concentrate that can be diluted with water or milk.
The Brewing Process: Step-by-Step Mastery
No matter which brewing method you choose, a consistent and methodical approach is crucial to brewing the perfect cup.
Preheating Your Equipment: Preheating your brewing device and your mug can help maintain the ideal brewing temperature and prevent heat loss, leading to a more consistent flavor profile.
The Bloom: For pour-over and other manual brewing methods, the bloom is the initial step. Gently pour a small amount of hot water over the coffee grounds, just enough to saturate them. Allow this to sit for approximately 30-45 seconds. This process allows the coffee to degas, releasing trapped carbon dioxide and creating a more balanced extraction.
Pouring Technique: For pour-over methods, pour the remaining water slowly and evenly over the grounds, ensuring all the grounds are saturated and the water drains through the filter at a consistent rate. For drip coffee makers, follow the manufacturer's instructions regarding the water pouring process.
Extraction Time: Pay attention to the extraction time. Over-extraction (too long) can lead to bitterness, while under-extraction (too short) can result in sourness. Adjust the grind size and brewing time accordingly.
Cleaning and Maintenance:: Clean your equipment after each use. Residue buildup can affect the flavor of your coffee. Use coffee-specific cleaners to keep it in perfect condition.
Final Thoughts: The Journey of a Coffee Connoisseur
Brewing the perfect cup of coffee is a journey, not a destination. It’s a continual exploration, an art form that is forever evolving. Experiment with different beans, grind sizes, and brewing methods. Keep notes on your preferences, and don’t be afraid to deviate from the traditional methods. Most importantly, enjoy the process. The joy of a perfectly brewed cup of coffee is immeasurable. Embrace the experimentation, explore your flavor preferences, and relish every sip of that consistently exceptional brew. Happy brewing!
