how does the touchpad on a laptop work

Title: Master Your Laptop Essential Touchpad Gestures Everyone Should Know
Channel: Torogi Pro
Master Your Laptop Essential Touchpad Gestures Everyone Should Know by Torogi Pro
how does the touchpad on a laptop work, how does the touch pad work on a laptop, how can i fix the touchpad on my laptop, how do i turn on the touchpad on my laptop
Laptop Touchpad Mystery SOLVED! (You Won't Believe How It Works!)
Unlocking the Secrets of Your Laptop Touchpad: A Journey of Discovery!
Ever marvelled at the effortless magic of your laptop’s touchpad? It’s a sleek, seamless portal to digital navigation. You glide your finger, and the cursor dances across the screen. But have you ever truly pondered the mechanics behind this marvel? It's time to delve into the fascinating world of touchpad technology.
The Touchpad's Silent Language: How Does It "See" You?
The core function relies on sophisticated, integrated technology. Primarily, these tiny rectangular surfaces employ at least one of three prominent methods. Firstly, we have capacitive touchpads. Subsequently, it involves electrical conductivity. Our fingers act as conductors, which interact with an electrical field. Therefore, the touchpad senses the change, translating it into cursor movement.
Capacitive Touchpads: The Gentle Touch
Capacitive touchpads are arguably the most prevalent. Consequently, they utilize a grid of tiny capacitors arranged beneath the glass. Your finger, bringing its electrical charge, alters the electrical field. Since that alteration is precisely measured, the system determines your finger's location. This technology is reactive, needing direct contact.
Optical Touchpads: Seeing Through the Surface
On the other hand, optical touchpads take a different route. They utilize light sensors to track your finger's movement. Tiny infrared LEDs shine across the surface. Thus, when your finger obstructs the light, sensors detect the disruption. It’s similar to how an optical mouse functions. The advantage? This method can detect gestures a bit more precisely.
Mechanical Touchpads: The Underdog Technology
Moreover, mechanical touchpads are less common these days, but they're worth mentioning. They use physical movement to interpret input. When you touch the pad, minuscule sensors inside detect the pressure. They then translate that pressure into cursor movement. This approach tends not to be as delicate.
Decoding the Gestures: From Tap to Swipe
The real beauty of the touchpad lies in its intuitive gestures. Besides simple cursor movement, you can perform amazing feats. In fact, these gestures are crucial for modern usability. For instance, a two-finger scroll allows you to navigate web pages. Moreover, the pinch-to-zoom gesture lets you zoom in on images.
The Software Symphony: Drivers and Algorithms
Behind the hardware lies a sophisticated software dance. Touchpad drivers are the conductors of this orchestra. They translate the raw data from the sensors into actionable commands. Algorithms interpret your movements, identifying gestures and optimizing responsiveness. Consequently, they also ensure smooth and precise control. These drivers also constantly get updated.
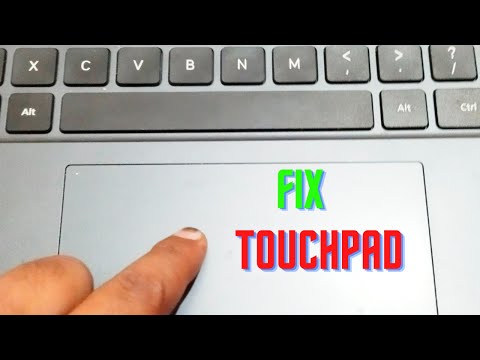
Troubleshooting Touchpad Troubles: Common Issues and Solutions
Sometimes, your touchpad may encounter issues. Fortunately, most problems have simple solutions. For instance, a stuck cursor could indicate a driver issue. Therefore, you may need to update the driver. If your touchpad isn't responding, check your system settings. Furthermore, ensure the touchpad is not disabled.
Beyond the Basics: Customizing Your Touchpad Experience
Did you know you can personalize your touchpad? Most operating systems offer customization options. In the settings, you can adjust cursor speed and sensitivity. You can also configure which gestures you would like to use. Consider experimenting to find your ideal configuration.
The Future of Touchpad Technology: Innovations on the Horizon
What does the future hold for touchpads? Expect exciting upgrades. We could witness even more seamless integration. Furthermore, anticipate improved accuracy and responsiveness. Perhaps we'll see touchpads that can detect more complex gestures. The possibilities are truly exciting.
Embracing the Touchpad: A User's Perspective
In conclusion, the laptop touchpad is an amazing piece of technology. It's a testament to engineering ingenuity and user-friendly design. Next time you use your touchpad, remember the layers of technology. With its smooth operation, it is a joy to use every day. Now, you understand how it works. You’ll never see your touchpad the same way again!
Laptop Sound DEAD? FIX This NOW!Laptop Touchpad Mystery SOLVED! (You Won't Believe How It Works!)
Hey, tech explorers! Ever felt like your laptop touchpad was speaking a language you didn't quite understand? One minute it's a smooth glide, the next a jerky, rebellious mess? We've all been there. That feeling of "why isn't this thing working?!" lingers, doesn't it? Well, get ready to ditch the frustration, because we're diving deep into the laptop touchpad mystery. Prepare to be amazed, because the magic behind this seemingly simple piece of tech is more fascinating than you might think. This isn't just a how-to; it's a journey into the heart of your digital assistant.
Decoding the Touchpad: More Than Meets the Eye
Let's start at the beginning. What is a touchpad, anyway? We often take them for granted, but think about it: a flat, unassuming square that somehow translates your finger movements into cursor actions on your screen. It’s like having a tiny, incredibly sensitive map of your hand’s intentions. But how does it actually work?
The Magic Ingredient: Capacitive Sensing (and a Sprinkle of Pixie Dust?)
The core technology behind most modern touchpads is called capacitive sensing. Think of it like this: your touchpad is layered with a grid of tiny, almost invisible sensors. These sensors are like miniature antennas, emitting a weak electrical field. When your finger (or any other conductive object, like a specialized stylus) touches the surface, it disrupts this field. This disruption is what the touchpad interprets as your input.
- Think of it like ripples in a pond: Your finger is the pebble, and the water (the electrical field) is disturbed, creating a pattern the touchpad reads.
- Multi-touch functions are just a smarter ripple analysis: The touchpad can identify multiple "pebbles" (fingers) and track their movements simultaneously for gestures like zooming, scrolling, and two-finger clicks.
So, no actual pixie dust involved, but it's still pretty magical, right?
The Underappreciated Components: A Deep Dive
It's not just about the surface. The touchpad’s functionality depends on several crucial components working in harmony:
- The Sensor Grid: As mentioned, this is the heart of the operation, the network of sensors that detects changes in the electrical field.
- The Controller Chip: This tiny but mighty chip processes the data from the sensor grid, translating the disturbances into usable information for your operating system. Think of it as the brain of the touchpad.
- The Firmware: This is the software that tells the controller chip how to interpret the sensor data. It's responsible for things like sensitivity settings, gesture recognition, and palm rejection.
- The Surface Material: Usually glass or plastic, the surface material protects the sensors and allows your finger to smoothly glide across the surface.
Common Touchpad Woes and How to Conquer Them
Let's be honest, touchpads can be finicky. You've probably experienced at least one of these:
- The "Jumpy Cursor": A frustrating experience where the cursor seems to have a mind of its own. This could be due to dust, moisture, or a malfunctioning sensor.
- The "Frozen Touchpad": It just stops working! Drivers can be the culprit here, or possibly a hardware issue.
- The "Unresponsive Gestures": Two-finger scrolling that just won't work. This usually boils down to driver settings or the touchpad's inability to recognize your specific gestures.
Troubleshooting Touchpad Troubles: Your First Line of Defense
Before calling in the tech cavalry, there are a few things you can try:
- Cleanliness is Next to Godliness (and a Functional Touchpad): Give your touchpad a good wipe-down with a microfiber cloth. Dust and grime can wreak havoc.
- The Dreaded Reboot: Sometimes, a simple restart is all it takes to reset things and get the touchpad back on track. It's the digital equivalent of "turning it off and on again."
- Driver Updates: Your Secret Weapon: Outdated or corrupted drivers are often the root of touchpad problems. Check your device manager (Windows) or system preferences (macOS) for driver updates.
- Sensitivity Settings: Find Your Sweet Spot: Experiment with the touchpad sensitivity settings. Too high, and it's jumpy; too low, and it's unresponsive. Find the perfect Goldilocks zone.
- Palm Rejection: Your Anti-Accidental-Click Savior: Make sure palm rejection is enabled if your touchpad supports it. This prevents accidental cursor movements when your palm brushes the surface.
More Than Just a Pointer: Touchpad Gestures Unleashed
Touchpads aren't just for moving the cursor. They offer a wealth of intuitive gestures:
- Two-Finger Scrolling: The standard way to navigate up and down on web pages and documents.
- Two-Finger Click: Acts as a right-click, bringing up context menus.
- Three-Finger Swipes: Often used for switching between applications (Windows) or showing the desktop (macOS).
- Four-Finger Swipes: Can be customized for various actions, depending on your operating system and touchpad settings. (e.g., opening the Notification Center)
Unlocking these gestures can seriously boost your productivity. Honestly, once you master them, you'll wonder how you ever lived without them.
Diving Deeper: Touchpad Technology Evolves
Touchpad technology has come a long way. We've seen significant improvements in:
- Precision: More accurate tracking and better cursor control.
- Gesture Recognition: Touchpads now recognize more complex gestures.
- Palm Rejection: Much more effective at preventing accidental clicks.
- Size: Touchpads are getting bigger, providing more surface area.
Touchpad vs. Mouse: Choosing Your Weapon
Ah, the age-old debate! Which is better, a touchpad or a mouse? The answer, as with many things, is: it depends.
- Touchpad Advantages: Portability, integrated into your laptop, great for basic navigation and quick tasks.
- Mouse Advantages: Precision, ergonomic comfort, ideal for detailed work (e.g., design, gaming).
Often, the best approach is to have both!
Touchpad Settings: Where the Magic Happens
Let's explore the settings:
- Windows: The Touchpad Settings Control Panel: Navigate to "Bluetooth & devices" (under Settings) > "Touchpad." Here, you’ll find options for changing cursor speed, gestures, and palm rejection.
- macOS: The Trackpad Pane: Within System Preferences (or System Settings), find "Trackpad." This is where you can customize all things trackpad: point & click, scroll & zoom, and more gestures.
Take some time to explore these settings and personalize them to your liking. You might be surprised at how much better your touchpad experience can be.
Beyond the Surface: Future Trends in Touchpad Tech
The future is bright for touchpad technology. We can expect to see:
- Haptic Feedback: Touchpads that simulate the feeling of clicking, even though there's no physical button.
- Integration with Other Features: Such as fingerprint sensors and shortcut controls.
- Improved Materials: For greater durability and better touch responsiveness.
Mastering the Touchpad: Tips for a Seamless Experience
Here are a few final tips to help you become a touchpad pro:
- Use Light Pressure: Don't press too hard. Your touchpad is sensitive!
- Keep Your Fingers Clean: Oil and dirt can interfere with tracking.
- Practice Makes Perfect: Get comfortable with all the gestures.
- Customize, Customize, Customize! The settings are your friends.
Laptop Touchpad Mystery SOLVED? Absolutely!
So there you have it! We've cracked the laptop touchpad mystery, revealing the fascinating science and functionality behind this essential piece of technology. You're now equipped with the knowledge to troubleshoot common problems, optimize your settings, and become a touchpad ninja. Now go forth and conquer your digital world, one tap and swipe at a time!
Closing Thoughts
We've journeyed from the basic mechanics of capacitive sensing to exploring the intricacies of touchpad settings and future trends. Hopefully, this article has demystified the workings of your laptop's touchpad, empowering you to get the most out of this often-overlooked piece of technology. Remember, a well-calibrated touchpad can significantly enhance your productivity and overall computing experience. So, take a moment, revisit your settings, and embrace the magic of the touchpad.
FAQs: Your Touchpad Questions Answered
1. My touchpad isn't working at all! What should I do first?
Start with the basics: Restart your laptop and clean the touchpad surface. Then, check your touchpad drivers in your device manager (Windows) or system preferences (macOS) for updates.
2. Why does my cursor sometimes jump around randomly?
This is likely due to dirt, moisture, or a palm rest touching the touchpad surface. Clean the touchpad thoroughly and adjust palm rejection settings.
3. Can I use a mouse and a touchpad simultaneously?
Absolutely! Most operating systems and laptops support using both a mouse and a touchpad at the same time.
4. My gestures aren't working as expected. What's going on?
Double-
Laptop Keyboard Disaster! Ctrl+Alt+Del WON'T WORK! (FIX INSIDE)How To Fix Touchpad Windows 1011 Fix Touchpad Not Working
By EasyTechGeek How To Fix Touchpad Windows 1011 Fix Touchpad Not Working by EasyTechGeek
How to Right Click with the TOUCHPAD on your Windows Device

By Quick Tech Tips How to Right Click with the TOUCHPAD on your Windows Device by Quick Tech Tips
How Apple's Force Touch Trackpad Works

By PCMag How Apple's Force Touch Trackpad Works by PCMag

Title: Touchpad Enable Disable Lenovo Support Quick Tips
Channel: Lenovo Support
Touchpad Enable Disable Lenovo Support Quick Tips by Lenovo Support
Laptop Wifi Connect
Let's get started.
The Art of Crafting the Perfect Espresso: A Guide to Unrivaled Coffee Excellence
Our shared passion for coffee often begins with the humble yet transformative espresso. It is a concentrated extraction, the very soul of the bean, and the foundation upon which countless other coffee creations are built. Achieving espresso perfection, however, is an art honed through a delicate balance of factors. This guide ventures into the world of espresso, offering an in-depth exploration that will elevate your skills and yield coffee of unparalleled quality.
Understanding the Fundamentals: Bean Selection and the Extraction Process
The journey to exceptional espresso starts long before the pull. Sourcing exceptional coffee beans is paramount. Arabica beans, known for their nuanced flavor profiles and higher acidity, are the dominant choice for espresso. Opting for single-origin beans allows a greater appreciation for the unique terroir characteristics, or you may choose a meticulously crafted blend designed specifically for the complexities of espresso. The roast level plays a vital role – typically, a medium to dark roast is favored for its balanced sweetness, body, and intensity. However, experiment to discover what meets your preference in taste.
Freshness is equally crucial. Ideally, beans should be roasted within a few weeks of extraction, preferably within a few days. Once roasted, the beans begin to release volatile aromatic compounds. Purchase whole beans and grind them immediately before brewing to capture the pinnacle of flavor.
The extraction process itself is a science. Espresso involves forcing near-boiling water through finely ground coffee under high pressure. This pressure, typically around nine bars (approximately 130 psi), is what distinguishes espresso from other brewing methods. It forces the coffee to extract solubles: essential oils, acids, and sugars that give espresso its flavor. The ideal extraction process results in a consistent espresso that yields a balance of sweetness, acidity, and body.
Grinding for Greatness: Mastering the Grind
The grind is the pivotal factor in the espresso process – the key to unlocking the full potential of your coffee beans. The espresso grind must be significantly finer than that used for drip coffee or French press. The fineness controls the water's flow through the coffee bed. A grind that is too coarse will result in a watery, under-extracted shot, while a grind too fine leads to over-extraction and a bitter, burnt taste.
A burr grinder is essential for consistent, uniform particle size. Blade grinders, which chop the beans, produce an inconsistent grind that will hamper the extraction process. The burr grinder lets you dial in the ideal grind size for your machine, the coffee beans, and, most importantly, your taste.
Adjusting the grind size is a crucial skill, a process of iterative refinement. Start with a middle-ground setting and take note of the shot’s characteristics. If the shot pulls too quickly (below 25 seconds for a double shot), the grind is too coarse. Adjust the grinder finer and try again. Conversely, if the shot takes a very long time and tastes bitter, dial the grind back to a coarser setting.
The Tools of the Trade: Espresso Machines and Equipment
A well-equipped espresso setup is essential for achieving espresso excellence. There are plenty of espresso machines, from entry-level pump machines to prosumer-grade semi-automatic machines and, of course, fully automatic machines. Consider your budget, skill level, and desired features.
Factors to consider when selecting an espresso machine:
- Pump Pressure: An espresso machine must supply at least 9 bars of pressure.
- Temperature Stability: Maintaining a precise and consistent water temperature is crucial for consistent extraction. Pressure is important, but temperature stability is equally impactful.
- Portafilter Size: A 58mm portafilter is the standard and allows for better distribution and puck management.
- Boiler Type: Heat exchange or dual-boiler systems offer superior temperature stability.
- Steam Wand: A powerful steam wand is essential for creating microfoam for lattes and cappuccinos.
Along with the espresso machine comes a list of equipment that is going to help you out with your coffee process:
- Tamper: A high-quality tamper is critical to create an even and consistent coffee puck. A calibrated tamper ensures consistent tamping pressure.
- Scale: A digital scale is required to measure the amount of coffee grounds and the weight of the extracted espresso.
- Timer: A timer is essential to track the extraction time.
- Distribution Tool or WDT Tool: They help ensure an even coffee bed.
- Knock Box: A knock box provides the safe and convenient disposal of the spent coffee grounds.
The Art of the Pull: Mastering the Extraction
Once the equipment is set up and the coffee beans are ground, it’s time for the extraction. The procedure, which demands precision and a little artistry is as follows:
- Dosing and Distribution: Weigh the ground coffee and place it into the portafilter’s basket. To ensure even distribution, use a distribution tool. This enables the elimination of any clumps and creates a smooth, level surface for the tamping.
- Tamping: Use a calibrated tamper to apply consistent pressure. The standard is about 30 pounds of pressure. Ensure the tamp is horizontal and even.
- Brewing: Insert the portafilter into the espresso machine and start the pump. The first droplets should appear after approximately 8-10 seconds. Expect the extraction process to have the consistency of warm honey.
- Extraction Time and Yield: A double shot of espresso, using 18-20 grams of ground coffee, should yield approximately 36-40 grams of espresso in about 25-30 seconds. Tweak the grind size to fine-tune the extraction time and flavor.
- Evaluating the Shot: The final espresso shot must be evaluated for its taste, aroma, and appearance. The shot should have a rich crema, a dark, viscous body, and a balance of sweetness, acidity, and bitterness.
Dialing it In: Refining Your Espresso Recipe
Dialing in or refining is the process of adjusting your grind size, dose, and extraction time to achieve the perfect shot. It's a cycle of experimentation and adjustment, where each variable is carefully tweaked to achieve the desired result.
- Start with the Fundamentals: Begin with the recommended dose for your portafilter, which is usually around 18-20 grams for a double shot. Use the grind as a starting point and aim for a 25-30 second extraction time.
- Assess the Shot: Taste the espresso and take notes. Is it sour (under-extracted)? Is it bitter (over-extracted)? Is it balanced?
- Adjust the Grind: If the shot is sour, grind finer to slow down the extraction. If it is bitter, grind coarser to speed up the extraction.
- Modify the Dose (if necessary): If the shot is too short, and the flavor is not very strong, you can increase the dose slightly. If the shot is too long and starting to taste bitter, you might want to lower the dose slightly.
- Taste and Repeat: Pull another shot and taste it again. Continue this process of adjustment, tasting, and refining until you achieve the desired flavor profile.
Milk Magic: Perfecting the Art of Steaming and Texturing Milk
Steaming milk is an art within the art of espresso. It's the process of turning milk into a velvety microfoam, the essential element for lattes, cappuccinos, and other milk-based espresso drinks.
Preparation: Use fresh, cold milk. Whole milk is the best choice for its rich texture, although non-dairy milk alternatives can be used.
Purging: Purge the steam wand for a few seconds to remove any condensation.
Positioning: Insert the steam wand just below the surface of the milk and angle the pitcher so that the wand is near the side.
Stretching (Aeration): Introduce air into the milk, which creates microfoam. Do this by slightly lowering the pitcher, allowing the wand to create a "hissing" sound. This phase should last only a few seconds.
Texturing (Rolling): Submerge the wand deeper and create a whirlpool effect in the milk. This breaks down the larger air bubbles and creates a microfoam. The milk should become silky smooth and increase in volume by approximately 50%.
Finishing: Turn off the steam wand. Wipe the wand clean to remove any milk residue. Gently tap the pitcher on the counter to eliminate any large bubbles. Swirl the milk to integrate the microfoam.
Troubleshooting Common Espresso Challenges
Even with careful preparation, issues can arise. Here are some strategies for fixing and averting common espresso challenges:
Sour Espresso: Underextraction is often the root cause. Grind the beans finer, increase the dose, and make certain the water temperature is at the correct level.
Bitter Espresso: Overextraction is the most likely culprit. In this case, grind coarser, lower the dose, and reduce the extraction time.
Thin Crema: The crema is thin, possibly due to the bean's roasting dating and/or the extraction time. Ensure bean freshness. Grind finer to extract for the correct amount of time.
Channels in the Puck: Uneven tamping or inadequate
