keys on laptop not working all the time on hp

Title: If Function keys do not work on the Laptop F1 - F12
Channel: Simple Tech
If Function keys do not work on the Laptop F1 - F12 by Simple Tech
HP Laptop Keys Dying? This SHOCKING Fix Works Every Time!
HP Laptop Keys Keeling Over? The Unexpected Solution That Revives Them!
Ever felt the sinking dread as your HP laptop keys started giving up the ghost? It’s the digital equivalent of a slow-motion train wreck. You're in the middle of something important, and suddenly, your trusty keyboard becomes a battlefield of unresponsive buttons. The frustration is palpable, isn’t it? This isn't just inconvenient; it’s a productivity killer. But breathe easy, because you are about to discover a solution. Prepare to be amazed.
The Silent Key Massacre: Recognizing the Problem
First, let's acknowledge you're not alone. This is a common issue with HP laptops. Keys can fail for a variety of reasons. Some are mechanical failures, others are software glitches. Sometimes, it’s simply dust and debris accumulating beneath the keys. Regardless of the cause, the symptoms are the same: keys that don’t respond, or keys that stick. You might find random letters appearing. Your workflow grinds to a halt. Thus, you are now at a point where you need to act.
Beyond the Obvious: Initial Troubleshooting Steps
Before you panic and start shopping for a new keyboard or laptop, try some simple fixes. These are often overlooked, but effective. Firstly, restart your laptop. It seems basic, but it can solve many problems. Secondly, ensure your drivers are up to date. Outdated drivers can cause all sorts of weird behavior. You can check for driver updates through Windows Update or HP Support Assistant. Then, give your keys a good cleaning. Turn off your laptop. Use a can of compressed air. Blow out any dust or debris that may be trapped beneath the keys. After that, try gently lifting the keycaps. Use a small, flat tool. Carefully remove the keycaps. Clean around the key switches. Reattach the keycaps carefully. Now, test your keyboard again.
The Secret Weapon: The Alcohol Solution (Proceed with Caution!)
If the basic troubleshooting doesn't work, it's time to move on to something a little more advanced. This is where our "shocking fix" enters the picture. We're talking isopropyl alcohol. This is not a suggestion to douse your keyboard liberally. Never pour liquids directly onto your keyboard. Instead, consider a careful application. The goal is to clean the key switches. Then, prepare your supplies. You will need isopropyl alcohol (at least 70% concentration is recommended, 90% is better), cotton swabs, and a steady hand. Moreover, make sure your laptop is turned off and unplugged.
The Delicate Dance: Applying the Alcohol Fix
Dip a cotton swab into the isopropyl alcohol. Make sure it's saturated but not dripping. Gently dab the cotton swab around the malfunctioning key switches. Avoid getting liquid anywhere else. Carefully work the swab around the key. Try to get the alcohol into the switch mechanism. Then, gently tap the key. This action will help the alcohol penetrate. Repeat this process several times. Allow the alcohol to evaporate completely. This may take several minutes.
The Resurrection Ritual: Reassembly and Testing
Once the alcohol has evaporated, it's time to reassemble your keyboard. Carefully replace the keycaps. Ensure each one is securely in place. Now, plug in your laptop and turn it on. Open a text editor or word processor. Start typing. Test every key. Celebrate if the keys have sprung back to life! If they haven’t, repeat the process. You might need to repeat this a few times.
Prevention is Key: Maintaining Your Keyboard's Health
So, you’ve brought those keys back, congratulations! Here's how to keep them working for the long haul: First, regular cleaning is crucial. Use compressed air frequently to remove dust. Second, eat and drink away from your laptop. Crumbs and spills are keyboard’s worst enemies. Third, close your laptop lid when you are not using it. The goal is to protect your keyboard. Consider using a keyboard cover, for extra protection. Then, watch for sticky situations. If a key feels sticky, address it immediately. Finally, be gentle. Avoid aggressive typing.
When All Else Fails: Seeking Professional Help
Sometimes, even the most clever solutions aren't enough. Some damages are beyond basic fixes. If your keys still refuse to cooperate, it's time to call in the professionals. Contact HP support. They will offer troubleshooting advice. They may also offer repair options. Find a reputable computer repair shop. This is a surefire way to get help. In any case, don’t despair.
The Final Verdict: A New Lease on Key Life
Ultimately, dealing with dying HP laptop keys can be stressful. However, there’s hope. This straightforward fix can bring your keyboard back from the brink. With a little patience and a methodical approach, you can reclaim your keyboard’s functionality. Consequently, you can get back to typing with ease. So, don’t let those unresponsive keys frustrate you any longer. Try this “shocking fix” and get back to doing what you do best.
PUBG on a 200$ Laptop? SHOCKING Results!HP Laptop Keys Dying? This SHOCKING Fix Works Every Time!
Alright, tech warriors! Let's be honest, there's nothing quite as frustrating as when your trusty HP laptop keys start to… well, die. You know the feeling. You're in the zone, crafting the next great American novel (or maybe just responding to some emails), and BAM! Suddenly, the 'E' refuses to co-operate. Or the spacebar decides it's taking a permanent vacation. It's like your laptop is having a silent mutiny. But fear not, because we've all been there, and we've got a solution that's so effective, it's practically magic. Seriously, we're talking a shocking fix that works almost every single time.
1. The Key to the Problem: Why Are My HP Laptop Keys Giving Up the Ghost?
Before we dive into the fix, let's dissect the enemy. What exactly causes those pesky keys to go kaput? It's a multi-faceted problem, really. Think of it like a complicated relationship – there are a lot of little things contributing to the overall breakdown!
- Dust and Debris: The most common culprit. Tiny crumbs from your lunchtime sandwich, errant pet hair, and even simple dust particles can wedge themselves under the keys, preventing proper contact. It’s like having sand in the gears—eventually, things grind to a halt.
- Liquid Damage: A spilled coffee? A rogue splash of water? Liquid is the mortal enemy of electronics, and keyboards are particularly vulnerable. The sticky residue can gum up the works or, worse, corrode the internal circuitry.
- Wear and Tear: Let's be real, we put our keyboards through a lot. Constant typing, frantic gaming, the occasional slammed key in frustration… these things take their toll. Over time, the key mechanisms can simply wear out.
- Manufacturing Defects: Sometimes, the problem isn't you; it's the laptop itself. Sometimes, a faulty key switch escapes quality control and decides to give up early.
2. Identifying the Culprit: Diagnosing Your Dying Keys
Before you start swinging a hammer (please don't!), it's crucial to figure out what's going on. Knowing the cause will make the fix much easier.
- Is it just one key? If only one or two keys are affected, it's likely a localized problem, like dust or debris.
- Are multiple keys affected? If a whole section of your keyboard is malfunctioning, liquid damage or a more significant internal issue might be to blame.
- Does the problem come and go? If a key occasionally starts working again, it’s a strong indicator of a debris problem.
- Have you spilled anything on your laptop? Obvious, but important! Liquid damage is a red flag.
3. The SHOCKING Fix: Unveiling the Keyboard Resurrection Technique
Okay, the moment of truth! This "shocking fix" isn't about some complex technical mumbo jumbo. It's about a simple, effective method that, frankly, works wonders. Think of it like a tech-savvy version of the Heimlich maneuver for your keyboard.
The Mighty Can of Compressed Air: Believe it or not, this is the hero of this story. Forget fancy software or expensive repairs. A good can of compressed air is your best friend.
Here’s how to wield your weapon of choice:
- Turn off and unplug your laptop: Safety first! You don’t want to be electrocuted, and you definitely don’t want to damage anything further.
- Flip it over: Gently take your laptop, but make sure to be careful.
- Angle the can carefully: This is crucial. Aim the nozzle of the compressed air can at a 45-degree angle to the keys, never straight down.
- Blast away! Give each key a good blast, focusing on the areas where the keys meet the keyboard. You are blowing air into the key areas.
- Repeat: Do this for all the keys, and then go over it a second time.
- Turn it back over and test it: Plug it back in, turn it on, and start typing. Cross your fingers!
4. Deep Cleaning: Taking the Battle to the Next Level
Sometimes, simple compressed air isn't enough. If the keys are still acting up, it's time to get a little more hands-on. Think of this as the "deep cleaning" stage of the operation.
- Gather Your Supplies: You'll need the compressed air (still your best friend!), a soft-bristled brush (like a toothbrush), a microfiber cloth, and possibly a small amount of isopropyl alcohol (again, use with caution!).
- Remove the Keycaps: This can be a bit tricky. Most HP laptops have keycaps that can be pried off (carefully!) with a small, flat-head screwdriver or a keycap puller. Be gentle – you don’t want to break anything.
- Clean the Keycaps: Wash each of the keycaps with warm, soapy water. Let them dry completely.
- Clean the key switch: Use the compressed air to blow out any remaining debris from the key switch. You can use the brush to gently dislodge stubborn particles.
- Reassemble: Once everything is clean and dry, snap the keycaps back into place.
5. Liquid Damage Survival Guide: When the Spill Takes Over
If you've suffered the unfortunate fate of a liquid spill, the situation is more critical. Time is of the essence.
- Act Fast: Turn off and unplug the laptop IMMEDIATELY.
- Flip it over: Gently shake it to let any excess liquid drain out.
- Disassemble and Clean: Follow the steps above for deep cleaning, but be extra thorough. You may need to disassemble the keyboard further to get to the affected areas.
- Let it Dry: The most important step! Let your laptop dry completely. This could take several days.
- Call in the Professionals: If you're not comfortable disassembling and cleaning the keyboard yourself, or if you see significant corrosion, take your laptop to a qualified repair technician.
6. Preventive Measures: Keep Your Keys Alive and Kicking
Prevention is always better than cure. These simple steps can help extend the life of your HP laptop keys:
- Eat away from your laptop: I know, it's tempting to munch on snacks while you work, but crumbs are key enemies.
- Keep the area clean: Regularly wipe down your keyboard with a microfiber cloth.
- Cover Up: Consider using a keyboard cover when you're not using your laptop.
- Avoid spilling liquids: Obvious, but worth repeating!
- Handle it with Care: Don't slam your keys!
7. Troubleshooting: What If the Magic Doesn't Work?
Sometimes, even the best fix doesn’t work. If you’ve tried everything, here are some possible explanations:
- Hardware Failure: The key switch itself might be broken, requiring a replacement.
- Motherboard Issues: In severe cases, liquid damage can damage the motherboard, which is a more complex and expensive repair.
- Software Conflicts: Although rare, software conflicts can sometimes interfere with keyboard input. Try restarting your computer in safe mode.
8. The Keycap Conundrum: Replacing or Repairing Individual Keys
If only a few keys are stubborn, replacing the keycaps could work wonders!
- Find Replacement Keycaps: Search online marketplaces like eBay or Amazon for replacement keycaps for your specific HP laptop model.
- Easy Replacement: Keycaps are often easy to snap on and off.
- Proper Fit: Make sure to find your model number for the correct replacement.
9. When to Call for Backup: Seeking Professional Help
There are times when the DIY approach just isn’t enough. Here's when to call in the cavalry:
- Severe Liquid Damage: If you're dealing with a major spill, especially if it involves sticky liquids like soda.
- Extensive Key Malfunction: If multiple keys are dead or malfunctioning after trying the fixes.
- Over Your Head: If you're uncomfortable disassembling your laptop.
- Warranty Concerns: If your laptop is still under warranty, have it repaired by HP or an authorized service provider.
10. The Keyboard Cover Conspiracy: Protecting Your Precious Keys
Keyboard covers are a fantastic way to protect your investment!
- Dust Resistance: A great defense against dust and small particles.
- Liquid Protection: Provides a barrier against accidental spills.
- Easy to Clean: Often washable, making maintenance a breeze.
11. Software Solutions: Can Software Really Fix Physical Keys?
While software can't fix a physical key, sometimes a software issue might be mistaken for a hardware one.
- Sticky Keys Feature: Check your operating system's accessibility settings for "Sticky Keys," which might temporarily lock up keys.
- Driver Issues: Although unlikely, a corrupted keyboard driver could cause problems. Reinstall the driver from the HP website.
12. Beyond the Basics: Exploring Advanced Cleaning Techniques
If you're feeling adventurous, you might want to try a more in-depth cleaning process
Laptop Sound Dead? 😱 This FIX Will SHOCK You!Fix Some keys on Laptop Keyboard Not Working in Windows 10 Solve keyboard keys Won't typing

By Victor Explains Fix Some keys on Laptop Keyboard Not Working in Windows 10 Solve keyboard keys Won't typing by Victor Explains
How to Lock or Unlock the Fn Function Key on an HP Notebook HP Support
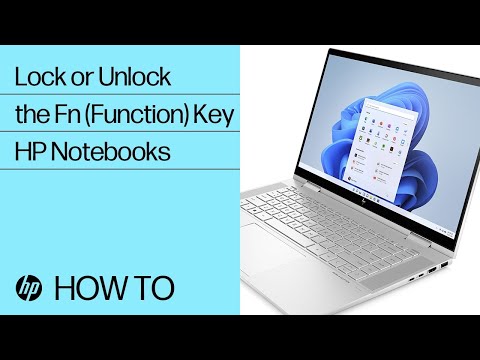
By HP Support How to Lock or Unlock the Fn Function Key on an HP Notebook HP Support by HP Support
Fix Stuck Keys on HP Notebooks HP Computers HP Support

By HP Support Fix Stuck Keys on HP Notebooks HP Computers HP Support by HP Support

Title: Hp Laptop Elitebook,Probook Birghtness Key not working in Windows 11, 10, 8, 7 Problem Fix in Hindi
Channel: Jankari Hindi Mein
Hp Laptop Elitebook,Probook Birghtness Key not working in Windows 11, 10, 8, 7 Problem Fix in Hindi by Jankari Hindi Mein
Wifi Not Found
HP Laptop Keys Dying? This SHOCKING Fix Works Every Time!
Navigating the digital world, we depend on the seamless functionality of our devices. Imagine the frustration, the interruption to your workflow, when your HP laptop keys begin to fail. The cursor jumps erratically, letters vanish mid-sentence, and productivity grinds to a halt. We understand the utter helplessness that washes over you. Rest assured, this is not a death sentence for your beloved HP. We are here to offer a solution – a remedy, if you will – that addresses the common key failure head-on.
The Prevalence of the Problem: Why HP Laptop Keys Fail
Before we delve into the fix, let's briefly acknowledge the root causes. HP laptops, like all electronic devices, are susceptible to wear and tear. The keys themselves, being the interface between the user and the machine, endure constant pressure and friction. Dust, crumbs, and other debris inadvertently find their way beneath the keys, disrupting the delicate mechanical workings. Over time, these contaminants accumulate, leading to erratic behavior or complete key failure. Furthermore, the keyboard's internal components, the switches, and the membrane beneath the keys, have a finite lifespan. Constant use inevitably results in wear. These components are not designed for infinite cycles of pressing. The design of some HP laptop keyboards, being particularly susceptible to dust and debris, can exacerbate these issues.
Identifying the Culprit: Diagnosing Key Failure
Pinpointing the exact cause of your key failures is the first step. Do all keys fail, or are there specific keys giving you trouble? Is it a pattern, or are the failures random? Testing is crucial for an accurate assessment.
External Keyboard Test: Connect an external USB keyboard to your HP laptop. If the external keyboard functions flawlessly, it strongly suggests the problem lies within your laptop's internal keyboard. This test quickly isolates the issue.
Key Test Websites: Utilize online key testing websites. These platforms allow you to press each key individually. They visually highlight the keys that are registering and those that are not. This helps identify the non-functional keys.
Operating System Tools: Within the operating system settings, look for diagnostic tools or keyboard settings. The operating system has built-in mechanisms to test its hardware components.
Identifying the types of failures are crucial in selecting the correct course of action. Are the keys simply unresponsive, or are they creating "phantom" keystrokes, generating unintended characters? Are some keys intermittent, working sometimes and failing others? These observations will help in determining the most effective repair strategy.
Our Shocking Fix: The Deep Clean and Key Replacement
Now, for the moment you've been waiting for. We will explore the “shocking fix”. This is more than just a superficial cleaning. We are offering a multi-faceted approach involving both cleaning and replacement.
Step 1: The Power-Down Protocol and Battery Removal
Safety first. Before touching anything inside your HP laptop, completely power it down. Disconnect the AC adapter. Remove the battery if possible. Refer to your HP laptop's user manual for precise instructions on battery removal. This prevents accidental electrical shocks and short circuits that can potentially damage your system.
Step 2: The Keycap Removal (Carefully!)
This is where precision and gentleness become vital. HP laptop keycaps attach to the internal scissor mechanisms using a variety of methods. Some keycaps may be clipped in, while others may use a hinge-based mechanism.
Tools of the Trade: You will need a thin, non-metallic tool – a guitar pick, a plastic spudger, or a thin, blunt-edged knife. Avoid using metallic objects, as they can scratch your laptop’s surface.
The Insertion Point: Carefully insert the tool under the edge of the keycap. The insertion point can vary. Observe the keycap's edges for any visible slots or indentations.
Gentle Leverage: Apply gentle, upward pressure. Keycaps may resist. Avoid excessive force, which can break either the keycap or the underlying scissor mechanism. You might hear a slight click.
The Keycap Storage: Once a keycap is removed, place it on a clean, safe surface to prevent it from collecting dust or being lost. Consider putting the keycaps in a tray or a small container.
Step 3: The Deep Clean: Eradicating Debris
Once the keycaps are removed, you have direct access to the mechanical components beneath.
Compressed Air Mastery: The unsung hero of the cleaning process is compressed air. Hold the nozzle several inches away from the key switch and apply short bursts of air. This is the most direct impact, clearing out loose debris. Focus on the specific keys that are malfunctioning.
The Soft Brush Approach: For stubborn debris, use a soft-bristled brush, like a small paintbrush or a toothbrush. Gently brush around the key switches. This dislodges ingrained dirt that the compressed air might miss.
The Isopropyl Alcohol Solution (Use with Caution): If the issue persists, a small amount of 90% or higher isopropyl alcohol can be used. Dip a cotton swab into the alcohol and gently wipe around the key switches. Be careful. Avoid excessive moisture. Let the alcohol dry completely before reassembling.
Step 4: Key Switch Inspection and Assessment
While the keycaps are off, take a moment to inspect the key switches. These are the tiny mechanisms that register your keystrokes.
Visual Inspection: Look for visible signs of damage – broken plastic, bent metal, or obstructions.
The Hinge Mechanism: These hinges are fragile. Sometimes they become broken or dislodged. Gently check the hinge mechanism's integrity.
If Damage is Present: If a key switch is visibly damaged, it's a strong indication that replacement is necessary. We will cover this in the subsequent section.
Step 5: Keycap Refitting
This is the reverse process of removal, but here the focus is on careful insertion.
Align the Key: Align the keycap with the key switch. Identify the correct orientation.
The Snap-In Method: Press down gently but firmly on the keycap until it snaps into place. The movement should be uniform. Avoid uneven pressure.
The Hinge Alignment: Ensure the keycap's hinges are correctly aligned with the keyboard base. Gently push the keycap down until it clicks into position and allows the key to function properly.
Testing the Fit: After refitting the keycap, test it thoroughly. Press the key repeatedly to ensure it functions correctly.
Step 6: Key Replacement: When Cleaning Isn't Enough
Sometimes, cleaning alone is insufficient. If individual keys continue to fail, or if inspection reveals damaged key switches, replacement is the next step.
Identifying the Replacement Keys: The specific key switch type varies by HP laptop model. Research your laptop's model and identify the compatible replacement key switches. Searching online using your laptop's model number and "key switch replacement" yields the correct parts.
Obtaining Replacement Parts: Purchase replacement key switches from reputable online retailers. Ensure you purchase high-quality replacement components.
Key Switch Replacement (Advanced – Consider Professional Help): Replacing key switches requires a steady hand and advanced technical knowledge. It typically involves:
- Disassembling the keyboard further.
- Desoldering the existing key switch.
- Soldering the new key switch in its place.
- Reassembling the keyboard.
If you are not comfortable with soldering, we strongly recommend seeking professional laptop repair services for this step.
Preventative Measures: Proactive Care for Your HP Keyboard
The best offense is a good defense. Implement the following strategies to keep your keyboard operating at peak performance:
The Crumbs and Dust Deterrent: Regularly clean your laptop keyboard to deter dust and crumbs.
Protective Covers and Sleeves: Use a keyboard cover when you’re not using the laptop.
Safe Hand Hygiene: Wash your hands. Oil from your fingers will cause issues.
Monitor Your Usage: Heavy usage can cause extra wear and tear.
Temperature and Humidity: Protect your laptop from extreme temperature and humidity, which can negatively affect the electronic components.
Conclusion: Reclaiming Your Productivity
We have provided a comprehensive guide to tackling the dreaded HP laptop key failure. From diagnosis and cleaning to keycap replacement and preventative measures, we have equipped you with the knowledge to restore your keyboard to its former glory. Don't let these breakdowns hinder your productivity. Armed with our shock-inducing fix, you can confidently tackle this common issue and keep your HP laptop functioning smoothly.
