endoscope not working laptop

Title: How to Fix Solution for Endoscope Problem
Channel: T Gadget
How to Fix Solution for Endoscope Problem by T Gadget
Laptop Endoscope DEAD? FIX IT NOW! (Easy Steps Inside)
Is Your Laptop Endoscope Giving You the Cold Shoulder? Revive It!
Picture this: You're in the middle of a crucial inspection. The endoscope gets blurry. It refuses to cooperate! Frustration mounts. But don't toss that laptop endoscope in the bin just yet. Because with a little troubleshooting, you can likely resurrect it. Your device can function again.
First, Diagnose the Drama: Identifying the Problem
Before attempting repairs, you should figure out the issue. The endoscope might exhibit several problems. The image could be distorted. It might freeze or even refuse to connect. It is also possible that the light source is dim. The first step is to thoroughly investigate. Start with the obvious. Is the connection cable securely plugged in? Is the software installed correctly? Ensure all the connections are tight. Therefore, start with these basic checks.
Software Shenanigans: The Driver Dilemma
Software glitches can be a major culprit. Incorrect or outdated drivers are common problems. These drivers facilitate communication between the endoscope and your laptop. You should check for compatible software. Then, visit the manufacturer's website. Download the latest drivers for your specific endoscope model. Uninstall any existing drivers. After this, reinstall the updated ones following their instructions. This is often a simple fix. But it can solve a vast array of issues. In addition, ensure you restart your computer after installation.
The Cable Calamity: Checking Physical Connections
The cable itself could be faulty. These cables endure wear and tear. Carefully inspect the USB or other connection cables. Look for any signs of damage. Check for kinks, breaks, or frayed wires. Try using a different cable if you have one. If the new cable functions, the old one is the root of the issue. You may need to replace the cable. Moreover, ensure the connection port on your laptop isn't damaged. Try connecting to a different USB port.
Lens Labyrinth: Clearing the View
A foggy or obscured lens will ruin your images. The lens is at the tip of the endoscope. It is susceptible to smudges, dust, and debris. Gently clean the lens. Use a soft, lint-free cloth. Make sure you dampen it slightly with a lens cleaner. Avoid using harsh chemicals. These can damage the lens. Similarly, be careful not to scratch the lens.
Illumination Imperfections: Brightening the Situation
If the light is dim, this affects image clarity. Ensure the light source is functioning correctly. Some endoscopes have adjustable brightness settings. Experiment with these to find optimal illumination. Check the endoscope’s light source. Some use LEDs or other bulb types. Replace any burnt-out bulbs. Your images should look clearer.
Power Problems: Seeking a Stable Current
Insufficient power can affect the device. Some endoscopes are powered via USB. Others have their own power adapters. If the endoscope acts intermittently, power might be the issue. Ensure your laptop’s battery is charged. Plug your laptop into a power outlet. This often resolves power-related problems. Consider using a powered USB hub. These hubs provide more stable power, especially if using multiple devices.
Software Specifics: Tweaking the Settings
Some software settings can impact performance. Software settings can cause problems. Explore the endoscope's software settings. Adjust the resolution, color settings, and brightness level. Experiment with the settings. Find what works best for your use case. In some cases, resetting the software to default settings helps. This is something to try.
The Ultimate Test: Trying a Different Laptop
Is the problem still occurring? Then consider trying a different laptop. This helps determine if the problem lies with the endoscope. If it works on another laptop, the issue is likely with your original device. It could be a software conflict. Or maybe it's a hardware issue. This is a good diagnostic step.
When to Call for Backup: Professional Help
If you've exhausted all troubleshooting steps, it's time for help. Do not be afraid to reach out to the manufacturer. They may offer repair services. They may also offer replacements. If the endoscope is still under warranty, this is a great option. Contacting a professional technician is a viable option too. They have extensive knowledge. They can diagnose more complex issues.
Prevention is Key: Keeping Your Endoscope in Tip-Top Shape
Routine maintenance prolongs the endoscope’s life. Store your endoscope properly. When not in use, store it in a clean, dry place. Avoid extreme temperatures and humidity. Clean the endoscope’s lens frequently. Handle it with care. This reduces the risk of damage. Update its drivers when new ones are released. These steps will extend its lifespan.
By following these steps, you can troubleshoot issues. You can revive your laptop endoscope. Don't give up on it. Now go forth and inspect!
Dell Touchpad Dead? FIX It NOW! (Easy Steps)Laptop Endoscope DEAD? FIX IT NOW! (Easy Steps Inside)
Hey everyone! Ever found yourself staring at a blank screen, your laptop endoscope stubbornly refusing to budge? You're not alone. We’ve all been there – that frustrating moment when you're mid-inspection, ready to peer into the depths of… well, whatever you're inspecting, and poof! Nothing. The dreaded black screen of doom. But before you chuck your endoscope out the window (or maybe just gently place it on the shelf), let's roll up our sleeves and breathe some life back into that little gadget. This isn't just about fixing a tool; it's about reclaiming your DIY spirit and, let's be honest, the satisfaction of outsmarting technology.
1. The Moment of Truth: Recognizing Your Endoscope's Silent Struggle
First things first: is your laptop endoscope really dead? Sometimes, the problem is simpler than we think. It’s like when your car won’t start – is it a dead battery or just a loose wire? The same principle applies here. Let's run through some quick checkpoints to make sure the issue is with the endoscope itself and not something else entirely.
- Check the USB Connection: Is it securely plugged into your laptop's USB port? Try a different port – sometimes a worn-out port can be the culprit.
- Inspect the Endoscope's Lights: Many endoscopes have LED lights. Are they illuminated? If they’re not, it could indicate a power issue.
- Try a Different Device: Does your endoscope work on a different computer or laptop? This simple test can quickly pinpoint whether the problem lies with the endoscope or your primary computer.
- Basic Software Check: Ensure the software associated with your endoscope is installed and properly running. Are you seeing the camera feed, or just a black screen?
If you've tried these initial checks and still have no luck, then we can delve deeper. Consider this the pre-flight checklist before we embark on our repair mission.
2. Software Shenanigans: Troubleshooting the Digital Demons
Okay, so we've confirmed the endoscope isn't simply unplugged. Now, let's talk about the software. This is where things can sometimes get a little… tricky. Think of the software as the translator between your endoscope and your laptop – if the translator is out to lunch, communication breaks down.
- Driver Dilemmas: Outdated or corrupted drivers are a common culprit. Imagine the driver as the endoscope's ID card. If the laptop can't read it, it can't recognize the device. Head to the endoscope manufacturer's website and download the latest drivers specific to your model and operating system. Then, uninstall the old driver and install the new one.
- Software Conflicts: Got conflicting software on your laptop? Other applications might be vying for control of the USB camera. Close any programs that might be interfering, such as other cameras or capture software.
- Compatibility Conundrums: Is your endoscope software compatible with your operating system? Sometimes, older endoscopes aren’t always friendly with the latest versions of Windows or macOS. Check the software’s system requirements. It's like trying to fit a square peg (your old endoscope) into a round hole (your new operating system).
3. USB Port Power Plays: Giving Your Endoscope a Boost
Sometimes, the issue isn't the endoscope itself, but the power it's receiving. USB ports don't always deliver the same amount of power, especially on laptops, which prioritize battery life. This can be particularly crucial for endoscopes with bright LED lights.
- Direct Connection is Key: Avoid using USB hubs, especially older ones. Connect your endoscope directly to a USB port on your laptop. A direct connection increases likelihood of consistent power supply.
- Try a Different USB Port: Some ports deliver more power than others. Experiment because you never know what port is more generous with its energy.
- External Power (if applicable): Some endoscopes have an external power adapter. If yours does, ensure it's connected and providing sufficient power. This is like giving your endoscope a power-up from an external source and it may fix the issue.
4. The Cable Conundrum: Examining the Physical Link
Let's not underestimate the importance of the physical connection. The cable itself can be a weak link, especially if it’s been subjected to wear and tear, like being repeatedly coiled and uncoiled. Think of it as the lifeline of your endoscope.
- Inspect the Cable: Examine the entire length of the cable for any visible damage – kinks, cuts, bends, or frayed wires. Even a small break can disrupt the signal.
- Test with Another Cable (if possible): If you have a spare USB cable (or a similar one), try using it to connect your endoscope. This can quickly determine if the original cable is the problem.
- Check the Connectors: Make sure the connectors at both ends (endoscope and laptop) are clean and free of any debris or corrosion. A cotton swab and a touch of isopropyl alcohol can work wonders here.
5. Camera Settings Calibration: Tuning Up the Visuals
So, the endoscope is plugged in, the software is running, and the cable seems fine, yet still, a blank screen? Let's check those camera settings. Sometimes the simplest adjustments can unlock the view.
- Access Camera Settings: In your endoscope software or the operating system's camera settings, ensure the endoscope is selected as the default camera.
- Adjust Brightness and Contrast: Some endoscopes might initially display a blank or dark image. Adjust the brightness and contrast settings in the camera software.
- Check the Resolution: The resolution could be set too low. Try increasing the resolution settings to see if the image appears.
- Experiment with Focus: Many endoscopes have a focus adjustment. Ensure your endoscope is in focus.
6. Uninstall and Reinstall: The Refreshing Reset
Sometimes, a fresh start is all that's needed. Take a deep breath and uninstall the software and the drivers. Then, download the latest software and drivers from the manufacturer's website. Think of it as hitting the "reset" button after a computer crash.
- Completely Uninstall: Make sure you fully remove the software and drivers from your computer. There are often remnants that can persist after the standard uninstall.
- Reboot Your Laptop: After uninstalling and before reinstalling, reboot your laptop. This clears out any temporary files and resets the system.
- Install in the Right Order: Install the drivers before the software. Don’t miss out on this step as it can impact the success.
- Run as Administrator: When installing the new software, right-click the installation file and choose "Run as administrator." This ensures the software has the permissions it needs.
7. Compatibility Checks: Ensuring Smooth Harmony
Is your endoscope truly compatible with your laptop's operating system? Operating systems update constantly, and we might not have taken the time to make sure that our equipment is compatible.
- Operating System Compatibility: Verify the endoscope is compatible with your laptop's OS. Check the manufacturer's website. An outdated endoscope may not work with modern OS versions without additional steps.
- System Requirements: Make sure your laptop meets the device's minimum hardware requirements. Insufficient system memory or processing power may cause malfunctions, especially when it comes to camera technology.
8. Hardware Hurdles: When It's Time to Dig Deeper
If all the software and cable checks haven't done the trick, the issue might be with the endoscope's hardware. Don’t panic! It's time to open up our toolbox (figuratively, of course) and get our hands a little dirty.
- Visual Inspection: Open your endoscope's housing (if possible without voiding any warranty). Look for any obvious signs of damage, like burnt components or loose connections. Just be careful and unplug the device beforehand.
- LED Light Check: If the LED light is not working, this is a symptom of a problem. Look up your endoscope manual for information on how to replace it.
- Contact the Manufacturer: If you're not comfortable performing hardware repairs, reach out to the endoscope manufacturer. They may offer repair services or, perhaps, a replacement, depending on the warranty.
9. Test and Troubleshoot: Process Before You Act
Before you start dismantling your endoscope (or, you know, your laptop), carefully test and troubleshoot the device. You can save yourself a lot of frustration by following this process: * Identify the Problem: Define the symptoms. Is the camera feed black? Is the light not working? * Isolate the Cause: Eliminate potential causes one by one. Swap the USB connection, download a newer driver version, etc. * Take Notes: Document every step you take, along with the results. If you seek help from technical support, this information will be useful.
10. Dusting and Cleaning: Keeping Things Pristine
Endoscopes that are not properly maintained can face issues. Dust and debris can affect image quality and overall functionality.
- Regular Cleaning Clean the endoscope lens with a gentle lens-cleaning solution.
- Storage: Store
An camera keeps stopping FIX Problem Endoscope not working Error USB OTG camera

By SKILL An camera keeps stopping FIX Problem Endoscope not working Error USB OTG camera by SKILL
OTG Endoscope Camera Setup does not work
By Veslinov Predrag OTG Endoscope Camera Setup does not work by Veslinov Predrag
Endoscope not working

By Yasen Bozhurski Endoscope not working by Yasen Bozhurski

Title: Fix not working USB port
Channel: LIFE360
Fix not working USB port by LIFE360
Change Wifi Settings
Laptop Endoscope: Navigating Troubles and Restoring Clarity
The modern laptop has become an indispensable tool, a nexus of productivity and entertainment. But imagine the frustration when a component, however seemingly minor, fails to function as intended. One such component that can induce both curiosity and panic is the laptop endoscope. When this intricate instrument malfunctions, it can feel like a significant setback. Fortunately, in many cases, these issues are not terminal, and solutions are often within reach. This article will guide you through a troubleshooting journey, empowering you to diagnose and rectify common problems, ultimately breathing new life into your laptop endoscope experience.
Understanding the Essential Role of the Laptop Endoscope
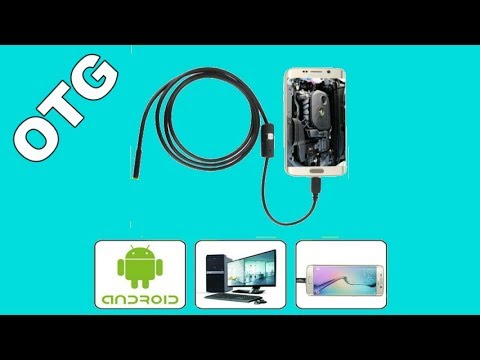
Before diving into potential fixes, it’s crucial to understand precisely what a laptop endoscope is and why it's become such a valuable asset. Primarily, a laptop endoscope facilitates visual inspection in confined spaces. Imagine the complexity of diagnosing issues within the intricate internal workings of a laptop itself. A laptop endoscope is designed with a long, flexible, or sometimes rigid, probe equipped with a tiny camera and illumination source. It transmits real-time visual data to the laptop’s screen, allowing you to see into areas otherwise inaccessible. This capability proves invaluable for assessing hardware damage, identifying debris accumulation, and confirming the integrity of various components.
Common Symptoms Signifying a Laptop Endoscope Malfunction
A malfunctioning laptop endoscope can manifest in a variety of ways, each signal a potential avenue for investigation. Recognizing these symptoms is the first step toward a resolution.
- Complete Lack of Signal: The most obvious symptom is the complete absence of any video feed. This implies a problem with the camera hardware, the connection to the laptop, or the software driver.
- Distorted or Blurry Images: Even if a video feed is present, image quality is paramount. Blurriness, distortion, or significant color inaccuracies are red flags. These issues can arise from a damaged lens, a malfunctioning light source, or software corruption.
- Intermittent Connectivity: The endoscope may connect and function for brief periods before losing the signal, a strong indication of a loose connection, a faulty USB port, or driver instability.
- Freezing or Crashing: The video feed might freeze unexpectedly, or the application used to view the images might crash altogether. Software conflicts or hardware incompatibility are potential causes.
- Inability to Power On: The endoscope's light source or camera might not activate at all, suggesting a power supply issue or a hardware failure within the probe itself.
Diagnostic Steps: Unearthing the Root Cause
Once you have identified the signs of a potential problem, a systematic approach helps isolate the source.
- Connection Verification: Ensure the endoscope is securely connected to the laptop. If using a USB endoscope, try different USB ports, including those on the back of the computer. This eliminates the chance of a malfunctioning port. Ensure the wire is properly plugged. Test on multiple ports.
- Software and Driver Checks: Update and reinstalls the video drivers. The application must be compatible with your operating system. Sometimes these applications get corrupted. In such a case, uninstall and reinstall the latest version to restore functionality.
- Probe Inspection: Carefully examine the endoscope's probe for physical damage, such as broken wires or cracks in the casing. Also, look at the lens.
- Lighting and Power Assessment: If the endoscope has an integrated light source, confirm its functionality. The light may be controlled within the software. Also check the power source. This can be a separate battery.
- Compatibility Confirmation: Always check your laptop's specifications. Ensure the endoscope is compatible.
Troubleshooting Procedures: Practical Solutions
Now that you’ve conducted the initial diagnostics, it's time to implement potential solutions.
- Driver Reinstallation: A vital step in resolving software-related issues. Go to your device manager. Uninstall the driver. Then, reinstall the updated version. Doing so will often resolve issues.
- Software Updates: Ensure you have the latest version of the application. These updates can fix bugs.
- Alternative Software: If the primary application is the source of the problem, try using alternative software designed for endoscope viewing, or even a generic video recording software.
- Check for loose Connections: Secure all the connections. Inspect the cabling, and make sure the cables are not pinched or damaged.
- Test on a Different Laptop: The most effective way of determining whether the fault lies with the endoscope itself or the laptop.
- Probe Cleaning: A dirty lens can severely impact image clarity. Gently clean the lens with a soft, lint-free cloth. Isopropyl alcohol can be used, but use caution and avoid harsh chemicals.
- Power Cycle: Disconnecting your endoscope and laptop. Then rebooting the laptop may solve the problem.
Advanced Troubleshooting: Addressing Complex Issues
If the basic steps fail to resolve the issue, consider a few more advanced troubleshooting techniques.
- Hardware Diagnostics: If a hardware failure is suspected, consulting a qualified technician becomes necessary. Internal repairs are usually not recommended.
- Operating System Reinstallation: In rare cases, a corrupted operating system can cause problems. Reinstalling the operating system may resolve conflicts. Back up your data before attempting this.
- External Power Considerations: Some high-end endoscopes require external power sources. Ensure any external power supplies are functioning correctly, and the endoscope is connected properly. This is especially valid when there are LEDs.
- Manufacturer Support: Reach out to the endoscope manufacturer's customer support for specific troubleshooting advice. They can offer tailored solutions or guide you through the repair process.
Preventive Measures: Prolonging the Laptop Endoscope's Life
Prevention is always better than cure. Implementing these simple measures can extend the lifespan of your laptop endoscope.
- Gentle Handling: The probe is a delicate instrument. Always handle it with care and avoid forceful bending or twisting. This prevents internal wire breakage.
- Proper Storage: Store the endoscope in a safe place. A protective case is highly recommended to prevent damage during transport and storage.
- Regular Cleaning: Keep the lens and probe clean. Make it a routine.
- Temperature Extremes: Avoid exposing the endoscope to extreme temperatures or humidity to prevent equipment degradation.
- Cable Protection: Protect the connection cables of the device. Avoid bending the cable too much or pulling the cable.
Case Studies: Real-World Problem Solving
- Scenario 1: The Blank Screen: A user reported a completely blank screen. Diagnostics revealed a loose connection at the USB port. After securing the connection, the endoscope began to function.
- Scenario 2: Blurry Images: A user experienced blurry images. Cleaning the lens with a cotton swab resolved the problem.
- Scenario 3: Connectivity Issues: The endoscope kept disconnecting. A driver update was needed to solve this problem.
Conclusion: From Trouble to Triumph
A malfunctioning laptop endoscope can initially appear like a disaster, but with a methodical approach, most issues are resolvable. By understanding the common problems, performing the right diagnostics, following practical troubleshooting steps, and taking preventive measures, you can minimize downtime. When the inevitable arises, we hope this article allows you to resolve the issue immediately and get back to productivity. When the endoscope malfunctions, remember the fixes, and the clarity will return. Enjoy using the endoscope.
