cd dvd player not working laptop

Title: CDDVD Drive Is Not Detected in Windows 10
Channel: TechFixIT
CDDVD Drive Is Not Detected in Windows 10 by TechFixIT
cd dvd drive not working on laptop, cd dvd drive not working on dell laptop
Laptop CD/DVD Drive Dead? FIX IT NOW!
Laptop CD/DVD Drive Blues? Breathe Easy, We've Got You Covered!
Let's face it. That moment of dread washes over you. Your laptop’s CD/DVD drive refuses to cooperate. Instead, it stares blankly, mocking your attempts to access that crucial disc. It’s frustrating, isn't it? But before you resign yourself to data loss or expensive repairs, take a deep breath. You’re in the right place. Because, believe me, you're not alone. This is a common predicament. And, more importantly, there's usually a solution.
The Silent Treatment: Diagnosing the Drive's Demise
First, let's delve into the potential culprits. Before you start panicking, consider the possibilities. Is the drive truly deceased? Or is it a temporary hiccup? Begin by checking the simplest issues first. Because often, the most obvious solutions are the easiest to overlook.
Check the disc itself first. Make sure it is clean and undamaged. Scratches can render a disc unreadable. Try inserting a known good disc. Then, if the drive still refuses, it's time to move on. Restarting your laptop can often resolve minor software glitches. It is a quick fix, yet surprisingly effective. After the restart, try again.
Next, consider the drive's hardware connection. Sometimes, external CD/DVD drives may not be fully connected. For internal drives, the connection might be loose or detached. If you feel comfortable, carefully inspect the drive connections. However, if you're unsure, consult a professional.
Software Shenanigans: Could It Be the Culprit?
Often, the problem lies not in hardware, but software. Driver issues are a frequent cause. Your computer’s operating system needs the correct drivers. These drivers allow it to communicate with the hardware.
So, how do you check your drivers? Access your Device Manager. You can usually find it through the Windows search bar. Look for the CD/DVD drive under "DVD/CD-ROM drives". If you see a yellow exclamation mark, then you have a driver problem.
You can update those drivers here. Right-click on the drive and select "Update driver". Windows will search for and install the latest drivers. If that doesn't work, try uninstalling and reinstalling the drivers. This resets the communication channel. This often resolves conflicts. If that, too, fails to work, you may need to download drivers from the manufacturer's website.
Physical Fixes: When Hardware Needs Hands-On Attention
Let’s be real: sometimes, the problem is physical. Over time, dust and debris accumulate. This can obstruct the laser lens. This obstructs the drive's ability to read discs. You will notice a gradual decline in performance.
Carefully clean the lens. Use a compressed air can. Direct the air into the drive's slot. Avoid using liquids. That could damage the drive further. Be vigilant about static electricity; it can damage sensitive components.
Another common issue is a jammed tray. Gently try to manually open the drive tray. Use a paperclip inserted into the emergency eject hole. If the tray consistently refuses to open or close, it may be a mechanical failure. Now could be the time for a replacement.
External Drive Alternatives: Bypassing the Built-in Blues
Not every issue requires an internal transplant. If the internal drive proves irreparable, there are alternatives. And it's often a simple and affordable solution.
Consider purchasing an external CD/DVD drive. They connect through USB. You can use them with any laptop. They are portable and easy to set up. Moreover, they are available at various price points. So you can find one to fit your budget.
Alternatively, you can create disc images. You would then save the contents to your hard drive. Then, instead of physically inserting a disc, you mount the image. It's an excellent workaround. This also reduces reliance on the drive. It can also protect your data.
Avoiding Future Failures: Proactive Protection
Preventative measures are key. Doing so will extend the life of your drive. Following these practices can minimize problems.
Regularly clean your laptop. Dust accumulation is a common enemy. Keep food and drinks away from your laptop. Spills are a disaster. Handle discs with care. Minimize scratches. Eject discs properly and safely.
Most importantly, back up your data. It’s a fundamental precaution. Cloud storage or external hard drives are excellent solutions. Doing so protects your files. It also safeguards against data loss.
Final Thoughts: Back in the Groove
So, there you have it! Hopefully, you can revive your CD/DVD drive. Whether it's a software tweak or a physical fix, the goal is to get back to work. Take a deep breath. Work through these steps methodically. You’ll likely find the solution. And remember, even if the drive is beyond repair, you have options. With a little troubleshooting, you can conquer this tech hurdle. Now go forth and get that disc working!
Laptop Screen SHOCKER: The Tech You NEVER Knew!Laptop CD/DVD Drive Dead? FIX IT NOW!
We've all been there. You reach for that dusty CD or DVD, ready to relive some old photos, install a new game, or finally digitize your old home movies. You pop it into your laptop, and… nothing. The drive whirs, maybe clicks a few times, and then falls silent. Your heart sinks. Your laptop's CD/DVD drive is dead. But before you resign yourself to a world without disc-based media, let's take a deep breath. Because, more often than not, we can resurrect that stubborn little drive and get it spinning again. Like a mechanic with a beloved vintage car, we're going to get our hands dirty and bring that technology back to glorious functionality!
1. The Dreaded Silence: Recognizing the Symptoms of a Dead CD/DVD Drive
First things first: how do we know for sure the drive is actually kaput? There are several telltale signs, and understanding them is the first step to troubleshooting. Think of it as your doctor’s pre-diagnosis checklist.
- No Response: Absolutely nothing happens when you insert a disc. No lights, no sounds, just… emptiness.
- Whirring and Clicking: The drive attempts to read the disc, but fails, often emitting a series of whirs, clicks, and possibly even a desperate grinding sound. This can be a sign of a mechanical issue.
- Error Messages: You receive an error message from your operating system, saying something like "No disc inserted," or "Unable to read disc."
- Drive Not Showing Up: The CD/DVD drive isn't even listed in your File Explorer (Windows) or Finder (Mac). It's as if it's vanished from existence.
If you're experiencing any of these, it's time to get your detective hat on and start investigating. Let's get this solved!
2. The Usual Suspects: Common Culprits Behind Drive Failure
Before we start tearing apart your laptop (though, trust me, it might not come to that), let's consider the most common culprits. Often, the solution is simpler than you think.
- Dirty Lens: This is the most frequent offender. Dust, grime, and even fingerprints can accumulate on the lens, obscuring its ability to read discs. Think of it like trying to see through a dirty windshield on a stormy night.
- Software Conflicts: Sometimes, a corrupted driver or a conflict with other software can interfere with the drive's functionality.
- Incorrect Region Settings: DVD drives, specifically, can be locked to a specific region. If the disc you're trying to play doesn't match your drive's region, it simply won't work.
- Disc Issues: It sounds obvious, but sometimes the problem isn't the drive, it's the disc itself. Scratches, smudges, or a faulty manufacturing process can render a disc unreadable.
- Physical Damage: Unfortunately, physical trauma to the drive is a possibility. If your laptop has taken a tumble, the drive could have been damaged.
3. First Aid: Easy At-Home Troubleshooting Steps
Alright, time to put on our "fix-it" apron. Before we get too technical, let's try some basic troubleshooting steps. These are the equivalent of putting a band-aid on a small cut.
- Restart Your Laptop: The classic "turn it off and on again" can often work wonders. This can clear up temporary software glitches that might be causing the issue.
- Check the Disc: Try a different disc, ideally one you know works. If the new disc works, the problem is likely with the original disc.
- Clean the Lens: This is where a CD/DVD drive cleaning kit comes in handy. They're relatively inexpensive and easy to use. You can simply insert the cleaning disc and follow the instructions. Otherwise, you can use compressed air carefully to blow any debris out.
- Update Drivers: Go to your laptop manufacturer's website and download the latest drivers for your CD/DVD drive. Outdated drivers can cause all sorts of problems.
- Check Device Manager (Windows): In Windows, search for "Device Manager." Expand "DVD/CD-ROM drives." If you see an error icon next to your drive, it indicates a problem. You can try right-clicking on the drive and selecting "Update driver" or "Uninstall device" (which will reinstall the driver).
4. Deep Dive: Advanced Troubleshooting Techniques
If the basic steps haven't worked, it's time to delve a little deeper. We're now moving from the simple "first aid" to a slightly more involved process, like calling in a specialist.
- Run Hardware Troubleshooter: Windows has a built-in hardware troubleshooter that can help identify and fix problems with your CD/DVD drive. Go to "Settings," then "Update & Security," then "Troubleshoot." Look for the "Hardware and Devices" option and run it.
- Check BIOS/UEFI Settings: Sometimes, the drive might be disabled in your laptop's BIOS/UEFI settings. Restart your laptop and enter the BIOS/UEFI (usually by pressing Del, F2, F12, or Esc during startup – the key varies depending on your laptop manufacturer). Look for the "Boot" or "Device Configuration" section and ensure your drive is enabled.
- Reinstall the Driver: Go to Device Manager (as described above). Right-click on the drive and select "Uninstall device." Then, restart your laptop. Windows should automatically reinstall the driver.
- Test on Another Computer: To rule out a problem with the disc itself, test it on another computer. If it works there, the issue is definitely with your laptop's drive.
- System Restore(Windows): If you suspect a recent software installation or update caused the issue, consider using System Restore to revert your system to a previous state where the drive was functioning correctly.
5. The Mechanical Marvel: When to Consider a Hardware Fix
If all the software solutions have failed, it's time to consider whether there's a hardware issue. This is where things get a little more complex and potentially risky (particularly if you're not comfortable working inside a laptop).
- Internal Inspection (Caution!): If you're comfortable and have the right tools, you can carefully open your laptop (refer to your laptop's service manual or online videos for instructions) and inspect the drive for any obvious damage, such as loose connections or physical obstructions. Be extremely cautious when working inside a laptop; ensure it's turned off and unplugged. Always ground yourself before opening your computer to prevent electrostatic discharge.
- Drive Replacement: In many cases, the CD/DVD drive is a replaceable component. You can purchase a replacement drive online and install it yourself, especially if you have some technical aptitude. Research your laptop model and the type of drive it uses. The replacement drive usually involves removing a few screws and sliding the old drive out, and the new one in.
- Professional Repair: If you're not comfortable with the DIY approach, or if the problem seems more complex, the best option is to take your laptop to a qualified repair technician. They have the expertise and tools to diagnose and fix hardware issues.
6. Avoiding Future Heartbreak: Preventing CD/DVD Drive Issues
Prevention is always better than cure, right? Let's look at what you can do to keep your CD/DVD drive healthy and happy.
- Regular Cleaning: Regularly clean the drive lens with a cleaning kit. Think of it as flossing your laptop's teeth!
- Handle Discs Carefully: Avoid touching the recording surface of your discs. Handle them by the edges to prevent fingerprints and scratches.
- Store Discs Properly: Store your discs in a cool, dry place away from direct sunlight and extreme temperatures. Use a case or sleeves to protect them from scratches.
- Install Software from Trusted Sources: Be cautious about installing software from unknown sources, as it could lead to driver conflicts or other software issues that affect your drive.
- Update Your Operating System: Keep your operating system (Windows or macOS) current with the latest updates. Updates often include driver improvements and bug fixes that can benefit your CD/DVD drive.
7. The Software Side: Addressing Driver and Software Conflicts
We've touched on drivers already, but it's worth revisiting the software aspect, as this is often the root of the problem.
- Driver Updates, Revisited: Regularly check for and install updated drivers. You can find this information on the device manufacturer's website.
- Driver Rollback: If the drive stopped working after a driver update, try rolling back to a previous driver version. In Device Manager, right-click on the drive, select "Properties," go to the "Driver" tab, and click "Roll Back Driver."
- Conflicts with Burning Software: If you use CD/DVD burning software (like Nero, ImgBurn, etc.), make sure it's compatible with your operating system and drivers. Try uninstalling or reinstalling the burning software.
- Virtual Drive Software: Remove any virtual drive software (like Daemon Tools or Virtual CloneDrive) as these can sometimes interfere with the physical drive's operation.
8. The Region Code Riddle: Solving DVD Playback Issues
For DVD players, region codes can be a major headache. Here's how to untangle the
Laptop Mouse Nightmare! Windows 10 Fix (NOW!)DVD CD-ROM drives not showing in device manager fix DVD drive not listed in device manager

By troubleshooterrors DVD CD-ROM drives not showing in device manager fix DVD drive not listed in device manager by troubleshooterrors
CD DVD Drive Not Reading Discs in Windows 10 11 Fixed

By Tips Howto CD DVD Drive Not Reading Discs in Windows 10 11 Fixed by Tips Howto
How to repair dvd writer . How to Repair DVD drive step by step in Bangla.
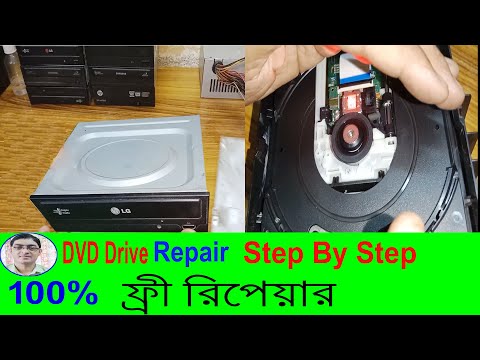
By Bapi G Technology How to repair dvd writer . How to Repair DVD drive step by step in Bangla. by Bapi G Technology

Title: How to clean an optical CD DVD drive that is not reading disks anymore
Channel: Ultimate DIY
How to clean an optical CD DVD drive that is not reading disks anymore by Ultimate DIY
Wifi Not Found
Laptop CD/DVD Drive Dead? FIX IT NOW!
Have you encountered the dreaded silence? Your laptop's CD or DVD drive, once a reliable source of entertainment and data access, has gone mute. The familiar whirring and clicking, the satisfying thunk of the tray, are now replaced by…nothing. This can be frustrating, especially when you need to install software, access old files, or simply enjoy a movie. But before you resign yourself to a life of digital file transfers, take a deep breath. There's a good chance you can revive your optical drive and restore its functionality. We will guide you through a series of troubleshooting steps, and you will be well on your way to resurrecting your drive and making it work perfectly again.
Step 1: Simple Solutions – The Quick Fixes
Before delving into more complex procedures, begin with the simplest solutions. These often resolve the most common issues and can save significant time and effort.
- Restart Your Laptop: This might seem elementary, but a simple reboot can work wonders. It clears temporary files, resets system processes, and often resolves minor software glitches that might be interfering with the drive's operation. Power down your laptop completely, wait for a minute, and then restart it. Test the drive immediately after the boot sequence completes.
- Check the Disc: Ensure the disc you're attempting to play is clean and free from scratches. Smudges, dust, or fingerprints can prevent the drive from reading the disc. Use a soft, lint-free cloth to gently wipe the disc from the center outwards. Try inserting a different disc; sometimes, the problem lies with the disc itself, and not the drive.
- Eject the Tray Manually: Sometimes, the drive mechanism gets stuck. Locate the small emergency eject hole, usually near the drive tray. Use a straightened paperclip, or a thin pin. Insert it into the hole and gently push. This forces the tray to open, allowing you to remove any stuck media. If the tray opens, inspect it for any obstructions.
- Check Device Manager: Windows (or the relevant operating system) might not be correctly recognizing the drive. Right-click on the Start button, then select "Device Manager." Expand the "DVD/CD-ROM drives" section. If your drive is listed with an error symbol (a yellow exclamation mark or a red "X"), this indicates a problem. Right-click on the drive and select "Update driver". If this does not work, choose "Uninstall device" and then restart your computer; Windows will automatically attempt to re-install the driver.
Step 2: Diagnose the Drive – Unveiling the Root Cause
If the quick fixes fail, it's time to dig deeper. The next step is the diagnosis.
- Run Hardware Diagnostics: Many laptop manufacturers provide built-in diagnostic tools. These tools can test the hardware components of your laptop, including the optical drive. Consult your laptop's manual or the manufacturer's website for instructions on accessing and running these diagnostics. If the diagnostic test reports an error with the drive, it offers valuable information about the kind of problem.
- Examine the Drive in BIOS/UEFI: Access your laptop's BIOS or UEFI setup (usually by pressing a key like Del, F2, F12, or Esc during startup). Look for a section that lists your connected hardware. If the CD/DVD drive isn't present in BIOS/UEFI, it suggests a more serious hardware issue, such as a connection problem or a dead drive.
- Listen for Sounds: Pay very close attention to the sounds the drive makes when you insert a disc. Does it spin up for a moment, then stop? Does it make any clicking or grinding noises? The sounds can provide clues about the nature of the issue. A gentle spin-up followed by silence might indicate a problem with the laser reader. Grinding noises could indicate a mechanical problem.
Step 3: Software Solutions – Repairing Logical Errors
Sometimes, the issue is not the hardware itself, but a software conflict or corruption.
- Driver Issues: As identified in the device manager, outdated or corrupted drivers often cause problems. Update the driver for your CD/DVD drive. Download the latest driver from the manufacturer's website, or, if the driver is already installed, right-click on the drive, select "Update driver," and choose "Search automatically for updated driver software."
- Registry Errors: The Windows registry contains critical system settings. Sometimes, errors or corruption in the registry can interfere with the drive's operation. Use the Registry Editor (type "regedit" in the search bar) to navigate to the following key:
HKEY_LOCAL_MACHINE\SYSTEM\CurrentControlSet\Control\Class\{4D36E965-E325-11CE-BFC1-08002BE10318}. Delete the entries called "UpperFilters" and "LowerFilters" (if these exist). Restart your computer. Note: Before modifying the registry, create a system restore point to allow you to revert to a previous state if something goes wrong. - Check for File Corruption: Run a system file check to identify and repair corrupted system files. Open Command Prompt as an administrator and type
sfc /scannow. This process scans for and attempts to repair corrupted system files that can cause all types of problems. This may take some time.
Step 4: Hardware Intervention – Addressing Physical Problems
If the software solutions have been exhausted, it is time to get hands-on.
- Inspect the Drive Mechanism: If you're comfortable with hardware, carefully disassemble the laptop (consult your laptop's service manual or online tutorials, as this can vary widely depending on the model). Once you've accessed the drive, examine the tray and internal components for any physical obstructions or damaged parts. Check the ribbon cable connecting the drive to the motherboard. Reseat the cable.
- Clean the Laser Lens: Dust and debris can accumulate on the laser lens, preventing it from reading discs. Very carefully, using a cotton swab slightly dampened with isopropyl alcohol, gently clean the laser lens inside the drive. Be extremely cautious not to damage the lens. Let it dry completely before reassembling.
- Replace the Drive: If all else fails, the drive itself might be faulty. Replacing a laptop CD/DVD drive is often a relatively straightforward process. Research compatible drive replacements, and order a new drive. The new drive can be installed just the way you removed the old one. Follow the correct replacement procedures. This is likely the most extreme solution, but it can be the most practical.
- Consult a Professional: If you are uncomfortable with disassembling your laptop or performing these hardware-related repairs, it's best to consult a qualified computer technician. They have the expertise and tools to diagnose and repair hardware issues safely and effectively.
Step 5: Preventative Measures – Keeping Your Drive Alive
Once you have successfully resurrected your drive, take steps to prolong its lifespan.
- Clean Discs Regularly: Make it a habit to wipe your CDs and DVDs before inserting them into the drive. This minimizes dust and debris buildup inside the drive.
- Avoid Extreme Temperatures: Do not leave your laptop in direct sunlight or extreme heat. These conditions can damage the drive's internal components.
- Eject Discs Properly: Always use the eject button or the operating system’s eject function to remove discs. Avoid forcefully pulling the tray open, as this can damage the drive mechanism.
- Keep the Drive Clean: Periodically use a CD/DVD drive cleaning disc to remove dust and debris build-up inside the drive. Insert the disc as directed by the manufacturer’s instructions.
Step 6: The Digital Alternative – Embracing the Future
In this era of cloud computing, and the increasing prevalence of online media, your CD/DVD drive may not be as crucial as it once was. Regardless of whether you can fix the drive or not, the digital world has answers for your needs.
- Cloud Storage: Utilize services like Google Drive, Dropbox, or OneDrive for storing and accessing your files.
- Digital Downloads: Download software, movies, music, and games from online sources.
- External Drives: Consider external CD/DVD drives, which connect via USB, as a solution.
By following these steps, you'll significantly increase your chances of reviving your dead drive. And even if the worst happens, and your drive is beyond repair, you'll have the knowledge to navigate to the best outcome.
