bootable usb microsoft 10 desktop does it work for laptop
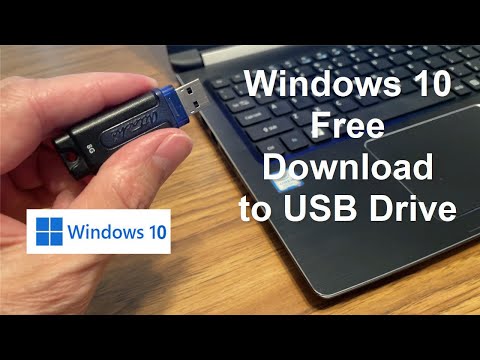
Title: How to Download Windows 10 from Microsoft - Windows 10 Download USB Free & Easy - Full Version
Channel: nickscomputerfix
How to Download Windows 10 from Microsoft - Windows 10 Download USB Free & Easy - Full Version by nickscomputerfix
**Laptop Upgrade SHOCKER! Will a Bootable USB Windows 10 Desktop Installer REALLY Work?**
Laptop Upgrade Revelation: The Bootable USB Windows 10 Odyssey
The world of personal computing offers an enticing dance of upgrades and advancements. You might be staring at that aging laptop, yearning for a fresh start. Perhaps you desire that sleek performance boost. You’ve likely already pondered the possibility: a bootable USB drive harboring the magic of Windows 10. But, really, will it work? Let's embark on this thrilling journey together.
Unveiling the USB Installer's Potential
First off, understand this: installing Windows 10 from a USB drive is absolutely possible. It is, in fact, a perfectly legitimate and, frankly, preferred method. It bypasses the often slower DVD drive, offering a speedier installation experience. The core concept is straightforward. We’re talking about creating a bootable drive. Then, this drive stores a complete version of the operating system. It’s ready, primed and waiting, to be loaded onto your laptop.
So, what does this mean for you? It could resurrect an older machine. It could breathe new life into that sluggish laptop of yours. Thus, this is an avenue worth exploring.
Crafting Your Bootable Arsenal
Next, we must delve into the actual creation process. Several tools exist designed for precisely this task. The most popular, and officially sanctioned, option is Microsoft’s Media Creation Tool. It’s available for free on the Microsoft website. Download it. Then, follow its simple instructions. Your USB flash drive becomes your new key.
Alternatively, you can use Rufus. It’s a third-party utility. Rufus is often favored by tech enthusiasts. Its appeal comes from added customization options. Whatever tool you select, choose a USB drive with sufficient storage. At least 8GB is generally recommended. However, using more than that won't be problematic. After all, Windows 10 is quite a weighty operating system.
The BIOS/UEFI Dance: Preparation is Key
Now, the plot thickens. Before booting from the USB, we need to prepare your laptop’s BIOS or UEFI. This is critical. This is where you instruct your computer to boot from the USB drive. The process varies by laptop manufacturer.
The steps are generally similar. You will, in most cases, start by restarting your laptop and entering the BIOS setup. Check your laptop's manual. It will, almost certainly, guide you. You'll typically press a specific key during startup. Common options are Delete, F2, F12, or Esc. This brings you into the BIOS environment.
Then, inside the BIOS, look for the "Boot Order" or "Boot Sequence" settings. You’ll likely see a list of boot devices. The drive’s priorities need to be changed. Move your USB drive to the top of this list. This will ensure it boots first. Save the changes and exit the BIOS.
The Installation Voyage Begins
With everything prepared, it's time for the main event. Restart your laptop. It should boot from the USB drive. If you've tweaked the BIOS correctly, the Windows 10 installation process will begin.
The setup wizard will guide you. You’ll be prompted to select your language, time zone, and keyboard layout. Then, you’ll be presented with options for the installation type. You will then choose a custom install. This permits a clean installation.
- Caution: Be extra careful. Installing on the wrong drive could cause data loss. Be sure you've got the target drive selected.
Once you select your drive, the installation will begin. This phase will involve several restarts. Patience is key during this point. After the installation, you will be prompted to create a user account and configure your settings.
Navigating Post-Installation Hurdles
After the installation, the real adventure begins. You have a fresh Windows 10 installation. What’s next?
You will likely need to install drivers. Drivers are crucial software. They allow your hardware to function correctly. Visit your laptop manufacturer’s website. Then, download the drivers specific to your model. This might include drivers for your graphics card, Wi-Fi adapter, and audio devices.
Troubleshooting Troubles
Things don’t always go perfectly. What do you do if you hit a snag?
- Boot Issues: If your laptop fails to boot from the USB, double-check your BIOS settings. Ensure the boot order is correct. Also, check your USB drive. Is it formatted correctly?
- Driver Problems: If hardware isn’t working properly, reinstall the appropriate drivers. Ensure they're the correct versions for your operating system.
- Activation Woes: You will need a valid Windows 10 license. If you did not purchase one previously, you will need to buy a new one. This will activate your installation.
The Verdict: A Transformative Upgrade
So, will a bootable USB Windows 10 desktop installer really work? Absolutely, unequivocally, yes! It’s a powerful tool. It empowers you to upgrade or revive your laptop.
The process may seem daunting, at first. However, the benefits surpass any initial complexity. Embrace the challenge. You'll not only gain a faster, more responsive laptop. You’ll also gain valuable technical skills. Plus, there’s a deep satisfaction that comes from successfully upgrading your own technology. So, arm yourself with a USB drive. Don’t wait. Go forth, and conquer the upgrade!
Laptop Work On Your Phone? This Insane Trick Will Blow Your Mind!Laptop Upgrade SHOCKER! Will a Bootable USB Windows 10 Desktop Installer REALLY Work?
Alright, folks, buckle up, because we're diving headfirst into the wild world of laptop upgrades! Specifically, we're talking about breathing new life into your trusty, but maybe a bit tired, laptop. And the question that's been buzzing around the digital water cooler? Can we actually pull off a full-blown Windows 10 desktop installation, using nothing but a trusty bootable USB drive? The answer, my friends, is a resounding… well, let's find out, shall we? This isn't just about copying files; it's a digital transplant, a software soul swap, and trust me, the journey can be as thrilling as a rollercoaster ride (with a few unexpected loops and dips, naturally).
1. The Laptop's Lament: Why Upgrade in the First Place?
Let's be honest, we've all been there. Our laptops, workhorses of the digital age, begin to creak and groan. Pages load slower than molasses in January. Applications crash more frequently than a toddler at a birthday party. You click, you wait, you mutter under your breath. This, my friends, is the lament of a laptop in need. But why upgrade? Why not just chuck the old beast and buy something shiny and new? Well, the reasons are manifold:
- Cost-Effectiveness: Upgrading is often significantly cheaper than buying a brand-new laptop, especially if you're just looking to boost performance, not overhaul the entire device.
- Environmental Friendliness: Extending the life of your existing laptop reduces e-waste and is kinder to Mother Earth. We’re all about that sustainability life!
- Sentimental Value (Maybe!): Perhaps your laptop holds memories. Or maybe you just hate setting up a new machine. Let's be real, that's a pain!
- The "Can-Do" Spirit: It's a fun challenge! There's a certain satisfaction in resurrecting a machine from the digital graveyard. Honestly, it's like digital DIY, and who doesn't love that?
2. Windows 10: The Operating System of Choice (And Why)
Okay, so we've established the why. Now, the what. Why Windows 10? Well, it's still a highly popular operating system, even with newer versions out there. It's familiar, widely compatible with software, and offers a robust feature set. Plus, if you're coming from an earlier version of Windows, the upgrade path to Windows 10 is relatively straightforward, like a familiar road.
3. Bootable USB: Your Digital Swiss Army Knife
So, what's a bootable USB drive, and why is it so important? Think of it as a digital Swiss Army knife, holding all the necessary tools and information needed to install an operating system. It's essentially a USB drive that's been specially formatted and loaded with the Windows 10 installation files. This allows you to bypass your laptop's current operating system (if it's corrupted or just plain sluggish) and install a fresh, clean copy of Windows 10 directly onto your hard drive or SSD. Pretty darn cool, isn't it?
4. The Essential Preparations: Before You Dive In!
Before you even think about plugging in that USB drive, there are a few crucial steps to take, like preparing your battle strategy before entering the digital arena:
- Backup, Backup, Backup! Seriously, back up everything. Your documents, photos, videos, everything! A full system backup is ideal, but at the very least, make sure your important files are safe and sound. Consider this your digital insurance policy.
- Download the Windows 10 ISO: You'll need an ISO file, which is essentially an archive containing all the Windows 10 installation files. You can download this directly from Microsoft's website.
- Create the Bootable USB: You'll need a tool like Rufus (a free and popular option) to "burn" the ISO file onto your USB drive, making it bootable. This is where the magic happens!
- Gather Your Keys: Make sure you have your Windows 10 product key. You'll need this to activate Windows once it's installed.
- Know Your Laptop's BIOS/UEFI: You'll need to access your laptop's BIOS (Basic Input/Output System) or UEFI (Unified Extensible Firmware Interface) settings to change the boot order. This tells your laptop to boot from the USB drive instead of the hard drive. This is a bit like flipping a switch, but a digital one!
5. BIOS/UEFI: The Gatekeeper of Booting
Ah, the BIOS/UEFI. This is where things can get a little technical, but don’t worry; we'll keep it simple. Think of the BIOS/UEFI as your laptop's control panel. It allows you to manage hardware settings, including the boot order. The boot order determines which device your laptop tries to boot from first.
- Accessing the BIOS/UEFI: This usually involves pressing a specific key (like Delete, F2, F12, or Esc) repeatedly during startup. The key you need to press will depend on your laptop manufacturer. Consult your laptop's manual if you're unsure.
- Changing the Boot Order: Once in the BIOS/UEFI, navigate to the "Boot" section. Here, you'll find a list of bootable devices. You need to move your USB drive to the top of the list, making it the primary boot device. Save your changes and exit the BIOS/UEFI.
6. Plugging In and Booting: The Moment of Truth!
With your BIOS/UEFI settings configured and your bootable USB drive ready, it's time to plug it in and boot up your laptop. This is the moment of truth!
- Insert the USB Drive: Make sure the drive is firmly plugged into a USB port.
- Restart Your Laptop: Your laptop should now boot from the USB drive. You'll see the Windows 10 setup screen.
7. The Windows 10 Installation: Step-by-Step Guide
The Windows 10 installation process is fairly straightforward, like following a recipe:
- Select Your Language and Keyboard Layout: Choose your preferred settings.
- Click "Install Now": This will start the installation process.
- Enter Your Product Key: Enter your Windows 10 product key to activate Windows.
- Choose Installation Type: Select "Custom: Install Windows only (advanced)" if you want a clean installation.
- Select the Drive to Install Windows On: Choose the drive where you want to install Windows. (If you're upgrading your hard drive, you should see a new, empty drive here).
- Format the Drive (If Necessary): If you're installing on a new drive, you may need to format it. This will erase all data on the drive, so make sure you've backed up everything!
- Follow the On-Screen Instructions: The installation process will copy files, install features, and restart your computer several times. Be patient!
- Create a User Account and Set Up Your Preferences: Once the installation is complete, you'll be prompted to create a user account and configure your settings.
8. The Driver Dilemma: Finding the Right Ones.
After the installation, you will need drivers for your various hardware components (graphics card, Wi-Fi adapter, etc.). Drivers are like the translators that allow your hardware to communicate with Windows.
- Windows Update: After installation, run Windows Update. It often installs many of the essential drivers automatically.
- Manufacturer's Website: Visit your laptop manufacturer's website (e.g., Dell, HP, Lenovo) and download the latest drivers for your specific laptop model.
- Driver Identification: If a hardware component isn't working correctly, identify the component (e.g., "Wi-Fi adapter") and search for its driver online.
9. Post-Installation Tweaks: Customizing Your New OS
Once Windows 10 is installed and your drivers are set up, it’s time to personalize your experience. This is about making your new OS all your own.
- Personalization: Customize your desktop background, themes, and colors.
- Install Your Favorite Applications: Download and install the software you use daily (web browsers, office suites, etc.).
- Configure Your Privacy Settings: Review and adjust your privacy settings to match your preferences.
- Optimize Performance: Consider disabling unnecessary startup programs to improve boot times.
10. Common Pitfalls and Troubleshooting: Staying on the Right Track
Let’s be real, things can go wrong. Here are common issues you might face and how to tackle them:
- Booting Issues: If your laptop doesn't boot from the USB drive, double-check your BIOS/UEFI settings and ensure the USB drive is formatted correctly.
- Driver Problems: If hardware isn't working, reinstall drivers. You can also try different driver versions (older or newer) if the current ones aren't working correctly.
- Activation Issues: If Windows 10 won't activate, double-check your product key and ensure you have an
How to Create a Windows 10 Bootable USB Drive Tutorial
By Brett In Tech How to Create a Windows 10 Bootable USB Drive Tutorial by Brett In Tech
How to Download Windows 10 Directly from Microsoft - Windows 10 Download on USB 2024

By nickscomputerfix How to Download Windows 10 Directly from Microsoft - Windows 10 Download on USB 2024 by nickscomputerfix
How to Run Windows From a USB Drive Win 10 or 11
By ThioJoe How to Run Windows From a USB Drive Win 10 or 11 by ThioJoe

Title: How to Boot From a USB Drive on Dell laptop to install Windows 10,11 dell dellpc
Channel: atlasyy
How to Boot From a USB Drive on Dell laptop to install Windows 10,11 dell dellpc by atlasyy
Wifi On Laptop
Laptop Upgrade SHOCKER! Will a Bootable USB Windows 10 Desktop Installer REALLY Work?
We’ve all been there. That sinking feeling when your trusty laptop starts to creak and groan under the strain of modern software. Applications take an eternity to load, the hard drive churns like a cement mixer, and the dreaded spinning wheel of death becomes an unwelcome companion. You’re faced with a decision: endure the digital drag or explore the possibility of a much-needed upgrade. For many, replacing the laptop entirely seems like the only feasible solution. But what if a simpler, more cost-effective answer exists? What if breathing new life into your aging machine is as simple as a bootable USB drive and a fresh installation of Windows 10?
This is the premise we’re tackling today. We'll unpack the mysteries of the bootable USB Windows 10 installer and determine if it truly holds the key to a revitalized laptop experience. We’ll delve into the practicalities, the potential pitfalls, and ultimately, whether this DIY approach delivers on its promise. Prepare to explore a detailed, step-by-step guide that will reveal the secrets to upgrading your laptop, the possibilities, and if the experience is something you can tackle. Let's find out if the desktop installer is truly helpful!
The Underlying Problem: Why Laptops Slow Down
Before we leap into solutions, understanding the root causes of laptop slowdown is crucial. The most common culprit is, without a doubt, the hard disk drive (HDD). HDDs, while providing ample storage, are mechanically driven devices. This means they rely on spinning platters and moving read/write heads, leading to inherently slower performance compared to more modern storage solutions. Over time, fragmentation of data on the drive further exacerbates the issue, as the read/write heads must traverse the entire drive to retrieve scattered file pieces.
Another significant factor contributing to a sluggish laptop is software bloat. As you install and uninstall programs, remnants of these applications, along with temporary files and outdated drivers, accumulate on the system. These files not only consume valuable storage space but also contribute to slow boot times and general system instability. Furthermore, the operating system itself, Windows 10 as an example, undergoes continuous updates, often adding new features and system processes that demand more resources.
Finally, the very hardware of your laptop can become a bottleneck. As software demands increase, the processor (CPU) and memory (RAM) can struggle to keep up. Older CPUs, particularly those with fewer cores and lower clock speeds, may struggle to execute multiple tasks simultaneously. Insufficient RAM forces the operating system to rely heavily on the hard drive for virtual memory, further slowing down performance. This is often the case with Windows 10 if the drivers are not correctly installed.
The Bootable USB: A Potential Savior
The bootable USB drive acts as a portable operating system installer. Instead of relying on a potentially failing or fragmented hard drive, you can load the Windows 10 installation files directly from the USB. This approach offers several potential benefits:
- Fresh Start: A clean installation of Windows 10 wipes away years of accumulated clutter, fragmented files, and outdated drivers. This often results in a noticeable performance boost.
- Storage Upgrade (Optional But Recommended): If you're feeling ambitious, a bootable USB allows you to install Windows 10 on a new Solid State Drive (SSD). SSDs operate using flash memory, offering significantly faster read and write speeds compared to traditional HDDs. This single upgrade is often considered the most effective way to revitalize an aging laptop.
- Bypass Physical Drive Issues: If your laptop's internal hard drive is failing, the bootable USB allows you to install Windows 10, or any operating system, regardless. This is a crucial advantage if your device cannot start.
- Simple and Quick: Creating a bootable USB is a relatively straightforward process that takes less than an hour and is a fast way to install an OS compared to other methods.
Crafting Your Windows 10 Bootable USB Drive
Creating a bootable USB drive for Windows 10 is a simple process. Here's a concise guide tailored to ensure success:
Gather Your Supplies: You'll need a USB drive with at least 8GB of free space. Ensure that you have a reliable internet connection to download the Windows 10 installation files. You will also need access to another computer.
Download the Media Creation Tool: Microsoft provides a free tool called the Media Creation Tool, designed specifically for creating Windows 10 installation media. You can download it directly from the Microsoft website.
Run the Media Creation Tool: Launch the Media Creation Tool. Accept the license agreement. At the "What do you want to do?" screen, select "Create installation media (USB flash drive, DVD, or ISO file) for another PC" and click "Next".
Select Language, Architecture, and Edition: Choose the language, Windows 10 edition (Home or Pro), and architecture (32-bit or 64-bit) for your laptop. Ensure these match what you want to install. If you are uncertain, select "Use the recommended options for this PC" and click "Next".
Choose USB Flash Drive: On the "Choose which media to use" screen, select "USB flash drive" and click "Next".
Select Your USB Drive: Select your USB drive from the list. Be extremely careful to select the correct drive; all data on the selected drive will be erased. Click "Next".
Wait for the Download and Creation Process: The Media Creation Tool will begin downloading the Windows 10 installation files and then create the bootable USB drive. This can take some time depending on your internet connection.
You're Done: Once the process completes the Media Creation Tool will display a message confirming the USB flash drive is ready. Click "Finish".
Preparing Your Laptop for Installation
Before attempting to install Windows 10, you must prepare your laptop. This involves a few crucial steps:
Back Up Your Data: This is the most important step. A clean installation will erase everything on your laptop's hard drive (or SSD). Back up all your important files, including documents, photos, videos, and music, to an external hard drive, cloud storage, or another computer.
Identify Your Boot Menu Key: You'll need to access your laptop's boot menu to tell it to boot from the USB drive. The key to enter the boot menu varies by manufacturer. Common keys include Delete, F2, F12, Esc, and F10. Consult your laptop's manual or search online for your specific model to determine the correct key.
Enter BIOS/UEFI Settings: After powering on your laptop, immediately press the boot menu key repeatedly. Once you're in the BIOS or UEFI settings, find the "Boot Order" or "Boot Priority" settings.
Prioritize the USB Drive: In the boot order, move your USB drive to the top of the list, ensuring it's the first device the laptop tries to boot from. Save the changes to your BIOS/UEFI settings and exit. Your laptop will restart.
Installing Windows 10 from the Bootable USB
With the bootable USB drive prepared and your laptop configured, the installation process can begin:
Boot from the USB Drive: As your laptop restarts, it should automatically boot from the USB drive. If it doesn’t, immediately press the boot menu key to select the USB drive as the boot device.
Choose Your Language and Keyboard Layout: The Windows 10 setup will appear. Select your preferred language, time, and keyboard layout, and click "Next".
Click "Install Now": Click the prominent "Install now" button.
Enter Your Product Key (or Skip): You’ll be prompted to enter your Windows 10 product key. If you're reinstalling Windows 10 on a device that already had it activated, you can often skip this step. If you do not have a product key, and it is your first time installing, you must purchase one.
Accept the License Terms: Accept the Microsoft Software License Terms and click "Next".
Choose Custom Installation: Select "Custom: Install Windows only (advanced)" to perform a clean installation.
Select Installation Drive: You will be presented with a list of drives. Select the drive on which you want to install Windows 10 (usually your laptop's internal hard drive or, if you have it, your SSD). If the drive has partitions, you may need to delete them before proceeding to create a new partition.
Format and Click "Next": If you have existing partitions on your drive, you will need to delete them and select "Format" to prepare the drive for installation to occur. Click "Next" to begin the installation process.
Wait for Installation: Windows 10 will start installing. The process involves copying files, installing features, and installing updates. This can take some time.
Restart and Complete Setup: Your laptop will restart multiple times during the installation process. After the final restart, you'll be prompted to personalize your settings, create a user account, and connect to the internet.
Post-Installation steps
Congratulations! You have completed the installation of Windows 10. But the job doesn't end here. The final touches
