how to test if laptop microphone is working
Title: how to test a microphone working or not, sound recording or not
Channel: Shabd Tech Support
how to test a microphone working or not, sound recording or not by Shabd Tech Support
how to test if laptop microphone is working, how to test if your laptop microphone is working, how to check if laptop microphone is on, how to check if my laptop mic is working, how to check if your laptop mic is working, how to check if microphone is working on lenovo laptop, how to check if microphone is working on hp laptop, how to check if microphone is working on dell laptop, how do i check if my laptop microphone is working, how to check microphone is working or not in laptop
Is Your Laptop Mic DEAD? (This 1-Minute Test Will SHOCK You!)
Is Your Laptop Microphone Alive or Buried? A Minute to Find Out!
Ever felt like you're shouting into the void during a Zoom call? Or maybe your voice messages sound muffled and distant? It’s incredibly frustrating when your laptop microphone acts up. Moreover, is it even working? Don't worry, we'll find out in a flash. In this guide, we’ll perform a quick test. Consequently, we'll determine if your laptop's mic is alive and kicking. Prepare to be surprised!
The Dreaded Silence: Why Your Mic Might Be Mute
Let's face it, tech can be temperamental. Firstly, the microphone might be disabled. Secondly, audio settings could be incorrect. In particular, the physical hardware might be at fault. Furthermore, a simple software glitch could be the culprit. Consequently, troubleshooting is crucial. Additionally, understanding potential issues helps. It helps you avoid embarrassing digital moments. Consequently, you'll be prepared for any audio hiccups.
A Sneaky 60-Second Test: Unmasking the Truth
Ready for the big reveal? We’re about to put your mic through its paces. This test takes approximately 60 seconds. Here's how you do it.
Step 1: Access Your Sound Settings (It's Easier Than You Think!)
First, locate the speaker icon in your system tray. Usually, this is located at the bottom-right corner of your screen. Secondly, right-click on the icon. Then, select "Open Sound settings" or "Sounds." Another option might be "Sound Control Panel."
Step 2: The Microphone's Moment of Truth
Once sound settings appear, navigate to the "Input" section. You should be able to see your microphone listed. If not, double-check the “choose your input device” dropdown. It should display all the available mics. Select your laptop's built-in microphone or the external mic.
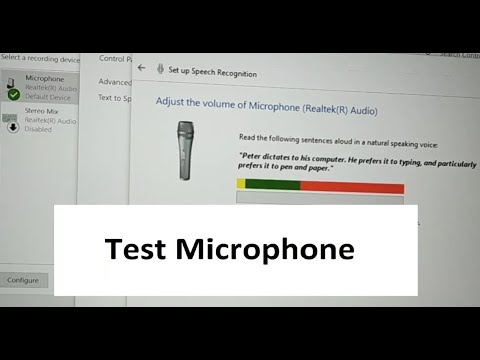
Step 3: The Talking Test (Say Something!)
Now, carefully speak into your microphone. For instance, say a test phrase. Perhaps, “Testing, one, two, three, can you hear me now?” Observe the input level meter. This bar will show activity based on the loudness of your voice.
Step 4: Evaluate the Results!
If the input level bar moves, your mic is working! However, is the volume adequate? Adjust any microphone volume settings. Additionally, test again using the same steps. If the bar shows no activity, the microphone likely has a problem. Furthermore, check the following.
Microphone Troubleshooting: Because Silence Isn't Golden (Always!)
Okay, so your test wasn't a success. However, don't lose hope! Troubleshooting often solves common issues.
Double-Check Connections: If using a headset or external mic, ensure it's connected correctly. Also, make sure the cable is physically attached.
Driver Dilemmas: Outdated or corrupted drivers cause issues. Consequently, uninstalling and reinstalling drivers could solve the problem. Go to Device Manager (search for it in Windows). Expand "Audio inputs and outputs" or "Sound, video and game controllers." Right-click on your mic or audio device. Select "Update driver" or "Uninstall device."
Software Sabotage: Some programs can interfere with your microphone access. So, ensure nothing else is using it. Close unnecessary applications.
Privacy Settings: Confirm your operating system's privacy settings. Ensure applications have permission to use your microphone.
Hardware Hurdles: Rarely, the microphone itself might be faulty. Try a different microphone. If that works, your built-in mic might need repair.
Beyond the Basics: Pro Tips for Pristine Audio
Want to elevate your audio game? These tips will help.
Position Perfection: Place the microphone in an ideal position. For example, keep it relatively close to your mouth. Maintain distance from noisy surroundings.
Noise Reduction Wizardry: Most operating systems offer noise suppression settings. Experiment with these settings to minimize background sounds.
Software Solutions: Use sound recording or conferencing software. Explore its built-in noise reduction tools.
Test Regularly: Periodically check your microphone. Be proactive about audio issues. So, you're ready for any virtual meeting.
Conclusion: Hear Ye, Hear Ye!
So, does your laptop microphone pass the test? Hopefully, it's delivering clear audio. Furthermore, you now have the tools to diagnose and fix audio problems. Remember, a functioning microphone is crucial. Consequently, you can communicate effectively in the digital world. So, take this knowledge and conquer those virtual calls!
HP Laptop Brightness & Volume DEAD? FIX THIS NOW!Is Your Laptop Mic DEAD? (This 1-Minute Test Will SHOCK You!)
We've all been there. You're on an important video call, ready to wow with your insights, when… crickets. You frantically tap your keyboard, adjust your headset, and whisper into the void, only to realize your laptop microphone has decided to take an unscheduled vacation. Talk about frustrating! So, how do you know if your laptop mic is actually dead, or just playing hide-and-seek? Let’s unravel this mystery together, and the answer might just surprise you. Consider this your personal tech rescue mission.
1. The Dreaded Silence: Recognizing the Early Warning Signs
Before we jump into troubleshooting, let's identify those red flags. Has anyone ever told you they can barely hear you during calls? Do recordings sound like you're talking from the bottom of a well? These subtle cues can be the first whispers of a malfunctioning mic. Think of it like a flickering lightbulb - it signals an impending issue. Ignoring these early warnings can lead to a complete breakdown in communication.
2. The 1-Minute Mic Check That Will Reveal the Truth
Alright, buckle up! This is the moment of truth, the quick test that will tell you, definitively, whether your laptop mic is alive and kicking, or lying dormant. The beauty of this test lies in its simplicity. We'll tackle it step by step:
- Step 1: Open Your Sound Settings. This is where all the magic begins. Navigate to your system settings (usually found in your control panel or settings app), and find the "Sound" or "Audio" section. This is your command center for all things sound-related.
- Step 2: Locate Your Input Device. In the "Sound" settings, you should see a list of input devices, which include your microphone. Look for the device associated with your laptop's built-in mic (it might be labeled "Internal Microphone" or something similar).
- Step 3: The Volume Test. Click on the microphone. You'll notice a volume bar that should react to your voice. If the bar dances up and down with your words, congratulations! Your mic is likely working. If it's as flat as a pancake, well… we have a situation. Speak clearly and loudly. Sometimes, the volume is just too low. Try different voice levels to ensure.
- Step 4: Record a Quick Test. Most operating systems offer a built-in voice recorder or a similar feature. Record a short message – a few sentences will do. Then, play it back. This is the ultimate litmus test. If you hear your voice clearly (even if the quality isn’t perfect), your mic is (mostly) fine. If there's nothing, or only static, we've got a problem.
3. Troubleshooting 101: When the Mic Doesn't Cooperate
So, the test results aren't what you hoped for? Don't despair! We're not giving up yet. Let's troubleshoot some common issues:
- Mute Mania: The most obvious, yet easily overlooked, culprit. Double-check that your mic isn't muted. There's often a dedicated mute button, sometimes on the keyboard (look for a microphone icon). Also, check the software you're using (Zoom, Teams, etc.) for a mute button. It's the equivalent of forgetting your keys inside the door!
- Driver Dilemma: Outdated or corrupted drivers can wreak havoc. Head back to your settings or device manager and ensure your microphone's drivers are up-to-date. Think of drivers as the translators between your mic and your computer. If the translation is off, things won't work.
- Software Interference: Other programs might be hijacking your mic. Close any applications that could potentially be using it, or check your app settings. Some applications are, shall we say, mic hogs!
- Hardware Hurdles: In rarer cases, the problem might be hardware-related. Is the microphone physically damaged? Are the connections loose? This is where a more experienced techie might have to get involved.
4. Software Solutions: Taming the Digital Beast
Often, the fix lies within the digital realm. Here's how to address software-related microphone issues:
- Check App Permissions: In your privacy settings, make sure the app you're using has permission to access your microphone.
- Update Your Apps: Outdated apps can create compatibility issues. Ensure you're running the latest versions.
- Restart Your Computer: The classic reset button can often solve the simplest problems. It's like hitting the reset button on life.
5. The Great Microphone Hunt: External vs. Built-in
This might be the perfect time to consider external options if your internal mic is consistently giving you problems. External microphones, such as USB mics or headsets, offer improved sound quality and are often more reliable. They're like upgrading from a rusty bicycle to a sleek sports car.
6. Microphone Placement Tips: Finding the Sweet Spot
Even if your microphone is working, its positioning can impact sound quality.
- Proximity Is Key: Position the microphone close to your mouth, but not directly in front. Imagine being 6 inches away from it for optimal quality.
- Angles Matter: Experiment with different angles to find the perfect sweet spot. We are not trying to get sound like a parrot.
- Minimize Background Noise: Be mindful of your surroundings, and try to eliminate any distracting sounds.
7. Demystifying Microphone Settings: Gain, Noise Cancellation, and More
Let's dive into the more technical aspects:
- Gain Control: This adjusts the microphone's input volume. Too low, and you'll be faint. Too high, and you'll get distortion.
- Noise Cancellation: Most microphones have built-in noise cancellation. Adjust this setting to help reduce background distractions.
- Equalization settings: In some advanced setups, experiment with equalization settings, specifically, reducing low frequencies.
8. The Hardware Checkup: A Physical Examination
Sometimes, the problem isn't software-related at all. Conduct a quick physical inspection:
- Dust and Debris: Clean out the microphone input, if visible.
- Loose Connections: Check for any loose connections on external devices.
- Damage Assessment: Look for any physical damage to the microphone itself.
9. Reboot and Recalibrate: The Art of Persistence
If all else fails, consider the following:
- Restart: Rebooting your laptop can often resolve temporary glitches.
- Reinstall Drivers: If you've updated your drivers recently, try rolling them back to a previous version.
- Factory Reset (Last Resort): This is a more drastic measure, but sometimes a factory reset can resolve deeper issues.
10. The Power of a Headset: Amplifying Your Voice
Consider a headset for better audio quality and ease of use. Headsets combine a microphone and headphones for a seamless communication experience. They're like having your own personal studio and you have the freedom to move around.
11. Common Laptop Microphone Problems and How to Fix Them
Let's address some typical problems:
- Static/Hissing: This is often due to interference or gain issues. Reduce the gain, or check for nearby sources of electrical interference.
- Echo: This can happen if your speakers are on and your microphone is picking up the sound. Mute your speakers or use headphones.
- Low Volume: Check the gain settings, and make sure the microphone isn't too far away.
12. How to Test Your Microphone on Different Platforms
Testing your microphone on various platforms (Zoom, Teams, Skype, etc.) is crucial. Each platform has its unique settings.
- Platform-Specific Settings: Familiarize yourself with the microphone settings within each platform.
- Test Calls: Make a test call to ensure everything is working correctly.
- Troubleshooting per Platform: Each platform may have its own specific troubleshooting tips.
13. Avoiding Future Microphone Meltdowns
Prevention is key! Here are some tips to keep your laptop mic in tip-top shape:
- Regular Updates: Keep your drivers and software updated.
- Gentle Handling: Avoid dropping or damaging your laptop.
- Cleanliness: Dust your laptop regularly.
14. When to Call in the Experts: Knowing Your Limits
If you've tried everything, and your mic is still dead, it might be time to seek professional help.
- Hardware Issues: Hardware problems often require the assistance of a technician.
- Software Complexity: Complex software issues might be beyond your skill level.
- Warranty Considerations: If your laptop is under warranty, contact the manufacturer.
15. The Final Verdict: Victory or Defeat?
By now, you should have a clear understanding of your laptop mic's status. Did our 1-minute test reveal a working microphone, or did it unearth a tech tragedy? Whatever the outcome, armed with this knowledge, you're now prepared to troubleshoot and communicate with confidence.
Closing Thoughts: Your Voice Matters
We hope this guide has been helpful and informative! Remember, technology is meant to make our lives easier. Don't let a dead microphone hold you back. With a little bit of knowledge
Steal This List: 10 Unbeatable Budget Work Laptops (2024)How To Check Microphone Is Working Or Not Laptop & PC

By Your Fix Guide How To Check Microphone Is Working Or Not Laptop & PC by Your Fix Guide
How to Test a Microphone on Windows 11 , Working or Not, Sound Recording or Not Solution
By MDTechVideos How to Test a Microphone on Windows 11 , Working or Not, Sound Recording or Not Solution by MDTechVideos
How To Fix Mic Not Working On PC - Full Guide
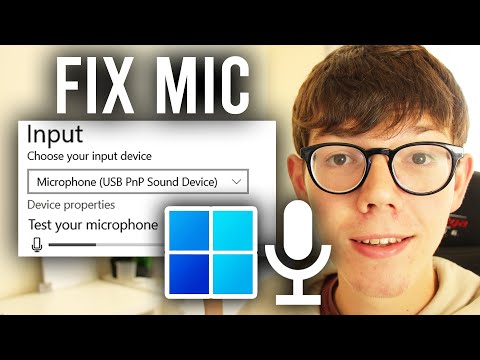
By GuideRealm How To Fix Mic Not Working On PC - Full Guide by GuideRealm
Title: Test Microphone Dell Laptop Tutorial
Channel: TechFixIT
Test Microphone Dell Laptop Tutorial by TechFixIT
Wifi On Laptop Phone
The title for your article is: "The Definitive Guide to Choosing the Perfect Wedding Photographer"
The Definitive Guide to Choosing the Perfect Wedding Photographer
The wedding day. A day meticulously planned, dreamed about for years, and destined to be etched forever in your memory. Within the tapestry of this extraordinary occasion, the photographs stand as immutable chronicles, preserving the fleeting moments, the stolen glances, the joyous celebrations for generations to come. Choosing the right photographer is not merely a decision; it is an investment in your legacy, a commitment to capturing the essence of your love story. To ensure you make this crucial selection with confidence and clarity, we present this definitive guide, designed to illuminate the path towards securing the perfect wedding photographer for your unique needs and vision.
Defining Your Photographic Vision: Style and Aesthetics
Before embarking on a search, a crucial first step lies in defining your photographic vision. What aesthetic resonates with you? What style of imagery do you envision adorning your walls and gracing your wedding album? The diverse landscape of wedding photography offers a spectrum of styles, each possessing its distinct characteristics and charm.
Consider the following:
Traditional Photography: This style emphasizes classic poses, formal portraits, and meticulously composed shots. It's characterized by clean lines, precise framing, and a timeless elegance. If you value heritage and a sense of formality, traditional photography may be ideal.
Photojournalistic/Documentary Photography: This approach focuses on candid moments, unscripted interactions, and a narrative-driven storytelling. The photographer acts as an observer, capturing the raw emotion and authentic experiences of the day. If you prioritize capturing the genuine essence of your wedding, this style is a compelling choice.
Contemporary Photography: This style often blends elements of both traditional and photojournalistic approaches, incorporating artistic angles, creative lighting, and modern techniques. It emphasizes both posed portraits and candid moments, often with a touch of editorial flair.
Fine Art Photography: Known for its soft, romantic lighting, ethereal tones, and a focus on artistic expression. Fine art photographers often utilize film or digital techniques to achieve a dreamy, painterly aesthetic.
Editorial Photography: Characterized by a fashion-forward approach, this style often incorporates dramatic lighting, stylized poses, and a focus on creating visually stunning images.
Carefully examine various wedding photography portfolio websites and blogs. Identify the styles that consistently captivate you. Pinpoint specific images you love – the way the light falls, the composition, the emotional connection. This process will solidify your understanding of your preferred aesthetic, providing a vital foundation for your search.
Research and Initial Screening: Finding Your Potential Match
Armed with a clear understanding of your desired photographic style, the search process can begin. The internet offers an abundance of resources, serving as an invaluable tool for your initial research.
Begin by exploring these avenues:
Online Wedding Directories: Websites such as The Knot, WeddingWire, and Zola provide extensive lists of photographers in your geographic area. Utilize the search filters to narrow down the options based on style, price range, and availability.
Social Media Platforms: Instagram, Pinterest, and Facebook are goldmines for discovering wedding photographers. Search for relevant hashtags (e.g., #weddingphotographer[yourcity], #destinationweddingphotography) to unearth potential candidates. Review their portfolios, engage with their content, and assess their visual narrative.
Word-of-Mouth Referrals: Ask recently married friends, family members, and colleagues for their recommendations. Personal experiences often provide the most genuine insights into a photographer's professionalism, personality, and quality of work.
Once you've compiled a list of potential photographers, meticulously review their websites and portfolios. Pay close attention to the following:
Photography Style Consistency: Does their portfolio align with the style you've defined? Ensure the images consistently demonstrate their aesthetic preferences.
Full Wedding Portfolios: Ideally, review full wedding galleries rather than just a curated selection of highlight images. This provides a more complete picture of their ability to document an entire wedding day.
Technical Proficiency: Assess the technical quality of their photographs. Examine the sharpness, composition, lighting, and overall aesthetic appeal.
Client Testimonials: Read client reviews and testimonials to gauge their professionalism, reliability, and ability to deliver exceptional service.
The Consultation: Unveiling the Photographer's Personality and Approach
Once you've narrowed down your choices, schedule consultations with your top picks. This is a vital opportunity to assess their personality, gauge their work ethic, and determine if they're a good fit for your wedding. Prepare a list of questions to delve into their experience, services, and approach.
During the consultation, consider the following:
Personality and Communication: Is the photographer friendly, approachable, and responsive? Effective communication is crucial for a smooth and enjoyable experience.
Experience and Expertise: Determine their years of experience, their familiarity with your wedding venue, and their knowledge of lighting and camera settings.
Wedding Day Approach: Inquire about their shooting style, how they manage the day, and their ability to blend seamlessly into the environment. Ask about their backup plan in case of equipment failure.
Package Details and Pricing: Understand the specifics of their packages, what's included (e.g., hours of coverage, number of photographers, prints, albums), and the total cost. Obtain a detailed contract that outlines all services and payment terms.
Portfolio Review: Review additional full wedding galleries that align with your venue and time of year.
Contract and Payment Terms: Before signing a contract, carefully review all terms and conditions. Ensure you understand payment schedules, cancellation policies, and the specifics of photo delivery.
Insurance: Ask about photographer's insurance.
The Contract: Securing Your Photographer and Protecting Your Investment
Following the consultation, a contract formalizes the agreement between you and the photographer. Thoroughly review this document before signing. It is crucial that all included terms align with the conversations you held and the services agreed upon.
Key elements to look for in the contract:
- Services Provided: Clearly outline the specific photography services, including hours of coverage, pre-wedding meetings, number of photographers, and any additional services.
- Fees and Payment Schedule: Ensure the total price and payment schedule are accurately reflected in the contract. Include details on deposit amounts, payment deadlines, and acceptable methods of payment.
- Cancellation Policy: Specify the terms of cancellation by either party, including any associated fees or refunds.
- Image Delivery: State the type of images delivered (e.g., high-resolution digital files, prints) and the estimated turnaround time for delivery.
- Image Usage Rights: Clarify the photographer’s and your rights regarding image usage and reproduction.
- Models, Releases, and Permissions: Ensure that the photographer has all necessary model releases, location permits, and permissions.
- Liability and Insurance: The contract should outline each party's liability in the event of unforeseen circumstances (e.g., equipment failure, photographer illness).
Preparing for the Big Day: Communicating your Vision
Once the contract is executed, maintain open communication with your photographer leading up to the wedding. You should provide them with this information:
- Wedding Day Timeline: Share your detailed wedding day timeline, including the ceremony, reception, and any planned activities. This allows them to anticipate key moments and plan their coverage accordingly.
- Shot List: Provide a shot list of must-have photos. It's important to discuss any specific requests (e.g., family portraits, special moments) to ensure they are captured.
- Venue Information: Share details about the venue, including locations for portraits, ideal lighting conditions, and any restrictions.
- Vendor Communication: Facilitate communication between your photographer and other vendors (e.g., wedding planner, videographer) to ensure seamless coordination and prevent conflicts.
- Contact Information: Make sure the photographer has all contact information for important people.
- Style Preference: Provide the same style preferences as discussed during initial consultation.
Post-Wedding: Receiving and Cherishing Your Memories
Following the wedding, the final step involves receiving your photographs and albums.
- Image Delivery: Ensure that the images are delivered according to the timeframe specified in the contract.
- Image Review and Selection: Review the photos carefully, and select any images for print albums, wall art, or other personalized memorabilia.
- Album Design and Proofing: If you've ordered an album, work with the photographer to select the images and arrange the layout. Review and approve the final proof before printing.
- Backup and Preservation: Back up your digital images in multiple locations (e.g., external hard drives, cloud storage) to protect them from loss or damage.
- Share Your Experience: Share your experience by writing a review of your photographer to help other couples.
By following this comprehensive guide, you can approach the process of choosing a wedding photographer with informed confidence. Remember that the photographs are a timeless investment, encapsulating the precious memories of your wedding day. The perfect photographer will not only capture the moments but will also contribute to your unique experience.
