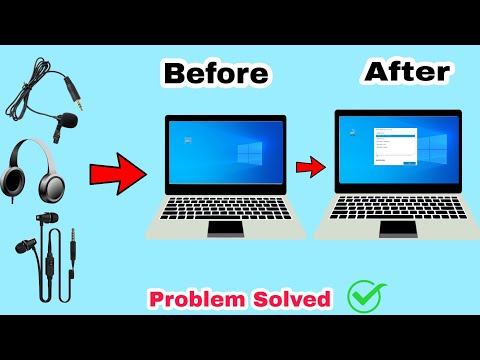
external mic doesn't work on acer laptop

Title: Fix Microphone Not Working on Windows 10
Channel: The Geek Page
Fix Microphone Not Working on Windows 10 by The Geek Page
Acer Laptop Mic Nightmare: FIXED! (Easy Steps Inside)
Acer Laptop Microphone Mayhem: Conquer the Silence!
Have you ever wrestled with a phantom microphone? You know, the one that refuses to cooperate, leaving you stranded in digital silence. This frustrating experience is all too common, especially with Acer laptops. I understand your pain. Fortunately, there's a light at the end of the tunnel. It’s time to banish those audio woes. So, let's dive in. Moreover, we'll get your Acer laptop mic working like a charm.
The Acoustic Anomaly: Identifying the Culprit
Before launching into solutions, let's diagnose the problem. Is your microphone completely silent? Or, could you hear a faint whisper, distorted noises, or even constant static? These clues are crucial. Specifically, they'll pinpoint the source of your aggravation. To continue, consider these possibilities. First, the microphone hardware itself might be faulty. Second, the software settings could be misconfigured. Thirdly, the drivers could be outdated or corrupted. Furthermore, understanding these potential causes helps us troubleshoot effectively. In essence, we're detectives on a mission.
Decoding the Digital Decibel Dilemma: Troubleshooting Steps
Now, roll up your sleeves. It's time to troubleshoot the problem. We'll walk through several straightforward steps. Consequently, you'll unlock your Acer laptop's audio potential.
- Step 1: The Sound Check Symphony – Hardware Verification
Initially, let’s eliminate the obvious. Is your microphone even physically connected? If you're using an external microphone, ensure it's securely plugged in. Afterwards, check the microphone's mute button. It's a common oversight. So, make sure it's not inadvertently engaged. Next, we could try a quick sound test. Access your laptop's audio settings. Then, verify the correct microphone is selected as the default input device. Besides, speak into the microphone. Observe the input level indicator. Does it register any sound? If the indicator moves, the hardware is likely functioning. However, if there's no response, we might have greater issues, let's keep that in mind.
- Step 2: The Software Serenade – Configuration Chronicles
Assuming your microphone hardware passes the sound check, let's explore software configuration. Head to your Windows settings. Then, navigate to the "Sound" section. Here, you will find input devices. Besides, make sure your Acer laptop's microphone is enabled. Sometimes, the microphone gets disabled accidentally. Subsequently, check the volume levels. The volume slider for your microphone should be set appropriately. Also, ensure that no applications are overriding the microphone's settings. Additionally, check the privacy settings related to the microphone. Some applications may not have permission to utilize your microphone. To clarify, grant the necessary permissions. Moreover, ensure any sound enhancements are either disabled or configured correctly.
- Step 3: The Driver's Dance – Update and Reinstall
Outdated or corrupted drivers are frequently the root of audio problems. It's essential to keep your drivers up-to-date. Open your Device Manager. You can easily find this by searching in the Windows search bar. Then, expand the "Sound, video and game controllers" section. Locate your microphone or audio device. Right-click on it and select "Update driver". Alternatively, you can choose "Uninstall device". Then, restart your laptop. Windows will automatically reinstall the driver. For better results, visit the Acer support website. Furthermore, download the latest drivers specifically for your laptop model. After all, this direct approach is vital to fix the error.
- Step 4: Application Audition – Selective Testing
The problem might be specific to a certain application. Try testing your microphone in multiple applications. Use the native Windows voice recorder. Furthermore, launch a video conferencing app. If the microphone works in one application but not another, the issue lies within the application. Consider checking the application's audio settings. To clarify, review microphone selection and volume levels. In addition, ensure the application has the necessary permissions.
Beyond the Basics: Advanced Troubleshooting Tips
Still struggling? Let’s explore a few less frequent but equally important strategies.
- Check for Physical Obstructions: It may sound silly, but a blocked microphone port can be the culprit. Make sure nothing is obstructing the microphone. A small speck of dust may be the only issue.
- Try a Different Microphone: If possible, test with an external microphone. This will help you isolate the problem. You need to differentiate between the software and hardware issues.
- Run the Windows Troubleshooter: Windows has built-in troubleshooters. They can automatically diagnose and fix common audio problems. Access the troubleshooter through the Sound settings panel.
- Consider a System Restore: Restoring your laptop to a previous point in time. If you are certain that the microphone worked, it could be an option. But, this is dependent on your system.
The Grand Finale: Triumph Over the Silence
By methodically following these steps, you should be able to resolve your Acer laptop microphone issues. In short, you've got this! If all else fails, contacting Acer's customer support is always an option. However, more often than not, these troubleshooting tips will have you back to crystal-clear audio. Now, go forth and conquer the silence!
Laptop Drop: My Blu-ray Drive Died?! (😱)Acer Laptop Mic Nightmare: FIXED! (Easy Steps Inside)
Hey everyone, let's be honest: there's nothing quite as frustrating as a malfunctioning microphone. You’re ready to hop on that Zoom call, catch up with your best friend, or record that killer podcast intro, only to be met with… silence. Or worse, a crackling, garbled mess that makes you sound like you're broadcasting from the bottom of the ocean. And if you, like me, are an Acer laptop owner, you might have experienced the dreaded "Acer laptop mic not working" saga. Fear not, my friends! We've all been there, and we’ve got the solutions. Forget wrestling with tech support for hours, because we're diving headfirst into fixing that Acer laptop mic nightmare.
1. The Silent Struggle: Identifying the Problem
Think of this as the "detective work" phase. Before we start scrambling for fixes, we need to figure out what exactly is going wrong. Is your microphone completely silent? Does it pick up sound but it's distorted or too quiet? Is your Acer laptop even detecting a microphone? We need to establish the baseline before we start tweaking things. This is like diagnosing a sick plant; you wouldn’t just start watering it without knowing if it needs light or not, right? So, let's get to the root of it.
2. The Hardware Hustle: Checking the Basics
Let’s start with the obvious, the things that might seem silly, but are often the culprits! It's like forgetting to plug in your phone to charge – facepalm moments are common.
- Microphone Port: If you're using an external microphone, is it plugged in securely? Wiggle it around a bit. It might seem obvious, but loose connections are sneaky devils.
- Integrated Microphone: Is the built-in microphone blocked? Check if anything (a sticker, a piece of tape, a rogue piece of paper!) is covering the tiny microphone opening usually found near the webcam.
- The Headphone Jack: This is a little more technical, but sometimes a dodgy headphone jack can confuse the laptop. Try plugging in headphones, and then unplugging them. This can sometimes reset the audio settings.
- Volume Levels: Double-check that the microphone volume isn’t muted or turned down in the Windows settings (more on that later). It's the digital equivalent of forgetting your keys, easily overlooked but incredibly frustrating when you need them.
3. Diving into the Windows Settings: Your First Line of Defense
Now, let's move to the digital realm. Windows is your command center, the control room for all things tech. We're going to dig into the settings to ensure everything is set up correctly. I know, the settings menu can feel like a digital labyrinth, but we'll navigate it together.
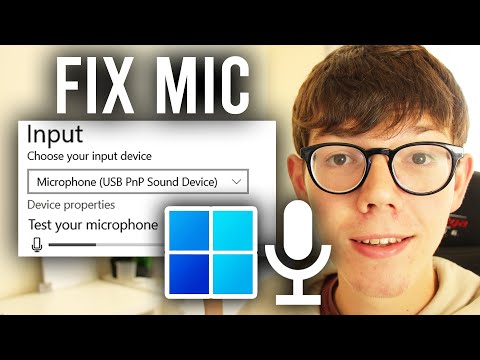
- Accessing Sound Settings: Click the little speaker icon in your system tray (that's the bottom-right corner of your screen). Right-click on it and select "Open Sound settings."
- Input Devices: Here, you should see a list of input devices (microphones). If your Acer laptop's internal microphone isn't showing up, try selecting "Troubleshoot" – Windows has surprisingly helpful built-in troubleshooters!
- Setting Your Microphone: Once the microphone appears, make sure it's selected as the default input device. There’s often a handy dropdown menu to adjust this.
- Volume Levels Again: Inside the "Input" device properties, verify that the microphone volume isn't muted or set to zero. Slide that volume bar up!
4. Drivers, Drivers, Drivers! The Tech's Silent Guardians
Think of drivers as the translators between your Acer laptop's hardware and the operating system. Without the right drivers, your microphone can't "speak" to your computer. It’s like trying to have a conversation in a language you don't speak.
- Device Manager: Access the Device Manager (search for it in the Windows search bar). This is your control panel for all connected devices.
- Audio Inputs and Outputs: Expand this category. You should see your microphone listed (it might be under a broader “audio input” category).
- Driver Updates: Right-click on your microphone and select "Update driver." Choose "Search automatically for drivers." Windows will then try to find and install the latest drivers for your microphone.
- Manual Installation (if necessary): If automatic updates fail, you might need to go to the Acer website, find your specific laptop model, and download the audio drivers manually.
5. The Application Check-Up: App Settings Matter Too!
Often, the problem isn’t the laptop itself, but the application you're using. Zoom, Skype, Discord, or any other communication program – these all have their own audio settings that can override your system settings.
- Check Application Settings: Open the application you're using (e.g., Zoom). Go to its audio settings.
- Select the Correct Microphone: Make sure the correct microphone is selected as the input device within the application. Sometimes, it defaults to a different one or even disables it.
- Test the Microphone: Most applications offer a built-in microphone test. Use it to make sure your voice is being picked up.
6. The Physical Reality Check: External Mic Issues
If you're using an external microphone, the troubleshooting steps are slightly different.
- USB Connections: If it's a USB microphone, try unplugging it and plugging it into a different USB port. Sometimes this resolves connection issues.
- External Mic Driver Updates: Make sure to consult the manufacturer’s website for driver updates for an external mic.
- Compatibility: Ensure your external microphone is compatible with your Acer laptop's operating system.
7. Software Conflicts and Running Interference
Sometimes, other software can interfere with your microphone. Think of it like a crowded room – everyone is trying to talk at once.
- Close Unnecessary Programs: Close any programs you’re not actively using, especially those with audio capabilities, to free up resources.
- Check Background Processes: Open the Task Manager (Ctrl+Shift+Esc) and close any suspicious processes that might be hogging audio resources.
- Antivirus/Firewall Interference: Rarely, your antivirus or firewall software might be blocking your microphone's access. Check your security software settings to ensure it isn't restricting audio input.
8. Restarting Your Acer: The Digital Reset Button
Sometimes, the simplest solution works best. Restarting your Acer laptop can solve a surprising number of issues. It’s like hitting the reset button on a video game console – it clears out temporary glitches and memory errors. After the restart, recheck all your settings.
9. Audio Enhancements and Why They Can Sometimes Backfire
Windows often includes audio enhancements that aim to improve sound quality. But sometimes, these features can actually hinder your microphone's performance.
- Disable Enhancements: Go back to your sound settings, select your microphone, and look for an "Enhancements" tab or section. Try disabling any enhancements to see if that fixes the issue.
- Noise Cancellation: Some enhancements include built-in noise cancellation. Tinkering with these settings can sometimes make a significant difference. Find a quiet environment to test after configuring.
10. The Acer Support Route: When to Call in the Pros
If you’ve tried everything above, it's time to consider getting professional help.
- Acer Support: Contact Acer's technical support. They have specific knowledge of your model and might have encountered this problem before.
- Warranty Check: Check if your Acer laptop is still under warranty. If so, you might be eligible for a free repair.
11. BIOS Updates: The Advanced Tune-Up
A BIOS update might fix some underlying hardware or software issues.
- Proceed with Caution: BIOS updates can be risky, so only do this if you are comfortable. Check the Acer website for the BIOS update for your specific model, and carefully follow the instructions.
- Research: Ensure you know what you are doing before proceeding.
12. The Clean Boot: Removing Clutter
A "clean boot" starts Windows with a minimal set of drivers and startup programs, which will help you diagnose any software conflicts.
- System Configuration: Search for "msconfig" in the Windows search bar.
- Services: In the System Configuration window, go to the "Services" tab. Check "Hide all Microsoft services," and then click "Disable all."
- Startup: Go to the “Startup” tab and disable all startup items.
- Restart: Restart your laptop to test after that.
13. Using a Headset: A Quick Fix
Sometimes the easiest solution is the best.
- Try a Headset: Plug in a headset with a microphone. If it works, you know the problem is with either your laptop's internal microphone or the audio settings.
- Troubleshooting: If it still doesn't work, then the problem likely runs deeper.
14. Reinstalling Audio Drivers: The Nuclear Option
Sometimes, drivers become corrupted. Reinstalling
Lenovo Touchscreen DEAD? FIX This NOW!Mic not working on PC FIX 2025 QUICK AND EXPERT STEP TO FIX mic not working on PC

By Etechniz Mic not working on PC FIX 2025 QUICK AND EXPERT STEP TO FIX mic not working on PC by Etechniz
How To Fix Microphone On Acer Laptop Latest

By Ultimate PC Guide How To Fix Microphone On Acer Laptop Latest by Ultimate PC Guide
How To Fix Windows 10 Not Detecting HeadphonesMicrophone When Plugged In Best Working Method 2021
By Zeeshan Awan How To Fix Windows 10 Not Detecting HeadphonesMicrophone When Plugged In Best Working Method 2021 by Zeeshan Awan
Title: How To Fix Mic Not Working On PC - Full Guide
Channel: GuideRealm
How To Fix Mic Not Working On PC - Full Guide by GuideRealm
Laptop Working
Acer Laptop Mic Nightmare: Conquering the Audio Abyss (Simplified!)
Have you recently found yourself wrestling with an Acer laptop's microphone, only to be met with deafening silence or distorted audio? Perhaps your voice sounds like it's emanating from the bottom of a well, or worse, it's completely absent during crucial online meetings or gaming sessions. You're not alone. This is a common issue, and thankfully, it's often resolvable with a series of straightforward steps. We'll guide you through the process, transforming your Acer laptop's microphone from a source of frustration to a reliable communication tool. Prepare to bid farewell to the audio abyss and reclaim crystal-clear sound!
Identifying the Culprit: Pinpointing the Source of the Microphone Malfunction
Before we dive into solutions, let's clarify the issue. Is the microphone completely unresponsive, producing no sound at all? Or is the sound distorted, crackling, or too quiet? The specific symptoms often point to different underlying problems. A total lack of audio usually indicates a hardware or driver issue, while distortion can stem from software settings or environmental factors. Let’s methodically investigate the most frequent troublemakers.
Step 1: The Elementary Check – Hardware and Physical Connections
It is easy to overlook the simplest things. Begin with the basics: confirm that the Acer laptop's microphone isn't physically disabled. Some models have a physical switch, typically located on the laptop's frame, that can mute the microphone. Ensure this switch is in the "on" position.
Next, inspect the integrated microphone's location. Most Acer laptops have their microphones integrated into the top bezel of the screen, near the webcam. Avoid obstructing the microphone. Covering it accidentally with a finger or positioning the laptop in a way that blocks sound delivery can render it effectively useless.
If you're using an external microphone (headset, USB microphone), double-check its physical connection. Is the plug firmly seated? Try unplugging and re-plugging the microphone to ensure a secure connection. If using a USB microphone, try a different USB port; a faulty port can sometimes impede device functionality.
Step 2: Diving into the Digital Realm: Software and Driver Investigations
Assuming the physical checks are complete, let's move onto the digital realm. The most typical root of the problem is a software or driver issue. First, access your sound settings.
2.1 Accessing Sound Settings on Windows
Windows 10/11: Right-click on the speaker icon in the bottom-right corner of your screen (system tray). Select "Open Sound settings." Alternatively, you can search for "Sound settings" in the Windows search bar.
Windows 10/8/7: Open the Control Panel and search for "sound." Click on "Sound."
2.2 Checking the Recording Devices
Once you've opened the sound settings, navigate to the "Recording" tab. Here, you should see a list of all available microphones. Your internal microphone should be listed, as well as any external microphones you have connected.
2.3 Enabling the Microphone and Adjusting Levels
Is Your Microphone Disabled? If your microphone isn't listed, right-click in the white space in the "Recording" tab. Select "Show Disabled Devices" and "Show Disconnected Devices." If your microphone appears now, right-click on it and select "Enable."
Checking Microphone Levels: Right-click on your chosen microphone (internal or external) and select "Properties." Go to the "Levels" tab. Make sure the microphone volume isn't muted (there shouldn't be a red "X" over the speaker icon). Adjust the microphone level to an appropriate setting. Start with a moderate level and test the microphone. You may need to increase the level incrementally until the sound is clear and audible.
Microphone Boost: The "Microphone Boost" setting, also found in the "Levels" tab, can sometimes improve the microphone's output. But use it cautiously. Excessive boost can introduce background noise and distortion. Start with a low boost value and only increase it if necessary to achieve a usable signal.
Step 3: Driver Deep Dive – Updating, Reinstalling, and Troubleshooting Drivers
Outdated or corrupted drivers are frequent causes of microphone problems. Let’s ensure your microphone drivers are up-to-date and properly installed.
3.1 Updating Drivers through Device Manager
- Access Device Manager: Right-click on the Start button (Windows icon) and select "Device Manager." Or, you can search for "Device Manager" in the Windows search bar.
- Locate the Microphone: In Device Manager, expand the "Audio inputs and outputs" section. You should see your microphone listed here.
- Update the Driver: Right-click on your microphone and select "Update driver."
- Choose Driver Update Method: Select "Search automatically for drivers." Windows will search for updated drivers online and install them if available.
- Restart Your Laptop: After installing the updated drivers, restart your Acer laptop. Test your microphone after the restart.
3.2 Reinstalling the Microphone Driver
Sometimes, a clean reinstall is necessary to resolve driver-related conflicts.
- Uninstall the Driver: In Device Manager, right-click on your microphone and select "Uninstall device."
- Confirm Uninstall: A confirmation dialog will appear. Check the box that says "Delete the driver software for this device" (if available). This ensures a clean removal.
- Restart Your Laptop: Restart your laptop. Windows will typically reinstall the default driver automatically.
- Test the Microphone: After the restart, test the microphone functionality. If the basic driver doesn’t work, you must install the latest one from the Acer website.
3.3 Downloading and Installing the Latest Drivers from Acer
If updating the driver through Device Manager doesn't work, or if you are experiencing problems, you should consider downloading the drivers directly from the Acer support website.
- Go to the Acer Support Website: Navigate to the official Acer support website for your region.
- Enter Your Laptop's Model Number: Use the search bar to find your Acer laptop model. You can typically find the model number on a sticker on the bottom of your laptop or in the BIOS settings.
- Find Driver Downloads: Once you see your laptop model, navigate to the "Drivers and Manuals" or "Downloads" section.
- Locate Audio Drivers: Look for audio drivers, specifically those related to the microphone or sound card. Download the latest driver.
- Install the Driver: Run the downloaded installer and follow the on-screen instructions to install the driver.
- Restart Your Laptop: Restart your laptop after the driver installation. Test the microphone after the restart.
Step 4: Software Conflicts and Application-Specific Settings
Beyond the core Windows settings, the problem could be related to specific applications or software conflicts.
4.1 Check Application Permissions
Certain applications have the ability to block microphone access. Make sure the applications you’re using for recording or calls have permission to use the microphone.
- Windows 10/11: Go to "Settings" > "Privacy" > "Microphone."
- Enable Microphone Access for Apps: Ensure the "Microphone access for this device is on" is enabled. Then, enable microphone access for the specific applications you intend to use.
4.2 Application-Specific Settings
Some applications (e.g., Zoom, Skype, Discord) have their own sound settings.
- Access Application Settings: Launch the application and go to its settings menu.
- Check Audio Input: Look for the "Audio" or "Sound" settings. Make sure the correct microphone is selected as the input device. Verify that the input levels are correctly set, and the microphone is not muted within the application.
Step 5: Addressing Interference and Environmental Issues
Sometimes, external factors are the culprit behind your Acer laptop microphone's poor performance.
5.1 Environmental Noise
Excessive background noise can often make it difficult for the microphone to pick up your voice clearly. Try to:
- Reduce background noise: Close windows and doors to minimize outside sounds. Consider moving to a quieter location.
- Test in a controlled environment: Conduct your tests in a quiet room to isolate microphone performance.
5.2 Interference
Electromagnetic interference can sometimes affect microphone performance.
- Keep away from potential sources: Avoid placing your laptop near other electronic devices, such as phones, radios, or other laptops, which might emit disruptive radiation.
- Consider a USB microphone: If interference is a persistent problem, using a USB microphone, which is external, can help to mitigate this problem.
Step 6: Advanced Troubleshooting – System File Checks and More
If the preceding steps haven't solved the problem, more in-depth troubleshooting may be required.
6.1 Run the System File Checker (SFC)
The System File Checker (SFC) utility can scan for and replace corrupted system files that might be contributing to the audio issue.
- Open Command Prompt as Administrator: Search for "cmd" in the Windows search bar. Right-click on "Command Prompt" and select "Run as administrator."
- Run the SFC Scan: Type
sfc /scannowand press Enter.
