apple laptop dvd drive not working

Title: DVD drive won't eject on this macBook pro. Fixed
Channel: dr idiot
DVD drive won't eject on this macBook pro. Fixed by dr idiot
macbook dvd drive not working, hp laptop dvd drive not working, laptop dvd drive not working, macbook pro dvd drive not working
Apple Laptop DVD Drive DEAD? FIX This NOW!
Apple Laptop DVD Drive: Is It Gone Forever? Don't Panic!
Have you ever had that sinking feeling? That moment you realize something on your beloved Apple laptop isn't working like it should. It can be incredibly frustrating, and when it involves something as seemingly obsolete as a DVD drive, the frustration can amplify. But before you resign yourself to a future devoid of disc-based entertainment, take a deep breath. Maybe, just maybe, there’s a solution. So, let's explore what could be the cause of your issues.
The Silent Treatment: Diagnosing the Problem
First, let's acknowledge the obvious. Your Apple laptop is getting older. Technology marches on relentlessly. Therefore, your DVD drive, unlike your screen or processor, is a mechanical component. It contains moving parts and, consequently, is susceptible to wear and tear. Frequently, the drive stops functioning due to simple mechanical failure. However, the problem might be software-related. Often, a corrupted driver or a glitch can lead to the drive's demise.
Try a simple test. Insert a known, working DVD into the drive. Next, listen carefully. Do you hear anything at all? Any whirring, clicking, or a faint attempt at reading the disc? If nothing happens, you can assume it's a hardware malfunction. On the other hand, a few sounds could indicate a more nuanced issue. Furthermore, examine the DVD itself. Is it scratched, dirty, or damaged? A flawed disc can certainly prevent the drive from recognizing it. Now, let’s consider the worst-case scenario.
Software Shenanigans: Resolving the Glitches
Alright then, so it's not hardware. Moreover, the laptop is showing signs of activity! Good news. Consequently, the issue may reside within the software realm. Let's attempt a few simple fixes. Firstly, restart your Apple laptop. This could offer a potential solution. Shut down your machine completely and then restart it. Hence, all background processes will refresh.
Next, check your System Preferences. Specifically, navigate to "Disc Burning". Ensure nothing is set to prevent the drive from operating. Another option involves updating your operating system. Software updates regularly improve device compatibility. It could be just what your drive needs for a new lease on life. Finally, consider reinstalling the drive's software driver. This process can cure various problems. If you are unsure how, search online support.
Hardware Hocus-Pocus: Potential Fixes
Alas, let's assume the worst. Therefore, your DVD drive may have a hardware malfunction. Sadly, hardware repairs are usually more complex. But don't give up just yet! First, try the most straightforward solution: removing the DVD and carefully reinserting it. Sometimes a simple reset is all that’s required. Another possible fix: gently clean the drive lens.
Next, carefully examine the DVD drive itself. If you're comfortable with electronics, inspect the drive mechanism. Otherwise, avoid taking the laptop apart. If you see any obvious issues, such as a loose connection or visible damage, address them immediately. Be extremely cautious. If you are not comfortable, consult a professional for assistance.
The Final Frontier: When to Seek Professional Help
At this point, you've exhausted several troubleshooting methods. However, your Apple laptop DVD drive persists in its refusal to cooperate. At this point, it's time to consult an expert. Don’t delay, for some issues can worsen with time. Find a reputable repair shop specialized in Apple products or contact Apple Support directly. They possess the diagnostic tools and expertise necessary to pinpoint the exact problem. Furthermore, they can discuss the available repair options.
Depending on the age of your laptop, and the specific model, the repair cost can vary greatly. Before committing to repairs, ask for an estimate. Determine whether the cost outweighs the benefits. In many cases, replacing the entire drive might be the best solution.
Beyond the Drive: Adapting to the Digital Age
Finally, let's confront the reality: optical disc usage is declining. Cloud storage and streaming services are now the norm. Consider embracing this digital transformation. Many software applications may now be downloaded electronically. You may not need a DVD drive! Now, let's be honest.
If your drive is beyond repair, it's not the end of the world. There are likely alternative solutions. External DVD drives connect easily to your Apple laptop via USB. These are both practical and affordable. They offer a temporary solution. Ultimately, consider this a sign of the times.
Final Thoughts: A Second Chance for Your Data
Ultimately, a non-functional Apple laptop DVD drive can be a hassle. However, by following these diagnostic steps and troubleshooting tips, you may fix the problem. You should always pursue your options before giving up hope. Remember to proceed carefully. If all else fails, seek expert assistance. Your data and digital entertainment lives on, whether on a disc or in the cloud. The future is here! Therefore, choose your adventure!
HP Laptop F12 Key Dead? This SHOCKING Fix WORKS!Apple Laptop DVD Drive DEAD? FIX This NOW!
Hey there, fellow tech enthusiasts! Ever stare in dismay at your Apple laptop, its DVD drive stubbornly refusing to cooperate? That blank silence when you pop in your favourite disc? Yeah, we’ve all been there. It's frustrating – like finding your favourite book with half the pages missing! But fear not, because we're diving deep to unearth why your Apple laptop's DVD drive has gone rogue and, more importantly, how to get it back up and running. Let’s get started on this tech adventure, shall we?
1. The Silent Treatment: Recognizing a Dead DVD Drive
First things first: how do you know your DVD drive is truly dead? Maybe it’s just taking a coffee break. Here’s what you might be experiencing:
- No Response: The drive simply doesn't acknowledge the disc. No spinning, no whirring, no attempt to read. Nada.
- Eject Button Blues: The eject button is unresponsive. You press it, and… nothing. The disc stubbornly stays put.
- Error Messages Galore: You might see an error message popping up, hinting at hardware problems.
- Constant Noise or Erratic Behavior: The drive might make unusual noises or frequently fail to read discs, even though you tested numerous disks.
If these sound familiar, then it's time to roll up our sleeves and troubleshoot.
2. The Usual Suspects: Common Culprits Behind a DVD Drive's Demise
Before we start waving any magic wands, let's investigate the likely villains causing this digital drama. Think of it like a detective story:
- The Software Saboteur: Sometimes, glitches with the software, either the system itself or third-party apps, can interfere with the drive’s operations. It's like a computer bug interrupting a movie.
- Dust and Debris Dilemma: Dust bunnies and other unwelcome particles can build up inside the drive, making it difficult for the laser to read the disc.
- Physical Damage: A drop, a bump, or just plain wear and tear can wreak havoc, damaging the internal components. This is like a dent in your favourite car; it needs attention.
- Driver Issues: Outdated or corrupted drivers are the digital equivalent of a faulty road map, preventing your laptop from "understanding" the DVD drive.
- Disc Discords: Sometimes, the disc itself is the problem (scratches, incorrect format, etc.). Before labeling the drive as deceased, test with a disc you know works.
3. First Aid: Basic Troubleshooting Steps
Before we get too technical, let’s try some quick fixes. Think of these as the digital equivalent of applying a bandage:
- Restart Your Laptop: This simple reboot can clear out temporary glitches and reset the system. It's often the first thing to try (and sometimes, the only thing needed!).
- Update Your System: Make sure your macOS is up to date. Software updates frequently include driver improvements and bug fixes that might solve your DVD drive problem.
- Clean the Drive (Carefully!): Use a DVD drive cleaner disc. They're readily available and can help dislodge dust.
- Check Disc Compatibility: Is the disc you're using compatible with your laptop's drive (DVD +/- R, RW, etc.)?
- Test With Another Disc: Rule out the possibility of the disc itself being the problem.
4. Digging Deeper: Advanced Troubleshooting Techniques
If the basic steps don't do the trick, it's time to move to the next level.
- Resetting the System Management Controller (SMC): The SMC controls various hardware functions, including the DVD drive. Resetting it can often resolve issues. The process varies depending on your Mac model; a quick Google search with your specific laptop model will guide you through it.
- Driver Check-up: Ensure your DVD drive's drivers are current. While Apple often handles this automatically, it’s worth double-checking in the System Information (accessed from the Apple menu > About This Mac > System Report). Look for your drive under the "Disc Burning" section.
- Disk Utility Diagnosis: Use Disk Utility (in Applications > Utilities) to check the drive for any errors. Run First Aid on any listed DVD or optical drives.
- Safe Booting: Start your Mac in Safe Mode (hold down the Shift key during startup). This loads only essential system components. If the DVD drive works in Safe Mode, a third-party application might be interfering.
5. The Software Showdown: Addressing Software Conflicts
As we mentioned earlier, software conflicts can be the root of the problem.
- Identify Problem Apps: Think about any recently installed or updated applications. Try removing them one by one to see if they resolve the issue.
- Reinstalling Apps: Sometimes apps can get corrupted. Reinstalling them can fix the conflict.
- Check for Background Processes: Some background processes could be interfering with the drive. Use Activity Monitor (in Applications > Utilities) to see what's running and look for anything suspicious.
6. Hardware Hiccups: Inspecting the Drive
If you are comfortable with it and only if the warranty is over, you proceed to open the case.
- External Drive Consideration: If the internal drive is dead, you could consider an external DVD drive, a plug-and-play solution that connects via USB. This might be the easiest fix.
- Seeking Professional Help: If you are not comfortable opening your laptop or if the fixes don’t work, taking your Mac to a qualified repair shop is a good idea. You're likely to have an expert examine the drive and assess its condition.
7. The Power of Prevention: Keeping Your Drive Healthy
Preventative maintenance is always the best medicine.
- Regular Cleaning: Use a drive cleaning disc every few months.
- Handle Discs Carefully: Avoid scratches and fingerprints.
- Avoid Extreme Temperatures and Humidity: These can damage both your discs and the drive.
- Eject Discs Properly: Always eject discs before closing the laptop.
8. The External Drive Alternative
I feel like this has been said before, but it is a good idea to reiterate it. An external DVD drive is a great option if your internal drive is truly beyond repair.
- Easy Setup: They connect via USB, making them incredibly simple to install and use.
- Portability: You can use them with multiple computers.
- Cost-Effective: Generally, they are an affordable solution.
9. The End of the Road? When to Replace Your Drive.
Sometimes, the drive is simply too far gone.
- Extent of Damage: If your drive has suffered physical damage or if repeated attempts at repair fail, replacement is probably the best option.
- Cost vs. Benefit: Consider the cost of repair versus the cost of a new external drive, or even a new laptop.
- Future Use: If you seldom use DVDs, an external drive might be a cost-effective solution. If you need it a lot, a reliable internal drive might be best.
10. Troubleshooting Tips for Specific Apple Laptop Models
(This section would include model-specific information like MacBook Air, MacBook Pro, etc.) I would briefly delve into the specific nuances of troubleshooting for several common Apple laptop models. Here, you would find more in-depth steps and FAQs tailored to each model, which would include a series of unique issues and specific solutions related to the drive.
11. The Role of Firmware in Fixing DVD Drive Issues
Firmware – which is the software that tells your drive how to work – is another area we must address.
- Firmware Updates: Check Apple’s support website for any firmware updates for your specific model.
- Updating Firmware: Follow the instructions carefully, because a botched firmware update could damage your drive.
12. The Laser's Lens: Addressing Laser-Related Problems
The laser is the heart of the drive.
- Cleaning the Lens: It might be blocked by dust or dirt.
- Laser Failure: If the laser is failing (and you’ve done the research), drive replacement is the best solution.
- Professional Repair: In such instances, it's wise to opt for an expert to do the repair.
13. The Importance of Proper Disc Handling
We’ve touched on this throughout this article, but let’s make it crystal clear:
- Avoid Fingerprints: Handle discs by the edges.
- Clean Discs Thoroughly: Use a soft, lint-free cloth to clean discs.
- Proper Storage: Store discs in cases.
14. When to Call in the Calvalry: Professional Repair
Sometimes, the best option is a qualified technician.
- Complex Issues: If you're comfortable with technology, but the issue persists, consider taking your Macbook to a repair shop.
- Warranty Considerations: Does your Mac have a warranty?
- Expert Diagnosis and Repair: A professional might identify the problem and repair it within an hour.
15. The "Is it Worth it?" Analysis
Do you need a DVD drive? It is a relevant question.
- The Future of Optical Discs: Considering the rise of streaming services
How to Eject Struck Dvd Drive from Apple Super Drive

By Dr. Mac How to Eject Struck Dvd Drive from Apple Super Drive by Dr. Mac
MacBook Pro optical drive not working

By Maximilian Reisch MacBook Pro optical drive not working by Maximilian Reisch
LFC66 - MacBook Pro DVD drive Jamming
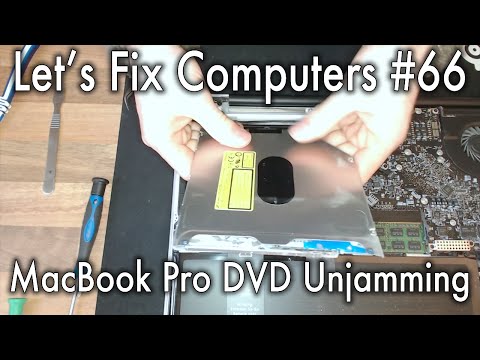
By Adamant IT LFC66 - MacBook Pro DVD drive Jamming by Adamant IT

Title: Fix- MacBook Pro M1 SuperDrive Not Working Not RecognizedDetect
Channel: Fix369
Fix- MacBook Pro M1 SuperDrive Not Working Not RecognizedDetect by Fix369
Laptop Wifi Hotspot
Apple Laptop DVD Drive: Troubleshooting and Reviving Your Optical Drive
The sleek design and powerful performance of your Apple laptop are undeniable. However, when a component falters, that seamless experience can quickly unravel. Perhaps the most frustrating of these failures is a non-functional DVD drive. This article provides a comprehensive guide to diagnosing and, hopefully, resolving the "Apple Laptop DVD Drive DEAD?" issue, getting you back to enjoying your movies, software installations, and data backups. We will work through a series of troubleshooting steps, from the simplest checks to more involved solutions.
Initial Assessment: Recognizing the Symptoms of a Dead DVD Drive
Before diving into fixes, it's crucial to accurately identify the problem. The symptoms of a dead or malfunctioning DVD drive can vary. Recognizing these signs will help pinpoint the issue. Common indicators include:
- Failure to Recognize Discs: Your laptop may spin up the drive, but then fail to recognize any inserted DVD or CD. The drive might make whirring sounds, followed by silence, or it might display an error message such as "Disc Not Readable."
- Eject Button Issues: The eject button might not function. Pressing the button might result in no action at all. You might hear the drive slightly attempt to eject and fail.
- Sporadic Functionality: The drive may work intermittently, sometimes reading discs and at other times failing to do so. This suggests a more complex internal issue that could be related to the drive's mechanics or control system.
- Error Messages: Error messages may be displayed by the operating system, such as "The disc you inserted was not readable by this computer" or "An error occurred while reading from the disc."
- Drive Not Appearing: The DVD drive may not show up at all in Finder, Disk Utility, or within the operating system. This often points to a hardware failure or a driver problem.
Carefully observe these symptoms to narrow down the potential causes.
Software-Based Solutions: Addressing Driver Conflicts and System Anomalies
Before considering hardware solutions, begin with software-based troubleshooting. Simple software malfunctions can often mimic hardware failures.
- Restart and Reset: The first step is always the simplest: restart your Apple laptop. This action can resolve temporary software glitches that might be interfering with the drive. If a simple restart doesn’t work, try a System Management Controller (SMC) reset.
- Software Updates: Ensure that your macOS is up-to-date. Apple frequently releases updates that include driver improvements and bug fixes that can positively impact hardware functionality. Navigate to System Preferences > Software Update to check for pending updates.
- Permissions Repair: Disk permissions sometimes become corrupted, which can affect the functionality of connected components like the optical drive. Open Disk Utility (Applications > Utilities) and select your hard drive. Click "First Aid" and then "Run" to repair disk permissions.
- Driver Verification and Removal (If Applicable): In rare cases, third-party software or drivers could interfere with the DVD drive. In older macOS versions, you could use System Information (Applications > Utilities) to examine system extensions. In newer versions, focus on any recently installed software that could affect hardware drivers. If something is detected, try temporarily disabling or removing it.
Physical Inspections: The Basics of DVD Drive Health
Sometimes, the fix is as simple as a bit of dust. Before moving on to more complex solutions, check for obvious physical issues.
- Disc Inspection: Examine the discs you're trying to read. Are they scratched, smudged, or damaged? A severely damaged disc might simply be unreadable, making it appear that the drive is at fault. Use a microfiber cloth to gently clean and inspect each disc before future attempts.
- Drive Cleaning: Dust accumulation is a common culprit. You can buy a DVD drive cleaner disc that has tiny brushes to clean the laser lens. Follow the disc's instructions. If you don't have one, and you are comfortable, you could carefully use compressed air to blow away dust from inside the drive's loading slot. However, use short bursts and avoid getting moisture into the drive. If you aren't comfortable doing this, do not proceed.
- Cable Connections (External Drives): If you're using an external DVD drive, ensure the USB or Thunderbolt cable is securely connected to both the laptop and the drive. Try a different cable or a different USB port to see if the problem persists.
Advanced Troubleshooting: When Software and Simple Checks Fail
If the above steps have not solved the problem, it's time to consider more involved procedures.
- Safe Mode Boot: Booting your Apple laptop into Safe Mode can help determine if third-party software is the problem. To enter Safe Mode, restart your Mac, immediately press and hold the Shift key, and release it when the login window appears. This mode loads a minimal set of drivers, and if the DVD drive functions in Safe Mode, it indicates a conflict with third-party software.
- Disk Utility and Drive Checks: Open Disk Utility (Applications > Utilities) and select your internal hard drive. Click "First Aid" to run a diagnostic check on the drive. While this primarily focuses on hard drive health, any errors could affect the ability of the operating system to correctly recognize the DVD drive.
- Hardware Diagnostics (Apple Diagnostics - Formerly Apple Hardware Test): Modern Macs include Apple Diagnostics. To use it, disconnect all external devices, including the DVD drive if it's external. Restart your Mac and hold down the "D" key during startup. Apple Diagnostics will run and potentially identify hardware issues, including optical drive problems.
Hardware Solutions: Repairing or Replacing the DVD Drive
If software troubleshooting fails, and hardware diagnostics reveal an issue, it's likely that the DVD drive itself has a mechanical or electronic fault. Two options exist: repair or replacement.
- Internal Drive Replacement (For Models with Built-In Drives): Replacing the DVD drive in an Apple laptop typically involves disassembling the laptop, removing the old drive, and installing a new one. This is generally a complex procedure. Consult the Apple service manual for your specific laptop model. It might be more cost-effective to seek professional repair, especially if you lack experience or the correct tools. Be careful when disassembling your laptop as damaging another internal component can be costly.
- External DVD Drive: If the internal drive is beyond economical repair, consider using an external DVD drive. These drives connect via USB and provide full functionality without requiring any internal modifications to your Apple laptop. While this might not fully address the problem, it provides a cost-effective solution for disc-based media playback and burning.
- Professional Repair: If you're not comfortable disassembling your laptop, or if the issue is complex, take it to an Apple-certified service provider or a reputable independent repair shop. These professionals have the expertise, tools, and parts necessary to diagnose and repair the problem effectively.
Preventative Measures: Extending the Lifespan of Your DVD Drive
Once you have your DVD drive functioning again, consider these tips to prolong its life:
- Regular Cleaning: Clean the loading slot periodically with compressed air. Avoid excessive dust accumulation, which can lead to malfunctions.
- Use High-Quality Discs: Use high-quality DVDs and CDs to minimize the wear and tear on the drive's laser lens and mechanics.
- Avoid Extreme Temperatures: Protect your laptop from extreme heat and cold, as these can harm the drive components.
- Eject Discs Properly: Always use the eject button or the Finder to eject discs. Do not force discs out of the drive.
- Limit Usage: If you rarely use the optical drive, consider getting rid of it.
- Keep Software Up-to-Date: Regularly update your operating system and related software to ensure compatibility and optimized performance.
- Consider Digital Alternatives: Explore digital alternatives, such as streaming services, digital downloads, and cloud storage, to minimize your reliance on physical discs. This reduces wear and tear on your drive.
Conclusion: Bringing Your DVD Drive Back To Life Is Possible
A dead DVD drive can be an inconvenience, but careful troubleshooting and the solutions detailed in this guide mean you usually have options. Follow the steps outlined in this article, starting with software fixes and basic inspections, and progressing to more involved hardware solutions if necessary. With a bit of patience and persistence, you can get your Apple laptop's optical drive back into working order.
