hp 240 g6 laptop keyboard not working

Title: HP Keyboard Not Working - 6 Fix
Channel: Tech Bachhal
HP Keyboard Not Working - 6 Fix by Tech Bachhal
HP 240 G6 Keyboard Dead? FIX It NOW! (Easy Steps)
Keyboard Catastrophe? Reviving Your HP 240 G6 Back to Life
Oh, the sinking feeling! You boot up your trusty HP 240 G6, ready to conquer the day, and BAM! Your keyboard is unresponsive. This is frustrating, I know. Don't despair, though. We'll navigate this digital dilemma together. Forget the panic button; we've got a plan. Let's troubleshoot and breathe life back into those silent keys.
Is It Really Dead? Checking the Obvious First
Before we launch into a full-scale investigation, let's eliminate the easy culprits. Surprisingly, the solution can sometimes be incredibly simple. First, power cycle your laptop. Completely shut it down. Then, remove the battery (if possible) and the power adapter. Hold the power button down for a full 30 seconds. This ensures any residual charge is drained. After, reinsert the battery and reconnect the power. Then, restart your HP 240 G6. Often, this single step resolves minor software glitches.
Next, inspect the keyboard physically. Are any keys visibly stuck or damaged? Sometimes, something as simple as a crumb or dust particle can disrupt functionality. Gently try to dislodge anything that may be blocking a key. Consider using compressed air to clean between the keys. You'd be surprised how often this works.
Software Glitches: The Digital Demons
If a physical inspection reveals no issues, the problem likely lies within the operating system. Keyboard drivers could be corrupted or malfunctioning. Thankfully, fixing this typically involves some straightforward steps.
Firstly, access Device Manager. You can quickly find this by typing "Device Manager" in your Windows search bar. Within Device Manager, locate the "Keyboards" section. Expand this section to reveal your specific keyboard device. Right-click on it. Then, select "Update Driver." Choose "Search automatically for drivers." Windows will attempt to find and install the latest drivers. Following this, reboot your laptop.
Alternatively, you might need to uninstall and reinstall the keyboard driver. In the same Device Manager window, right-click on the keyboard device again. This time, select "Uninstall device." Confirm the uninstallation. Once uninstalled, restart your laptop. Windows will often automatically reinstall the driver upon reboot. This often resolves driver-related problems.
External Keyboard Savior? Temporary Solution
While you diagnose and fix the built-in keyboard, a workaround exists. You can connect an external USB keyboard. This allows you to continue working without interruption. This is a temporary fix, for sure. But it ensures you maintain productivity while you address the main issue. It is also useful for testing whether the problem is hardware or software.
Keyboard Hardware: Potential Culprits
If the software solutions don't work, hardware failure is a possibility. This is more complex, but not necessarily insurmountable. The keyboard itself could be faulty. Or, the connection cable inside the laptop could be loose or damaged.
If you're comfortable, you could try opening your laptop (always disconnect power and remove the battery!) to inspect the keyboard cable. This should be done with extreme caution. Refer to your HP 240 G6's service manual. This manual provides detailed instructions. Look for any visible damage to the cable. Ensure it is firmly connected to the motherboard. If it seems loose, gently reseat it.
If the cable appears fine, the keyboard itself might be broken. Replacing a laptop keyboard is often a viable solution. You can find replacement keyboards online. Follow the service manual for installation instructions.
Troubleshooting Tips for Advanced Users
For more advanced users, there are a few additional troubleshooting steps. Consider checking for recent Windows updates. Sometimes, updates can create conflicts with hardware. You might roll back to a previous driver version if problems arose after an update. Then, explore the BIOS settings. In the BIOS setup, check to see if the keyboard is enabled. This can impact functionality.
When to Seek Professional Help
There are situations that warrant professional assistance. If you’re uncomfortable opening your laptop, or you’re unsure about any of the steps, consider seeking help. If you suspect motherboard damage, it requires professional repair. If all troubleshooting steps fail, consider contacting an authorized HP service center. A professional can accurately diagnose the issue and provide a reliable fix.
Prevention: Keeping Your Keyboard Happy
Prevention is better than cure, as they say. To minimize future keyboard issues, practice good habits. Clean the keyboard regularly. Use a soft brush or compressed air to remove dust and debris. Avoid exposing your laptop to liquids. Also, be mindful of accidental spills. Be gentle when typing, and avoid excessive force. Following these tips will help protect your keyboard.
Final Thoughts and a New Beginning
Facing a dead keyboard can be stressful. However, you’re now equipped with the knowledge to address this issue. Hopefully, you were able to resolve the situation. Remember to approach each step methodically. Work through the processes step by step. It is important to remain patient. If you followed the instructions, you've significantly increased your chance of success. So, go forth and revive your HP 240 G6 keyboard. Your digital journey awaits. Good luck!
Internet Laptop Meltdown? FIX It NOW!HP 240 G6 Keyboard Dead? FIX It NOW! (Easy Steps)
Let's face it, we’ve all been there. That sinking feeling when you power on your trusty HP 240 G6, ready to dive into some serious work (or, you know, a bit of online retail therapy), only to be met with… silence. More specifically, keyboard silence. You're furiously typing, your fingers flying across the keys, but the screen remains stubbornly blank. Panic sets in, right? Fear not, fellow technology adventurers! If your HP 240 G6 keyboard has decided to take an unscheduled vacation, we're here to guide you through the wilderness and bring those keys back to life. We'll explore potential culprits and, more importantly, provide you with easy, actionable steps to get that keyboard clicking again. Think of this guide as your digital first-aid kit for keyboard woes.
1. Oh No! My HP 240 G6 Keyboard is Dead – Now What?
Take a deep breath. Seriously. We understand the frustration. A dead keyboard on a laptop can feel like a major setback. It's like your main communication line with the digital world has been severed. But before you start envisioning expensive repairs or a whole new laptop, let's take a step back and assess the situation. Chances are, it's not as dire as it seems. Often, the solution is surprisingly simple. Think of it as a minor hiccup, not a complete system failure. We're going to methodically troubleshoot the issue, exploring all the usual suspects, from the simple software glitches to potential hardware problems.
2. Is It Really Dead? Checking the Obvious First
Before we launch into more advanced troubleshooting, let's cover the basics. Sometimes, the answer is staring us right in the face. It's like forgetting where you put your keys while they're still in your hand!
- Is it plugged in and powered on? This might sound silly, but it's the first thing to check. Make sure your laptop is not only plugged in but also fully charged. Low battery can sometimes cause strange behavior.
- Are the Num Lock and Caps Lock keys functional? Try toggling these keys. Do their indicator lights change? If they're working, it's a good sign that your keyboard is at least partially functional. This helps us determine if other keys are the only ones affected.
- External Keyboard Test: Plug in an external USB keyboard. Does that work? If yes, it strongly suggests the problem lies with your laptop's built-in keyboard. If no, we know it’s likely a deeper system issue.
- Restart Your Laptop: A simple reboot can often fix minor software glitches. This is often the digital equivalent of taking a nap – sometimes, that’s all your system needs.
3. Dust Bunnies and Crumbs: The Keyboard Cleanliness Check
Okay, let's get a little hands-on. Sometimes, the simplest solution is the most overlooked. Your keyboard is, after all, a prime real estate for dust, crumbs, and other debris. Think about all the typing, the snacking, the general wear and tear. It’s inevitable!
- Turn off and Unplug: Before doing anything, always shut down and unplug your laptop. Safety first!
- Gentle Blows: Use a can of compressed air to blow out any visible debris from between the keys. This is like a mini-sandstorm for your keyboard, removing the obvious culprits.
- Gentle Cleaning: Use a soft, lint-free cloth lightly dampened with isopropyl alcohol to gently wipe down the keys. Avoid excessive moisture. This is like giving your keyboard a spa treatment.
4. Driver Drama: Updating or Reinstalling Your Keyboard Driver
Sometimes, the issue is a software conflict or a corrupted driver. The keyboard driver is the software that allows your operating system to communicate with the keyboard. Think of it as the translator.
- Access Device Manager: Right-click on the Start button and select "Device Manager."
- Expand "Keyboards": Locate the "Keyboards" section and expand it.
- Update Driver: Right-click on your keyboard (it will likely be listed as "Standard PS/2 Keyboard" or something similar) and select "Update driver." Follow the on-screen instructions. This is like giving your translator a tune-up.
- Reinstall Driver: If updating doesn’t work, right-click on your keyboard and select "Uninstall device." Then, restart your laptop. Windows should automatically reinstall the driver. This is like retraining your translator from scratch.
5. Troubleshoot with the HP Support Assistant
HP laptops come with a built-in support assistant, a helpful tool that can diagnose and sometimes even fix common problems.
- Launch the HP Support Assistant: You can usually find it in your Start menu or by searching for it.
- Run the Troubleshooter: The Support Assistant often has troubleshooting tools specifically for keyboard issues. Follow its recommendations. It’s like consulting a digital tech support guru.
6. Sticky Keys and Filter Keys: Checking Accessibility Settings
Sometimes, accessibility settings can interfere with keyboard functionality. These settings are designed to make it easier for people with disabilities to use computers, but they can sometimes cause unexpected behavior.
- Open Ease of Access Settings: Type "Ease of Access settings" in the Windows search bar and open the corresponding settings menu.
- Review "Keyboard" Settings: Check the settings under "Keyboard" to ensure that Sticky Keys and Filter Keys are disabled unless you specifically need them. These are two features that can impact keyboard behavior.
7. The BIOS Check-Up: Keyboard Functionality at Startup
Your BIOS (Basic Input/Output System) is the software that runs when your computer first starts. It’s responsible for initializing hardware. If the keyboard isn't working here, it's a strong indicator of a hardware problem.
- Access the BIOS: Restart your laptop and immediately start pressing the key to enter the BIOS setup (usually Del, F2, F10, or Esc – the specific key is often displayed during startup).
- Test the Keyboard: Navigate the BIOS menus using the arrow keys. If the arrow keys (or other keys) do not work in the BIOS, it points towards a more serious hardware fault with the keyboard or potentially the motherboard.
8. The Nuclear Option (But Try This First): System Restore
If everything else fails, it could be a software conflict. A system restore rolls your operating system back to a previous point in time, potentially undoing any changes that might be causing the issue. Think of it as a digital time machine.
- Open System Restore: Type "Create a restore point" in the Windows search bar and select the appropriate option. Then, select "System Restore."
- Choose a Restore Point: Select a restore point from before the keyboard issue began. Follow the on-screen instructions. Be aware that you will lose any software installed after this time.
9. Hardware Inspection: Are Your Connections Secure?
If you're comfortable (and only if you're comfortable!), you could consider looking inside your laptop, to verify connections. However, this can void your warranty. Proceed with extreme caution.
- Consult Your HP 240 G6 Service Manual: This manual (available online) will provide instructions on how to safely disassemble your laptop.
- Disconnect the Battery (IMPORTANT): Before doing anything, disconnect the battery to prevent electrical shorts.
- Check the Keyboard Connector: Locate the keyboard connector on the motherboard and ensure it's securely attached. Reseat the connector.
- Inspect the Keyboard Cable: Look for any signs of damage to the keyboard cable.
10. Is It Hardware? The Final Assessment
If you've exhausted all the software troubleshooting steps, and the keyboard still doesn't work, it's highly likely that there's a hardware fault. This may involve the keyboard itself, the keyboard cable, or, in the worst-case scenario, the motherboard.
11. The Keyboard Replacement: The Cost-Benefit Analysis
Replacing an HP 240 G6 keyboard can be relatively inexpensive, especially compared to replacing the entire laptop.
- Research Replacement Keyboards: Check online retailers (Amazon, eBay, etc.) for replacement keyboards for your specific model.
- Assess Your Technical Skills: If you're not comfortable with hardware repairs, consider taking your laptop to a qualified technician. You’ll need to feel comfortable with tools and the dismantling/re-assembly process.
12. Seeking Professional Help: When to Call in the Cavalry
Sometimes, DIY just isn't the right option. If you're not comfortable with hardware repairs, or if the problem persists despite your best efforts, it's time to seek professional help.
- Find a Reputable Repair Shop: Search for local computer repair shops with good reviews.
- Contact HP Support: Check if your laptop is still under warranty. Contact HP Support for assistance.
13. Preventative Measures: Keeping Your Keyboard Happy
Once you get that keyboard working again, you'll want to keep it functioning smoothly!
- Regular Cleaning: Make cleaning your keyboard a routine task.
- Avoid Spills: Be mindful of any liquids near your laptop. Spills are keyboard killers!
- **Use a Keyboard
how to replace hp 240 G6 laptop keyboard shorts laptoprepair youtube ytshorts laptops
By laptop it solution how to replace hp 240 G6 laptop keyboard shorts laptoprepair youtube ytshorts laptops by laptop it solution
HP 240 G6 Keyboard Replacement Time Lapse
By Imamudin SH HP 240 G6 Keyboard Replacement Time Lapse by Imamudin SH
How To Fix HP Laptop Keyboard Keys Not Working Simple Solutions You Can Try So Resolve The Issue

By Helpful Solutions How To Fix HP Laptop Keyboard Keys Not Working Simple Solutions You Can Try So Resolve The Issue by Helpful Solutions

Title: How To Fix HP Laptop Keyboard Not Working in Windows 10
Channel: Cap Trong Nam - How To
How To Fix HP Laptop Keyboard Not Working in Windows 10 by Cap Trong Nam - How To
Wifi On Laptop Phone
HP 240 G6 Keyboard Dead? Revive Your Laptop with This Comprehensive Guide
The chilling silence of a dead keyboard on your HP 240 G6 laptop can bring your productivity to a screeching halt. When your fingers tap away, and nothing appears on the screen, a sense of panic can quickly set in. However, before you resign yourself to the expense of a repair or replacement, know that you are not alone, and a variety of straightforward fixes might be all that's needed to restore your keyboard to its former glory. This guide will dissect the common causes of keyboard failure on the HP 240 G6 and provide you with actionable steps to troubleshoot and resolve the issue effectively.
Initial Troubleshooting: The First Steps to Recovery
Before diving into more complex solutions, let's run through some preliminary checks. These initial steps, which take mere minutes, can often identify and resolve the problem without any technical expertise.
The Power Cycle Protocol: This is the digital equivalent of a restart, yet more thorough. Completely shut down your HP 240 G6. Remove the AC adapter and, if possible, the battery. Press and hold the power button for at least 30-60 seconds. This process drains any residual power from the system and can clear minor glitches. Reconnect the AC adapter (and battery, if removed) and attempt to boot up the laptop. Test the keyboard functionality immediately.
The External Keyboard Test: The objective here is to isolate the problem. Connect an external USB keyboard to your HP 240 G6. If the external keyboard works flawlessly, you can be certain the problem lies within the laptop’s internal keyboard, not with the operating system or other core components. If the external keyboard is also unresponsive, the issue might be more complex, and the troubleshooting steps below will be crucial.
Driver Diagnostics: Sometimes, corrupted or outdated keyboard drivers can lead to malfunctions. Access the Device Manager (search for it in the Windows search bar) and look for the "Keyboards" section. Expand this section to reveal the installed keyboard devices. Right-click on each keyboard device, and select "Update driver." Choose "Search automatically for drivers." If the system detects a driver update, install it and restart your laptop.
The Sticky Keys and Filter Keys Gambit: These accessibility features, designed to assist users with physical limitations, can sometimes interfere with normal keyboard operation. Access the Ease of Access settings (search for it in the Windows search bar). Under “Keyboard,” ensure that Sticky Keys, Filter Keys, and Toggle Keys are all toggled to the "Off" position.
Delving Deeper: Advanced Troubleshooting Techniques
If the initial steps fail to resurrect your keyboard, it's time to dig a bit deeper. These methods require a modicum of technical comfort, but are generally safe and manageable.
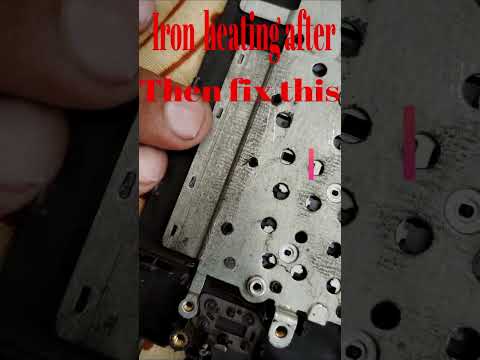
Inspect the Keyboard Connector: This is where things get a little more hands-on. You’ll need to carefully open up your HP 240 G6. The process varies slightly based on the specific model (check your service manual), but generally involves removing the bottom panel screws and then carefully prying the panel open.
- Identify the Keyboard Cable: Locate the keyboard ribbon cable. It's a small, flat cable that connects the keyboard to the motherboard.
- Check the Connection: Gently disconnect and reconnect the cable. Sometimes, a loose connection is the culprit. Ensure the cable is securely inserted into its connector on the motherboard. Be extra gentle!
- Visual Inspection: Inspect the cable and the connector for any signs of damage, such as bent pins, corrosion, or debris. If damage is visible, a replacement cable or connector might be required.
The System Restore Option: Windows System Restore can revert your computer to a previous state when the keyboard was working properly. Search for “Create a restore point” in the Windows search bar and open it. Select “System Restore” and follow the prompts. Choose a restore point from a time before the keyboard issue arose. Be aware that any software installed after the restore point date will be lost, so back up relevant data before performing the restore. After the restore process completes, check if the keyboard is operational.
Boot into Safe Mode: Safe Mode starts Windows with a minimal set of drivers and services, allowing you to determine if a third-party software or driver is causing the keyboard problem. Press and hold the F8 or F12 key (often found during startup - experiment) to access the boot menu and select "Safe Mode." Once in Safe Mode, test your keyboard. If it functions correctly in Safe Mode, a software conflict is likely the root of the problem. You can then attempt to identify the problematic application or driver by uninstalling recently installed software or updating drivers.
Run Hardware Diagnostics: HP laptops often come with built-in hardware diagnostics. Restart your laptop and repeatedly press the F2, F10, or Esc key (this varies by model; consult your HP documentation) during startup to access the diagnostic menu. Run the keyboard test to pinpoint any hardware failures.
Hardware Replacement: When Restoration Isn't Enough
If you've exhausted the troubleshooting steps above and your HP 240 G6 keyboard remains unresponsive, a hardware issue is likely the cause. This typically means the keyboard itself requires replacement.
Identifying the Correct Replacement Keyboard: Ensure you purchase the correct replacement keyboard for your specific HP 240 G6 model. There are various sub-models, and keyboard layouts (e.g., with or without a numeric keypad). Double-check the product number printed on the bottom of your laptop or the original keyboard itself to avoid compatibility issues. Online retailers, such as Amazon or eBay, typically provide detailed model compatibility information.
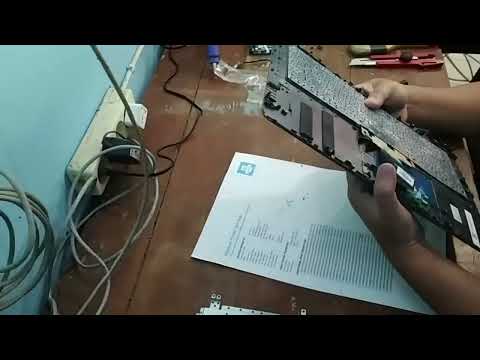
The Keyboard Replacement Process: Replacing the keyboard involves disassembling parts of your laptop. This process is moderately complex, and requires care and patience. YouTube videos specifically for your HP 240 G6 model are an excellent resource. Generally, it involves the following:
- Power Down and Preparation: Completely shut down your laptop and disconnect the AC adapter. Place the laptop on a clean, well-lit surface. Gather the necessary tools: small Phillips head screwdriver, a plastic pry tool, and possibly a spudger (a plastic tool used for opening electronic devices).
- Remove the Battery: If the battery is externally accessible, remove it. If it is internal, you'll generally need to remove the bottom panel to disconnect it.
- Remove the Palm Rest: This step may vary depending on your particular laptop configuration. This may involve removing screws (often hidden beneath rubber feet or access covers) and carefully using a plastic pry tool to separate the palm rest from the laptop chassis.
- Disconnect the Keyboard Cable: Once the palm rest is removed, you'll have access to the keyboard cable. Carefully disconnect it from the motherboard.
- Remove the Keyboard: Locate the screws securing the keyboard to the chassis. It's possible that some screws are hidden beneath stickers. After removing the screws, you should be able to gently lift away the keyboard.
- Install the New Keyboard: Position the replacement keyboard and secure it with the screws. Reconnect the keyboard cable to the motherboard.
- Reassemble: Carefully reassemble other parts of the laptop, reversing the disassembly steps.
Professional Assistance: If you are uncomfortable with the disassembly process, or if you lack the tools or confidence, consider seeking professional repair services. A qualified laptop technician will have the expertise and tools to replace the keyboard quickly and effectively. This ensures the job is done correctly and can prevent further damage to your laptop.
Preventative Measures: Protecting Your Keyboard Long Term
Once you've successfully resolved the keyboard issue, take steps to protect your investment and extend the life of your new keyboard.
Regular Cleaning: Dust and debris can accumulate under the keys, leading to malfunctions. Regularly clean your keyboard with a can of compressed air. Turn the laptop upside down and shake gently to dislodge debris. Use a soft cloth dipped in isopropyl alcohol to wipe down the keyboard surface.
Avoid Food and Liquids: Spilled liquids are a keyboard’s worst enemy. Keep food and drinks away from your workspace. If you spill something, immediately shut down and unplug your laptop. Clean the spill carefully, aiming to minimize liquid intrusion.
Use a Keyboard Cover: A silicone or plastic keyboard cover can protect your keyboard from dust, spills, and general wear and tear. Ensure the cover fits your keyboard precisely to avoid interfering with key presses.
Gentle Typing Habits: Avoid excessive force when typing. Pressing the keys gently will reduce wear and tear.
By following these steps, you'll significantly increase your chances of bringing your keyboard back to life and restoring your laptop's functionality.
