hdmi cord not working on laptop

Title: 2023 NEW How to Fix HDMI Not Working on Laptop Windows
Channel: Wondershare Recoverit Data Recovery
2023 NEW How to Fix HDMI Not Working on Laptop Windows by Wondershare Recoverit Data Recovery
hdmi cord not working on laptop, hdmi cable not working on laptop to tv, hdmi cable not working on laptop to monitor, hdmi cable not connecting laptop to tv, hdmi cable not working on laptop, my laptop won't connect with hdmi on tv
HDMI Cord Disaster?! Fix Your Laptop's Screen NOW!
Laptop Screen Blackout? Don't Panic! Decoding the HDMI Havoc
Ever stared at a blank laptop screen after plugging in an HDMI cord? It's a frustrating experience. The initial shock often leads to a frantic search for answers. But before you chuck your precious device out the window, take a deep breath. We'll unravel this common tech woe together. This guide will help you reclaim your screen in no time.
The HDMI Headache: A Common Culprit
HDMI cables, while generally reliable, aren’t always perfect. They're like tiny conduits of digital magic. Sometimes, the magic goes awry. You might see nothing but darkness when you expect a vibrant display. This situation can arise for several reasons. Consequently, troubleshooting is key. Often, the solution is simpler than you think. Let’s explore the usual suspects.
Pinpointing the Problem: Diagnostics are Your Friend
First, eliminate the obvious. Is your HDMI cable securely connected at both ends? A loose connection is a frequent offender. Therefore, double-check the port on your laptop and the monitor or TV. Next, examine the cable itself. Are there any visible signs of damage? If your cable looks frayed or bent, it's time for a replacement. Besides, a damaged cable can transmit faulty signals. Now, consider the external display. Can your monitor or TV handle the resolution your laptop is sending? Check their respective settings. Furthermore, sometimes, a simple restart works wonders. It refreshes the connection and resets the system.
Software Shenanigans: Tweaking Your Settings
Your operating system plays a significant role. It controls how your laptop interacts with external displays. Sometimes the settings are incorrect. For instance, your laptop might be set to "duplicate" the display. In other words, both screens show the same thing. You may need to switch to "extend" or "second screen only." Accessing these settings is easy. On Windows, right-click on the desktop. Then, select "Display settings." For macOS, go to "System Preferences" and click on "Displays." Thus, you can see the available options.
Driver Dilemmas: Keeping Things Updated
Outdated graphics drivers can wreak havoc. They tell your laptop how to communicate with your display. They can cause all sorts of display issues. So, it's important to keep them current. Open Device Manager on Windows. You will find it by searching in the start menu. Then, expand "Display adapters." Right-click on your graphics card. Select “Update driver.” Similarly, macOS updates often include new drivers. Keeping your software updated is generally a good habit. After all, updates usually include critical bug fixes.
Hardware Hurdles: When Things Get Serious
If software fixes fail, the problem could be hardware-related. Unfortunately, hardware issues are more complicated. First, test the HDMI port on your laptop. Connect another device, like a game console, to your monitor. Then, see if it works. If the display works, the issue lies with your laptop. Similarly, try using a different HDMI port on your monitor. This helps to isolate the problem. If the port is faulty, you may need professional assistance.
Troubleshooting Tricks: Advanced Techniques
Consider these additional steps. Firstly, try a different HDMI cable. Even a new cable can be faulty. Secondly, check your display settings. Ensure your external device is selected. Moreover, confirm the input source on your monitor. Make certain it correctly identifies the HDMI port you're using. Thirdly, consider power management. Your laptop might be turning off the external display to save power. Fourthly, reset your display settings. Many monitors have an "auto-detect" function. Fifthly, use the "Windows Key + P" shortcut. This can quickly switch display modes. Subsequently, try the "Fn" key combined with a function key. This combination may control display output.
Seeking Professional Help: When to Call in the Experts
Sometimes, the problem is beyond your skill set. Don't hesitate to reach out for professional help. When do you need to do this? Primarily, if you suspect a hardware failure. Secondly, if you've tried everything and nothing works. Thirdly, if you're uncomfortable opening up your laptop. Computer repair shops have the expertise and tools. They can diagnose and fix complex problems. Moreover, warranty coverage could still apply. So consult your warranty documentation if applicable. In conclusion, don't give up hope. Most HDMI-related screen issues have solutions. You can restore that beautiful picture with some patience.
Dell Mouse Disaster: Why Isn't My Cursor Moving?!HDMI Cord Disaster?! Fix Your Laptop's Screen NOW!
Okay, let’s be honest. We’ve all been there. You're all geared up for movie night with your friends, ready to share that epic presentation with the team, or just trying to enjoy some quality gaming time on the big screen. You plug in that trusty HDMI cord, and… nothing. The screen stays stubbornly black. The dreaded HDMI cord disaster has struck, leaving you staring at a lifeless laptop display. Fear not, fellow tech warriors! We're going to conquer this together. Think of this as your personal troubleshooting guide, packed with solutions to resuscitate your screen and reclaim your viewing pleasure. Let’s dive in and get that image flowing again!
1. The HDMI Horror Show: Identifying the Culprit
Before we start swinging our virtual hammers and screwdrivers, we need to assess the damage. Think of this like a detective scene: we need to pinpoint the bad guy. Is it the laptop? The TV/monitor? Or, the often-overlooked star of our show: the HDMI cable itself?
- Scenario 1: The Blank Screen Blues: This is the most common symptom. You plug in the HDMI, and…nothing. No signal, no picture. It's like the screen is on silent.
- Scenario 2: The Flickering Nightmare: Images dance chaotically across your screen. This could mean a bad connection somewhere or an incompatibility issue.
- Scenario 3: The Distorted Reality: The image might appear stretched, blurry, or filled with strange artifacts. This can indicate a resolution problem or a faulty cable.
- Scenario 4: The Sound-But-No-Vision Mystery: You hear the audio perfectly, but the screen remains stubbornly dark. This points towards a potential issue with the display settings.
Once you've identified the symptoms, we can start our troubleshooting journey.
2. The Cable's the Criminal? A Quick HDMI Cable Reality Check
First things first: let's consider our cable. It's the lifeline of our visual experience, and sometimes the simplest solutions are the best.
- The Plug-and-Unplug Dance: Seriously, give it a shot. Unplug the HDMI cable from both your laptop and the TV/monitor, wait a few seconds (like, count to ten), and plug it all back in firmly. Sometimes, it’s just a loose connection causing the problem.
- The Cable Swap: Got another HDMI cable lying around? Swap it out! A faulty cable is a surprisingly common culprit. If the new cable works, problem solved.
- Dust Bunnies and Debris: Examine the HDMI ports on both your laptop and the display. Sometimes, a tiny piece of dust can interfere with the connection. Gently blow into the ports (or use a can of compressed air) to clear them out. Be careful not to damage the pins!
- Cable Age and Quality: Older cables, or cheap ones, may have degraded over time. They might not be able to handle the latest resolutions or refresh rates. Consider upgrading to a newer, higher-quality HDMI cable. Think of it as investing in a better viewing experience!
3. Laptop Logic: Diving into Your Display Settings
If the cable checks out, let’s focus on your laptop. This is where things can get a little more technical, but don’t worry, we'll keep it understandable.
- Detecting the Display: Your laptop might not automatically "know" it’s connected to a second screen. You need to tell it! Go to your display settings. In Windows, right-click on the desktop and select "Display settings." On a Mac, go to "System Preferences" and then "Displays." Look for an option to "Detect" or "Identify" displays. Try clicking it.
- The Duplicate or Extend Gambit: Once your laptop recognizes the display, you'll often have the option to "duplicate" the screen (mirroring the laptop screen on your TV/monitor) or "extend" the screen (creating a wider desktop that spans both displays). Choose the option you want. Think of it like deciding whether to have one big screen or two!
- Resolution Revelation: Make sure your resolution settings are compatible with your TV/monitor. If your laptop is outputting a resolution that the TV/monitor doesn't support, you might get a blank screen. Experiment with different resolutions until you find one that works.
- Refresh Rate Reconsideration: Similar to resolution, the refresh rate of your laptop's display may not be compatible with the external display. Adjust the refresh rate in the display settings.
4. Source Selection Shenanigans: The TV's Tale
Let's turn our attention to the TV or monitor. It's possible the problem isn't your laptop at all.
- The Input Inquisition: Make sure your TV/monitor is set to the correct HDMI input. Most TVs have multiple HDMI ports. Use your TV's remote to select the HDMI port that corresponds to the port you plugged your cable into on the TV itself.
- The Power Play: Is your TV/monitor turned on? Seriously, sometimes the simplest things are the culprit!
- Check the TV's Settings: Some TVs have settings that can affect HDMI input. Look in the TV's settings menu for options related to display mode or input settings.
5. Driver Drama: Keeping Your Graphics Card Happy
Your graphics card, also known as your "GPU," is the powerhouse behind your display. Outdated or corrupted drivers can wreak havoc on your visual output.
- Driver Detective Work: Find out which graphics card you have. Search online for your laptop model and "graphics card specs."
- Driver Downloads: Go to the website of your graphics card manufacturer (Nvidia, AMD, or Intel) and download the latest drivers for your specific card.
- Driver Installation: Install the new drivers. This usually involves restarting your laptop.
6. Restart Remedy: Giving Your System a Fresh Start
Sometimes, a simple restart is all it takes to shake things loose. Close all your programs, save your work, and restart your laptop. This can often clear up temporary glitches that are causing problems. Think of it as hitting the reset button!
7. Thunderbolt to the Rescue (Maybe!)
If your laptop has a Thunderbolt port (often with a lightning bolt symbol next to it), you might be able to use a Thunderbolt to HDMI adapter. This can sometimes bypass HDMI compatibility issues, giving you a cleaner connection. However, verify your laptop can support video output with the Thunderbolt port.
8. Screen Saver Shuffle: Disabling the Disruptor
Believe it or not, a screen saver can sometimes interfere with the HDMI connection, especially if it’s set to activate quickly. Try disabling your screen saver temporarily and see if that resolves the issue. Go into your power settings and select to not use a screensaver.
9. The Mac's Mystique vs. Windows' Wonders
While the general troubleshooting steps are the same, some of the menu locations and terminology will differ. The biggest variance is that a MacBook will run on macOS, while most other laptops run on Windows.
- Mac: The "Detect Displays" Dance: As mentioned earlier, on a Mac, go to System Preferences > Displays. Look for the "Detect Displays" button.
- Windows: The "Project" Power Move: Windows often uses the "Project" settings to manage multiple displays. Press the Windows key + P to quickly access these options.
10. Power Source Problems: The Subtle Saboteur
Ensure your laptop is plugged into a reliable power source. Low power can sometimes cause strange display issues.
11. The External Monitor's Secrets: Testing the Terrain
If possible, test your laptop's HDMI output with a different TV or monitor. This will help you determine whether the problem lies with your laptop or the original display.
12. Check the Connections
Ensure that the HDMI cable is securely plugged into both the laptop and the TV or monitor. Try unplugging and re-plugging the cable at both ends.
13. Update BIOS Configuration
If the above steps failed to work consider Updating the BIOS of your laptop. Check the manufacturer website, follow the instructions, and proceed carefully.
14. The Ultimate Reset: Factory Reset (Last Resort!)
This is a last resort! If nothing else works, you may be forced to consider a factory reset of your laptop. This will erase all your data, so BACK UP EVERYTHING beforehand. This is like hitting the nuclear option, but sometimes it's necessary to clear out deep-seated software conflicts.
15. Seeking Professional Help: When to Call in the Experts
If you’ve tried everything and still can’t get your laptop to connect to your TV or monitor, it's probably time to seek professional help. A computer repair technician can diagnose more complex hardware issues.
Closing Thoughts: Back to the Big Screen!
We did it! We've navigated the treacherous waters of the HDMI cord disaster. Hopefully, by following these steps, you've successfully resurrected your laptop's screen and are back to enjoying your favorite content. Remember, technology can be a bit finicky, but with a little detective work and some patience, you can usually get things working again. Now, go forth and enjoy your movies, games, and presentations! Happy viewing.
FAQs
**1. My laptop screen works, but the TV/monitor is blank. What
Laptop Touchpad DEAD? This SHOCKING Fix Works!How to Fix HDMI Not Working on Laptop Windows 11

By Ground Zero How to Fix HDMI Not Working on Laptop Windows 11 by Ground Zero
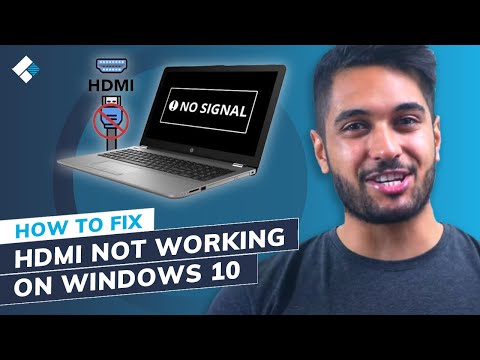
How to Fix HDMI Not Working on Laptop Windows 10

By Systweak Software How to Fix HDMI Not Working on Laptop Windows 10 by Systweak Software
Laptop Not Detecting HDMI TV in Windows 111087 - How To Fix PC not Connected 4K tv Via hdmi

By Victor Explains Laptop Not Detecting HDMI TV in Windows 111087 - How To Fix PC not Connected 4K tv Via hdmi by Victor Explains
Title: How to Fix HDMI Not Working on Laptop Windows 10 5 Methods
Channel: Wondershare Recoverit Data Recovery
How to Fix HDMI Not Working on Laptop Windows 10 5 Methods by Wondershare Recoverit Data Recovery
Laptop Wifi Hotspot
HDMI Cord Disaster?! Fix Your Laptop's Screen NOW!
Have you ever experienced the sinking feeling of your laptop screen going dark just as you're about to present a crucial presentation, stream a much-anticipated movie, or simply finish a vital project? The culprit, more often than not, is the humble HDMI cord. But don't despair! We're here to guide you through a series of diagnostic steps and practical solutions to get your display back up and running, turning a potential tech catastrophe into a minor inconvenience. Let's delve into the world of HDMI issues and reclaim your screen's vibrancy.
Decoding the HDMI Puzzle: Identifying the Problem
Before you start troubleshooting, it's vital to identify the source of the trouble. Is the issue confined to your laptop's screen exhibiting problems when connected to an external display, or are the external displays failing to receive a signal from your laptop? The answers will guide your troubleshooting steps. We'll assume you are experiencing issues with your laptop's screen in this scenario.
- The Blank Screen Blues: A completely black screen is the most obvious sign of an HDMI problem, and it can manifest in a variety of ways. Your computer might be on and running, with sound playing, but the screen remains stubbornly dark. Or perhaps the screen flickers intermittently before going dark, serving as a more confusing prelude to the blackout.
- No Signal Detected: If your laptop is trying to communicate through the HDMI port, and the problem stems from the laptop itself, you may see a “No Signal” message on the external display that the laptop should be sending the signal to. This typically indicates that the external display isn't receiving the signal it expects. This could be a symptom of issues with the HDMI port.
- Distorted Visuals: Sometimes, the HDMI connection struggles to deliver a clear picture, creating other issues. The laptop's screen might display fuzzy, blurry, or pixelated content. Vertical or horizontal lines may appear, adding to the visual chaos. These distortions hint toward a connection problem with the HDMI cord, your laptop's HDMI port, or video drivers.
- Sound but No Sight: The frustrating scenario of hearing sound from your movie or presentation but not seeing anything on the screen is also common. If you confirm that audio continues to work, but the picture is missing, the issue most likely lies with the video signal, which is transmitted separately. This suggests an issue with your HDMI cord or the laptop's HDMI port.
- Intermittent Connections: If your HDMI screen flickers or loses the connection from time to time, you may be looking at an inherent connection problem. This indicates the need to check the HDMI cable while re-plugging the HDMI cord into each port.
HDMI Troubleshooting: A Step-by-Step Guide
Armed with an understanding of the problem, it's time to troubleshoot. It's best to work methodically, so let's follow a step-by-step approach:
Step 1: The Simple Solutions
- Check the Basics: Begin by confirming that all connections are secure. Unplug and then firmly plug the HDMI cord back into both your laptop's HDMI port and the external display or projector's HDMI port. Ensure that the HDMI cord is fully inserted into both.
- Power Cycle Your Devices: Sometimes, a simple reset is all it takes. Turn off both your laptop and the external display. Unplug both from the power source. Wait about a minute, then plug them back in and turn them on.
- Test with a Known Good HDMI Cord: This is a crucial step in isolating the problem. If you have a spare HDMI cord, or can borrow one, connect it to your laptop and the external display. If the picture appears, the initial HDMI cord is faulty and requires replacement.
Step 2: Exploring the Video Settings on Your Laptop
- Windows Display Settings: Right-click on an empty area of your laptop's desktop and select "Display Settings." In Windows 10 and 11, you will likely see a section with multiple displays and the system will show you the detected monitors (your laptop screen and the external display). If your external screen is not detected but not showing up, click "Detect". If it is still undetected, try pressing the Windows key + P to cycle through different display modes (PC screen only, Duplicate, Extend, Second screen only).
- Mac Display Settings: On a Mac, go to System Preferences > Displays. Your laptop should automatically detect the external display. If it doesn't, click "Detect Displays". You can also adjust the arrangement and mirroring options from here.
Step 3: Investigating the HDMI Output on Your Laptop
- Laptop HDMI Port Inspection: Carefully inspect your laptop's HDMI port. Look for any bent or damaged pins. Debris in the port can also interfere with the connection. Use a can of compressed air to gently clean out any dust and debris. If the port is visibly damaged, consider contacting a qualified technician.
- Driver Updates: Outdated video drivers can cause a variety of display issues.
- Windows: Right-click the Start menu and select "Device Manager." Expand "Display adapters." Right-click on your graphics card (e.g., Intel HD Graphics, NVIDIA GeForce) and select "Update driver." Choose to search automatically for drivers.
- macOS: Go to the Apple menu > System Preferences > Software Update. If a graphics driver update is available, install it.
Step 4: Advanced Considerations
- External Display Compatibility: Ensure that the external display supports the HDMI version your laptop is utilizing. Older displays may not be compatible with newer HDMI standards, causing problems.
- Resolution and Refresh Rate Conflicts: Incorrect display settings can cause issues. Check the display settings on both your laptop and the external display. Ensure that the resolution and refresh rate are compatible.
- Check the BIOS Settings:: Ensure the laptop's BIOS settings are configured to enable your HDMI Output.
Preventative Measures: Keeping Your HDMI Connection Strong
- Handle Your HDMI Cord with Care: Avoid bending or pulling the HDMI cord excessively. Treat it as you would any delicate electronic component.
- Protect the HDMI Ports: Avoid plugging and unplugging your HDMI cord frequently, as this can wear down the ports over time. Consider using quality HDMI cords with robust connectors.
- Keep Your Ports Clean: Regularly clean the HDMI ports on your laptop and other devices to prevent dust and debris from interfering with the connection. A can of compressed air is your best friend here.
When to Seek Professional Help
If you've tried all the troubleshooting steps and your laptop screen still isn't displaying correctly, it's time to consult a professional. A qualified laptop repair technician can diagnose and fix more complex issues, such as a faulty HDMI port or problems with the graphics card. Don't hesitate to seek their expertise! They'll likely have the necessary tools and expertise to diagnose the problem and recommend solutions that would be useful for your laptop.
By following these steps, you can increase your odds of quickly solving any HDMI connection problems and getting your laptop's screen working again. The world of digital displays is a complicated one, but with a systematic approach, you can troubleshoot the problem and restore visual functionality.
