hp laptop cd dvd player not working
Title: How to eject a stuck CD drive from laptopshorts cdplayer
Channel: Learn Basics
How to eject a stuck CD drive from laptopshorts cdplayer by Learn Basics
HP Laptop CD/DVD Drive DEAD? FIX IT NOW! (Easy Steps!)
HP Laptop CD/DVD Drive: A Silent Killer? Revive It!
Have you encountered a frustrating silence when you insert a disc into your HP laptop? It’s one of those unexpected tech hiccups that can genuinely ruin your day. The dreaded CD/DVD drive failure happens, unfortunately, more often than we'd like. But don't despair. There’s a high probability you can breathe life back into that digital heart. We'll explore how.
Is Your Drive Truly Gone? A Quick Diagnostic Check
Before you assume the worst, let's perform a preliminary assessment. First things first, carefully check whether the drive is even recognized by your operating system. To achieve this, you should right-click the “Start” button. Then, select “Device Manager” from the context menu. Take a minute to scan the list for an entry labeled “CD-ROM drives” or something similar.
If you see it, that's good news; it indicates your laptop acknowledges the drive's existence. However, if you don't see it listed, that is, unfortunately, a harsher indicator. Still, do not panic; there are further steps. Perhaps it’s disabled, or the drivers are experiencing an issue.
Software Solutions: Battling the Digital Gremlins
Let's approach the issue head-on with some software-based fixes. First up, you must make sure that it isn't a driver issue. Drivers are essential software components that permit different hardware to communicate with your OS.
Driver Update: Return to the “Device Manager.” Locate your CD/DVD drive and right-click on it. Select “Update driver” from the pop-up menu. Choose the option to automatically search for updated driver software. Windows will attempt to locate and install a newer version. Afterward, restart your laptop and test the drive.
Driver Uninstall and Reinstall: Sometimes, a fresh start is best. If the update doesn’t work, right-click the drive again, and select “Uninstall device.” Windows should prompt you to confirm. Confirm, and proceed. Once uninstalled, restart the laptop. Windows should automatically detect and attempt to reinstall the driver.
Registry Tweaks (Proceed with Caution): This is a more advanced step, so approach with care. Occasionally, registry keys can malfunction. You should back up your registry before making changes. Press the Windows key + R, type “regedit,” and hit Enter. Navigate to
HKEY_LOCAL_MACHINE\SYSTEM\CurrentControlSet\Services\atapi. Double-click on the “Start” value. The value data should be set to “0”. If it's not, change it, and restart. If it is, this may not be the issue.
Hardware Tango: When Software Isn't Enough
Okay, so software solutions haven't yielded results. Now, we should look into the hardware. This is where things can become more intricate. Remember, if you're uncomfortable opening your laptop, seek professional help. Always.
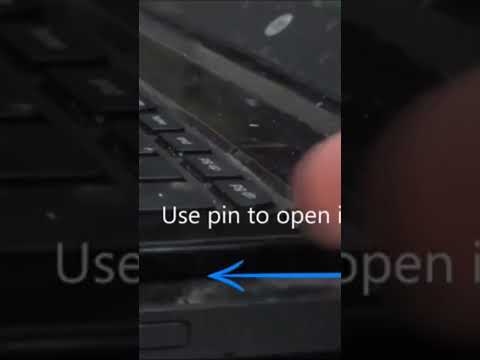
The Eject Button's Resilience: Ensure your drive isn’t jammed. Make sure the eject button actually does what it is intended to do. Try pressing it firmly, holding it down for a few seconds. Consider using a paper clip to manually eject the drive. There may be a small, pinhole near the eject button. Insert the clip and see if that helps.
Physical Inspection: If possible, shut down your laptop and unplug the power adapter. Remove the battery to ensure safety. Consult your laptop's manual or search online for disassembly instructions specific to your HP model. Carefully open the laptop. Inspect the CD/DVD drive for any obvious issues. Look for loose connections, dust buildup, or any visible damage.
The SATA Connection: Within the laptop, you'll find a SATA cable connecting the drive to the motherboard. Ensure this connection is firm and not loose. Sometimes a simple re-connection can fix the problem.
Laser Lens Cleaning: Dust and debris can obstruct the laser reader responsible for reading your discs. With the laptop open, you can try gently cleaning the lens. A cotton swab barely dampened with isopropyl alcohol can work. However, be extremely gentle.
Disc Detective: Testing with a Known Good Disc
Assuming you've done all the steps mentioned before, try testing the drive with a known good disc. This helps eliminate the possibility of a faulty disc. Use a commercial CD or DVD you know works.
Professional Assistance: When to Call in the Cavalry
If all these troubleshooting steps have proven unsuccessful, accept that there might be a deeper issue. It might be time to consider professional repairs. The drive itself may be defective. A tech will have the expertise to diagnose the problem accurately. They can also replace the drive.
The Bottom Line: Don't Give Up!
Losing a CD/DVD drive can feel like a major setback. However, with a little patience and the right approach, you can often revive the drive. Implement the steps carefully, and don't be afraid to seek help when needed. Remember, a bit of troubleshooting can save you a lot of money and frustration. Good luck, and happy disc-ing!
Laptop Shortcut Keys DEAD? This SHOCKING Fix Works!HP Laptop CD/DVD Drive DEAD? FIX IT NOW! (Easy Steps!)
Alright, buckle up, buttercups, because we’re about to embark on a tech rescue mission! Ever stared in disbelief at your HP laptop, only to realize your CD/DVD drive has apparently kicked the bucket? The spinning, the whirring, the almost reading… then nothing? We’ve all been there. That sinking feeling that maybe, just maybe, all those precious CDs and DVDs are destined for a digital graveyard. But before you resign yourself to a future of online streaming, let's roll up our sleeves and see if we can bring that disc drive back from the brink! Consider this your personal, hands-on guide to reviving your HP laptop's optical drive. Think of it as a digital defibrillator for your data.
1. The Dreaded Silent Treatment: Recognizing the Problem
First things first, let's confirm the obvious. Is your CD/DVD drive truly deceased, or is it just playing shy? The symptoms can range from a complete lack of response (no lights, no sounds) to inconsistent reading (attempting to read a disc, but ultimately failing). Maybe it opens and closes fine, but the computer doesn't see the disc. A silent drive is like a grumpy cat – you know something's wrong, but you're not quite sure what. This is where a little detective work comes in handy. Let's run some basic tests:
- Try a Different Disc: It’s the tech equivalent of "Have you tried turning it off and on again?" Pop in a known-good CD or DVD. Different media, different results.
- Look for the Light: Most laptops have a little LED indicator next to the drive. Does it light up or blink when you insert a disc? If not, that's a bad sign.
- Check Your Computer's Recognition: Navigate to "This PC" (or "My Computer") in Windows. Can you see the drive listed? If it's missing, we have a problem.
2. A Software Checkup: The Operating System's Role
Our operating system (OS) is the conductor of the digital orchestra, and sometimes, it gets a little…off-key. A corrupted driver or a software glitch can lead to your drive's refusal to cooperate. Let's see if a software hiccup is the culprit:
- Driver Update: This is the digital equivalent of a software tune-up. Go to Device Manager (search for it in the Windows search bar). Expand "DVD/CD-ROM drives." Right-click your drive and select "Update driver." Let Windows search for the latest updates. (Think of this as giving your drive a new pair of digital shoes!)
- Driver Reinstall: If updating doesn’t work, try uninstalling the driver (right-click, "Uninstall device"). Reboot your laptop, and Windows should reinstall the driver automatically. Fingers crossed!
- Check for Conflicts: Sometimes, other software can interfere. Try closing any programs that might be using the drive (like virtual drive programs or disc burning software).
3. The Physical Examination: Checking the Hardware
Okay, if software fixes didn't bring your drive back to life, it's time to get a little more hands-on. Don’t worry; we won't be disassembling the entire laptop (unless you're feeling particularly adventurous!). Sometimes, a bit of dust or a loose connection is all it takes to throw a wrench in the works.
- The Tray's Behavior: Does the tray open and close smoothly? If it struggles or jams, there could be a physical obstruction. Gently blowing compressed air into the drive slot might help dislodge any debris.
- External Drive Check: If your laptop has an external drive port, plug an external CD/DVD drive to determine if the port itself may be defective.
- The Power Connection: If you're comfortable, and your laptop allows easy access, you might consider checking the drive's power and data connections (if they are accessible without voiding your warranty, otherwise, don’t).
4. Burn Baby, Burn (Back to Life): Burning Software Basics
Sometimes, the problem isn't the drive itself, but your operating system's ability to use it. If you need to burn a CD or DVD, the software that does the ‘burning’ has to be correct.
- Using Windows Media Player: This built-in software often works wonders for simple CD burning. Just insert a blank CD and follow the prompts.
- Third-Party Software: Programs like ImgBurn or Nero (careful of free trials!) are powerful tools for burning and disc management.
5. The BIOS Whispers: Checking Your System's Settings
The BIOS (Basic Input/Output System) is your computer's "brain" before Windows boots up. Sometimes, the BIOS can affect how the drive is recognized.
- Entering the BIOS: Usually, you'll need to press a specific key (Del, F2, F10, or Esc) during startup to access the BIOS setup. The key varies by manufacturer (check your HP laptop manual).
- Checking Drive Recognition: In the BIOS, look for a setting that lists your drives. Make sure the CD/DVD drive is enabled.
- Restoring Defaults: If you've messed around in the BIOS, the easy fix is to restore the default settings and save your changes.
6. The Laser Lens Cleanse: A Little TLC for Your Drive
Over time, dust and grime can accumulate on the laser lens of your CD/DVD drive. This can hinder its ability to read discs.
- Compressed Air Again!: A gentle puff of compressed air can sometimes dislodge dust from the lens itself. Hold the can a reasonable distance from the drive and give it a short burst.
- The Cleaning Disc: You can purchase specialized CD/DVD cleaning discs that contain tiny brushes designed to clean the lens.
- The DIY Approach (Proceed with Caution!): ONLY if you're comfortable and your drive is easily removable, you could carefully use a cotton swab (lightly dampened with isopropyl alcohol) to clean the lens. But this is risky, so only if all else fails.
7. The Hardware Tango: Potential Hardware Issues
If all else fails, it's unfortunately possible that your drive has a more serious hardware malfunction. This is where things get a little trickier.
- The Drive's Age: How old is your laptop? Optical drives have a lifespan.
- Physical Damage: Has your laptop been dropped or exposed to extreme conditions? Physical shock can damage the drive's internal components.
- Professional Help: If you're not comfortable with internal repairs, it's time to consult a tech professional. They have the tools and expertise to diagnose and replace a faulty drive.
8. The Replacement Option: Swapping the Drive
If your drive is truly beyond repair, replacing it might be the best course of action. This often involves:
- Identifying Your Drive: Note the drive's model number (usually printed on the drive itself or the label).
- Finding a Replacement: Search online for a replacement drive compatible with your HP laptop model.
- Installation: This can vary in difficulty, but it often involves unscrewing the drive, unplugging the connections, and installing the new drive. Refer to your laptop's service manual or online guides for instructions.
9. External Drive Solutions: A Convenient Alternative
If replacing the internal drive seems like too much trouble, an external drive provides a user-friendly alternative.
- USB Connection: External drives connect to your laptop via USB and they are generally plug-and-play.
- Cost-Effective: External drives can be relatively inexpensive and can easily be used with multiple computers.
10. Updating your Drivers Automatically
Consider using driver update software.
- Driver Update Software Use: Driver update software scans your computer for outdated drivers.
- Driver Download: Driver update software downloads and installs the latest drivers.
11. Check For Virus or Malware
Viruses or malware could be the issue.
- Scan with Anti-Virus: Use your installed anti-virus to find and remove threats.
- Scan with Anti-Malware: Run a scan with your anti-malware software.
12. Troubleshoot Your Operating System
Sometimes the operating system itself is the problem.
- Use the Troubleshooting Tools: Your operating system typically has built-in tools to find and fix common system issues.
- Reinstall the OS: Reinstalling the OS could be the fix. Be sure to back up essential information beforehand.
13. Reinstalling the Drive
Attempt a more definitive solution by uninstalling and reinstalling the drive.
- Uninstalling the Drive: Open Device Manager, right-click, and remove the drive from your computer.
- Reinstalling the Drive: Restart your computer; the driver will be reinstalled automatically.
14. Warranty Check
See if your laptop has a warranty.
- Check The HP Warranty: Check your HP product's warranty.
- Contact HP: Contact HP if your drive is covered.
15. Final Thoughts and Preventing Future Issues
So, we've covered a
HP Tablet Laptop Touchpad DEAD? FIX IT NOW!CDDVD Drive Is Not Detected in Windows 10

By TechFixIT CDDVD Drive Is Not Detected in Windows 10 by TechFixIT
DVD CD-ROM drives not showing in device manager fix DVD drive not listed in device manager

By troubleshooterrors DVD CD-ROM drives not showing in device manager fix DVD drive not listed in device manager by troubleshooterrors
DVD player nodisc problem shorts youtubeshorts viral

By RK Techsol DVD player nodisc problem shorts youtubeshorts viral by RK Techsol

Title: How to Use CDs and DVDs on a Computer with No Disk Drive
Channel: Love What You Do
How to Use CDs and DVDs on a Computer with No Disk Drive by Love What You Do
Wifi On Laptop
HP Laptop CD/DVD Drive DEAD? FIX IT NOW! (Easy Steps!)
Navigating the digital landscape, especially when your trusty HP laptop's CD or DVD drive decides to call it quits, can be a frustrating experience. The ability to access data from optical media, install software, or simply enjoy a classic movie can feel like a fundamental loss. Fear not! We are here to guide you through a comprehensive troubleshooting process, brimming with practical solutions crafted explicitly to breathe life back into your dormant drive. These steps are designed to address the common causes of failure and restore functionality, ensuring your laptop is ready to handle all your multimedia needs.
Initial Diagnostics: Identifying the Problem
Before delving into intricate fixes, it's crucial to accurately pinpoint the nature of your drive's malfunction. This initial diagnostic phase is akin to a doctor assessing a patient—the more accurate the assessment, the more effective the treatment. Let's methodically explore the various possibilities to determine the underlying cause.
1. The Simple Restart: A Power-Up Reset
Sometimes, the simplest solutions prove the most effective. A straightforward restart of your HP laptop can often resolve temporary glitches. This action clears the system's memory and re-initializes all hardware components, including the CD/DVD drive. Shut down your laptop completely; don’t just put it to sleep. Wait a full minute before restarting. This gives the system adequate time to reset itself fully. After the restart, attempt to access your CD/DVD drive. If it works, the problem was likely a temporary software conflict.
2. Check the Physical Connection:
Laptops, by their mobile nature, can experience the occasional jolt or bump. These physical impacts can, in rare cases, dislodge the connections between the CD/DVD drive and the motherboard, particularly in older models.
- Internal Drive: If you are comfortable with technology, and your warranty permits, carefully open the laptop’s access panels (consult your HP laptop’s service manual for precise instructions). Locate the CD/DVD drive within the internal bay. Ensure the SATA data cable and the power cable are securely connected to both the drive and the motherboard. Firm, but gentle pressure may be needed to re-seat the connections.
- External Drive: If the drive is a USB-connected external model, physically inspect the USB cable and the port on both the drive and the laptop. Try a different USB port. Sometimes, a faulty USB port can prevent device recognition. Replace the USB cable to verify that the original cable is not the culprit.
3. Firmware and Drivers: The Digital Interface
Obsolete or corrupted firmware and drivers represent a common source of drive malfunction. Your laptop’s operating system requires the correct drivers to communicate with its hardware. Let us ensure that the drive has the correct driver installed.
- Driver Update: Boot up your HP laptop. Type "Device Manager" in the search bar. Open Device Manager. Locate "DVD/CD-ROM drives" in the list. If the drive is present, right-click on it and select "Update driver." Choose "Search automatically for drivers." Windows will search for and install the latest drivers if available. Restart your laptop following the update.
- Manual Driver Download: If the automatic update fails, visit the HP support website. Enter the model number of your HP laptop. Navigate to the "Drivers" section. Search for the appropriate CD/DVD drive drivers for your specific model and operating system. Download and install the drivers, following HP's on-screen instructions.
4. Test with Different Discs: The Media Factor
The CD/DVD drive may be functional, but a damaged or incompatible disc could be causing issues.
- Disc Compatibility: Try inserting several different types of optical media (CD-R, CD-RW, DVD-R, DVD+R, etc.) into the drive. Ensure it can read some discs before we declare it as faulty.
- Disc Condition: Thoroughly inspect each disc for scratches, smudges, or any visible damage. If the drive successfully reads some discs but not others, the problem may lie in your media.
Advanced Troubleshooting: Deeper Dive into Solutions
If the initial diagnostics do not resolve the issue, we must perform more detailed troubleshooting steps. These steps address potential issues within your operating system beyond the basic restart and driver updates.
1. Registry Manipulation: Ensuring Proper Drive Recognition
Incorrect registry entries can sometimes interfere with the proper functioning of your CD/DVD drive. Take extra precaution here; we will take careful steps to edit the registry. You can corrupt your system, so complete the steps carefully.
- Open Registry Editor: Press the Windows key + R. This opens the "Run" dialog box. Type "regedit" and press Enter. This opens the Registry Editor.
- Navigate to the UpperFilters and LowerFilters Keys: Go to the following registry key:
HKEY_LOCAL_MACHINE\SYSTEM\CurrentControlSet\Control\Class\{4D36E965-E325-11CE-BFC1-08002BE10318}. In the right-hand pane, locate and delete the entries named "UpperFilters" and "LowerFilters". - Restart Your Laptop: Exit the Registry Editor and restart your HP laptop. Windows will attempt to reconfigure the necessary drivers.
2. Using the Microsoft Fix It Tool:
Microsoft provides a dedicated troubleshooting tool designed to automatically diagnose and fix issues related to hardware.
- Download the Tool: Visit the Microsoft support website and search for the "CD/DVD drive not recognized" troubleshooter, or follow a link to the Microsoft troubleshooter. Download and run the tool.
- Follow the On-Screen Instructions: The tool will initiate a scan to identify potential problems. Follow the prompts to apply any recommended fixes.
3. Malware Scan: The Threat of Infection
Malware can disrupt various system functions, including hardware operation.
- Run a Full System Scan: Use your installed antivirus software to perform a full system scan. This scan looks for any malicious software that may be causing the CD/DVD drive to malfunction.
- Remove Detected Threats: If any malware is detected, follow your antivirus software's instructions to remove it.
4. Testing The Drive in Safe Mode:
Starting your laptop in Safe Mode loads only the essential drivers and services. This can help isolate the problem.
- Enter Safe Mode: Restart your HP laptop. Repeatedly press the F8 key during startup (before the Windows logo appears) until the "Advanced Boot Options" menu appears. Select "Safe Mode" and press Enter.
- Test Drive Functionality: Once in Safe Mode, attempt to use the CD/DVD drive. If the drive works in Safe Mode, a third-party software conflict is likely.
- Identify the Conflict: If the drive functions correctly in Safe Mode, the issue is likely caused by a driver or application loading during normal startup.
- Clean Boot: Perform a clean boot of Windows to isolate the problematic software. To do this, type "msconfig" in the search box, and select "System Configuration." On the "Services" tab, check "Hide all Microsoft services," then click "Disable all." On the "Startup" tab, click "Open Task Manager." In Task Manager, disable all startup items. Restart your laptop.
- Re-enable Services and Startup Items: If the drive now works, re-enable services and startup items one at a time, restarting after each, to identify the conflicting software as the culprit.
Hardware Considerations: Addressing Physical Drive Issues
If none of the software-based solutions resolve the problem, the issue may lie within the hardware itself. We will now examine possible physical drive failures.
1. Inspecting the Drive's Physical Components
Should you feel comfortable doing so, and after consulting your HP laptop's service manual, you can carefully inspect the drive for visible signs of damage.
- Visual Inspection: If your warranty permits and you feel comfortable, carefully remove the drive from the laptop. Examine the drive’s exterior for physical damage: cracks, dents, or loose components. Do not open the drive itself.
- Dust and Debris: Use compressed air to gently remove dust and debris from the drive, including the laser lens and tray mechanism.
2. Drive Replacement: When Repair Isn’t Possible
Unfortunately, optical drives are not always repairable. Sometimes, the most practical solution is replacing the entire drive.
- Determine Drive Type: Find the type of CD/DVD drive in your HP laptop (e.g., SATA, Slimline). Check your HP laptop's documentation or the Device Manager for this information.
- Purchase a Replacement: Purchase a replacement drive of the correct type from a reliable source. Ensure it’s compatible with your HP laptop model.
- Install the New Drive: Carefully remove the old drive and install the replacement drive, following the installation steps in your HP laptop's service manual. Take careful note of the position and direction in which the drive is installed.
- Install Drivers: After installing the new drive. Boot up the laptop and install the proper drivers from the HP website.
If the drive still does not function after a replacement, other components may be affected that are beyond the scope of this article. In this case, a qualified technician may be needed.
Preventive Maintenance: Ensuring Longevity
Once you have successfully restored functionality, adopting a few preventative measures can help prolong your drive’s lifespan.
1. Store Discs Properly:
- Avoid Extreme Temperatures: Protect your discs
