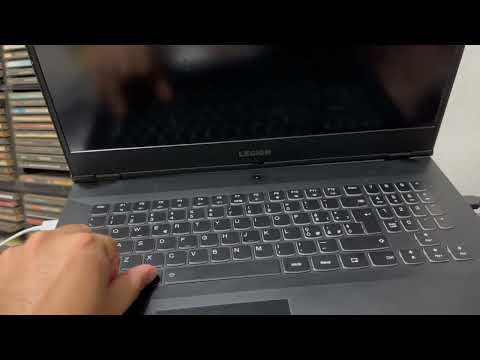
keyboard doesn't work on lenovo laptop

Title: How To Fix Lenovo Keyboard Not Working Windows 10
Channel: Cap Trong Nam - How To
How To Fix Lenovo Keyboard Not Working Windows 10 by Cap Trong Nam - How To
keyboard doesn't work on lenovo laptop, keyboard won t work on lenovo laptop, keyboard not working on lenovo laptop windows 11, keyboard not working on lenovo laptop windows 10, how do i get my keyboard to work on my lenovo laptop, why is the keyboard on my lenovo laptop not working, lenovo laptop can't use keyboard, how to get the keyboard to work on a lenovo laptop
Lenovo Laptop Keyboard Disaster: Fix It NOW!
Lenovo Keyboard Woes? Don't Panic, We've Got You!
Let's face it; a sticky or malfunctioning laptop keyboard is a modern-day digital tragedy. Especially when your trusty workhorse happens to be a Lenovo. Don't fret though! You are certainly not alone. Many Lenovo laptop owners have experienced keyboard issues. But fret not, because we will guide you through the troubleshooting process.
The Keyboard Conspiracy: Is it Truly Broken?
Before you hurl your Lenovo across the room, take a deep breath. Before you go crazy, it's worth a few minutes of investigation. In most cases, a complete keyboard failure is rare. Sometimes, the issue is minor and quite easily rectified! In fact, the problem could stem from something as simple as a software glitch. Moreover, a physical obstruction might be the culprit. Therefore, let's first eliminate the obvious.
First, restart your Lenovo. This simple reboot can magically resolve many temporary software hiccups. After a fresh start, test your keyboard. Does the problem persist?
Dust Bunnies and Debris: The Usual Suspects
Often, the enemy of a functional keyboard is lurking right under your keys. Dust, crumbs, and even pet hair are common keyboard villains. Consequently, these invaders can interfere with the proper function of the keys. Therefore, it is time to launch a counter-offensive.
Grab a can of compressed air. Then, carefully angle the nozzle and direct the air blasts between the keys. Focus on the problem areas: the keys that stick, or are unresponsive. Be thorough, but gentle. Finally, give the entire keyboard a good once-over.
Driver Dilemmas: A Software Showdown
Sometimes, the problem resides not in hardware, but in software. Specifically, outdated or corrupted keyboard drivers can cause chaos. Consequently, ensuring your drivers are up-to-date is important. Fortunately, it's a relatively easy process.
Head to Lenovo's official support website. Next, navigate to the driver download section. Find the drivers specific to your laptop model and operating system. Finally, download and install the keyboard drivers if they are not up to date. You will restart your laptop after the installation. Then, test your keyboard again.
Sticky Situation: Cleaning the Key Caps
If debris is the problem, the keycaps might need some extra attention. Therefore, begin by turning off and unplugging your Lenovo. It’s crucial to avoid any accidental damage. Next, you can use a soft cloth dampened (not soaked) with isopropyl alcohol. This will work to carefully wipe down the surfaces of each key.
Remember, avoid using excessive liquid. Furthermore, be careful not to damage the keycaps. Finally, let the keyboard air-dry completely before powering it back on.
The Great Typing Test: Identifying the Culprit
To pinpoint the exact issue, perform a typing test. There are many online keyboard testing tools available. Moreover, you simply start typing and observe the results.
These tests highlight any unresponsive keys. Also, the test will reveal if some keys are stuck. Furthermore, the test helps you determine if specific keys or an entire section of the keyboard is malfunctioning.
Software Conflicts: A Hidden Battleground
Occasionally, conflicting software can interfere with your keyboard's functionality. Specifically, certain programs or utilities can cause issues. Therefore, performing a clean boot can help you determine if this is the case.
In a clean boot, Windows starts with a minimal set of drivers and startup programs. This isolates the issue to a particular program. So, if the keyboard works fine in a clean boot, then a software conflict is the likely cause. You will need to identify the conflicting software. Then, you will disable this software.
Hardware Hysteria: Considering Internal Issues
If all else fails, the problem might be hardware-related. Possibly, there could be a damaged keyboard cable. Perhaps, there is a faulty key switch. Unfortunately, these issues often require professional attention.
If your Lenovo is still under warranty, contact Lenovo support. Or, consider taking your laptop to a qualified repair technician. Do not even attempt to open the laptop yourself if you are not comfortable with hardware repairs.
Prevention is Key: Future-Proofing Your Typing Experience
Once you have fixed the keyboard, consider taking preventative measures. First, regularly clean your keyboard to prevent future issues. Also, use a keyboard cover to shield it from dust and spills. Finally, be mindful of your environment.
In addition, avoid eating or drinking near your laptop. Therefore, you are protecting it from potential damage. Furthermore, gentle use and regular maintenance will extend the life of your keyboard.
Final Thoughts: Typing Triumph!
Dealing with a problematic Lenovo keyboard is frustrating. But, with the right troubleshooting steps, you can usually resolve the issue! Consequently, you can get back to typing without a hitch. So, don't give up! You just might be able to revive your keyboard.
Dell Laptop Speaker Dead? FIX IT NOW!Lenovo Laptop Keyboard Disaster: Fix It NOW!
Hey everyone, let's be honest, there's something universally frustrating about a malfunctioning keyboard, right? It's like having a vital limb suddenly decide to take a vacation. And when that keyboard is on your Lenovo laptop, well, it can feel like a complete digital meltdown. We've all been there, staring at a blank screen, desperately trying to type a simple email or finish that crucial project, only to be met with a barrage of unresponsive keys or bizarre, self-inflicted typos. If you're navigating this digital storm right now, take a deep breath. You’re not alone, and more importantly, there's hope! We're going to dive deep into the common keyboard woes of Lenovo laptops and, more importantly, equip you with the knowledge and practical steps to get things back on track. Consider this your digital knight in shining armor, ready to rescue you from the typing abyss.
1. The Silent Scream: Common Lenovo Keyboard Problems
Before we jump into solutions, let's pinpoint the usual suspects. Understanding why your keyboard is acting up is half the battle. Think of it like a doctor’s diagnosis before prescribing treatment. Here are the most frequent culprits:
- Unresponsive Keys: The most obvious and infuriating issue. Certain keys, or even the entire keyboard, simply refuse to register your keystrokes.
- Sticky Keys: Keys that get stuck down, repeating characters endlessly. It’s like the keyboard's having a never-ending party.
- Typing the Wrong Characters: Imagine trying to type "hello" and ending up with "gdhgfd." This can be a sign of driver issues or hardware problems.
- Phantom Typing: Keys that type on their own, even when you're not touching them. It's as if your laptop has developed a mind of its own and decided to write a novel without your permission.
- Backlight Issues: The backlight flickering, dimming, or not working at all. While not a functional issue in itself, a faulty backlight can be a real productivity killer in low-light environments.
- Spills: Liquid damage, the ultimate keyboard nemesis. A spilled cup of coffee or glass of water can wreak havoc on the delicate internal components.
2. Troubleshooting 101: Your First Line of Defense
Before you panic and start envisioning expensive repairs, let's try some simple, often effective, fixes. Think of this as your digital first aid kit:
- Restart Your Laptop: This classic solution resolves a surprising number of issues. It's like hitting the reset button on your brain when you're having a bad day.
- Check Your Connections: If you're using an external keyboard, ensure it's securely plugged in. Also, try a different USB port to rule out a port issue.
- Inspect for Obstructions: Look for any debris (crumbs, dust, pet hair) trapped under the keys. A can of compressed air can be your best friend here.
- Run the Windows Troubleshooter: Windows has a built-in keyboard troubleshooter. Go to Settings > Update & Security > Troubleshoot and select "Keyboard."
- Check for Updates: Make sure your Windows is up-to-date, as well as your keyboard drivers. Outdated drivers are a common source of problems.
- Clean Your Keyboard: Shut down your laptop, ensure it's unplugged, and use a soft, lint-free cloth (slightly damp, if necessary) to clean the keys and surrounding areas. Be gentle!
3. Driver Dilemmas: Updating and Reinstalling
Drivers are the translators that allow your keyboard to "speak" to your operating system. If these translators are faulty, you'll encounter problems.
- Updating Drivers:
- Right-click the Start button.
- Select "Device Manager."
- Expand the "Keyboards" section.
- Right-click on your keyboard device.
- Select "Update driver." Choose "Search automatically for drivers."
- Reinstalling Drivers:
- Follow steps 1-3 above.
- Right-click on your keyboard device.
- Select "Uninstall device."
- Restart your laptop. Windows will automatically try to reinstall the drivers.
4. The Sticky Situation: Dealing with Stuck Keys
Sticky keys can be incredibly annoying. Here's how to tackle them:
- Turn Off Sticky Keys Feature: Check if the Sticky Keys feature is activated in Windows (Settings > Ease of Access > Keyboard). Disable it if necessary.
- Physical Cleaning: Try cleaning around the affected keys with compressed air. If that doesn't work, carefully remove the keycap (use a small flathead screwdriver or a keycap puller) and clean underneath.
- Professional Help: If the keys are still stuck, it might indicate a more serious problem (like a spill). Consider taking your laptop to a repair shop.
5. The Backlight Blues: Fixing Dim or Non-Functional Backlights
A faulty backlight, while inconvenient, doesn't always indicate a dire situation.
- Check Keyboard Shortcut: Use the function keys (Fn + a backlight icon key) to adjust the backlight brightness.
- Driver Check: Ensure your keyboard drivers are up-to-date.
- Hardware Check: If the backlight is a consistent issue, the display could be damaged.
6. The Liquid Logic: What to Do After a Spill
This is the most urgent situation. Act fast!
- Unplug Immediately: Disconnect the power adapter and remove the battery if possible.
- Flip It Over: Immediately turn the laptop upside down to allow the liquid to drain out.
- Remove Peripherals: Disconnect any external devices.
- Absorb Liquid: Use a soft cloth or absorbent paper towels to blot up any visible liquid.
- Dry Thoroughly: Let the laptop dry completely (for at least 24-48 hours) in a well-ventilated area. Rice might help, but it's not a guaranteed fix.
- Seek Professional Help: Even if the laptop seems to work after drying, liquid damage can corrode internal components. Take it to a repair shop for a thorough cleaning and inspection. Ignoring this step could lead to more significant problems down the line.
7. Hardware Hang-Ups: When to Call in the Professionals
Sometimes, the problem goes beyond software or simple cleaning. If you've tried all the above steps and your keyboard still isn't working, you might be facing a hardware issue.
- Identifying Hardware Problems:
- Keys are physically damaged (broken or missing).
- The keyboard is consistently unresponsive, even after trying all software solutions.
- The laptop has been exposed to significant liquid damage.
- Professional Repair: Time to contact a trusted repair shop. They can diagnose and repair (or replace) your keyboard.
8. Avoid the Abyss: Preventing Future Keyboard Disasters
Prevention is always better than cure.
- Regular Cleaning: Dust and debris are the enemies of any keyboard. Clean your keyboard regularly with compressed air and a soft cloth.
- Liquid Precautions: Keep liquids away from your laptop. Use a spill-proof water bottle or cup.
- Protective Measures: Consider a keyboard cover, especially if you often eat or drink near your laptop.
- Gentle Handling: Avoid excessive force when typing.
9. Lenovo Specifics: Keyboard Features and Settings
Lenovo laptops often have unique features that can affect keyboard functionality.
- Fn Key Lock: The Fn key enables secondary functions (like volume control and screen brightness). Some Lenovo laptops have an Fn key lock. Check your Lenovo settings to see if Fn Lock is enabled or disabled.
- Lenovo Vantage: Lenovo’s utility software, check for updates for your keyboard drivers and any keyboard settings there.
10. Common Keyboard Layout Issues
Sometimes, your keyboard might seem to be typing the wrong characters because your keyboard layout is set incorrectly.
- Check Language Settings: Go to Settings > Time & Language > Language. Make sure your keyboard layout (e.g., US English) matches your physical keyboard.
- Troubleshooting Layout Problems:
- Press the Windows key + Spacebar to cycle through keyboard layouts.
- If you've accidentally added an incorrect layout, remove it.
11. The External Alternative: Using an External Keyboard
While you're troubleshooting, an external keyboard can be a lifesaver.
- Connecting an External Keyboard: Simply plug it into a USB port or connect wirelessly via Bluetooth.
- Using an External Keyboard as a Diagnostic Tool: If an external keyboard works perfectly, it strengthens the case for a hardware issue with your laptop's keyboard.
12. DIY Keyboard Replacement: Is It Worth It?
Replacing a Lenovo laptop keyboard can be a viable solution, but it's not always simple.
- Determining the Difficulty: Laptop keyboard replacements can vary in difficulty depending on the model. Research your specific Lenovo model.
- Resources: Watch online tutorials and find a repair manual for your model.
- Tools: You'll need tools like a
Lenovo laptop keyboard stop work, fix solution tested yoga y540 15 17
By Henrique Lima Lenovo laptop keyboard stop work, fix solution tested yoga y540 15 17 by Henrique Lima
Fix Lenovo Keyboard NOT Working in Windows 1011 2024

By Tech Reda Fix Lenovo Keyboard NOT Working in Windows 1011 2024 by Tech Reda
Lenovo Thinkpad X250 Laptop Keyboard not working ENG SUB

By TEKNIK TV 101 Lenovo Thinkpad X250 Laptop Keyboard not working ENG SUB by TEKNIK TV 101

Title: Lenovo Keyboard Not Working - 6 Fix
Channel: Tech Bachhal
Lenovo Keyboard Not Working - 6 Fix by Tech Bachhal
Wifi Not Found
Lenovo Laptop Keyboard Disaster: Reclaim Your Productivity Today!
We understand the frustration. Your Lenovo laptop keyboard, the very tool that connects you to work, communication, and entertainment, has betrayed you. Keys stick, fail to register, or behave in ways that defy logic. The resulting downtime, the data loss, and the sheer inconvenience are enough to make even the most patient among us see red. But before you resign yourself to a costly repair or, worse, a complete laptop replacement, pause. We have compiled an exhaustive guide, a digital lifeline, to help you diagnose, troubleshoot, and ultimately, fix your Lenovo laptop keyboard disaster. Let us dive in.
Identifying the Culprit: Pinpointing the Source of the Keyboard Chaos
The first step toward a solution is accurate identification. Not all keyboard issues are created equal. Is it a hardware malfunction, a software conflict, or something else entirely? Accurate diagnosis is crucial to avoiding unnecessary steps and wasting valuable time.
Software vs. Hardware: A Crucial Distinction
Begin by determining whether the problem stems from the operating system or the physical keyboard itself. The quickest method is to connect an external keyboard. If the external keyboard functions correctly, the issue is almost certainly a hardware problem—the internal Lenovo laptop keyboard. If the external keyboard also exhibits similar issues, consider that the problem may be with the operating system or settings.
Common Hardware-Related Keyboard Fails
A malfunctioning keyboard can manifest in numerous ways. These are the most frequent hardware-related issues you might face:
- Sticky Keys: This is often the result of dust, debris, or even spilled liquids that have seeped beneath the keycaps and created friction. Keys might not fully return to their original position.
- Non-Responsive Keys: Certain keys, or entire sections of the keyboard, may fail to register when pressed. This can be due to damaged key switches (the physical mechanism beneath each keycap) or internal cable damage.
- Phantom Key Presses: The keyboard might seem to be typing on its own, with letters or characters appearing without any input from you.
- Erratic Typing: Keys might produce the wrong characters or symbols. This could be a sign of a misconfigured keyboard layout (software-related) or a hardware malfunction.
Troubleshooting Software Issues: Reclaiming Control of Your Keyboard
While hardware issues are common, software conflicts and settings can also cause keyboard problems. Thankfully, these are generally easier to resolve.
Driver Conflicts: The Silent Saboteur
Outdated, corrupted, or incompatible keyboard drivers are a frequent cause of keyboard malfunctions. To address this:
- Access Device Manager: Right-click the Start Menu button (or press the Windows key + X) and select "Device Manager" from the list.
- Locate Your Keyboard: In the Device Manager window, expand the "Keyboards" section. You should see your Lenovo laptop keyboard listed (it might just be generic such as "HID Keyboard Device").
- Update the Driver: Right-click on your keyboard and select "Update driver." Choose "Search automatically for drivers" to allow Windows to find and install the latest driver.
- Roll Back the Driver (If Necessary): If the problem began after a recent driver update, right-click on the keyboard in Device Manager, select "Properties," go to the "Driver" tab, and click "Roll Back Driver." This will revert to the previous driver version.
- Uninstall and Reinstall: If updating or rolling back doesn't work, uninstall the keyboard driver (right-click, "Uninstall device") and then restart your laptop. Windows should automatically reinstall a basic driver upon restart.
Keyboard Layout and Language Settings: Are You Speaking the Right Language?
It's possible your keyboard layout or language settings have been accidentally changed. This can lead to incorrectly typed characters.
- Check Language Settings: Click the Windows key, type "language settings," and select "Language settings." Verify that the correct language is selected and that the keyboard layout matches your physical keyboard (e.g., US English, UK English).
- Add or Remove Languages: If needed, add your desired language or keyboard layout using the "Add a language" option. Remove any unwanted languages.
Sticky Keys, Filter Keys, and Other Accessibility Settings: Fine-Tuning Keyboard Behavior
Windows includes accessibility features that can sometimes interfere with proper keyboard function.
- Accessibility Settings: Press the Windows key and type "ease of access keyboard settings."
- Sticky Keys: Ensure that "Sticky Keys" is turned off. This feature can make it seem as though keys are sticking.
- Filter Keys: Also, disable "Filter Keys." This feature can alter how Windows responds to repeated or brief keystrokes.
- Toggle Key: Ensure that "Toggle Key" is turned off.
Hardware Solutions: Diving into the Physical Repair
If software troubleshooting fails, the focus shifts to the physical keyboard. This requires a degree of technical proficiency and patience. We strongly suggest backing up any important data before proceeding.
Cleaning Your Lenovo Keyboard: A First Line of Defense
Before attempting more complex repairs, thoroughly clean your keyboard. This often resolves issues caused by dust, crumbs, or other debris.
- Power Down and Unplug: Turn off your Lenovo laptop completely and disconnect the power adapter.
- Invert and Shake: Gently invert the laptop and tap the keyboard area to dislodge loose debris.
- Compressed Air: Use a can of compressed air to blow out dust and particles from between the keys. Direct the air at an angle, rather than directly downwards, to avoid forcing debris further into the keyboard.
- Keycap Cleaning (Optional): If significant debris remains, you might carefully remove the keycaps. Consult the Lenovo laptop user manual for the proper method for removing keycaps, as the mechanism varies depending on the model. Gently pry the keycaps off with a flat-edged tool (like a small screwdriver or a plastic spudger). Clean the keycaps with mild soap, water, and a soft cloth. Allow them to dry completely before replacing them. Once cleaned, snap them back into place.
Removing Keycaps Safely: A Step-by-Step Guide
If cleaning doesn't help, and some of the keys still do not work, you may consider going for professional help, or you can attempt this yourself. Remember to have the right tools:
- Gather Your Tools: A small flat-head screwdriver or a keycap puller (a specialized tool available online) are essential.
- Gentle Pry: Insert the flat-head screwdriver or the keycap puller beneath the edge of the keycap. Apply gentle, even pressure to pry the keycap upwards. Avoid excessive force, as you could damage the keycap or the underlying mechanism.
- Keycap Removal: Once the keycap is dislodged, it should come off easily.
- Examine the Switch: Inspect the switch (the small component beneath the keycap). Look for any visible debris, damage, or liquid residue.
- Cleaning the Switch: If you see debris, use compressed air or a small brush to clean the switch. If there is liquid residue, use a cotton swab lightly dampened with isopropyl alcohol to gently clean the area.
- Reattaching the Keycap: Align the keycap with the switch and firmly press it down until it snaps into place.
Keyboard Replacement: When Repair Isn't Enough
If cleaning and keycap repair prove unsuccessful, or if multiple keys are malfunctioning, keyboard replacement may be the best solution.
- Identify Your Model: The precise keyboard model varies depending on your Lenovo laptop model. Locate the model number on the bottom of your laptop or in the user manual.
- Source a Replacement: Purchase a replacement keyboard from a reputable online retailer. Make sure you’re buying the right model.
- Disassembly and Installation: This is often the most difficult step, it requires following the following guidelines (refer to a Lenovo service manual specific to your laptop model. These are often found online). If you are not comfortable with electronics, or don't have any experience, consider taking it to a professional.
- Power Down and Disconnect: Turn off your laptop and disconnect the power adapter. Remove the battery (if possible).
- Locate Screws: Identify and remove the screws that secure the keyboard to the laptop chassis. These screws are often labeled and are different from the screws used for the bottom cover.
- Carefully Pry: Use a plastic pry tool (or a thin, flat-edged tool) to gently pry the keyboard from the chassis. There may be clips or tabs that need to be released.
- Disconnect the Cable: Locate and carefully disconnect the keyboard's ribbon cable from the motherboard. This is usually a delicate connector.
- Install the New Keyboard: Align the new keyboard with the chassis and connect its ribbon cable to the motherboard.
- Secure the Keyboard: Replace the screws that secure the keyboard to the chassis.
- Test the Keyboard: Turn on your laptop and test the new keyboard to ensure all keys are functioning correctly.
Professional Assistance: When to Call in the Experts
While many keyboard issues can be resolved with the above steps, some problems require professional expertise. Consider seeking professional help if:
- The problem is complex and involves internal component failures.
- You are not comfortable disassembling your laptop
