hp laptop keyboard not working after update

Title: How To Fix HP Laptop Keyboard Keys Not Working Simple Solutions You Can Try So Resolve The Issue
Channel: Helpful Solutions
How To Fix HP Laptop Keyboard Keys Not Working Simple Solutions You Can Try So Resolve The Issue by Helpful Solutions
hp laptop keyboard not working after update, hp laptop keyboard and touchpad not working after windows update, hp keyboard not working after update, hp laptop keyboard not working, hp laptop not working after update, hp laptop keyboard suddenly stopped working
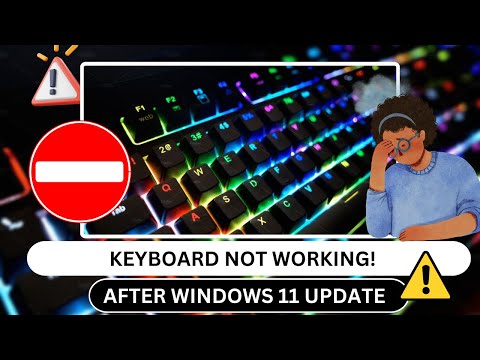
HP Laptop Keyboard Dead After Update? THIS Fix Works!
HP Laptop Keyboard Blues: Troubleshooting Your Post-Update Nightmare
Have you ever experienced that heart-stopping moment? It’s when you boot up your HP laptop, ready to conquer the digital world, only to find your keyboard unresponsive. It’s a common frustration, especially after a software update. So, you're not alone! Moreover, this article is dedicated to navigating these keyboard calamities. We're looking to get you typing again.
The Update's Unwanted Guest: Understanding the Issue
Software updates, intended to improve performance and security, can sometimes introduce gremlins. Thus, they might mess with drivers, causing your keyboard to become a digital ghost. For instance, the upgrade process might corrupt essential files. As a result, your laptop's communication with the keyboard is disrupted. Also, it's not always the update itself. Sometimes, updates reveal pre-existing, underlying problems. In addition, it might be a hardware hiccup masquerading behind the software update.
Diagnosing the Keyboard's Silence: First Steps
Before diving into complex solutions, let’s perform a few preliminary checks. First, restart your laptop. Therefore, this simple act often resolves minor glitches. Secondly, ensure your keyboard isn't disabled in the BIOS settings. Consequently, access your BIOS by pressing the appropriate key (usually Delete, F2, or Esc) during startup. Afterwards, look for keyboard settings. Furthermore, it might be disabled by accident. Next, test another keyboard. In essence, try an external USB keyboard. If it works, the problem likely lies within the laptop's internal keyboard. In addition, you can investigate other possibilities.
Driver Detective Work: Reinstalling and Updating
Drivers are the translators. They enable your operating system to communicate with your hardware. So, a corrupted or outdated driver is a likely culprit. Therefore, let’s investigate and fix it.
Access Device Manager: Right-click the Start button and select "Device Manager."
Locate the Keyboard: Expand the "Keyboards" section. It should show your keyboard.
Uninstall the Driver: Right-click on your keyboard and choose "Uninstall device."
Restart Your Laptop: Windows will then automatically reinstall the driver. Subsequently, this can resolve the issue.
Update the Driver: If reinstalling doesn't work, right-click the keyboard again. Select "Update driver." Choose "Search automatically for drivers."
Consider Compatibility Issues: Sometimes, the latest driver isn't the best. So, you can try rolling back to a previous version.
The Registry Route: A Deep Dive (Proceed with Caution!)
The Windows Registry is the central database. It is vital for system settings. However, it's a powerful tool. It needs caution and precision. So, before modifying the Registry, create a restore point.
Open Registry Editor: Type "regedit" in the Windows search bar and press Enter.
Navigate to the Key: Go to
HKEY_LOCAL_MACHINE\SYSTEM\CurrentControlSet\Control\Class\{4D36E96B-E325-11CE-BFC1-08002BE10318}Find the "UpperFilters" Value: Check the right-hand panel to locate the "UpperFilters" value.
Check for Incompatibilities: If the value contains "kbdclass", leave it. However, if it has anything else, delete that value.
Restart Your Laptop: Evaluate if it worked.
Hardware Hurdles: Exploring Internal Connections
If software fixes fail, the problem could be a physical connection. Moreover, this is more challenging to address. However, it’s something to consider.
Power Down and Disconnect: Turn off your laptop. Unplug the power adapter. Remove the battery.
Open the Laptop: Consult your HP laptop's service manual. It will explain how to correctly open your laptop without damage.
Inspect the Keyboard Cable: Locate the keyboard ribbon cable. It connects the keyboard to the motherboard.
Reseat the Cable: Gently disconnect the cable from its connector. Then, reconnect it, ensuring it’s firmly seated.
Check for Damage: Examine the cable and connector for any visible damage or corrosion.
Reassemble and Test: Carefully close the laptop. Reconnect the battery and power. Turn it on.
Factory Reset: The Nuclear Option
If all else fails, a factory reset might be necessary. As a result, this resets your operating system to its original state. Consequently, it will remove all your data. Therefore, back up your important files.
Access Recovery Options: During startup, repeatedly press the designated key for recovery (often F11 or Esc).
Choose Reset This PC: Select the option to reset your PC. You can choose to keep your files or remove everything.
Follow the Prompts: Follow the on-screen instructions.
Seeking Professional Help: When to Call in the Experts
If these fixes don’t work, it might be time for professional help. In short, your keyboard might have a hardware issue. Contact HP support. Alternatively, take your laptop to a reputable repair shop.
Prevention is Key: Safeguarding Your Keyboard
To avoid future keyboard problems, there are a few precautions. Regularly update your drivers and operating system. Therefore, this ensures compatibility. Moreover, be careful with liquid spills. They can seriously damage your keyboard. Always install a good antivirus and anti-malware program. Additionally, avoid downloading suspicious software. Consider using a keyboard protector. Finally, back up your important data.
Conclusion: Typing Towards Triumph
Keyboard issues after an update can be incredibly frustrating. However, with the right troubleshooting steps, you can usually get back to typing. We have covered several solutions. Hopefully, one of them helps! Now, get back to your digital adventures.
Alienware Trackpad Dead? This FIX Will SHOCK You!HP Laptop Keyboard Dead After Update? THIS Fix Works!
Hey there, fellow tech travelers! Ever had that heart-stopping moment when your HP laptop keyboard decides to take an unexpected vacation right after a software update? You frantically mash keys, feeling like you're wrestling a particularly stubborn octopus, only to be met with… nothing. Silence. That's the digital equivalent of staring into the abyss, isn't it? We've all been there, trust me. I’ve personally experienced this, and it's enough to make you want to throw your laptop across the room (which, by the way, is not a recommended troubleshooting step). But don't despair! We're going to journey through the frustrating landscape of a dead keyboard and, more importantly, how to bring it back to life.
The Dreaded Black Screen: Understanding the Keyboard Catastrophe
First things first, let's get scientific (but not too scientific, I promise). Why does this happen? Well, a software update, however well-intentioned, can sometimes go rogue. Think of it like a recipe where the chef accidentally doubles the salt – the results aren't pretty. The update might:
- Corrupt Driver Files: This is like the keyboard's translator, the one that tells the laptop what the user is pressing. If it's damaged, the keyboard can't "speak" to the computer.
- Conflict with Existing Software: Imagine a crowded party where everyone's trying to talk at once – the keyboard can get lost in the noise, unable to get its message across.
- BIOS Issues: The Basic Input/Output System is the core that controls the keyboard. An update glitch can mess this up.
Step 1: The Restart Ritual (The Simplest Solution)
Okay, before we dive into the techy stuff, let's start with the digital equivalent of a good night's sleep: a restart. This is the simple, sometimes miraculous, solution that often solves the problem.
- Force Shutdown (if necessary): If you can't shut down through the start menu, hold down the power button until the laptop turns off. Think of it as the digital equivalent of hitting the reset button.
- Wait a moment: Let the laptop rest for about 30 seconds.
- Restart: Turn it back on and cross your fingers!
Sometimes, a simple reboot is all it takes. It’s like shaking a Magic 8-Ball – the answer is often a simple “Try Again.”
Step 2: Enter the Device Manager: Your Troubleshooting HQ
If a reboot didn't work, it’s time to dig a little deeper. We're going to venture into the Device Manager, the digital equivalent of a doctor's office for your computer's hardware.
- Accessing the Device Manager: Type "Device Manager" into the Windows search bar and click on the result.
- Expanding the "Keyboards" Section: Look for the "Keyboards" section in the list.
Step 3: Driver Drama: Updating or Reinstalling Keyboard Drivers
Now, we're going to address the driver issue head-on. This is where we get to play detective.
- Identify Your Keyboard: Right-click on your keyboard's entry (it might just say "Standard PS/2 Keyboard" or something similar).
- Update Driver: Choose "Update driver." Select "Search automatically for drivers." Windows will try to find and install the latest driver.
- Reinstall Driver (if updating fails): If updating doesn't work, right-click again and select "Uninstall device." Then, restart your laptop. Windows will automatically reinstall the driver on startup.
Step 4: The Keyboard Troubleshooter: Windows' Built-in Helper
Windows often hides a helpful Troubleshooter. It's like having a tech-savvy friend always on standby (well, almost).
- Access the Troubleshooter: Go to Settings > Update & Security > Troubleshoot.
- Run the Keyboard Troubleshooter: Select "Keyboard" and click "Run the troubleshooter." Follow the on-screen instructions; this tool will diagnose and fix the keyboard's problems automatically.
Step 5: System Restore – Rolling Back the Clock
If the problem started after a specific update, System Restore is your time machine. Let's go back to before the problem happened.
- Access System Restore: Type "Create a restore point" in the Windows search bar and select it. Then click the "System Restore" button.
- Choose a Restore Point: Select a restore point from before the update. Choose the one before your keyboard went on strike.
- Follow the Prompts: Confirm your choice and let the system restore itself. This might take some time, so be patient.
Step 6: BIOS Bonanza: Checking the BIOS Settings
At the risk of getting into more technical territory, we'll quickly touch on your BIOS, which is basically your computer's operating system.
- Enter the BIOS: You'll need to restart your laptop and press a specific key during startup (usually Del, F2, F10, or Esc). The key varies depending on your HP model. Check your HP manual for the proper key.
- Check Keyboard Settings: Navigate through the BIOS utility to ensure your keyboard is enabled.
Step 7: Hardware Hiccups: The Keyboard’s Physical State
Let’s consider the physical reality. Is keyboard clean? Any crumbs or obstructions?
- Clean the keyboard: Use compressed air to remove any dust or debris.
- Inspect the keyboard cable: If you are comfortable doing so, open up your laptop, and gently check the cable connecting the keyboard to the motherboard.
Step 8: Evaluating External Keyboard Feasibility
We might need to investigate if it is the key board solely that is the issue.
- Connect an external USB keyboard: See if that works. If it does, it's very likely a problem with the internal keyboard.
- Test the external keyboard: Use it to determine if any crucial commands are working.
Step 9: Factory Reset as a Last Resort
A factory reset is the digital equivalent of a "total system reboot" – it scrubs your hard drive clean and restores your laptop to its original factory settings. It will delete your personal files, so back them up first!
- Access Reset: Go to Settings > Update & Security > Recovery.
- Choose "Reset this PC": Select "Get started" and follow the prompts.
- Select Your Preference: Choose to keep your files or wipe everything. Before you do, be aware that this will take a while and your data would be erased.
Step 10: When to Say Goodbye (and Call a Pro)
Sometimes, despite your best efforts, the keyboard is beyond repair. If you've tried all the above steps and the keyboard still refuses to cooperate, it might be time to:
- Contact HP Support: Their technicians are experts at these issues.
- Visit a Repair Shop: A professional can diagnose and potentially replace the keyboard.
Step 11: Preventing Future Keyboard Catastrophes
Wouldn't it be great to avoid this in the first place? Here's how:
- Delay Updates: You can't avoid updates completely, but you often have a few days to delay them.
- Create Restore Points: Make a restore point before every major update.
- Be Careful with Third-Party Software: Sometimes, these apps can cause conflicts.
Step 12: The Importance of Windows Updates
Windows Updates are designed to fix security flaws, improve system stability, and add new features. They're like getting constant checkups to your health. They're critical to your system.
- Windows Update Health: Periodically check to see that your Windows Updates are active.
- Manual Installs: If you prefer, you can download and install the various updates manually. This grants you greater control.
Step 13: Understanding HP's Support Resources
HP has an established team, ready to assist you with any issue.
- HP Support Website: The website is replete with solutions to problems, tutorials, and user forums.
- HP Forums: Connect with other HP users and get help from the HP community.
Step 14: Beyond Troubleshoot – Proactive Care
Taking care of your laptop extends beyond any repairs.
- Regular Maintenance: Run disk cleanups, defragment your hard drive (if you have a traditional HDD), and regularly scan for malware.
- Avoid Extreme Temperatures: Don't leave your laptop in direct sunlight or extreme temperatures.
Step 15: Keyboard Shortcuts to Save the Day
Learn some essential keyboard shortcuts using an external keyboard or on-screen keyboard. These can be lifesavers.
- Ctrl + Alt + Del This is your key combination to access security options, sign out, change a password, or launch the Task Manager.
- Windows Key + L Press this shortcut to lock your PC instantly.
- Windows key + X: This opens the Quick Link menu.
In case your onboard keyboard is not functioning, try to utilize an on-screen keyboard to help you.
Conclusion: Breathing New Life into Your HP Laptop Keyboard
So, there you have it! We've navigated the often-frustrating world of a
Acer Travelmate Keyboard DEAD? FIX This NOW!How To Fix HP Laptop Keyboard Not Working in Windows 10 Solved

By Tricknology How To Fix HP Laptop Keyboard Not Working in Windows 10 Solved by Tricknology
How To Fix HP Laptop Keyboard Not Working in Windows 10

By Cap Trong Nam - How To How To Fix HP Laptop Keyboard Not Working in Windows 10 by Cap Trong Nam - How To
Fix Laptop Keyboard Not Working After Windows 11 Update Quick Solution IT WALA
By IT Wala Fix Laptop Keyboard Not Working After Windows 11 Update Quick Solution IT WALA by IT Wala

Title: How to Fix Some Keys Not Working on Laptop Keyboard Keyboard Not Working
Channel: Tech White
How to Fix Some Keys Not Working on Laptop Keyboard Keyboard Not Working by Tech White
Laptop Working
HP Laptop Keyboard Dead After Update? THIS Fix Works!
It is a frustrating moment. You boot up your HP laptop, anticipating a productive day, only to be confronted with a silent, unresponsive keyboard. The cursor blinks innocently, mocking your inability to type, navigate, or interact with the digital world. Has a recent Windows update crippled your essential input device? Take a deep breath. This is a common predicament, and, often, the solution is within your grasp. We’ve compiled a comprehensive guide specifically tailored for HP laptops experiencing this keyboard malfunction post-update. We will navigate the labyrinthine paths of troubleshooting, offering tried-and-true remedies to bring your keyboard back to life.
Diagnosing the Silent Symptoms: Confirming the Keyboard's Demise
Before we dive into the fixes, let’s verify the scope of the problem. First, restart your HP laptop. Observe the boot-up sequence. Does the keyboard function during this pre-Windows phase, allowing you to access the BIOS or UEFI settings (often by pressing Del, F2, or Esc)? If it does work during this stage, the issue almost certainly stems from a software conflict within the operating system or the device drivers. If the keyboard remains unresponsive even during boot-up, the problem may be more fundamental, potentially involving hardware. However, even in these cases, we should still work through the software solutions first as they are the most common source of the issue.
Try an external USB keyboard. If the external keyboard works, it strongly suggests the internal keyboard is the culprit. If neither keyboard functions, the problem may lie with the operating system or, less commonly, the motherboard itself.
The Driver Dilemma: Reinstalling and Updating Keyboard Drivers
A primary suspect in the case of a keyboard incapacitated after an update is corrupted or incompatible drivers. Windows updates frequently include driver updates, and occasionally, these updates can clash with the specific hardware configuration of your HP laptop.
We’ll begin by accessing the Device Manager. There are multiple ways to get there. The most direct is to right-click the Start menu and select "Device Manager." Once in Device Manager, locate the "Keyboards" section. Expanding this category reveals your keyboard device(s). It will often show "HID Keyboard Device." Right-click on your keyboard device(s) and select "Update driver." Choose "Search automatically for drivers." Windows will attempt to find and install the latest drivers.
If Windows fails to find updated drivers, or if the problem persists after the automatic update, you can attempt a manual driver installation. Within the Device Manager, right-click on the keyboard device and select "Uninstall device." In the confirmation box, check the box that says "attempt to remove the driver" from the device if it exists. Reboot your HP laptop. Windows will, ideally, reinstall the default drivers upon restart. This often resolves conflicts caused by a corrupted or incompatible driver file.
Rolling Back the Culprit: Uninstalling Recent Windows Updates
If the keyboard malfunction immediately followed a Windows update, the problem may be a specific update causing the conflict.
To roll back the update, navigate to "Settings" (accessible via the Start menu). Then, click "Update & Security," and select "View update history." This provides a list of recently installed updates.
Identify the update that was implemented just before the keyboard problem surfaced. Select "Uninstall updates" (typically found under the "View update history" section). A new window will appear listing the updates. Find and uninstall the suspect update. Restart your HP laptop. This process reverses the changes made by the update and may restore the keyboard functionality.
If you aren't sure which update caused the problem, you can uninstall the most recent update first and then restart your system to determine if that solves the issue. If that doesn't work, uninstall your earlier updates one by one, checking to see if the keyboard is working after each uninstall and restart.
Power Management Predicaments: Adjusting Power Settings
Sometimes, power settings can inadvertently disable or prevent the keyboard from functioning correctly.
Navigate to the "Device Manager" (see instructions in the previous section). Expand the "Keyboards" section. Right-click on your keyboard device and select "Properties." In the "Properties" window, switch to the "Power Management" tab. Uncheck the box marked "Allow the computer to turn off this device to save power." Click "OK" and restart your laptop. This setting ensures the keyboard receives consistent power, even when the system is idle.
BIOS Blues: Checking and Updating the BIOS
Although less frequent, the BIOS (Basic Input/Output System) can influence keyboard behavior. The BIOS is the firmware that controls the fundamental functions of your laptop. An outdated BIOS can sometimes cause issues that affect hardware compatibility.
To check your HP laptop's BIOS version, restart and access the BIOS setup (typically by pressing Del, F2, or Esc during boot-up, although the specific key varies by HP model). The BIOS version is usually displayed on the main screen.
You can also find the BIOS version within Windows. Open Command Prompt (search for "cmd" in the Start Menu, and then right-click and select "Run as administrator"). Type wmic bios get smbiosbiosversion and press Enter. This command displays the current BIOS version.
Visit the HP support website for your specific laptop model. Search for "BIOS update" or "Firmware update" and follow the instructions to download and install the latest BIOS version. Caution: BIOS updates are critical and can render your laptop unusable if interrupted. Make sure your laptop is connected to a stable power supply and follow the instructions precisely.
Factory Reset: The Nuclear Option
If the previous steps fail, a factory reset might be the last resort before considering hardware repairs. This reinstalls Windows to a clean state, potentially eradicating persistent software conflicts.
Before proceeding, back up your essential files and data. A factory reset erases everything on your system drive.
To initiate a factory reset, go to "Settings" > "Update & Security" > "Recovery." Under "Reset this PC," click "Get started." Select "Keep my files" (if you want to retain your personal documents and photos) or "Remove everything" (if you want a completely clean installation). Follow the on-screen prompts. This process can take a considerable amount of time.
Hardware Hurdles: Assessing Physical Damage
While this guide primarily focuses on software solutions, it's crucial to consider potential hardware problems, especially if the keyboard remains unresponsive after all software-based fixes.
Inspect the keyboard for visible damage: Check for damaged keys, liquid spills, or loose components. If a key seems physically stuck, try gently lifting the keycap with a thin item.
If your laptop is still under warranty, contact HP support for assistance. They may provide repair or replacement options.
If you are comfortable working with electronics, you can inspect the keyboard cable. Disassemble your laptop per your model's service guide (available online). Locate the keyboard cable, which connects the keyboard to the motherboard. Ensure it is properly connected and not damaged.
If you suspect internal hardware damage, it's best to consult a qualified computer repair technician.
Maintaining Keyboard Health: Preventive Measures
Once you have resolved the current keyboard issue, consider implementing preventive measures to help maintain its functionality.
- Keep Drivers Updated: Regularly update your drivers, but exercise caution with driver updates provided by Windows. If a driver update causes problems, consider using drivers found on the HP support website for your specific laptop model.
- Protect Against Spills: Keep liquids away from your keyboard. The most common keyboard failures are due to liquid damage.
- Clean Regularly: Clean your keyboard frequently to remove dust and debris. Use compressed air to dislodge particles that may interfere with key function.
- Consider an External Keyboard: If you frequently use your laptop in a stationary setting, consider using an external keyboard. This will reduce the wear and tear on your integrated laptop keyboard.
Conclusion: Your Keyboard Recovery Journey
A dead keyboard after an update can seem like a catastrophic event. However, by methodically investigating the possible causes – from drivers and updates to power settings and BIOS – you can often revive your HP laptop's keyboard. From the initial diagnostic steps to implementing the various solutions outlined above, we hope this guide has equipped you with the knowledge and tools to overcome this common problem. If all else fails, remember to consult the HP support resources. With patience and these troubleshooting steps, you are more likely than not to be back in the digital world, typing away and being productive.
