system fan not working in hp laptop

Title: Cara Memperbaiki Laptop Hp System Fan Error Saat Dinyalakan
Channel: Rupa Rupi Rdua
Cara Memperbaiki Laptop Hp System Fan Error Saat Dinyalakan by Rupa Rupi Rdua
system fan not working in hp laptop, why is the fan of my laptop not working, how do i fix the fan on my hp laptop, hp laptop says fan not working, hp laptop fan not working error
HP Laptop Fan DEAD? 😱 Fix This NOW!
HP Laptop Fan Disaster? Don't Panic, We've Got You!
Your HP laptop's fan just died. The dreaded heat is rising. A silent machine is bad news. You are now staring into the abyss of potential system failure. But fear not! We will navigate this together. Let's get that fan roaring back to life!
The Unmistakable Signs of Fan Failure
First, what exactly signals a dying fan? Your laptop might announce it. The most obvious symptom is absolute stillness. Then, your laptop will become extremely hot. Also, expect performance to plummet. Software will lag and stutter. Therefore, pay close attention to overheating. The fan exists to keep the internal components cool. Without it, disastrous consequences loom. Hence, learn the warning signs. Ignoring them invites trouble. Keep looking out for these critical red flags.
Troubleshooting Steps: Before You Crack Open the Case
Before diving headfirst, let's try a few preliminary checks. Sometimes, simple solutions work wonders. Firstly, make sure your laptop is not in a power-saving mode. Battery-saving features can throttle fan speed. Thus, adjust these settings. Secondly, check for software conflicts. A rogue process can overload the CPU. This forces the fan to work overtime. Therefore, close any unnecessary programs.
Next, let's examine the vents. Dust build-up is a common culprit. Use compressed air to clear them out. Aim the nozzle carefully. Do this from various angles. Moreover, perform a system restart. Often, this fixes minor glitches. Then, check the BIOS settings. The fan's behavior may be controlled there. Make sure it’s set to “automatic”. If these steps don't work, we'll move forward.
Dismantling and Diagnosing: The Next Level
Now, we move into the more involved realm. Disconnecting the power cord is crucial. This is paramount for safety. Then, locate your laptop's service manual. Search online for your exact model number. This is a lifeline for proper disassembly. Study it carefully. It will give you instructions. Proceed with caution and take your time.
Once inside, identify the fan. Observe it closely. Look for obvious damage. Also, check for any obstructions. A simple wire or a stray object could be the issue. Next, check if the fan spins freely. If it’s seized, you’ll need a replacement. Consequently, a replacement fan is usually affordable. However, finding the right one is vital.
The Fan Replacement Process: Step-by-Step Guide
Now, let's get a fresh fan installed. Begin by disconnecting the old fan's power cable. Carefully note its connections. These are usually delicate. Gently remove the fan from its housing. Unscrew any mounting screws. After, install the new fan. Secure it with the screws. Make sure the fan is seated correctly. Connect the power cable. This is one of the most important steps.
Before fully reassembling the laptop, we must test. Connect the power cord. Turn on your laptop. Listen carefully for the fan. Observe the fan's operation. This is crucial to ensure proper function. If it's working, feel the air flowing. If all checks out, reassemble your laptop. This is the final step.
Preventative Measures: Keeping Your Fan Alive Longer
Now that your fan is working, let's implement some smart habits. First, clean your laptop vents regularly. This prevents dust accumulation. Using compressed air is effective. Next, avoid using your laptop on soft surfaces. Such as blankets or beds which restrict airflow. Also, consider a laptop cooling pad. These offer extra cooling. Ensure adequate ventilation at all times. Moreover, keep your software updated. Software updates sometimes improve fan control. These simple tips will prolong the life of your fan. Therefore, act now and keep your gear cool.
When to Call in the Professionals
Sometimes, you'll encounter a situation beyond your capabilities. If you're uncomfortable with the above steps, don't force it. If you have damaged any computer components. Consider consulting a professional. Also, a specialist will have the right tools. In addition, they possess the necessary expertise. Don’t hesitate to seek help. Protect your investment. It’s better than causing more damage.
Final Thoughts: Keeping Your HP Laptop Cool
In conclusion, a dead fan is a serious issue. But, it doesn't have to be a catastrophe. With patience and care, you can often fix it yourself. Always prioritize safety first. Understand the limitations of your skillset. Hopefully, these steps guide you. Furthermore, remember to stay proactive. This way, your laptop will stay cool and functional for a long time. Now, go get that fan spinning again!
Dell Mouse Disaster: Why Isn't My Cursor Moving?!HP Laptop Fan DEAD? 😱 Fix This NOW!
Alright, fellow laptop warriors! Have you heard that unsettling whir of silence emanating from your HP laptop when you fire it up? Is your trusty machine suddenly sounding like a confused paperweight instead of a productivity powerhouse? If the answer is a resounding YES, then you’re in the right place. We're going to dive deep into the often-dreaded scenario of a dead HP laptop fan and, crucially, explore how to fix it. Trust me, we've all been there. It's like your laptop’s internal air conditioner decided to take an extended vacation in the middle of a desert heatwave! Let's get that digital breeze blowing again.
🌬️ Why Your HP Laptop Fan Died (And Why You Should Care)
First things first: why should you even bother? A dead fan isn't just an annoying noise issue; it's a serious health hazard for your laptop. Think of it like a runner who’s lost their ability to breathe – your CPU and GPU (the brains and brawn of your laptop) are going to overheat. This can lead to:
- Performance throttling: Your laptop will slow down dramatically to protect itself. Imagine trying to run a marathon while constantly putting on the brakes. Frustrating, right?
- Hardware damage: Prolonged overheating can fry your precious components, leading to costly repairs or even a full system replacement. This is like overcooking your roast – burnt to a crisp!
- Data loss: If the laptop shuts down abruptly to prevent overheating, you might lose all your unsaved work. Talk about a digital nightmare!
So, yeah, a dead fan is a big deal. We need to fix this NOW.
🧐 Spotting the Signs: Is Your Fan Really Gone?
Before we start wrenching, let's make sure the fan is actually the culprit. Sometimes, the issue is something else entirely. Here are some telltale signs:
- Silence is Golden… Usually: Your laptop used to sound like a jet engine taking off (or at least a moderate hum) when you were doing demanding tasks. Now, it’s eerily silent.
- Overheating: The underside of your laptop feels like a stovetop. You could probably fry an egg on it (though, please don't try!).
- Performance Degradation: Lagging, freezing, and overall sluggishness are consistent.
- Sudden Shuts Downs: Your HP laptop unexpectedly powers off. This is the CPU screaming for help.
- Error Messages: Sometimes, your laptop might give you a warning about fan failure or overheating. It's like a red flag waving frantically.
If you're experiencing a combination of these, chances are your fan has checked out.
🛠️ Troubleshooting 101: The First Steps to Revival
Before you start disassembling your laptop and risking a complete digital breakdown, let's try some simpler solutions. These are like giving your laptop a digital health checkup before major surgery.
- Restart Your Laptop: Sounds basic, but a simple reboot can often clear temporary glitches that may be affecting fan control. Think of it as pressing the "reset" button.
- Update Your Drivers: Outdated drivers, especially BIOS updates, can sometimes interfere with fan control. Go to the HP support website, enter your laptop model, and download the latest drivers.
- Check System Processes: Some software can hog CPU resources, causing the fan to work overtime…or completely shut down. Open Task Manager (Ctrl+Shift+Esc on Windows) and look for any suspicious programs eating up CPU power. Close them if you don't need them.
- Clean the Air Vents: Dust bunnies are the enemy! Use compressed air to blow out the vents (usually located on the side or the back of your laptop). Think of it as sweeping out the cobwebs from your digital life.
💨 Airflow is Key: The Great Dust Buster Challenge
Dust is the silent killer of laptop fans. It's like a tiny, fluffy army infiltrating your machine and clogging everything up.
We're going to dust off the vents.
Here’s how to clean your laptop’s vents efficiently and safety:
- Turn off and Unplug: Safety first! Turn off your laptop and unplug the power cord.
- Compressed Air is Your Friend: Use a can of compressed air (available at any office supply store) and direct it into the vents. Use short bursts and direct the air from multiple angles.
- Be Gentle: Avoid spraying the air directly onto internal components. Be as delicate as though you're brushing your cat.
- Repeat as Needed: Keep doing this for several minutes until you can see no more dust.
💻 DIY Disassembly: When You Need To Go Deeper
If the troubleshooting steps above haven't worked, it's time for the main event: opening up your laptop. Warning: This voids your warranty, so proceed at your own risk! Additionally, if you're not comfortable with tech tinkering, consider taking your laptop to a professional.
Important Note: Every laptop model is different. Research your specific model online for detailed disassembly guides. This is important! You can find specific walkthroughs on YouTube.
Here’s a general overview, but always consult a specific guide for your HP laptop model:
- Gather Your Tools: You'll need a small Phillips head screwdriver (magnetic is helpful), a plastic opening tool (like a guitar pick), and possibly an anti-static wrist strap.
- Power Down Completely: Ensure your laptop is fully shut off and the power cord is unplugged. Take all external accessories out as well.
- Remove the Battery (If Possible): Some HP laptops have easily accessible batteries. Removing it will disconnect the power and make the process safer.
- Find the Access Panel: Locate the bottom panel that houses the fan. It’s frequently marked.
- Unscrew the Screws: Carefully unscrew the panel, keeping track of which screws go where. A magnetic tray or labeled baggie can be a lifesaver.
- Pry the Panel: Use the plastic opening tool to gently pry the panel off.
- Locate the Fan: The fan is usually connected to the motherboard by a small connector.
- Unplug and Remove the Fan. You'll likely see a heat sink attached to the fan.
- Clean the Fan: If the fan itself looks dirty, clean it gently with compressed air.
- Inspect the Heat Sink: The heat sink is usually a metal contraption designed to pull heat away from the CPU and GPU. Check for dust and clean it carefully.
- Replace the Fan (if Necessary): If the fan is truly dead, you'll need to buy a replacement. Search online for your HP laptop model and "replacement fan."
- Reassembly: Put everything back together in reverse order, being careful not to overtighten any screws.
⚙️ Fan Replacement: Finding the Right Match
Buying a replacement fan is like finding the right shoes – it has to fit perfectly. Here’s how to make sure you get the right fan:
- Know Your Model Number: This is the most crucial piece of information. It's typically on a sticker on the bottom of your laptop.
- Search Online: Use your model number and "replacement fan" to find compatible options.
- Check Specifications: Make sure the new fan has the same voltage and amperage ratings as the old one.
- Read Reviews: See what other customers have to say about the fan's quality and ease of installation.
💡 BIOS Settings: Fine-Tuning Your Fan
Sometimes, your fan might be working, but the settings are wrong. You may be able to adjust fan behavior through the BIOS (Basic Input/Output System). This is like tweaking the engine of your laptop.
- Accessing the BIOS: Restart your laptop and repeatedly press a specific key during startup (often Del, F2, F10, or Esc). The key varies by model, so consult your HP manual.
- Finding Fan Settings: Navigate the BIOS menu to find settings related to fan control or thermal management.
- Adjusting the Fan Curve: Some BIOS environments allow you to customize the fan curve (how fast the fan spins at different temperatures).
- Saving Your Changes: Once you're satisfied, save your settings and exit the BIOS.
🩺 Monitor Your Temps: Keeping an Eye on Things
After you’ve performed any fixes, use a temperature monitoring program to keep an eye on your laptop's internal heat. This is like having a digital thermometer to check for fever. Popular options include:
- HWMonitor: A free program that provides detailed temperature readings for your CPU, GPU, and other components.
- Core Temp: Similar to HWMonitor, Core Temp is great for monitoring CPU temperatures.
- HP Support Assistant: HP's own software can also provide temperature information.
Make sure the temperatures stay within safe limits (usually below 80-90°C for the CPU and GPU).
💻 Software Conflicts: The Program Interference
Sometimes, software can clash with your fan's performance.
- Background Processes: Some background programs can constantly push your CPU, causing the fan to spin
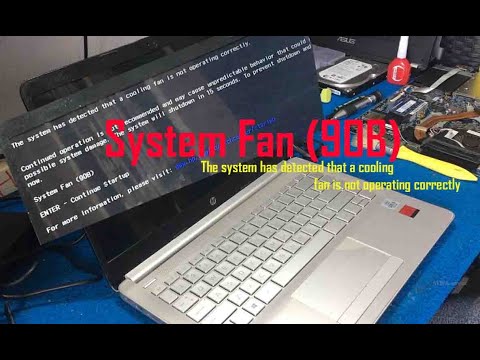
Error System Fan 90B Laptop HP System Has Detected That a Cooling Fan Is No Operating Correctly

By Teckfo Computer Error System Fan 90B Laptop HP System Has Detected That a Cooling Fan Is No Operating Correctly by Teckfo Computer
Fix the system has detected that a cooling fan is not operating correctly System Fan 90B

By Whiszan Tech Fix the system has detected that a cooling fan is not operating correctly System Fan 90B by Whiszan Tech
Cara Memperbaiki Laptop HP 14s Kipas Heatsink Macet
By SYIFA service Cara Memperbaiki Laptop HP 14s Kipas Heatsink Macet by SYIFA service

Title: HP LAPTOP HP System Fan 90B Error Fix The system has detected that a cooling fan is not operatin
Channel: OM CHIPLEVEL IT SOLUTION
HP LAPTOP HP System Fan 90B Error Fix The system has detected that a cooling fan is not operatin by OM CHIPLEVEL IT SOLUTION
Laptop Wifi Connect
HP Laptop Fan DEAD? 😱 Breathe Life Back into Your Beloved Machine!
We understand. That sinking feeling. The sudden, unsettling silence emanating from your HP laptop where the reassuring whir of the fan used to reside. Followed by a creeping dread as temperatures climb, performance suffers, and the specter of irreversible damage looms. But before you resign yourself to component replacement or, worse, a total system failure, let’s take a deep breath and work through this together. We're not just going to offer generic advice; we're going to provide you with actionable solutions. This isn't just a fix; it's a revival.
Identifying the Culprit: Pinpointing the Source of the Silence
Before we delve into solutions, we must accurately diagnose the problem's origin. A "dead" fan can manifest in several ways, each pointing to a different underlying issue.
- Complete Non-Operation: No sound, no vibration, no hint of activity. This often indicates a more significant issue, possibly involving power delivery to the fan, a completely seized motor, or a fundamental circuit board failure.
- Erratic Behavior: The fan spins sporadically, intermittently, or only at high speeds. This points to issues, such as thermal sensor malfunctions, driver problems, or accumulated dust buildup.
- Excessive Noise (Preceding Silence): Perhaps the fan was previously noisy, screeching, or rattling before abruptly ceasing operation. This can be a sign of failing bearings or a fan blade obstruction.
Step 1: The Power Cycle Ritual – A Simple But Powerful First Step
Often, the simplest solutions are the most effective. Before dismantling your laptop, performing a thorough power cycle can resolve many temporary glitches or software conflicts that may be hindering the fan's operation. Here’s how:
- Shut Down Completely: Not just sleep or hibernate; a full shutdown is crucial.
- Disconnect the Power Adapter: Unplug the charger from your HP laptop.
- Remove the Battery (If Possible): Some HP laptops have easily accessible batteries; remove yours if you can. If you cannot access the battery or if the removal is not possible, skip this step.
- Press and Hold the Power Button (The Magic Touch): Press and hold the power button for a solid 30-60 seconds. This drains any residual power stored in the capacitors, effectively resetting the system.
- Reassemble and Restart: Replace the battery (if removed), plug in the power adapter, and power on your laptop. Observe the fan's behavior during startup.
Step 2: The Dust Bunny Roundup – Cleaning Your Cooling System
Dust is the silent killer of electronics. It restricts airflow, causing components to overheat, which in turn can prematurely wear out the fan and its related components. A thorough cleaning is essential.
- Power Down and Disconnect: Ensure the laptop is fully shut down and disconnected from the power.
- Gather Your Arsenal: You will need a can of compressed air, a soft-bristled brush (like a toothbrush), and possibly a small Phillips head screwdriver.
- Locate the Ventilation Grilles: Identify the air intake and exhaust vents on your HP laptop. Usually, they are located on the side, bottom, or rear of the laptop.
- Gentle Air Blast: Using the compressed air, direct short bursts into the vents. Focus on areas where dust is most likely to accumulate. Rotate the laptop to ensure all areas are covered.
- Internal Inspection (Advanced): If you're comfortable, remove the bottom panel of your laptop (consult your HP laptop’s service manual for specific instructions - search online, providing your exact model number). This allows you to access the fan and heat sink directly. Be extremely careful, and ground yourself to prevent static discharge.
- Brush and Blow: Gently brush away any stubborn dust from the fan blades and heat sink fins. Use short, controlled bursts of compressed air to dislodge any remaining debris.
- Reassemble and Test: Carefully reassemble your laptop and power it on. Observe the fan's operation.
Step 3: Software Savvy – Troubleshooting with HP Support Assistant and BIOS Settings
Sometimes, the issue isn't hardware but software-related. HP provides valuable tools to help diagnose the problem.
- HP Support Assistant: Pre-installed on most HP laptops. Run the fan diagnostics; it will often identify potential problems and provide recommendations. Go to the Power section and click on Cool control setting
- BIOS Settings Check: Access your laptop's BIOS (usually by pressing F2, F10, Del, or Esc during startup – consult your manual for the exact key). Look for settings related to fan control or thermal management. Ensure the fan is enabled and configured to operate according to your desired performance profile.
- Driver Updates: Outdated or corrupted drivers can interfere with fan operation. Visit the HP support website, enter your laptop's model number, and download the latest chipset and fan control drivers.
Step 4: The Thermal Paste Tango – When Heat is the Undeniable Enemy
Over time, the thermal paste (a compound that transfers heat) between the CPU/GPU and the heat sink can dry out, losing its effectiveness. This can cause these components to overheat, triggering the fan to operate at high speeds or even shut down completely as a protection measure.
- Advanced Procedure: This is an advanced procedure that should only be attempted if you have experience with computer hardware. Consult your laptop’s service manual for detailed instructions and safety precautions.
- Disassembly: Carefully disassemble your laptop to access the CPU/GPU and heat sink.
- Cleaning: Thoroughly clean the old thermal paste from the CPU/GPU and the heat sink using isopropyl alcohol and a lint-free cloth.
- Application: Apply a fresh, thin, and even layer of high-quality thermal paste to the CPU/GPU.
- Reassembly: Carefully reassemble the laptop, ensuring proper contact between the CPU/GPU and the heat sink.
Step 5: The Ultimate Resort – Fan Replacement (When Silence Becomes Permanent)
If all else fails, the fan itself may be the culprit. A completely dead fan necessitates replacement.
- Identify the Fan: Determine the exact fan model for your HP laptop. This information is usually printed on the fan itself or can be found in the service manual.
- Source a Replacement: Purchase a replacement fan from a reputable supplier. Ensure the new fan is compatible with your specific laptop model.
- Disassembly: Carefully disassemble your laptop, following the service manual instructions to access the fan.
- Replacement: Disconnect the old fan from the motherboard and remove it. Install the new fan, ensuring proper alignment and connection.
- Reassembly and Test: Reassemble your laptop diligently, and power it on to test the new fan's operation.
Precautions and Further Troubleshooting Tips
- Static Electricity: Always ground yourself before working inside your laptop to prevent static discharge, which can damage sensitive components. Use an anti-static wrist strap or touch a grounded metal object.
- Documentation is Paramount: Refer to your HP laptop's service manual for detailed disassembly and reassembly instructions. These manuals are your best friend during this process. You can often find them online.
- Slow and Steady Wins the Race: Take your time. Rushing can lead to mistakes and potential damage.
- Monitor Temperatures: After completing any repairs, monitor your laptop's temperatures using software like HWMonitor or the HP Support Assistant. This allows you to verify that the fan is functioning correctly and maintaining optimal temperatures.
- Seek Professional Help: If you are uncomfortable performing any of these steps, or if the problem persists, consult a qualified computer repair technician. Attempting repairs beyond your skill level can cause further damage.
- Data Backup: Before any significant repair, back up all your important data. This protects you from data loss in case of unforeseen circumstances.
Reviving your HP Laptop: A Renewed Commitment
A dead fan doesn’t have to spell doom for your laptop. By methodically working through these steps, you can diagnose the problem accurately and restore your machine to its former glory. Careful attention to detail, patience, and a proactive approach are your greatest allies in this process. Armed with the correct knowledge and a willingness to troubleshoot, you can breathe life back into your beloved HP laptop. Remember, every successful repair is a testament to your skills and a victory against the forces of technological obsolescence. You can do this!
