hp laptop keys not working windows 10

Title: How To Fix HP Laptop Keyboard Not Working in Windows 10
Channel: Cap Trong Nam - How To
How To Fix HP Laptop Keyboard Not Working in Windows 10 by Cap Trong Nam - How To
hp laptop keyboard not working windows 10, hp laptop brightness keys not working windows 10, hp laptop number keys not working windows 10, hp laptop volume keys not working windows 10, hp laptop function keys not working windows 10, hp laptop keyboard stopped working windows 10, hp laptop some keys not working windows 10, hp laptop keyboard not working after windows 10 update, hp pavilion keyboard not working windows 10, hp pavilion laptop keyboard not working windows 10
HP Laptop Keys Dying? Windows 10 Fix Inside!
HP Laptop Keys Gone Rogue? Don't Panic – You've Got This!
Has your HP laptop decided to play the silent treatment? Are some – or even all – of your keys refusing to cooperate? Frustrating, right? You're not alone. This is a common issue. Fortunately, before you resign yourself to an external keyboard, there are several troubleshooting steps you can try. Let's dive in and get those keys clicking again!
The Keyboard Crisis: Understanding the Culprits
Before we begin, understanding why your HP laptop keyboard is misbehaving is crucial. Several factors can contribute to this digital mutiny. Perhaps a software glitch has taken hold. Maybe a recent Windows update caused the problem. Dust, debris, and the occasional spilled beverage are enemy number one of any keyboard. Furthermore, simple wear and tear can take its toll over time.
Step 1: The Simple Reboot – Sometimes, That's All It Takes!
First things first: restart your laptop. Sounds basic, I know. However, it can often resolve underlying software hiccups. After all, a simple reboot can clear temporary files and refresh the system. Shut down your HP laptop completely. Wait a minute or two. Then, power it back on. Is the keyboard working now? Great! If not, move on to the next step.
Step 2: Driver Detective – Updating Your Keyboard's Minders
Outdated or corrupted keyboard drivers can wreak havoc. It’s time to check if your keyboard’s software is up to date. Access the Device Manager. Type "Device Manager" in the Windows search bar. Then, select "Device Manager" from the results. Now, expand the "Keyboards" section. Right-click your HP keyboard. Select "Update driver." Choose "Search automatically for drivers." Windows will then search for any available updates. If it finds some, install them. Restart your computer if necessary.
Step 3: Keyboard Troubleshooter – Let Windows Do the Heavy Lifting
Windows has built-in troubleshooters. These are designed to diagnose and fix common problems. Luckily, one specializes in hardware issues. Locate the "Troubleshoot" settings. You can find this in your Windows "Settings" menu. Go to "Update & Security," then select "Troubleshoot." Select the "Keyboard" troubleshooter. Then, run the troubleshooter and follow the prompts.
Step 4: Sticky Situation? Cleaning Your Keys
Sometimes, the problem is physical. Crumbs, dust, and other debris may be interfering with the keys. Start by turning off your laptop and unplugging it. Consider using a can of compressed air. Aim the nozzle at the keys. Then, gently blow out any debris that may be stuck. You can also use a soft-bristled brush to clean between the keys. Be careful. Avoid using excessive force. Also, be cautious with liquids. A slightly damp microfiber cloth can gently clean the surface of the keys.
Step 5: The Registry Remedy – (Proceed with Caution!)
This step requires a bit more technical know-how. Be careful when modifying your registry. Incorrect changes could cause issues. It's better to backup your registry before proceeding.
Open the Registry Editor. Type "regedit" in the Windows search bar. Then, select "Registry Editor." Navigate to the following key: HKEY_LOCAL_MACHINE\SYSTEM\CurrentControlSet\Control\Keyboard Layout. On the right side, look for a value called "Scancode Map." If it exists, and you didn’t create it, it's likely causing the problem. Delete this value. Then, restart your laptop.
Step 6: Windows Update – Keeping it Fresh
Microsoft frequently releases updates that include bug fixes and improvements. These updates may address issues affecting your keyboard. Check for Windows updates. Go to "Settings," then "Update & Security," and finally "Windows Update." Click "Check for updates." Install any available updates. Restart your laptop afterward.
Step 7: External Keyboard Test – Isolating the Problem
To rule out a hardware issue, connect an external USB keyboard. If the external keyboard does work, it suggests the internal keyboard is the problem. This further validates that the issue is not software-related.
Step 8: System Restore – Rolling Back the Clock
Did your keyboard issues start recently? Consider using System Restore. This allows you to revert your system to a previous state. Choose a restore point before your keyboard problems began. Be aware that this action will remove programs and drivers installed after that point.
Step 9: The Final Resort – Professional Help
If you’ve tried all of the above steps, it might be a hardware problem. If so, it's time to seek professional help. Contact HP support. Or, take your laptop to a qualified repair technician.
Final Thoughts: Keeping Your Keys Happy
Preventative care is key. Regularly clean your keyboard. Avoid eating or drinking near your laptop. Consider using a keyboard cover for extra protection. By following these steps, you can often resolve keyboard issues yourself. Hopefully, these tips help you get your HP laptop keyboard functioning like new. Now, get back to typing!
Laptop-Loving Ladies: The Ultimate Work Purse Powerhouse!HP Laptop Keys Dying? Windows 10 Fix Inside!
Alright, folks, gather 'round! Ever had that moment where your trusty HP laptop's keyboard starts acting up? You hit the "A" key, and nothing. Then, bam, five "A"s show up a minute later, like a delayed, digital confetti cannon. It’s infuriating, isn’t it? We’ve all been there. We're talking about the dreaded situation where your HP laptop keys seem to have decided to stage a sit-in, or worse, a complete and utter shutdown. And let’s be honest, typing with a wonky keyboard is about as fun as trying to eat soup with a fork. But fret not, because we're diving headfirst into the world of fixing sticky, unresponsive, or completely MIA keys on your HP laptop running Windows 10.
1. The Keyboard Apocalypse: Why Are My HP Laptop Keys Dying?
Let’s be real: Why is this happening? It’s like your keyboard has a mind of its own. Well, a few culprits are usually to blame. Think of it like a detective novel, and we’re about to unearth the suspects.
- Dust and Debris: This is the most common crook. Tiny crumbs, dust bunnies (you know, the ones that multiply overnight), and even pet hair can sneak their way under your keys and wreak havoc. It’s like tiny ninjas infiltrating your keyboard's inner workings.
- Spills: Oh, the dreaded spill! A rogue coffee splash or a clumsy water incident can cause sticky keys or short-circuit the keyboard's internal circuitry. It's like a sudden downpour that floods your digital village.
- Software Glitches: Believe it or not, software issues can also mess with your keyboard. Driver problems, corrupted files, or even conflicting programs can lead to unresponsive keys. It’s a digital drama unfolding behind the scenes.
- Hardware Failure: Sometimes, the problem is simply a hardware one. The keys themselves, or the internal connections, might be wearing out. It’s like your trusty old car getting a bit creaky with age.
2. Identifying the Culprit: Pinpointing the Problem
Before we whip out the digital repair kit, we need to know what we're up against. Is it a single key that’s decided to stage a protest, or is it a whole section of keys that are going AWOL? The nature of the problem will guide our fix. If only one or two keys are giving you grief, it's likely the dust/debris scenario. But a whole section or the entire keyboard going haywire could point to something more serious.
3. The Gentle Cleanse: Cleaning Your HP Laptop's Keyboard
This is your first line of defense, the digital equivalent of a good spring cleaning. You don’t need fancy tools, usually.
- Power Down: First things first, shut down your laptop completely and unplug it. We don’t want any accidental electrical surprises!
- The Air Duster: This is your best friend. Use a can of compressed air (held at a slight angle – don't be too aggressive!) to blast out the dust and debris lurking beneath the keys. Think of it as a digital exorcism.
- The Gentle Wipe: Use a soft, lint-free cloth (microfiber works wonders) to wipe down the keyboard surface. Avoid harsh chemicals or excessive liquid.
- Key Cap Removal (Proceed with Caution!): If a specific key is particularly stubborn, you MIGHT carefully pop it off. Use a small plastic spudger or a thin, non-sharp tool. Be very gentle, and remember where each key goes! After removing the key cap, clean underneath with compressed air and a slightly damp (not wet!) cotton swab. Again, use caution to not break anything!
4. Software Sleuthing: Troubleshooting Driver Issues
Sometimes, the problem isn’t physical, but a digital gremlin. We need to check the keyboard drivers, and the solution is usually pretty straight forward.
- Device Manager: Right-click the Windows Start button and select "Device Manager."
- Expand the "Keyboards" Section: Look for your keyboard listed here.
- Update or Reinstall Driver: If there's a yellow exclamation mark next to your keyboard, there's a problem. Right-click on your keyboard, and try "Update driver." Follow the on-screen instructions. If that doesn't work, try "Uninstall device," then restart your laptop. Windows should automatically reinstall the driver.
5. Sticky Situation? Tackling Key Stickiness
If your keys are sticky, likely something has spilled and seeped in. This is a tricky one.
- Liquid Damage: If something sticky was spilled, immediately shut down and unplug your laptop! Don't let the liquid dry and solidify.
- Gentle Alcohol Wipe (Use with extreme caution!): For relatively small spills, you might carefully try wiping the affected keys with a cotton swab slightly dampened with isopropyl alcohol (70% or higher). It helps to dissolve the sticky substance. LET IT DRY COMPLETELY before using your laptop again!
- Professional Help: If the spill was extensive, or the keyboard is still sticky after cleaning, consider taking your laptop to a professional repair shop.
6. Keyboard Shortcut Sanity Check: Are Shortcuts Causing Chaos?
Sometimes, a rogue keyboard shortcut can seemingly disable individual keys. It's rare, but worth a quick investigation.
- Accidental Activation: Check for accidental presses of function keys (Fn) or other shortcut keys that might be causing unexpected behavior.
7. The External Keyboard Solution: A Temporary Fix
If all else fails, and you need to get work done (or play your favorite game!), an external keyboard is your savior.
- Plug and Play: Most external keyboards are plug-and-play; just plug them into a USB port and you're good to go.
- Bluetooth Option: Bluetooth keyboards offer wireless convenience.
8. Windows 10 Accessibility Features: Exploring Built-in Tools
Windows 10 offers built-in accessibility features that can help you navigate if certain keys are unresponsive.
- On-Screen Keyboard: This is a virtual keyboard accessible through the Windows Accessibility settings. You can use your mouse to "type."
- Filter Keys: This feature ignores brief or repeated keystrokes, which can be helpful if you have a sticky key issue.
9. The BIOS Test: Is It a Hardware Problem?
This is a more advanced test that can help determine if the problem is hardware or software.
- Access the BIOS: Restart your laptop and press the appropriate key to enter the BIOS setup (usually Del, F2, F12, or Esc; the prompt appears during startup).
- Test the Keyboard: Use the keyboard within the BIOS environment. If the keys malfunction here as well, it's highly likely that there is a hardware issue.
10. The Factory Reset Option: A Last Resort
If nothing else works, a factory reset can be a drastic, but effective, measure.
- Back Up Your Data: Make sure you back up all your important files and documents before proceeding.
- Reset Windows 10: Go to Settings > Update & Security > Recovery and choose "Reset this PC."
11. Hardware Hurdles: When to Seek Professional Repair
If you've tried everything, and the keys are still dead, it's time to concede defeat and consider professional repair.
- Damage Assessment: A professional can diagnose the problem and determine if it’s a simple fix (like a keyboard replacement) or something more complex.
- Warranty Check: If your HP laptop is still under warranty, contact HP support.
12. Keyboards Galore: Considering Replacement
Sometimes, a keyboard is simply at the end of its lifespan.
- HP Laptop Keyboard Replacement: Replacing the keyboard is usually a viable option. You can often find replacement keyboards online, and some models are relatively easy to install.
- Professional Installation: If you're not comfortable with DIY, consider having a professional replace the keyboard.
13. Preventative Measures: Keeping Your Keys Healthy
Prevention is always better than cure! Here are a few key strategies:
- Regular Cleaning: Make it a habit to clean your keyboard regularly (at least once a month).
- Liquid Avoidance: Keep liquids away from your laptop!
- Protective Covers: Consider using a keyboard cover to shield against spills and debris.
14. Diving Deeper: Advanced Troubleshooting Tips
For more tech-savvy individuals, here are a couple of extra tips:
- Check for Malware: Run a full system scan with your antivirus software, as malware can sometimes interfere with keyboard functionality.
- Isolate the Problem: If you suspect a specific software conflict, try booting your laptop in Safe Mode to see if the keyboard works correctly.
15. The Final Verdict: Keeping Your HP Laptop Typing
We've covered a lot of ground, from simple cleaning to advanced troubleshooting. Now, let’s recap what we've been through and how to get your HP laptop typing like a champ again. Remember, patience is key (pun intended!).
We hope this guide has been helpful! Remember, every HP laptop is a bit
Evo p870TM-R Keyboard Nightmare: FIXED! (Easy Solution)How To Fix HP Laptop Keyboard Not Working in Windows 10 Solved

By Tricknology How To Fix HP Laptop Keyboard Not Working in Windows 10 Solved by Tricknology
Fix Some keys on Laptop Keyboard Not Working in Windows 10 Solve keyboard keys Won't typing

By Victor Explains Fix Some keys on Laptop Keyboard Not Working in Windows 10 Solve keyboard keys Won't typing by Victor Explains
How to Fix Keyboard Not Working Issue in Windows 108.1 Easy

By MJ Tube How to Fix Keyboard Not Working Issue in Windows 108.1 Easy by MJ Tube
Title: HP Laptop Brightness Keys Not Working FIX
Channel: Graphically Challenged
HP Laptop Brightness Keys Not Working FIX by Graphically Challenged
Laptop Wifi Connect
HP Laptop Keys Dying? Windows 10 Fix Inside!
Navigating the digital landscape presents a constant flow of challenges, and the unexpected failure of keyboard keys on your HP laptop can be a particularly frustrating setback. We, at [Your Company Name, if applicable, or "We"] understand the crucial role your laptop plays in your professional and personal life. Whether you're crafting emails, working on critical documents, or unwinding with entertainment, a malfunctioning keyboard instantly throws a wrench into your workflow. Fortunately, a variety of solutions exist, especially within the Windows 10 environment, to diagnose and resolve these issues, often without resorting to costly hardware replacements. This comprehensive guide provides a step-by-step approach to troubleshooting and fixing dying keys on your HP laptop. We are here to empower you to reclaim control of your device and restore seamless productivity.
Identifying the Culprit: Pinpointing the Affected Keys
Before diving into potential fixes, accurate identification of the problematic keys is paramount. Begin by meticulously testing each key on your HP laptop's keyboard. Create a simple text document using Notepad, Microsoft Word, or any word processing program. Type out the entire alphabet, all numbers, and any special characters you frequently use. Observe closely which keys fail to register, or exhibit erratic behavior like double-typing or sticking. This meticulous assessment allows us to understand the scope of the problem. Is it limited to a specific row, a cluster of keys, or is the issue widespread? This critical information is the bedrock of our troubleshooting efforts. Furthermore, note the context in which the key malfunctions occur. Are the problems consistent across all applications, or are they isolated to a particular program or set of programs? These details will help paint a clearer picture of the underlying cause. For example, if the 'Ctrl' key fails to function solely within a specific application, the issue might stem from program-specific keyboard mapping or conflict, not directly a physical keyboard issue.
Software Conflicts: Ruling Out Driver Issues and Software Interference
Often, the cause of seemingly dying keys isn't hardware at all, but the result of software conflicts or driver issues. Windows 10, being a complex operating system, can sometimes experience glitches. Let's investigate some crucial software-based remedies.
Updating or Reinstalling Your Keyboard Driver
The keyboard driver is the software facilitator, allowing your keyboard to communicate with the operating system. An outdated, corrupted, or incompatible driver can lead to a variety of keyboard issues.
- Accessing Device Manager: Right-click the Windows Start button and select "Device Manager" from the context menu. Or, type "Device Manager" in the Windows search bar and select the app.
- Locating the Keyboard: In Device Manager, expand the "Keyboards" section. You should see your HP laptop's keyboard listed there. Right-click on this entry to select "Update driver."
- Automatic Driver Search: Choose the "Search automatically for drivers" option. Windows will then search online for the latest driver for your keyboard and install it automatically.
- Manual Driver Installation (If Necessary): If the automatic search fails to find a suitable driver, you may have to manually install one. In this scenario, you might need to visit the HP support website, enter your laptop's model number, and download the appropriate keyboard driver. Alternatively, from the same keyboard device in Device Manager, right-click the device name, select "Uninstall device", unplug any external keyboards, then restart your HP laptop. Windows 10 will attempt to reinstall the driver upon restart.
- Driver Rollback: If the issue started after a recent driver update, it's possible the update is the culprit. Right-click on your keyboard within Device Manager, choose "Properties," go to the "Driver" tab, and click "Roll Back Driver" if it is available.
Troubleshooting Using the Windows Keyboard Troubleshooter
Windows 10 has built-in troubleshooting tools that can automatically detect and fix common keyboard problems.
- Accessing Troubleshoot Settings: Open the Settings app (Windows key + I). Then, navigate to "Update & Security" -> "Troubleshoot."
- Running the Keyboard Troubleshooter: In the Troubleshoot section, find the "Keyboard" troubleshooter and click "Run the troubleshooter." Windows will then scan your system for potential issues and attempt to resolve them automatically. This is a good first step.
Checking for Conflicting Software
Certain software, such as custom keyboard mapping utilities, macro programs, or even some security software, can interfere with keyboard functionality.
- Identifying Potential Conflicts: Think about any recently installed software or any programs that might be running in the background that could potentially impact your keyboard.
- Temporary Disabling: Close these programs one at a time and test your keyboard after each closure. If the keyboard starts working correctly after disabling a specific program, that program is likely the source of the problem.
- Checking Startup Programs: Sometimes, these conflicting programs load automatically at startup. To prevent this, in Task Manager (Ctrl + Shift + Esc), go to the "Startup" tab, and disable programs that might be interfering with your keyboard. Restart your HP laptop and test.
Hardware Inspection and Potential Physical Solutions
If software troubleshooting yields no results, the problem might lie within the physical components of your HP laptop. Before considering more extensive repairs, let's explore some DIY solutions and checks.
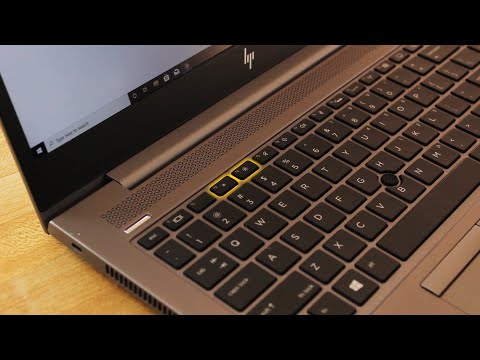
Cleaning the Keyboard: Eliminating Debris and Dust
The most common cause of sticky or unresponsive keys is the accumulation of dust, crumbs, and other debris beneath the keycaps. Regular cleaning is vital to keyboard health.
- Power Down and Disconnect: Shut down your HP laptop completely and disconnect it from the power source.
- Gentle Inversion: Carefully invert your laptop and gently tap on the bottom side of the keyboard to dislodge any loose debris.
- Compressed Air: The Primary Weapon: Use compressed air to blow out debris from between the keys. Angle the nozzle at about 45 degrees to the keys and direct short bursts of air between the keycaps. Be careful not to tilt the laptop too far or apply excessive pressure, just enough to dislodge debris.
- Surface Cleaning: Use a soft, slightly damp (with water only) microfiber cloth to wipe the surface of the keys. Avoid using excessive moisture, which could seep into the keyboard circuit.
- Advanced Cleaning (If Necessary): Carefully remove the keycaps (using a keycap puller if available or a small, flat tool) for a deeper clean. Once removed, use compressed air and the microfiber cloth to clean around the switches. Note the keycap's orientation before removal; to reinstall them correctly.
External Keyboard Test: Isolating the Internal Keyboard
To determine whether the problem is specifically with your laptop's built-in keyboard or with the operating system.
- Connect an External Keyboard: Connect a USB or Bluetooth external keyboard to your HP laptop.
- Test Functionality: Test the external keyboard to see if all keys work correctly.
- If External Keyboard Works: If the external keyboard works flawlessly, the problem is highly likely with the internal keyboard.
- If External Keyboard Fails: Assuming the failure occurs on both keyboards, the issue might be the Windows driver or settings, or even a deeper issue.
Checking for Physical Damage: Loose Connections and Water Damage
Physical damage, such as spills or impacts, can damage the internal keyboard components.
- Visual Inspection: Carefully examine your HP laptop's keyboard for any visible signs of damage, such as cracked keys, loose keys, or signs of liquid spills.
- Water Damage Indicator: If you suspect a liquid spill, inspect the edges of the keyboard and the surrounding area for signs of water damage. There may be discoloration or corrosion.
- Professional Assistance: If you find signs of physical damage, especially if water damage is present, consider seeking professional assistance from a laptop repair technician. Trying to repair water-damaged electronics yourself can be risky.
Advanced Troubleshooting and System-Level Solutions
If the above steps don't resolve the keyboard issue, more advanced troubleshooting steps might be necessary. These often involve system-level configurations or deeper software modifications.
System File Checker (SFC) Scan
Corrupted system files can sometimes cause keyboard malfunctions. The System File Checker is a Windows utility to scan and replace corrupted system files.
- Open Command Prompt as Administrator: Type "cmd" in the Windows search bar, right-click on "Command Prompt," and select "Run as administrator."
- Run the SFC Command: In the Command Prompt window, type the following command and press Enter:
sfc /scannow - Allow the Scan to Complete: The SFC scan will take some time to complete. It will scan your system files for errors and attempt to repair them.
- Restart Your Laptop: After the scan is complete, restart your laptop and test the keyboard functionality.
System Restore: Rolling Back to a Previous State
If the keyboard issue began recently, a System Restore might be able to revert your system to a point where the keyboard was functioning correctly.
- Access System Restore: Type "Create a restore point" in the Windows search bar, and click on the result. In the System Properties window, select "System Restore."
- Choose a Restore Point: Follow the prompts to choose a restore point from before the keyboard issue started. 3
