what to do if dell laptop keyboard is not working

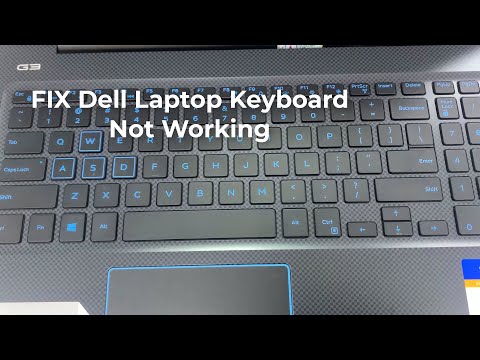
Title: FIX Dell Keyboard Not Working Windows 10 Dell Inspiron 15 3501
Channel: Cap Trong Nam - How To
FIX Dell Keyboard Not Working Windows 10 Dell Inspiron 15 3501 by Cap Trong Nam - How To
what to do if dell laptop keyboard is not working, what to do when dell laptop keyboard is not working, what to do if your dell laptop keyboard stops working, why my dell laptop keyboard is not working properly, why has my dell laptop keyboard stopped working, why is my keyboard on dell laptop not working
Dell Laptop Keyboard Dead? FIX It NOW! (Easy Steps)
Keyboard Catastrophe? Reviving Your Dell Laptop's Dead Keys!
Have you found yourself staring at a frozen cursor and a silent keyboard on your Dell laptop? It's frustrating, to say the least! That sinking feeling when your primary input method goes AWOL can be maddening. But before you resign yourself to an expensive repair or replacement, take heart. This guide will walk you through some surprisingly simple fixes. Chances are, you can bring your Dell keyboard back to life with a few strategic maneuvers.
Is It Really Dead? Troubleshooting the Obvious First
Before diving headfirst into complex solutions, let’s rule out the simplest culprits. First, perform a basic reboot. Restarting your Dell might seem too easy, however, it often resolves temporary software glitches causing keyboard issues. Try this first. Next, check your keyboard's connections. If you use an external keyboard with your laptop, ensure it's connected correctly. Similarly, verify the USB cable is firmly plugged in. Battery power is another thing to consider. If your laptop is low on power, it could be interfering with the keyboard. Ensure your laptop is charged or plugged in before anything else. Besides, check for any sticky keys. Sometimes a crumb or tiny piece of debris can block a key. Carefully examine your keyboard to see if anything is lodged.
Software Shenanigans: Diagnosing Driver Dilemmas
Often, the issue isn't hardware, but software. Keyboard drivers can become corrupted or outdated, creating havoc. Let's delve into some driver diagnostics. Navigate to your Device Manager. You can find it by searching in the Windows search bar. Look for "Keyboards" in the list. Expand this section to see your keyboard device. Right-click on your keyboard device, then select "Update driver." Choose "Search automatically for drivers." Windows will then attempt to locate the newest drivers. If that doesn't work, try uninstalling and reinstalling the driver. Right-click the keyboard device again. Select "Uninstall device." Restart your laptop after uninstalling. Windows will automatically reinstall the driver. Also, check for Windows updates. Sometimes, updates contain crucial driver fixes.
Hardware Hurdles: When the Problem Lies Within
If driver fixes don't work, we move to the hardware side. This can be trickier. Initially, inspect the keyboard cable (if accessible). Some Dell laptops have internal keyboard cables. These can become loose or disconnected. If you're comfortable, carefully open your laptop to check the cable. Although doing this can void warranties, it's worth considering. Next, consider a keyboard cleaning. Dust and debris can accumulate over time. Use compressed air to get rid of these issues. Target individual keys and tight spaces. Furthermore, water damage is another possibility. Spills, even small ones, can wreak havoc on electronics. If you suspect liquid damage, turn your laptop off immediately. Allow it to dry completely. Professional help is crucial in these cases. Consequently, physical damage is also a factor. Bumps or drops can damage internal components.
BIOS Blues and Beyond: Advanced Troubleshooting
Sometimes, the problem lies deeper within your laptop's system. Access the BIOS settings upon startup. The exact key to enter the BIOS varies by Dell model. Consult your laptop's manual. Within the BIOS, verify that your keyboard is recognized. Check if there are any keyboard-related settings. Also, consider a system restore. A recent software change might have caused the issue. If you have system restore points, use them. Roll back your system to a time before the keyboard problem began. Ultimately, don't discount the possibility of a faulty keyboard. External USB keyboards can serve as a workaround. Because of this, you can keep working while troubleshooting.
The Ultimate Fix: When to Seek Professional Help
At this point, you've exhausted the majority of DIY solutions. If your keyboard remains unresponsive, it may be time to seek professional help. Certified Dell technicians have specialized tools and expertise. They can diagnose and repair complex hardware problems. Even though you may hesitate to spend money, it might save you time and frustration. Repairing a Dell keyboard often involves replacing the keyboard. Therefore, getting expert help is often more cost-effective. Moreover, if your laptop is under warranty, contact Dell support. They can offer repair options or replacements. In addition, don't attempt advanced repairs yourself. Doing so can worsen the damage.
Prevention is Key: Protecting Your Dell Keyboard
Now that you’ve hopefully resurrected your keyboard, let's talk prevention. Use a keyboard cover. These inexpensive accessories protect against spills and dust. Clean your keyboard regularly. Use compressed air to remove debris. Treat your laptop gently. Avoid dropping it or exposing it to extreme temperatures. Finally, be proactive. Regularly back up your data. That way, you’re prepared for any other potential issues. Because of these preventative measures, you'll be prepared.
Conclusion: Typing Triumph – You've Got This!
Dealing with a dead keyboard can be stressful. Fortunately, many solutions exist. Above all, take these steps systematically. You should be up and typing again in no time. Remember to be patient. Don't give up! Henceforth, embrace the troubleshooting process. Your Dell laptop and your fingers with thank you!
Acer Laptop Mic Nightmare: FIXED! (Easy Steps Inside)Dell Laptop Keyboard Dead? FIX It NOW! (Easy Steps)
Hey everyone, let's be honest, a dead laptop keyboard is like a car without wheels – utterly useless! And if you're staring at a darkened Dell keyboard, chances are you're already experiencing a wave of frustration. Don't worry, we've all been there. I remember the first time my keyboard went kaput during a deadline. Panic set in, followed by a scramble for an external keyboard. But before you resign yourself to a life of external peripherals, let's breathe, grab a virtual cup of coffee, and tackle this annoying problem head-on. We'll go through some simple, yet effective, solutions to get you typing again in no time. Ready? Let's get started!
1. Is It Really Dead? Quick Checks Before Diving Deep
Before we launch into the tech trenches, let's do some quick checks to confirm the keyboard is actually defunct. This might seem obvious, but trust me, we've all overlooked the simplest things. Think of it as a doctor giving you a simple physical exam before ordering major tests.
- Restart Your Dell: Sounds basic, right? But a simple restart often clears up minor glitches. It's like hitting the reset button on your brain after a long day.
- Inspect the Keyboard Connections: For some Dell laptops, especially older models, the keyboard can be physically disconnected internally. (We're not going to crack open the laptop yet, but this is the next level of obviousness).
- Check External Keyboard: If you have an external keyboard, plug it in. Does it work? If so, it reinforces our belief that the problem resides within the laptop's built-in keyboard.
If these initial checks fail, buckle up; we're moving to the next level.
2. Sticky Keys and Other Culprits: Cleaning Your Keyboard
Okay, let's consider the basics. Sometimes, the issue isn't a full-blown keyboard failure but rather a sticky key or debris. Think of it like a clogged drain – the water won't flow until you clear the blockage.
- Turn Off and Flip: Shut down your laptop and carefully turn it upside down. Gently tap the back to dislodge any loose crumbs or debris.
- Compressed Air to The Rescue: Grab a can of compressed air (available at any electronics store). Direct short bursts of air between the keys to remove dust, crumbs, and anything else lurking.
- Gentle Cleaning: Dampen a microfiber cloth (not dripping wet!) with isopropyl alcohol or a specialized keyboard cleaner. Gently wipe down the keys and surrounding areas. Let it dry completely before restarting.
Remember, precision is key here. We want to avoid liquid getting inside the laptop, so be cautious!
3. Driver Drama: Updating or Reinstalling Your Keyboard Driver
Sometimes, the problem isn’t physical; it’s digital. Driver issues can cause all sorts of headaches, including a non-functional keyboard. Think of drivers as translators, making sure the hardware and the operating system, speak the same language. If the driver's language is garbled, nothing will work.
- Device Manager is Your Friend: Press the Windows key + X, and select "Device Manager."
- Look for the Keyboard: Expand the "Keyboards" section. You should see your laptop's keyboard listed.
- Update Driver: Right-click on your keyboard and choose "Update driver." Select "Search automatically for drivers." Windows will try to find and install the latest version.
- Reinstall If Necessary: If updating doesn't work, right-click and select "Uninstall device." Then, restart your laptop. Windows should automatically reinstall the driver on boot.
This process is like upgrading your software. Sometimes, the old version just doesn't play well with the new operating system.
4. Check for Windows Updates: Keep Your PC Healthy
This may seem unrelated, but outdated Windows updates can sometimes cause unexpected hardware glitches.
- Head to Settings: Click the Windows Start button and go to "Settings."
- Update & Security: Click on "Update & Security."
- Check for Updates: Click "Check for updates." Windows will download and install any pending updates. Restart your laptop if prompted.
Updating your Windows is like getting a regular checkup. Sometimes, it can fix underlying issues before you even realize you have them.
5. Diagnosing Hardware Issues: Running Dell's Built-in Diagnostics
Dell laptops often come with built-in diagnostic tools for hardware troubleshooting. Think of it as having your own on-site mechanic.
- Restart and Access: Restart your laptop. During startup, press the appropriate key (usually F12 or a key with a logo to access Dell's boot menu).
- Choose Diagnostics: Select the "Diagnostics" option from the boot menu.
- Run the Test: Follow the onscreen prompts to run the keyboard test. This will usually involve pressing keys and seeing if they register.
- Check the Results: The diagnostic tool will report any keyboard failures.
This helps pinpoint whether the issue is directly with the keyboard itself or a more general hardware problem.
6. The External Keyboard Solution (Temporary or Permanent)
While we're trying to fix the internal keyboard, an external USB keyboard can be a lifesaver!
- Plug and Play: Simply plug a USB keyboard into your Dell laptop. Most of the time, it will automatically work.
- Bluetooth Option: If you prefer a wireless setup, connect a Bluetooth keyboard.
- Workaround: This is a great temporary solution, allowing you to keep working while you troubleshoot the internal keyboard.
Picture this as having a spare tire. It gets you moving while you solve your problems, even if not perfect.
7. The Nuclear Option: Resetting Your BIOS (Use With Caution!)
This is a more advanced step, and we recommend exercising caution!. Think of the BIOS is the brain of your computer before Windows takes control. Resetting it can sometimes fix weird hardware conflicts.
- Access BIOS: Restart your laptop and repeatedly press the key to access the BIOS setup.
- Load Defaults: Look for an option like "Load Defaults" or "Reset to Defaults." Select it.
- Save and Exit: Save your changes and exit the BIOS. Your laptop will restart.
Resetting the BIOS is like a system clean-up. It can resolve configuration conflicts that might be causing issues.
8. Power Cycle Your Laptop (A Simple, But Often Effective Trick)
Sometimes, simply removing power and restoring it can fix minor glitches, like your laptop's memory getting a little confused.
- Shut Down Completely: Fully shut down your Dell laptop.
- Unplug Everything: Unplug the power adapter and remove the battery (if possible).
- Hold the Power Button: Press and hold the power button for 30 seconds.
- Reassemble and Restart: Reinsert the battery (if removed), plug in the power adapter, and restart your laptop.
This is similar to a hard reset. Removing all power can sometimes help the system "forget" any temporary issues.
9. Inspect the Keyboard Ribbon Cable (Advanced, But Sometimes the Fix)
This step requires a bit of tech confidence.
- Open the Laptop (Carefully): Research how to open your specific Dell laptop model. Watch videos if needed. Disconnect the battery before opening the laptop.
- Locate the Ribbon Cable: The keyboard ribbon cable typically connects the keyboard to the motherboard.
- Check the Connection: Make sure the cable is securely seated in its connector. Gently reseat the cable if needed. Be very gentle!
- Reassemble and Test: Carefully put everything back together and test the keyboard.
This is like checking the electrical wiring in your house. The ribbon cable is what tells the keyboard and motherboard how to communicate.
10. Check for Malware: A Digital Pest Problem
Malware can sometimes interfere with hardware functionality. A virus infection can corrupt your operating system and cause keyboard issues.
- Run a Scan: Run a full system scan using your antivirus software.
- Remove Threats: Quarantine or remove any detected threats.
- Consider Malware Removal Tools: If you suspect a deep-seated infection, consider using specialized malware removal tools.
Think of it as cleaning out an infestation. Get rid of the digital bugs!
11. Troubleshoot for Software Conflicts: Look for Problem Applications
Sometimes, a specific application can interfere with your keyboard's functionality.
- Safe Mode: Restart your laptop in Safe Mode. If the keyboard works in Safe Mode, a software conflict is likely.
- Identify the Culprit: The next thing to do is start uninstalling applications, one by one, that had issues with the keyboard.
- Reinstall Suspects: Once the keyboard is working, download the programs that may be causing the issue.
This is like removing specific ingredients that are causing a recipe to fail.
12. Consider a System Restore: Revert to a Previous State
If the keyboard problem happened recently, a system restore might be a quick fix.
- Access System Restore: Search for "Create a restore point" in the Windows search bar go to "System Protection".
- Choose a Restore Point: Select a restore point from before the keyboard issue started.
- **Follow
How to Fix Some Keys Not Working on Laptop Keyboard Keyboard Not Working on Windows 10 & 11

By Real Insight How to Fix Some Keys Not Working on Laptop Keyboard Keyboard Not Working on Windows 10 & 11 by Real Insight
FIX DELL keyboard not working in Windows 1087 3 METHODS
By Cap Trong Nam - How To FIX DELL keyboard not working in Windows 1087 3 METHODS by Cap Trong Nam - How To
Dell Laptop Keyboard Not Working - How To Fix

By Tothepoint Tutorials Dell Laptop Keyboard Not Working - How To Fix by Tothepoint Tutorials

Title: How to Fix Some Keys Not Working on Laptop Keyboard Keyboard Not Working
Channel: Tech White
How to Fix Some Keys Not Working on Laptop Keyboard Keyboard Not Working by Tech White
Change Wifi Settings
Dell Laptop Keyboard Dead? FIX It NOW! (Easy Steps)
Encountering a non-responsive Dell laptop keyboard can transform a productive day into a frustrating ordeal. Fear not! This comprehensive guide provides a structured, actionable approach to diagnosing and resolving keyboard issues on your Dell laptop. From simple software glitches to more complex hardware problems, we'll navigate the troubleshooting landscape with clear, concise instructions, aiming to restore your typing functionality swiftly and efficiently.
Step 1: Initial Diagnostics – Is It Really the Keyboard?
Before diving into complex solutions, it's crucial to definitively determine whether the keyboard is the actual culprit. External factors can often mimic keyboard malfunctions. Start by:
Connecting an External Keyboard: The quickest method to isolate the problem. Plug in a USB or Bluetooth keyboard. If the external keyboard functions flawlessly, the issue almost certainly lies with your Dell laptop's integrated keyboard. If the external keyboard also experiences issues, the problem might be more systemic (e.g., operating system corruption) or hardware-related (e.g., a faulty USB port or Bluetooth adapter).
Booting into the BIOS: Access your Dell laptop's BIOS (Basic Input/Output System) during startup. The key combination varies depending on your Dell model (often F2, F12, or Del). Refer to your Dell laptop's manual if unsure. Once in the BIOS, attempt to use the keyboard. If the keyboard works in the BIOS, it strongly suggests a software problem within the operating system or a driver-related conflict. If the keyboard fails in the BIOS, a hardware issue is highly probable.
Checking for Sticky Keys or Physical Obstructions: Sometimes, the simplest solutions are the most effective. Carefully examine each keyboard key for any physical impediments. Tiny crumbs, dust particles, or even spilled liquids can prevent proper key actuation. Use a can of compressed air (held at a slight angle to avoid damaging components) to dislodge any debris. Ensure keys aren't physically stuck, and gently tap each key to verify movement.
Step 2: Software Solutions - Addressing Operating System Glitches
Assuming the initial diagnostics pointed towards a software-related problem, the following steps will hopefully get your Dell laptop keyboard back to normal:
Restart Your Laptop: A simple yet often overlooked solution. A quick restart can resolve temporary software glitches and clear out any conflicting processes that might be interfering with keyboard functionality. After the reboot, test your keyboard immediately to see if the issue is resolved.
Update Your Keyboard Drivers: Outdated or corrupted drivers are a frequent cause of keyboard malfunctions. Here's how to update them:
- Press the Windows key + X and select "Device Manager."
- Expand the "Keyboards" section.
- Right-click on your keyboard entry (it might simply say "Standard PS/2 Keyboard" or similar) and select "Update driver."
- Choose "Search automatically for drivers."
- Windows should search online for the latest drivers and install them.
If Windows can't find updated drivers automatically, you may need to visit the Dell support website and download the drivers specific to your laptop model. Locate your Service Tag (usually found on the bottom of the laptop or under the battery) to pinpoint the correct drivers.
Run the Windows Troubleshooter: Windows includes a built-in troubleshooter designed to diagnose and automatically fix common hardware and software problems, including those related to keyboards.
- Type "troubleshoot" in the Windows search bar and select "Troubleshoot settings."
- Click on "Keyboard" and then "Run the troubleshooter."
- Follow the on-screen instructions. The troubleshooter may identify and fix driver issues or configuration errors.
Perform a System Restore (If Applicable): If the keyboard issue started recently, a system restore can revert your operating system to a previous state when the keyboard was functioning correctly. This is particularly useful if the problem coincided with a software installation or system update.
- Type "create a restore point" in the Windows search bar and open "System Properties."
- Click on the "System Restore…" button.
- Choose a restore point that predates the onset of the keyboard problem.
- Follow the on-screen prompts to complete the restore process. Important: back up all personal files before doing this process.
Step 3: Hardware Troubleshooting – Investigating Physical Damage and Internal Connections
If the software solutions prove ineffective, the problem likely stems from a hardware malfunction. This section details more advanced troubleshooting steps:
Inspect the Keyboard Cable (If Applicable): Some Dell laptop models have keyboard cables that can become dislodged or damaged. This applies to laptops with removable keyboards. However, proceed with caution, as opening your laptop could void your warranty.
- Power Down and Disconnect: Completely shut down your Dell laptop and unplug the power adapter. Remove the battery as a extra safety precaution.
- Consult Your Service Manual: Before taking anything apart, locate your Dell laptop's Service Manual (available on the dell.com support website - use your Service Tag). This manual provides detailed instructions on disassembling and reassembling your laptop, including the location of the keyboard cable.
- Locate the Keyboard Cable: Identify the keyboard cable connector. This cable is usually a flat, ribbon-like cable that connects the keyboard to the motherboard.
- Check the Connection: Carefully examine the cable for any signs of damage (e.g., tears, cuts, or burns). Gently unplug the cable and reconnect it, ensuring it's securely seated in its connector.
- Reassemble: Carefully put the laptop back together, following the steps in the Service Manual.
Check for Liquid Damage: Spilled liquids are a common cause of keyboard failure. Even a small amount of liquid can seep into the keyboard and damage the internal components. If you suspect liquid damage:
- Immediate Action: Immediately shut down the laptop and disconnect the power adapter. Remove the battery.
- Dry the Laptop: Allow the laptop to air dry completely. Avoid using a hairdryer, as the heat can warp components. Place the laptop in a well-ventilated area for several days. Consider placing the laptop in a bag of uncooked rice, which may absorb any moisture in the laptop.
- Professional Inspection: Even after drying, liquid damage can cause corrosion and short circuits. It's highly recommended to take your laptop to a qualified repair technician for a thorough inspection and cleaning. Do not attempt to plug the laptop into a power source until it has been professionally inspected.
Consider Keyboard Replacement: If all other troubleshooting steps fail, and the keyboard's cable is properly connected, the keyboard itself may be faulty. Unfortunately, replacing a laptop keyboard is often the most practical and definitive fix.
- Research Your Dell Laptop Model: Identify the specific keyboard replacement parts compatible with your Dell model. The keyboard model is usually listed in your Service Manual (available on the Dell support website). You can also search for "Dell [your laptop model] keyboard replacement."
- Purchase a Replacement Keyboard: Purchase a replacement keyboard from a reputable online retailer or a local computer repair shop. Ensure you get a genuine or high-quality replacement keyboard.
- Follow Service Manual Instructions: Carefully follow the instructions in your Dell laptop's Service Manual to remove the old keyboard and install the new one. This often involves removing screws, disconnecting cables, and carefully prying the old keyboard out. Take pictures during the process.
- Test the New Keyboard: Once the new keyboard is installed, power on your laptop and test all the keys to ensure they function correctly.
Step 4: Advanced Considerations – Beyond Basic Troubleshooting
While the preceding steps cover the most common scenarios, other factors can contribute to keyboard problems on Dell laptops:
- Malware Infections: In rare cases, malware can interfere with keyboard functionality. Run a full scan with a reputable anti-virus program to eliminate any potential threats.
- Operating System Corruption: Severe operating system corruption can cause widespread system instability, including keyboard problems. In this situation, consider reinstalling Windows, backing up all personal files before proceeding.
- Motherboard Issues: In the most extreme cases, a faulty motherboard could be the underlying cause of the keyboard malfunction. This is a complex repair that usually requires professional assistance.
Step 5: Prevention – Keeping Your Dell Laptop Keyboard Healthy
Once you've resolved the keyboard issue, take preventative measures to minimize future problems:
- Regular Cleaning: Regularly clean your keyboard with compressed air to remove dust, crumbs, and other debris.
- Liquid Spill Precautions: Keep liquids away from your laptop. Consider using a keyboard cover.
- Handle with Care: Avoid dropping your laptop or subjecting it to excessive force, which might damage the internal components.
- Software Updates: Keep your Windows operating system, drivers, and applications up-to-date to minimize software conflicts.
By methodically following these steps, you can effectively diagnose and resolve keyboard issues on your Dell laptop. Remember to back up your important data before making any major system changes. If the problem persists, don't hesitate to seek professional assistance from a qualified computer repair technician.
