sony vaio laptop camera not working

Title: Sony VAIO Computers How to troubleshoot webcam not detected on the computer
Channel: Sony Connect Sony Electronics Support US
Sony VAIO Computers How to troubleshoot webcam not detected on the computer by Sony Connect Sony Electronics Support US
sony vaio laptop camera not working windows 10, sony laptop camera not working
**Sony Vaio Webcam DEAD? FIX It NOW! (Easy Steps)**
Sony Vaio Webcam Woes? Breathe Life Back Into Your Video Calls!
Ever stared into the abyss of a black screen during a video call, only to realize your Sony Vaio webcam has decided to stage a silent protest? Frustrating, right? Don’t fret! You’re not alone, and thankfully, fixing a dead webcam is often simpler than navigating a complex tech labyrinth. We’ll get that camera back online, making you the star of your next virtual meeting.
The Sudden Silence: Diagnosing the Problem
First things first, before you start tearing apart your laptop, let’s identify the culprit. Is it a hardware issue or a software glitch? Many problems stem from software, so let's start there. Assuming the camera was working just fine yesterday, something changed. Because let’s face it, technology can be fickle.
Step 1: The Device Manager Dance
Think of the Device Manager as your laptop’s central nervous system. It oversees all connected hardware. Accessing it is easy. You can search for "Device Manager" in the Windows search bar. Alternatively, right-click the Start menu and select it from the options that appear.
Once open, meticulously scan the list. Look for “Imaging devices.” Expand this section. Does your webcam appear? If it’s listed, great! If not, it’s a red flag. It might appear with a yellow exclamation mark or a downward-pointing arrow, hinting at a problem. If present, right-click the webcam's entry. Select "Properties."
Step 2: Driver Detective Work
Inside "Properties", scrutinize the "General" tab. An error message here provides crucial clues. A driver issue might be to blame. A driver is essentially a translator, allowing your webcam to communicate with your operating system. Outdated, corrupted, or incompatible drivers are frequent issues.
Let's address this immediately. In the "Properties" window, navigate to the "Driver" tab. At first, try clicking "Update Driver". Windows will search for the latest version online. If that fails, consider uninstalling the driver. Then, restart your laptop. Windows will then attempt to reinstall the driver automatically.
Step 3: Software Shenanigans and Application Access
Double-check if the webcam is enabled within the installed software. For example, if you use Skype, Zoom, or another video conferencing app, ensure the correct camera is selected in the settings. Sometimes, software inadvertently disables the webcam. This is easily missed!
Furthermore, some applications require explicit permission to access your camera. Investigate your privacy settings. Check if the specific application has camera access granted in your operating system's privacy settings. Go to Settings > Privacy > Camera. Make sure your desired applications have the switch toggled on.
Step 4: The BIOS Blueprint (For More Seasoned Techies)
In rarer cases, problems stem from the BIOS (Basic Input/Output System). This is the firmware responsible for initializing hardware during startup. Be warned: tinkering with the BIOS is for more experienced users. Incorrect adjustments can cause serious issues.
Accessing the BIOS varies depending on your Vaio model. Often, you must press a specific key (like F2, Delete, or Esc) repeatedly during startup. Inside the BIOS, search for settings relating to “Integrated Webcam.” Ensure it's enabled. If it's disabled, enable it. But proceed with caution.
Step 5: Hardware Harmony: A Gentle Peek
Okay, let’s assume the software checks have been completed. The hardware itself might be the culprit. Is the webcam physically damaged? Inspect the camera lens. Is there any visible damage, like a cracked lens?
Also, inspect the area around the webcam. Sometimes, loose connections can interrupt the signal. But, be cautious. Don’t attempt to disassemble your laptop unless you're comfortable and knowledgeable. Consider professional repair if you suspect internal hardware damage.
Step 6: Third-Party Test Run
To isolate the problem, utilize a neutral third-party application. Download a simple webcam test program. This will help determine if the issue lies within a specific application or is a general problem affecting the webcam itself. If the third-party app works, the problem is likely with the specific software, not your webcam.
Step 7: A System Restore Rescue
If the problems started recently, consider performing a system restore. This reverts your system to a previous state. This undoes changes and potentially resolves driver conflicts or software glitches. Select a restore point from before the webcam malfunctioned.
Step 8: The Nuclear Option – Reinstalling the OS (Use as a Last Resort)
This should be the final option. If all else fails, reinstalling your operating system might be necessary. This wipes your system but can resolve deep-seated software conflicts. Remember to back up your essential files before taking this drastic step.
The Final Fix: You've Got This!
Solving a dead webcam problem might seem daunting. Consequently, by methodically working through these steps, you’ll pinpoint the source of the issue and bring your Sony Vaio webcam back to life. It may involve a little patience. Therefore, don’t give up! Soon, you'll be back to your video calls, smiling confidently. After all, you are prepared! Now go fix that webcam!
This Laptop Bag Will SHOCK You! (Best Work Bag EVER!)Sony Vaio Webcam DEAD? FIX It NOW! (Easy Steps)
Hey everyone, it's Max here, and let's be honest, we’ve all been there. You're in the middle of a crucial Zoom call, ready to wow your colleagues, or maybe you’re just about to video chat with your family, and…nothing. Your Sony Vaio webcam is stubbornly refusing to cooperate. The dreaded black screen stares back at you, mocking your attempts at connection. Frustrating, right? It's as annoying as your coffee machine deciding to quit on a Monday morning! But don't despair, because we’re going to dive headfirst into fixing that pesky problem. Think of this as your personal webcam rescue mission. Let's get started!
1. The Unresponsive Eye: Recognizing the Sony Vaio Webcam's Silent Protest
Before we jump into solutions, we need to diagnose the problem. Is your webcam truly dead, or just…playing shy? The signs can be subtle. Are the lights on? Are you getting an outright error message? Or is it just a black screen? Think of your webcam as a moody teenager – sometimes it just needs a gentle nudge, other times a full-on intervention. If the light isn't on, or you see the dreaded 'no camera detected' notification, we've got work to do.
2. Quick Checks: The Simple First Steps to Webcam Revival
Before we delve into the techy stuff, let's try a few quick and easy fixes. These are the equivalent of checking if your car has gas before assuming the engine is broken.
- Restart Your Vaio: This is the IT equivalent of "have you tried turning it off and on again?" A simple restart can often work wonders, clearing out temporary glitches.
- Ensure the Webcam is Physically Enabled: Some Vaio laptops have a physical switch, usually near the webcam lens, that disables it. Check this! It's like forgetting to unlock your front door before trying to enter your house. You'd be surprised how often this is the problem!
- Check Your Software: Make sure the application you're using (Zoom, Skype, etc.) is actually allowed to access your webcam. The settings usually allow you to grant or deny access. This can easily be overseen.
- Verify Battery Life and Connectivity: A low battery could possibly impede webcam functionality. Also make sure that your network is secure, just as your data needs to be.
3. Driver Shenanigans: The Heart of the Matter (Maybe)
Drivers are the backbone of your webcam's communication with your operating system. Think of them as interpreters translating between the human world of your laptop and the foreign language of the webcam. If the driver is outdated, corrupted, or missing, your webcam is essentially mute.
- Update Your Drivers: This is often the golden ticket. Go to Device Manager (search for it in the Windows search bar). Find ‘Imaging devices’ and look for your webcam. Right-click it and select "Update driver". Let Windows search for updates automatically.
- Roll Back Drivers: If updating didn't work (or made things worse!), you can try rolling back to a previous version. Right-click the webcam in Device Manager, select "Properties," go to the "Driver" tab, and click "Roll Back Driver."
- Reinstall Drivers: As a last resort, uninstall the driver (right-click, 'Uninstall device'), and then restart your Vaio. Windows will usually automatically reinstall the driver, hopefully fixing any corruption problems.
4. App Permissions: Are They Playing Nice?
Windows has strict permissions settings for apps using your webcam, like a bouncer at a nightclub. Sometimes, your favorite app isn't on the guest list. Checking app permissions is a crucial step.
- Check Camera Privacy Settings: Go to Settings > Privacy > Camera. Make sure the toggle switch for "Let apps access your camera" is ON. Scrolling down, ensure the specific app you're using (Zoom, Skype, etc.) is also allowed access. If it's off, flick that switch!
- Run the Troubleshooter: Windows has built-in troubleshooters. Go to Settings > Update & Security > Troubleshoot, and find the 'Hardware and Devices' troubleshooter. Run it; it might identify and fix the problem. This is akin to calling technical support; sometimes, they just know how to fix it.
5. The Virus Factor: Could a Lurking Threat Be the Culprit?
Malware can sometimes interfere with your webcam's functionality, just like a mischievous gremlin in the system. Ensure you have a reliable antivirus program installed and running regular scans. A full system scan is always a wise precaution to keep your laptop safe.
6. Camera Hardware: A Physical Inspection (Gently!)
While rare, sometimes the hardware itself can be the problem. Before you panic and rush off to buy a new webcam, there are a couple of things worth checking.
- Inspect the Camera Lens: Is the lens clean? Fingerprints, smudges, or dust can easily obstruct the view. Gently wipe it with a microfiber cloth. It's like cleaning your glasses; it can make a huge difference.
- Check for Loose Connections (If Applicable): While most Vaio webcams are built-in, on some older models, there might be a physical connection. If possible, gently inspect for any loose connections or damage.
7. Software Conflicts: Identifying the Clash of Titans
Sometimes, different software programs can conflict with your webcam, like two divas vying for the spotlight. Try closing any other apps that might be using your webcam, especially video conferencing applications. This might free up the resources and allow your webcam to function properly.
8. Check for External Webcams or Capture Cards:
Do you have an external webcam plugged in? Sometimes, your computer might be trying to default to the external webcam and not using the built-in one on your Vaio. Unplug the external webcam or capture card to address this issue.
9. The BIOS Blues: A Deep Dive (Only If Necessary)
The BIOS (Basic Input/Output System) is the underlying software that controls your computer's hardware. Occasionally, the webcam might be disabled in the BIOS settings. This is a more advanced step and should only be attempted if you're comfortable with computer settings.
- Access the BIOS: Restart your Vaio and repeatedly press the key specified by your manufacturer (usually Del, F2, or F12) during startup.
- Find the Webcam Setting: Navigate through the BIOS menus (it varies depending on the model) until you find the onboard device options. Look for a setting related to the webcam and ensure it's enabled.
10. Fresh Start: A System Restore (Last Resort)
If everything else fails, a system restore might be an option. This reverts your system to a previous state when the webcam was working. Be warned that this will undo recent changes, so back up any important data first. Go to System Restore in Windows (search for it in the search bar). Choose a restore point when your webcam was known to be functioning.
11. Hardware Check: Could It Be Terminally Ill?
If you've tried everything, there's a chance the webcam itself has failed. This is rare, but it's a possibility. At this point, it might be time to consider contacting Sony support or consulting a professional technician.
12. Sony Support: Your Lifeline (and Your Last Resort)
Sony has customer support, and while navigating support can sometimes feel like wrestling an octopus, they are there for you when things go wrong. Visit the Sony support website and search for Vaio laptop support. You might find specific troubleshooting steps, driver downloads, or contact information for technical assistance.
13. External Webcam Option: The Backup Plan
If the internal webcam is truly dead, don't despair! An external webcam is a viable and often superior alternative. It's like having a spare tire. There are plenty of excellent options available on the market.
14. Regular Maintenance: Preventing Future Problems
Once you have your webcam working again, it is time to make sure it lasts. Keep your drivers updated regularly, run antivirus scans, and avoid downloading suspicious software. The better you take care of it, the longer it'll work.
15. The Art of Patience: Don't Give Up!
Troubleshooting can be frustrating, but don't give up! Sometimes it is just a process of elimination. Take a deep breath, work through the steps methodically, and you'll eventually find the solution. Think of it as a puzzle—a frustrating one, but one worth solving.
In Closing…
Okay, we did it! We plunged into the depths of webcam woes and emerged, hopefully, victorious. We've covered everything from the simplest fixes to more complex troubleshooting steps. Remember, patience and persistence are key. Don't get discouraged if the first solution doesn't work. Keep trying, and you'll get that webcam working again. Now go forth and video chat!
Frequently Asked Questions (FAQs)
1. My webcam light turns on, but the image is still black. What's going on?
This could be a driver issue, a software conflict, or a problem with app permissions. Check the driver status in Device Manager, close any conflicting apps, and verify that the app you're using
Is Your Boss Spying? The SHOCKING Truth About Using Your Work Laptop at Home!Fix Camera Not Working Windows 10 Windows Webcam Not Working Laptop camera not working

By EasyTechGeek Fix Camera Not Working Windows 10 Windows Webcam Not Working Laptop camera not working by EasyTechGeek
How to Fix Camera and Webcam Problems in Windows 7 - Two Simple Methods

By itech tips How to Fix Camera and Webcam Problems in Windows 7 - Two Simple Methods by itech tips
Vaio E15 Laptop Camera Flickering and Camera Not Working SOLVED 2022

By Tech Point Official Vaio E15 Laptop Camera Flickering and Camera Not Working SOLVED 2022 by Tech Point Official
Title: My Sony Vaio web camera is not working - permanent solution to this problem.
Channel: 360degreehelp
My Sony Vaio web camera is not working - permanent solution to this problem. by 360degreehelp
Wifi On Laptop
Sony Vaio Webcam DEAD? FIX It NOW! (Easy Steps)
Is your Sony Vaio webcam refusing to cooperate? That frustrating black screen or error message can bring your video calls and online meetings to a screeching halt. But before you resign yourself to a webcam-less existence, know that a solution is often within reach. This comprehensive guide will walk you through a series of troubleshooting steps, designed to diagnose and resolve common Sony Vaio webcam problems, empowering you to reclaim your video functionality with ease. Get ready to bring that camera back to life!
Initial Diagnostics: Pinpointing the Problem
Before diving into fixes, it's crucial to understand where the problem lies. This initial assessment will save you valuable time and effort.
1. Hardware Check: The First Line of Defense
Begin by physically examining your Sony Vaio. Is the webcam physically present? While this sounds elementary, sometimes a loose connection or accidental disconnection can be the culprit. Gently wiggle the webcam module (if external) or examine the bezels around the screen (if internal). Look for any obvious signs of damage, like frayed wires or loose components. Also, ensure the webcam's built-in privacy shutter (if equipped) is open.
2. Software Interference: Ruling Out Conflicts
Next, consider software conflicts. Has a recent software installation or update coincided with the webcam failure? Uninstalling recently installed applications, particularly those related to video capture or image processing, can sometimes resolve conflicts. Also, temporarily disable any third-party security software, as it may be inadvertently blocking webcam access. Remember to re-enable the security software afterward and add your webcam software as an exception if necessary.
3. The Device Manager: Your Central Diagnostic Hub
The Device Manager is your primary weapon in this troubleshooting battle. Access it by right-clicking the Start button and selecting “Device Manager.” In Device Manager, expand the "Cameras" or "Imaging devices" category. Does your Sony Vaio webcam appear in the list?
- If the webcam is listed with a yellow exclamation mark or a red X: There's a problem. This indicates a driver issue or a hardware conflict. Proceed to the driver troubleshooting section immediately.
- If the webcam isn't listed at all: This suggests a more significant issue, possibly a disabled device or a physical hardware failure. Double-check your BIOS settings (see below) and then consider hardware-specific solutions.
4. BIOS Settings Check: Ensuring Webcam Enablement
Some Sony Vaio laptops offer the ability to disable the webcam in the BIOS (Basic Input/Output System). To access the BIOS, restart your laptop and repeatedly press the appropriate key during startup (usually Del, F2, F10, or Esc – consult your Vaio's manual for the exact key). Within the BIOS, look for settings related to "Integrated Peripherals," "Onboard Devices," or similar. Ensure that the webcam is enabled. Save the BIOS settings and exit.
Driver Solutions: Restoring Webcam Communication
Driver issues are a frequent cause of webcam malfunctions. Fortunately, they're usually easily fixable.
1. Driver Updates: The Refresh Button for Your Webcam
Back in Device Manager (as accessed above), right-click your Sony Vaio webcam and select “Update driver.” Choose “Search automatically for drivers.” Windows will attempt to find and install the latest drivers. If this is successful, restart your computer and test your webcam.
2. Manual Driver Search: The Targeted Approach
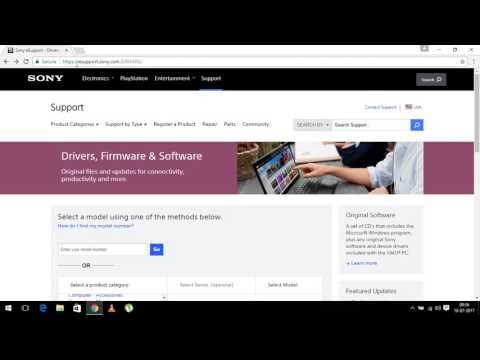
If the automatic update fails, try a manual approach. You’ll need to know your Sony Vaio model number (usually found on a sticker on the bottom of the laptop). Visit the official Sony support website and navigate to the drivers and downloads section for your specific model. Download the latest webcam driver. Once downloaded, run the installation file and follow the on-screen prompts. Restart your computer after installation.
3. Driver Rollback: Reverting to a Stable State
Sometimes, a recent driver update introduces problems. In Device Manager, right-click your webcam, select “Properties,” and go to the “Driver” tab. If the "Roll Back Driver" button is active, click it. This will revert to the previously installed driver. Restart your computer and test the webcam.
4. Driver Uninstallation and Reinstallation: A Fresh Start
If all else fails, try a clean uninstall and reinstall. In Device Manager, right-click the webcam and select “Uninstall device.” In the confirmation prompt, check "Delete the driver software for this device" if the option is available. Restart your computer. Windows should automatically try to reinstall the webcam driver on bootup. If not, manually install the driver you downloaded from the Sony support website.
Application-Specific Troubleshooting: Fine-Tuning Access
Sometimes, the issue isn’t the webcam itself, but rather how specific applications interact with it.
1. Application Permissions: Granting Access Rights
Ensure that the application you’re using (Skype, Zoom, etc.) has permission to access your webcam. Go to your Windows Privacy settings. Search for “Camera privacy settings” in the Windows search bar. In the “Allow access to the camera on this device” section, make sure camera access is turned on. Then, in the list below, ensure that the application you're using has permission to access the camera.
2. Application Settings: Configuring Webcam Selection
Within the application itself, check the settings to confirm that the Sony Vaio webcam is selected as the default camera. Some applications may offer multiple camera options (e.g., an external webcam and an integrated one). Make sure the correct one is chosen. You are looking for a Camera selection in the software's settings.
3. Application Updates: Keeping Up-to-Date
Outdated applications can sometimes cause compatibility issues. Ensure that the application you’re using is updated to the latest version. Check for updates within the application itself or via the application’s website.
Advanced Troubleshooting: Addressing Stubborn Problems
If the above steps haven't solved the problem, consider these more advanced solutions.
1. System Restore: Reverting to a Previous State
If you suspect a recent system change or update caused the problem, try a System Restore. This will revert your system to a previous point in time when the webcam was working correctly. Search for “Create a restore point” in the Windows search bar, and click “System Restore.” Follow the on-screen prompts, selecting a restore point from before the webcam issue began. Note that this can sometimes resolve software-related issues.
2. Hardware Diagnostics: Looking for Physical Issues
If all software-related solutions fail, the problem might be hardware-related. Unfortunately, diagnosing hardware failures can be trickier. Consider the following:
- External Webcams: Try connecting the external webcam to a different USB port.
- Internal Webcams: If possible, attempt to access the webcam through another operating system (e.g., by booting from a live USB drive). If the webcam fails under a different OS, the issue is likely hardware-based.
- Contact Sony Support: If your Vaio is still under warranty, contact Sony support for assistance. They may be able to provide further troubleshooting steps or arrange for a repair.
3. Factory Reset (Last Resort): A Fresh Operating System
As a final resort, consider a factory reset of your Sony Vaio. This will erase all your data and reinstall Windows. Be sure to back up all your important files before proceeding. Consult your Vaio's manual for instructions on how to perform a factory reset. While drastic, this can sometimes resolve deeply rooted software conflicts that are preventing webcam functionality.
Preventing Future Problems: Maintaining Webcam Health
Once your webcam is functioning again, take steps to prevent future issues.
1. Regular Software Updates: Keeping Your System Current
Regularly update Windows and all your drivers. These updates often include bug fixes and improved compatibility.
2. Safe Software Installation: Avoiding Conflicts
Be cautious about installing software from untrusted sources. Avoid installing programs that may interfere with your webcam.
3. Physical Care: Protecting Your Hardware
Handle your laptop with care and avoid dropping it or exposing it to extreme temperatures or humidity.
4. Virus and Malware Protection: Keeping Your System Clean
Maintain robust virus and malware protection to prevent malicious software from interfering with your webcam. Run regular scans.
By systematically working through these steps, you'll increase your chances of successfully resolving your Sony Vaio webcam issue. Remember to be patient, persistent, and methodical in your approach. With a little troubleshooting effort, you can bring your webcam back to life and enjoy seamless video communication again.
