water laptop keyboard not working

Title: How To Fix a Water Damaged Laptop
Channel: HowToBasic
How To Fix a Water Damaged Laptop by HowToBasic
water laptop keyboard not working, water damage laptop keyboard not working, water on my laptop keyboard not working, water fell on laptop keyboard not working, water on laptop keys not working, laptop keyboard not working after water damage, hp laptop keyboard not working after water spill, laptop keyboard not working due to water spill, dell laptop keyboard not working after water spill, acer laptop keyboard not working after water spill
Laptop Keyboard Died After Water Spill? 😱 FIX IT NOW!
Oh No! My Laptop Keyboard Is Waterlogged! What Now?
That sinking feeling. You know the one. Your heart leaps into your throat. Coffee, water, or maybe even a rogue spilled smoothie has decided to stage a watery coup on your precious laptop. Immediately, your trusty keyboard goes dark. This prompts a flurry of panicked thoughts. Is my laptop doomed? Can I even salvage this tech catastrophe before total loss? Take a deep breath. Don't despair just yet! There’s often a path to recovery, even after a liquid invasion.
Immediate Actions: Damage Control is Key!
First, speed is paramount. Every second counts. Quickly, unplug your laptop from any power source. Now, if possible, immediately flip your laptop upside down. Gently shake it to try to dislodge any excess liquid. Next grab a soft, absorbent cloth or paper towels. Carefully wipe away any visible liquid from the surface. Be especially gentle around the keyboard keys. Avoid pressing them aggressively, as this might spread the liquid further inside.
The Drying Process: Patience is a Virtue
Next comes the waiting game, which honestly tests your patience. Open your laptop as widely as possible. Place it in a dry, well-ventilated area. Specifically, avoid direct sunlight or using a hairdryer, as excessive heat can cause further damage. Instead, aim for a consistent, gentle airflow. You can use a fan on a low setting. This helps expedite the drying process. Depending on the amount of liquid damage, this phase could take anywhere from 24 to 72 hours. Sometimes even longer. Because drying completely is crucial.
Disassembly (If You Dare!) and Inspection: A Closer Look
If, after drying, your keyboard still refuses to cooperate, you may consider a more hands-on approach. This, of course, involves disassembling your laptop. Proceed with EXTREME caution. Only a skilled person should attempt this. Research your laptop model online. Find a detailed disassembly guide. Armed with this knowledge, you can begin.
Carefully remove the keyboard from its housing. Inspect the keyboard’s internal components. Look for any remaining liquid or signs of corrosion. You might find some sticky residue. It's likely from sugary drinks. For cleaning, use isopropyl alcohol (90% or higher). Apply it with a cotton swab. Let it dry completely. Ensure all connections are clean and dry. Then, reassemble the keyboard.
Keyboard Replacement: A Practical Solution
Perhaps, despite your best efforts, your keyboard remains unresponsive. In this situation, a keyboard replacement may be necessary. This can involve a local repair shop or ordering a replacement from online retailers. The good news, eventually, a replacement keyboard can often revive your laptop. Carefully research the correct keyboard model for your specific laptop. Consider your budget. Compare prices and reviews to find the best option. Replacing the keyboard yourself can be a cost-effective solution. However, if you aren’t comfortable, then a professional replacement is wise.
Preventative Measures: Keeping Your Keyboard Dry
Prevention is always better than cure. Take steps to prevent future spills. First, avoid placing drinks near your laptop. Consider using a spill-proof travel mug. Use a keyboard cover. They are inexpensive and provide an additional layer of protection. Be mindful of operating your laptop in environments prone to moisture or spills.
Data Backup: Protecting Your Precious Files
No matter the outcome of your keyboard recovery, you MUST back up your data regularly. Cloud storage services, external hard drives, and USB drives are all viable options. By backing up, you safeguard your invaluable files. Imagine having your keyboard fail and then losing years of work!
When to Seek Professional Help: Knowing Your Limits
Sometimes, the damage is simply too extensive. If you've tried all the above steps, and your keyboard is still dead, then it's time to seek professional help. Qualified technicians have the expertise and specialized tools. They can diagnose the problem accurately. And they can fix complex issues. Don't hesitate to consult them. They can save you time and frustration.
Final Thoughts: Resilience and Recovery
A water-damaged keyboard is a frustrating experience. But remember, you’re not alone. Many laptop owners face this dilemma. By remaining calm, acting swiftly, and employing the strategies discussed, you significantly increase your chances of recovery. So, even after a spill, your laptop's journey isn't necessarily over. It's about taking the right steps. Prepare yourself for the next adventure. Embrace the challenges. And most importantly, back up your data!
Laptop Dying? Fix Your ASUS Screen's Battery Bug NOW!Laptop Keyboard Died After Water Spill? 😱 FIX IT NOW!
Oh, the sinking feeling! You're cruising along, maybe binge-watching your favorite show or furiously typing away at that impossible deadline, and BAM! A rogue glass of water, a sneaky coffee mug, or perhaps even a clumsy child decides to stage an aquatic invasion on your precious laptop. The keyboard, your gateway to the digital world, goes dark. Panic sets in. But don’t you worry, friend! We've all been there. And guess what? It's not necessarily the end of the line for your trusty companion. We’re going to navigate this together, turning that watery mishap into a potential (and hopefully successful) rescue mission. Think of this as your survival guide, your digital emergency kit for a soggy situation.
1. Recognizing the Splash Zone Disaster!
First things first: Assess the damage. Was it just a tiny splash, or did your laptop take a full-blown bath? The severity of the spill drastically impacts your chances of recovery. A quick drizzle? Good news! A complete immersion? Okay, let's not panic yet. Observe and quickly recognize the extent of the damage. This is critical as it directs the following steps.
2. Immediate Actions: Speed is Your Friend!
Time is of the essence! The longer liquid lingers inside your laptop, the more corrosion and electrical mayhem it can create. So, here's what you need to do instantly:
- Power Down: The moment the spill happens, shut down your laptop by holding the power button. Do not try to save your work. Data can be recovered (we'll discuss that later); your laptop's hardware is the priority right now.
- Unplug: Disconnect the power adapter immediately. No electricity, less risk of short-circuit.
- Remove the Battery (If Possible): If your laptop has a removable battery, eject it. This is a crucial step to cut off all power supplies. This can prevent further damage.
Think of it like this: you're performing digital CPR on your beloved machine. Every second counts!
3. The Emergency Extraction: Drying Your Laptop
Now, the crucial drying phase. The goal is to remove as much liquid as possible, as quickly as possible.
- Inverted Position: Turn your laptop upside down, with the keyboard facing down. This allows gravity to do its work, allowing the water to drain out.
- Absorbent Assistance: Gently blot the external surfaces of the laptop with a soft, absorbent cloth or paper towels. Avoid rubbing, as this could push water further inside.
- Open Wide: If possible, open your laptop to its maximum angle to facilitate airflow and drying.
4. The Temptation of Rice (And Why It Might Not Be Enough!)
You've probably heard the rice trick. Yes, placing your laptop in a bag of uncooked rice can help absorb moisture. However, it's not a guaranteed fix and often isn't enough on its own. The rice is slow at absorbing moisture, it's better known for absorbing moisture. Deeper liquids take more time. If the spill was significant, rice by itself may not be your solution.
5. The DIY Disassembly Dilemma: Should You Take It Apart?
This is a tricky one. Disassembling your laptop can potentially accelerate the drying process and allow you to clean the internal components. However, it also carries significant risks:
- Warranty Voidance: Opening your laptop often voids the manufacturer's warranty.
- Component Damage: You could accidentally damage delicate internal components if you're inexperienced.
- Reassembly Issues: Putting everything back together can be a challenge, even for tech-savvy individuals.
Our advice: If you're comfortable with this, go for it, but proceed with caution. If not, skip to the next step.
6. The Patience Game: The Waiting Period
The drying process takes time. Even if your laptop seems dry, there could still be moisture lingering deep inside. You need to be patient, like waiting for toast to pop. Ideally, give your laptop at least 24 to 72 hours (longer is better). If you took the device apart, put it back together after drying, and if you did not, then just wait for a couple of days. This patience is crucial.
7. The Moment of Truth: Testing the Keyboard
After waiting and waiting (and waiting…), it’s time to test. Slowly power on your laptop. If it boots up, fantastic! Now, carefully test the keyboard. Type some characters. Check the function keys. Make sure everything works. If some keys don't work, or they are sticky, don't despair just yet.
8. Deep Cleaning: Addressing Sticky Keys and Residue
If some keys are still not working or are sticky, there's likely some residue from the spilled liquid causing the problem. Here’s how to address this:
- Isopropyl Alcohol (IPA): This is your friend! IPA evaporates quickly and is safe for electronics.
- Cotton Swabs or Soft Brush: Dip a cotton swab or a soft brush in IPA and gently clean around and under the affected keys.
- Patience (Again!): Allow the IPA to evaporate completely before retesting.
Think of alcohol as a digital degreaser.
9. The Software Side: Potential Issues
Sometimes, a water spill can corrupt software or cause the operating system to malfunction.
- Backup Your Data: Before attempting any major troubleshooting steps, back up all your important data.
- System Restore or Reinstallation: If your laptop is still unstable or glitchy, consider using the system restore feature or reinstalling your operating system. This is a last resort, but it might be necessary.
10. The Hardware Repair: When to Seek Professional Help
If all else fails – the keyboard still doesn't function, or the spill caused other hardware issues – it's time to consult a professional.
- Laptop Repair Shops: Look for reputable laptop repair shops in your area.
- Data Recovery Services: If your data is paramount, explore data recovery services. They can often salvage your files even if the laptop is badly damaged.
11. Prevention is Key: Future-Proofing Your Laptop
Let's face it, accidents happen. But you can take steps to minimize the risk of future spills.
- Keep Liquids Away: Avoid placing drinks near your laptop.
- Protective Covers: Consider a keyboard cover to prevent spills from reaching the keys.
- Laptop Placement: Be mindful of your laptop's environment, especially near children or pets.
12. Data Retrieval: If the Worst Happens
Even if your laptop is a goner, all hope is not lost. If critical data is the priority, try to remove the hard drive or SSD and take it to a data recovery service. They have advanced tools to extract your pictures, documents, and other precious data.
13. The Cost Factor: Repair vs. Replacement
Assess the repair costs. Depending on the damage, it might be more economical to replace your laptop rather than repair it. The cost depends on the severity of the spill. Compare repair quotes and factor in the age and value of your laptop.
14. Insurance and Warranty: Knowing Your Coverage
Check your laptop's warranty and any insurance policies you may have. They might cover water damage, at least partially.
15. The Aftermath: Learning From Your Mistakes
This water spill is a stressful situation. Use it as a learning lesson and an opportunity to reinforce your digital safety practices.
Closing Thoughts
So, there you have it! Your guide to surviving the laptop keyboard water spill apocalypse. Remember, stay calm, act fast, and follow these steps. Even if the damage seems irreparable, there’s a good chance you can save your laptop or, at the very least, recover your precious data. And hey, even if you end up needing a new laptop, at least you'll be armed with the knowledge to handle the next digital emergency. Now, go rescue your keyboard!
FAQs
1. What liquid does the most damage?
Any sugary or sticky liquids, like soda or juice, will cause the most damage! As the sugary liquids dry up, they create a sticky residue.
2. How long should I let my laptop dry?
It depends on the severity of the spill. Aim for at least 24-72 hours. If the spill was significant, or you're doing a disassembly, let it dry as long as possible (several days).
3. Can I use a hair dryer to dry my laptop?
No! The heat from a hairdryer can damage the internal components of your laptop.
4. What if some keys still don't work after cleaning?
If cleaning with IPA doesn't resolve the issue, there might be permanent damage to the keyboard circuitry. Consider taking your laptop to a professional repair shop.
5. Is it safe to plug in my laptop if I suspect water damage?
No. Plugging in your laptop before it's thoroughly dry can cause a short circuit, leading to further damage.
- Principal Keywords: Laptop Water Damage Keyboard Fix.
- SEO Headline: Laptop Keyboard Died After Water? 😱 FIX IT! (NOW)
Water Spilled on Laptop - What To Do

By A-Plus IT Group, Inc. Water Spilled on Laptop - What To Do by A-Plus IT Group, Inc.
Repair Laptop Keyboard Water damaged Wasserschaden Part 1 Disassembly
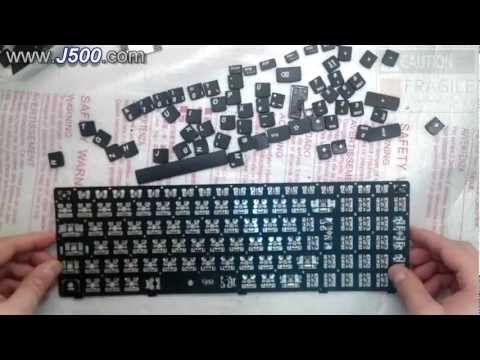
By Laptop Repair j500j500 Repair Laptop Keyboard Water damaged Wasserschaden Part 1 Disassembly by Laptop Repair j500j500
How to Remove Laptop Key to Repair Lenovo Laptop Keyboard Cleaning and Repairing Keyboard Fix

By News N View How to Remove Laptop Key to Repair Lenovo Laptop Keyboard Cleaning and Repairing Keyboard Fix by News N View

Title: How To Repair Computer Keyboard With Some Keys Not Working
Channel: RJ The Bike Guy
How To Repair Computer Keyboard With Some Keys Not Working by RJ The Bike Guy
Working With Laptop
Laptop Keyboard Died After Water Spill? 😱 FIX IT NOW!
We've all been there. That heart-stopping moment when a rogue glass of water, a clumsy coffee mug, or an overflowing water bottle meets your laptop keyboard. The immediate dread is palpable: a sudden and irreversible end to productivity, communication, or perhaps worse, the loss of precious data. But before you resign yourself to defeat or start picturing a hefty repair bill, take a deep breath. The situation might not be as dire as it seems. In most cases, prompt and decisive action can make the difference between a fully functional keyboard and a complete laptop catastrophe. We will guide you through a comprehensive, step-by-step recovery process designed to maximize your chances of a successful keyboard resuscitation.
Immediate Actions: The Golden Hour of Laptop Rescue
Time is of the essence. The longer liquid remains inside your laptop, the greater the chance of corrosion and short circuits. Your first instinct should be to react with speed and precision.
Disconnect Power Immediately: Unplug the power adapter from both the laptop and the wall outlet. This is the single most crucial step. Preventing further electrical current flow is paramount to minimizing damage.
Shut Down the Laptop: If the laptop is miraculously still on, force a shutdown. Press and hold the power button for several seconds until the screen goes black. Do not attempt to save any open files. The priority is to prevent further damage.
Invert and Drain: Immediately turn the laptop upside down, with the keyboard facing the floor. Gently shake the laptop to dislodge any excess liquid. This gravitational intervention is vital for helping liquid to escape the delicate internal circuitry. Position the laptop at a slight angle, ideally propped up on a towel.
Remove the Battery (If Possible): If your laptop's battery is easily removable, do so. This further isolates electrical components and reduces the risk of short circuits. Store the battery separately in a cool, dry place. Removing the battery will eliminate a source of power.
Disassembly and Inspection: A Deep Dive into Keyboard Recovery
Now that you've taken immediate action, it's time for a more detailed assessment. The level of disassembly required depends on your laptop model and your comfort level with technical tasks. However, a thorough investigation is key to a successful repair.
Gather Your Tools: You'll need a small Phillips head screwdriver (a magnetic one is incredibly helpful), possibly a spudger or plastic opening tools, and ideally, an antistatic wrist strap to prevent damage to sensitive electronic components. A magnifying glass can also be very helpful.
Consult Your Laptop's Manual: Before disassembling anything, consult your laptop's manual. Look for information on keyboard removal. Many manufacturers have online support pages that provide detailed disassembly instructions specific to your model.
Power Off and Unplug Again: Double-check that the power is off, and unplugged. It is best to be extra careful at this stage.
Remove the Keyboard: The keyboard is usually held in place by screws, clips, or a combination of both. Carefully remove the screws (often located on the bottom of the laptop) and any clips. Be gentle and avoid forcing anything.
Disconnect the Keyboard Cable: Locate the keyboard's ribbon cable, which connects the keyboard to the motherboard. This cable is often secured by a small latch. Carefully lift the latch (or gently slide the cable out, depending on the design) to disconnect the keyboard.
Inspect the Keyboard and Components: Once the keyboard is detached, carefully inspect it for any visible signs of damage: corrosion, liquid residue, or debris. Pay attention to where the liquid appears to have entered.
Assess the Motherboard (If Accessible): If you can access the motherboard, examine it for liquid residue. This is a crucial step, as liquid can seep beneath the keyboard and cause damage to other components.
Cleaning and Drying: The Meticulous Restoration Process
Cleaning and drying are the cornerstones of successful keyboard recovery. Patience and thoroughness are essential.
Use Distilled Water and Isopropyl Alcohol: Avoid using tap water, which contains minerals that can cause corrosion.
Rinse the Keyboard (If Necessary): If the keyboard has significant liquid contamination, gently rinse it with distilled water. Avoid using excessive force.
Clean with Isopropyl Alcohol (90% or Higher Concentration): Isopropyl alcohol (IPA) evaporates quickly and is a great solvent for removing residue. Use a Q-tip, soft brush, or lint-free cloth dipped in IPA to carefully clean the keyboard keys, the key switches, and any affected areas of the motherboard.
Thorough Drying: This is the most critical step. The goal is to remove all traces of moisture. Allow the keyboard to dry completely. Place the keyboard in a well-ventilated area out of direct sunlight. Some people recommend placing the keyboard near a fan.
Consider Rice (With Caution): While the rice trick is a popular remedy, use it with caution. Rice can absorb moisture, but it can also trap moisture inside the keyboard. If you choose to use rice, place the keyboard in a sealed bag or container filled with uncooked rice for at least 48-72 hours.
The Oven Method (Advanced and Risky): Some technicians use a specialized oven for electronics. However, the risks are that you may damage the keyboard. Ensure that oven is at 100 degrees Fahrenheit. The oven can dry out the keyboard and remove some of the water and moisture.
Reassembly and Testing: Bringing Your Keyboard Back to Life
Once you are certain that the keyboard and its components are completely dry, it's time to put everything back together.
Reassemble the Keyboard: Carefully reinstall the keyboard, reconnecting the ribbon cable and securing it with the latch.
Replace the Keyboard: Carefully align the keyboard with the laptop's chassis and secure it with the screws and clips.
Reinstall the Battery (If Removed): Reinstall the battery.
Power Up and Test: Connect the power adapter and turn on the laptop. Once the operating system loads, test all keys to confirm their functionality. If some keys still don't work, there might be a deeper issue requiring professional repair or keyboard replacement.
Software and Drivers: If the keyboard functions, but some keys behave erratically, consider reinstalling the keyboard drivers. You can usually find the latest drivers on the manufacturer's website.
When to Seek Professional Help: Knowing Your Limits
While we have walked through a fairly thorough guide, some situations warrant professional intervention.
Extensive Corrosion: If you see widespread corrosion on the keyboard or motherboard, the damage might exceed your repair capabilities.
Serious Electrical Damage: Any observed sparks, smoke, or unusual smells during the spill indicate significant electrical damage.
Complex Keyboard Designs: Some laptops have very complex keyboard designs that are difficult to disassemble and reassemble.
Component-Level Repair: If you are not comfortable with soldering or replacing individual components, professional repair is necessary.
Data Preservation: If your primary concern is to save data, seek professional help.
Preventative Measures: Shielding Your Laptop from Liquid Disasters
The best defense is a good offense. These prevention tips can help protect your laptop from future liquid spills.
Keep Liquids Away: The most obvious, but often neglected, is to keep liquids away from your laptop. Place drinks and water bottles far from the keyboard.
Use a Laptop Sleeve or Case: This provides an extra layer of protection against accidental spills or splashes.
Employ a Keyboard Cover: Keyboard covers are inexpensive and create a barrier against liquid, dust, and debris.
Be Mindful of the Environment: Pay attention to your surroundings. Avoid using your laptop near water sources or in areas where spills are common.
Consider a Waterproof Laptop: If spills are a recurring concern, consider investing in a rugged or waterproof laptop designed to withstand such events.
By following these detailed steps, you significantly increase your chances of saving your water-damaged laptop keyboard. Remember, swift action, careful cleaning, and thorough drying are your allies in this battle against liquid damage. While there is no guarantee of success, with diligence and precision, you can often resurrect your keyboard and keep your productivity flowing.
