why is my microphone not working on hp laptop

Title: How To Fix HP Microphone Not Working
Channel: lapfix
How To Fix HP Microphone Not Working by lapfix
why is my microphone not working on hp laptop, why is my microphone not working on my hp laptop windows 11, why is my microphone not working on zoom hp laptop, why is my microphone not showing up on my hp laptop, why isn't my mic working on my hp laptop, why is my mic not working on my hp laptop
HP Laptop Mic Dead? 😱 FIX IT NOW!
HP Laptop Mic Dead? Silence No More!
Have you been wrestling with a silent HP laptop microphone? 😩 It's frustrating, right? You are not alone. Many users face this audio predicament. The good news? Several solutions exist to revive your microphone. Let's troubleshoot and get you back to crystal-clear audio.
Is Your Microphone Actually Dead? Initial Checks
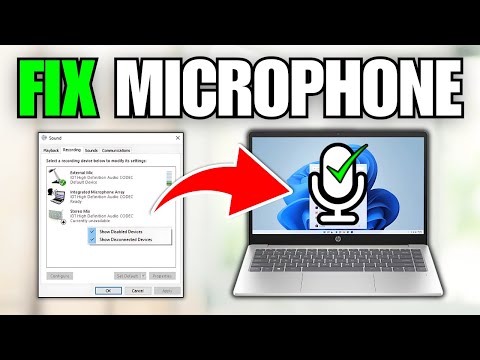
Before panicking, let's perform some basic checks. First, ensure your microphone isn't muted. There's often a physical mute button on laptops. Otherwise, it can be a software setting within the operating system. Inspect the system tray for a speaker icon. Clicking it reveals volume controls and mute options. Furthermore, make sure the mic isn't disabled in your audio settings. Right-click the speaker icon. Select "Open Sound settings." Then, choose "Sound Control Panel." Verify your microphone is enabled. Look for a green checkmark. This indicates the system recognizes your microphone. If not present, right-click your microphone and select "Enable".
Software Solutions: Diving Into the Audio Maze
Now, let's delve into software fixes. This is where things get a bit more technical. However, remain calm; we’ll break it down. First, check your default recording device. Again, navigate to the Sound Control Panel (as described above). Go to the "Recording" tab. Make sure your preferred microphone is set as the default. Right-click the microphone and choose "Set as Default Device." Also, ensure your microphone isn’t accidentally connected as a "communications device."
- Driver Dilemmas: Outdated or corrupted drivers can be the culprit. Driver issues can lead to several problems. Update your audio drivers. Search for "Device Manager" in the Windows search bar. Expand "Sound, video and game controllers." Right-click your audio device. Select "Update driver." Choose "Search automatically for drivers." Windows will find and install any available updates. It might also be helpful to visit the HP support website. Download the latest audio drivers specifically for your laptop model.
Troubleshooting Specific Apps: The App-Specific Glitch
Sometimes, the problem lies within specific applications. Test your microphone in different apps. Try recording audio using the built-in Voice Recorder app. If the microphone works there, the issue is likely app-specific.
App Permissions: Check app permissions. Many apps require microphone access. In Windows settings, search for "Privacy settings" or "Microphone privacy settings." Ensure the problematic app has permission to access your microphone.
App Sound Settings: Different apps have their own internal sound settings. Review the app's audio configuration. Look for options related to microphone input. Make sure the app is using the correct microphone device. Adjust the input volume within the app.
Hardware Hurdles: When the Problem Hits Home
Software fixes not working? Time to consider hardware issues. Hardware is typically the most complicated scenario.
Physical Connections: If you use an external microphone, ensure the connection is secure. Check the microphone jack. Make sure it is fully inserted into the correct port. Also, examine the microphone cable for any damage.
Testing External Microphones: Try a different external microphone. This helps determine if the problem lies with your existing microphone. Similarly, you can test the external microphone on another device. This verifies if the microphone itself is faulty.
Internal Microphone Issues: Internal laptop microphones are trickier. They are less accessible. They are integrated within the laptop's design. If no external microphones function, this could indicate a hardware failure.
Advanced Troubleshooting: Diving Deeper into the Abyss
If you've gone through all the steps, and still no luck, let's get more advanced. Back up your data first. Then try these methods.
System Restore: System Restore can revert your computer to a previous state. This is before the microphone issue began. Search for "Create a restore point" in the Windows search bar. Select "System Restore." Choose a restore point from before the problem started. Carefully follow the on-screen instructions. This can solve software conflicts and revert corrupted settings.
Check for Hardware Conflicts: Device Manager can reveal hardware conflicts. Conflicts can prevent your microphone from functioning correctly. Look for any devices with yellow exclamation points or red crosses. Resolve these conflicts by updating drivers or disabling conflicting devices.
Clean Boot: A clean boot starts Windows with a minimal set of drivers. This can help isolate the source of the problem. Search for "msconfig" in the Windows search bar. Go to the "Services" tab. Check "Hide all Microsoft services." Click "Disable all." Go to the “Startup” tab. Click "Open Task Manager." Disable all startup items. Restart your computer. Test your microphone. If it functions, the problem lies with a startup program. Re-enable startup items one by one. Identify the offender.
When To Seek Professional Help
Sometimes, the problem is beyond your capabilities. Don't hesitate to seek professional help. Here's when you should do so:
Hardware Damage: If you suspect hardware damage, consult a technician. Don't try to disassemble your laptop unless you are experienced. Opening your laptop could void the warranty.
Persistent Issues: If you've tried all the steps, and your mic remains dead. It's time to see a professional. A repair shop can diagnose and fix the issue.
Warranty Considerations: If your laptop is still under warranty, contact HP support. They can provide assistance or arrange for a repair.
Conclusion: Triumph Over Silence!
Hopefully, these steps help you bring your HP laptop microphone back to life. Remember to systematically troubleshoot. Be patient, as the solution can be a bit elusive. You can solve most microphone problems. By working through these steps, you can communicate clearly again. You will conquer this audio challenge. Enjoy your newfound audio freedom!
Laptop Charger OVERHEATING? This FIX Will SHOCK You!HP Laptop Mic Dead? 😱 FIX IT NOW!
Hey everyone, are you pulling your hair out because your HP laptop’s microphone decided to take a permanent vacation? We've all been there. You're ready to jump into that Zoom call, record that killer podcast, or sweetly serenade your significant other, and… crickets. Silence. Nada. It's the digital equivalent of a dropped mic, and trust me, I understand the frustration. Don't worry, though! We're going to dive deep and get that mic singing again. Think of this as your "Fix It Now" survival guide to silencing the silence.
1. The Sound of Silence: Recognizing the Problem
First things first: let's make sure it is the microphone, and not something else. It's like diagnosing a car problem – you don't just assume it's the engine. Is the volume turned down everywhere? Have you checked the mute button on your headset, if you’re using one? The issue might be as simple as that, and we don't want to spin our wheels doing unnecessary troubleshooting.
2. The Obvious Suspects: Basic Checks to Get You Started
Let's start with the low-hanging fruit. The most common culprits are surprisingly simple.
- Volume Levels: Seriously, double-check them! Right-click the speaker icon in the bottom-right corner of your screen and select "Open Volume Mixer". Ensure your laptop’s mic isn’t muted or turned down to zero. This is the classic mistake, akin to forgetting you've unplugged your phone. Don't laugh, it's happened to the best of us!
- Physical Connections: Are you using an external microphone? Make sure it's securely plugged into the correct port (mic input, not the headphone out!). Ensure the cables aren't bent or damaged. It’s like ensuring the power cord is securely plugged in before panicking that your laptop won't start.
- Hardware Troubleshooter: Windows has a built-in hardware troubleshooter. Right-click the Start button, select "Settings," then go to "System" and click on "Troubleshoot". Run the "Recording Audio" troubleshooter. It's like having a digital mechanic look under the hood.
3. Diving into Device Manager: Unmasking Driver Demons
If the basic checks didn’t do the trick, it’s time to dig a little deeper, into the heart of your computer. The Device Manager is your detective tool.
- Accessing Device Manager: Type "Device Manager" into the Windows search bar and open it.
- Locating Your Microphone: Expand the "Sound, video and game controllers" section. Look for your microphone. It might be listed by its brand or simply as "Microphone Array" or something similar.
- Driver Blues: If there's a yellow exclamation mark next to it, that spells trouble – usually a driver issue. Right-click on the microphone and select "Update driver." Choose "Search automatically for drivers." This is like giving your computer a shot of adrenaline, hoping it fixes the problem.
- Rollback: If the driver update doesn't work and the issue started recently, try rolling back the driver. Right-click on the microphone, select "Properties," go to the "Driver" tab, and click "Roll Back Driver." This is like hitting the reset button on an old, glitchy video game.
4. Privacy Settings: The Silent Gatekeeper
Sometimes, the mic’s not dead, it's just… restricted. Windows' privacy settings can be surprisingly strict.
- Microphone Access: Go to "Settings" (Windows Key + I), then "Privacy," and then "Microphone." Make sure "Microphone access for this device is on." Also, review the apps that have permission to use your microphone. Is your Zoom app or recording software listed? If not, enable access for those apps. It's like checking the guest list before a party – you've got to let them in!
5. Application Specific Problems: The App's Fault?
Sometimes, the issue isn't a system-wide problem, but with a specific application.
- App Settings: Check the audio settings within the application you're using (Zoom, Skype, etc.). Make sure the correct microphone is selected as the input device.
- Troubleshooting Within the App: Many apps have their own troubleshooting steps. Check the app’s help section or search the internet for "[App Name] microphone not working."
6. BIOS: The Deep Dive
This is one for the more advanced users but it could be the way to fix it. Accessing your BIOS (Basic Input/Output System) can sometimes reveal hidden settings related to your audio. Remember, this is the computer's "brain," so be careful!
- Restart and Access BIOS: Restart your computer. As it restarts, look for a prompt that tells you which key to press to open the BIOS setup (often Del, F2, or F12).
- Audio Settings: Navigate BIOS settings. Look for settings related to audio or integrated peripherals. Ensure the microphone is not disabled.
7. Test, Test, and Test Again: The Proof is in the Pudding
After each troubleshooting step, test your microphone! Use the Windows "Voice Recorder" app or another testing program to see if it is working. It's like testing the brakes after fixing a car.
8. The Headset Factor: Pinpointing Where the Audio Lies
Are you using a headset? It's a common scenario that’s easy to overlook.
- Different Headset, Different Result? If your headset mic isn't working, try a different headset. If the new headset works, you've pinpointed the problem.
- Headset Jack: Double-check the jack is fully inserted.
9. Hardware Malfunction: When Things Get Serious
Sometimes, the problem is hardware related. And sometimes, we end up in a fix-it-yourself situation.
- Physical Inspection: Look for any physical damage to your laptop, particularly around the microphone area.
- Professional Help: If all else fails, it might be time to call in the professionals – a computer repair shop. They have the tools and expertise to diagnose and fix hardware problems.
10. Cleaning Your Hardware: Keeping It Fresh
Dust and debris can negatively impact the performance of your microphone. Even subtle obstructions have a negative effect.
- Gentle Cleaning: Use compressed air to gently blow out any dust or debris around the microphone.
- Soft Brush: A soft-bristled brush to carefully remove any potential obstructions.
11. Audio Enhancement Settings: Hidden Gems
Sometimes, Windows has sound enhancements that are enabled by default. These could be causing problems.
- Disabling Enhancements: Right-click the speaker icon, select "Sounds," go to "Playback," select your audio device and click "Properties." Under the "Enhancements" tab, experiment with disabling audio enhancements to check whether it has a positive effect.
12. Windows Updates: The Fixes You Probably Need
Keeping Windows updated is an essential step. Updates often include driver updates and security patches that can resolve audio issues.
- Check for Updates: Head to "Settings" > "Update & Security" > "Windows Update". Click "Check for updates" and install any available updates.
13. Malware and Antivirus: Sometimes, a Subtle Culprit
Malware or a overly-aggressive antivirus program can sometimes mess with audio settings.
- Scan Your System: Perform a full scan with your antivirus software.
- Temporary Disable: As a test, temporarily disable your antivirus software (be very cautious about websites visited whilst it’s disabled).
14. Factory Reset: The Nuclear Option
As a last resort, a factory reset can resolve deep software-related issues but will wipe your data.
- Backup Your Data: Make certain your crucial files and documents are backed up.
- Resetting Windows: Go to "Settings" > "Update & Security" > "Recovery." Click "Get started" under "Reset this PC." Choose whether to keep your files or start fresh.
15. Preventive Measures: Maintaining Your Microphone's Health
- Avoid Harsh Environments: Try not to expose your laptop to extreme temperatures or humidity.
- Regular Cleaning: Regularly clean your devices.
- Update Drivers: Make sure you maintain the newest drivers.
Alright, soldier, that’s the game plan!
Closing Thoughts
Hopefully, one of these methods has helped you resurrect your HP laptop’s dead microphone. If you’ve followed these steps, you've hopefully managed to avoid the dreaded silence and are now back in the audio game. Remember, troubleshooting is a process of elimination. Be patient, methodical, and you will find the solution. And hey, if you’re still struggling, don’t hesitate to ask for help. The internet is full of helpful people and online communities ready to lend a hand. Now go forth and make some noise!
FAQs
1. My microphone worked perfectly yesterday; what could have changed overnight?
The most likely culprits are a Windows update that installed overnight (check your update history) or a driver update. Less likely but possible is a program that was installed, changed your settings, or a change in
HP Laptop Keyboard Glitch? FIX THIS NOW!How To Fix HP Laptop Microphone Not Working In Windows 10 and Windows 11
By TechFixIT How To Fix HP Laptop Microphone Not Working In Windows 10 and Windows 11 by TechFixIT
Fix Microphone Not Working on Windows 10

By The Geek Page Fix Microphone Not Working on Windows 10 by The Geek Page
How To Fix Microphone Not Working on HP Laptop
By Your Fix Guide How To Fix Microphone Not Working on HP Laptop by Your Fix Guide

Title: How to resolveMUTE LED light issue in HP laptops Mute Key light not working
Channel: Its Lucky Blogger
How to resolveMUTE LED light issue in HP laptops Mute Key light not working by Its Lucky Blogger
Laptop Wifi Connect
HP Laptop Mic Dead? 😱 FIX IT NOW!
Having your microphone fail on your HP laptop can be incredibly frustrating. Whether it's for a crucial video call, recording audio, or simply using voice commands, a non-functional microphone drastically limits your laptop's capabilities. Fortunately, in most cases, a "dead" HP laptop mic isn't a sign of permanent hardware failure. Often, the issue is a software glitch, incorrect settings, or a loose connection that you can easily troubleshoot and resolve. This comprehensive guide will walk you through a series of effective solutions to revive your HP laptop's microphone and get you back to communicating clearly.
1. Immediate Preliminary Checks: Ruling Out the Obvious
Before diving into advanced troubleshooting, let's establish a baseline. There are a few fundamental checks we need to perform to eliminate the most common culprits:
- Physical Inspection: Carefully examine your HP laptop's microphone. Many laptops have a dedicated microphone port, often a 3.5mm jack, alongside the headphone jack. Ensure that nothing is physically obstructing the port or plugged in. Also, check the built-in microphone, which is usually located near the webcam. Look for any obvious signs of damage, such as debris, dust, or physical obstructions. If you have an external microphone, ensure it is correctly plugged in and that the cable isn't frayed or damaged.
- Volume Levels: Check the volume settings on both your HP laptop and the application you are using. The microphone might be muted or have its volume set to zero. Click the speaker icon in your system tray (usually at the bottom right of the screen) and ensure the microphone isn't muted and the volume slider is appropriately positioned. Within the application you're using (Skype, Zoom, etc.), double-check its specific audio settings to ensure that the microphone is selected as the input device and that its volume is turned up.
- Power Cycle: A simple restart can often resolve temporary software glitches. Restart your HP laptop. This clears the system's memory and can resolve minor issues that might be affecting the microphone's functionality.
2. Unveiling the Sound Settings: Configuring Your Microphone
Windows' sound settings are the central hub for managing your audio devices. Incorrect configurations here are a frequent cause of microphone problems. Let's navigate these settings to ensure your microphone is properly set up:
- Accessing Sound Settings: Right-click the speaker icon in your system tray and select "Open Sound settings." Alternatively, you can search for "Sound settings" in the Windows search bar.
- Input Device Selection: In the "Input" section, you'll see a dropdown menu labeled "Choose your input device." This is where you select the microphone you want to use. Ensure that your desired microphone (the built-in one, an external microphone, or a headset mic) is selected. If you have multiple microphones connected, make sure you've selected the correct one.
- Testing Your Microphone: Beneath the input device selection, you'll see a section labeled "Test your microphone." Speak into your microphone, and observe the "Input volume" bar. If the bar doesn't react to your voice, the microphone isn't receiving any input. If the bar moves, it indicates that the microphone is picking up sound, and the problem might lie elsewhere, like the application settings.
- Device Properties: Click on "Device properties" under the input device selection. This opens another window with further settings. Here, you can adjust the microphone's volume, enable or disable microphone enhancements (like noise cancellation; more on this later), and check the device's status. Ensure that the microphone is enabled.
3. Application-Specific Settings: Ensuring Compatibility
Many applications (Skype, Zoom, Microsoft Teams, etc.) have their own audio settings that can override your global system settings. It's critical to check these settings to ensure they're configured correctly.
- Application Audio Settings: Open the application you're using and navigate to its audio or sound settings. The location of these settings varies depending on the application, but they're usually found in the "Settings," "Preferences," or "Options" menu.
- Microphone Selection within the Application: Within the application's audio settings, look for a section that allows you to select your microphone input device. Ensure that the correct microphone is selected from the dropdown menu. This setting often overrides your Windows settings, so selecting the right microphone here is critical.
- Volume and Gain: Check the microphone's volume and gain settings within the application. Adjust the volume to a suitable level. Some applications also allow you to adjust the microphone gain, which determines how sensitive the microphone is. Experiment with these settings to find the optimal level for your voice and environment.
- Troubleshooting Application Issues: Sometimes, an application might have its own internal issues affecting microphone input. Try updating the application to its latest version or, if the problem persists, uninstalling and reinstalling the application.
4. Driver Diagnostics: Updating and Reinstalling Microphone Drivers
Outdated or corrupted drivers are a common cause of hardware malfunctions, including microphone problems. Updating or reinstalling your microphone drivers can often resolve the issue.
- Accessing Device Manager: Right-click the Windows Start button and select "Device Manager." Alternatively, search for "Device Manager" in the Windows search bar.
- Finding Your Microphone: In the Device Manager, expand the "Audio inputs and outputs" section. You should see your microphone listed here, typically as "Microphone (Realtek High Definition Audio)," or similar, depending on your audio hardware.
- Updating Drivers: Right-click your microphone and select "Update driver." Choose "Search automatically for drivers." Windows will search for and install the latest drivers for your microphone.
- Reinstalling Drivers: If updating doesn't help, right-click your microphone again and select "Uninstall device." In the confirmation prompt, check the box to "Delete the driver software for this device." (if available) Then, restart your HP laptop. Windows will automatically reinstall the default drivers when the system restarts.
- Manual Driver Downloads: If Windows can't find updated drivers, you can manually download them from the HP support website. Visit the HP support website, enter your laptop model number, and search for the latest audio drivers compatible with your operating system. After downloading, install the drivers.
5. Advanced Troubleshooting: Addressing Specific Audio Issues
If the above steps haven't resolved the issue, we can explore some more advanced solutions:
- Troubleshooting Audio: Windows has a built-in troubleshooter that can automatically diagnose and attempt to fix common audio problems. In Sound settings, click on “Troubleshoot.” Follow the on-screen instructions.
- Microphone Enhancements: In Device Manager, right-click your microphone, select "Properties," and go to the "Enhancements" tab. Here, you can enable or disable various audio enhancements, such as noise cancellation, echo cancellation, and bass boost. Experimenting with these settings can sometimes improve microphone performance, although too much enhancement can sometimes negatively influence the sound.
- Check for External Interference: Electronic devices, such as other computers, Wi-Fi routers, and mobile phones, can sometimes interfere with the microphone's signal. Try moving your HP laptop away from these devices to see if it improves the situation.
- BIOS Updates: Outdated BIOS versions can occasionally cause compatibility issues with external devices. Check the HP support website for BIOS updates for your specific laptop model. Install the BIOS as directed in the HP support documents. Note that a BIOS update is a powerful change and must always be performed with due care.
- Operating System Updates: Ensure that your operating system is up to date. Windows updates often include driver updates and bug fixes that can resolve audio-related problems. Go to Settings > Update & Security > Windows Update and check for updates.
6. Hardware Considerations: When Repair is Necessary
While software and settings are often the culprits, it's crucial to address the possibility of hardware failures.
- External Microphone Testing: If you have an external microphone, test it on your HP laptop. If the external microphone functions correctly, the issue is likely with the built-in microphone. This will help narrow down where the failure is located.
- Microphone Hardware Checks: If the built-in microphone is the problem, and software troubleshooting has failed, it may be an issue with the microphone itself. Contact HP support regarding repair prospects.
- Professional Repair: If your laptop is still under warranty, contacting HP support or taking it to a certified repair center is the best course of action. If the laptop is out of warranty, you can explore independent repair shops, but ensure they have experience repairing HP laptops.
7. Maintaining Your Microphone: Preventative Measures
To avoid future microphone problems, you can take the following preventative steps:
- Keep your Laptop Clean: Regularly clean your laptop, particularly around the microphone area. Use a soft, dry cloth to remove dust and debris. Avoid using liquids or harsh chemicals.
- Protect Your Laptop from Extreme Temperatures: Extreme temperatures can damage internal components, including the microphone. Avoid exposing your laptop to direct sunlight or extreme cold.
- Install Security Software: Malware can sometimes interfere with hardware functionality. Install reputable antivirus software and keep it updated.
- Regularly Update Drivers: Keep your drivers updated by frequently checking Windows Update or visiting the HP support website.
- Handle your Laptop with Care: Avoid dropping your laptop or subjecting it to physical shocks.
By systematically working
