dvd player not working on lenovo laptop

Title: Lenovo Think pad CD DVD drive removal and refitting replacement
Channel: cagmito76
Lenovo Think pad CD DVD drive removal and refitting replacement by cagmito76
dvd drive not working in lenovo laptop, lenovo dvd player not working, why is my dvd player not working on my laptop
Lenovo Laptop DVD Player Refusal: The SHOCKING Fix You NEED!
Lenovo Laptop DVD Player Drama: Unveiling the Unexpected Solution!
Have you ever stared, bewildered, at your Lenovo laptop, the DVD player stubbornly refusing to cooperate? It's a frustrating situation. The spinning disc, the blinking light – yet, nothing. Let’s face it; it’s a digital head-scratcher. That’s where this article comes in handy. We’re navigating the choppy waters of Lenovo DVD player woes. We'll uncover a solution that might just surprise you.
The Silent Treatment: Why Your Lenovo is Ignoring Your Discs
So, your Lenovo laptop suddenly develops an aversion to your movie collection. What gives? Well, several culprits exist. They range from the mundane to the technically complex. One common issue is a simple driver problem. Drivers are the software’s gatekeepers. They translate your commands into actions your hardware understands. Sometimes, these drivers can become outdated.
Other times, they suffer from corruption. The resulting system instability can wreak havoc on the DVD functionality. Also, consider the physical disc itself. Scratches, smudges, or dust can render a DVD unreadable. The drive might be fine, however. The disc is the problem.
Troubleshooting: The First Steps to DVD Redemption
Before diving into advanced fixes, let’s troubleshoot. Start with the simplest things first. First, restart your laptop. It’s a classic tech solution for a reason. A simple reboot can resolve minor software glitches. Next, check the disc. Clean it carefully with a soft, lint-free cloth. Inspect it for any obvious damage.
Then, test different DVDs. If only one disc isn’t working, the disc itself is likely the issue. Try inserting the disc gently. Make sure it’s seated correctly. Is the drive even showing up in File Explorer? The drive might not be recognized by the system.
The Driver Dilemma: Updating or Reinstalling Your Drive
Now, let's delve into the drivers. They are vital for operation. Outdated or corrupted drivers can be fatal. Start by updating your DVD drive driver. Search your device manager (Windows). Locate the DVD/CD-ROM drives entry. Right-click your drive and select "Update driver." Windows will then search for a new one.
If the update process fails, consider a manual approach. Go to Lenovo’s support website. Enter your laptop’s model number. Search for the latest drivers for your DVD drive. Download and install them. Still having problems? Try uninstalling the driver entirely. Then, restart your laptop. Windows will automatically attempt to reinstall the correct driver.
Beyond the Basics: Delving into Advanced Fixes
Sometimes, the problem runs deeper. Sometimes, the hardware itself might be at fault. If you’ve tried the basic troubleshooting steps, it might be time for the next level. Check for any obvious physical issues in the drive. Is it loose? Does it make any unusual noises?
Also, it’s worth investigating your system's power settings. Low power settings can also impact your drive. These settings can sometimes prevent optimal operation. Another option involves examining your system’s registry (use caution). Incorrect registry modifications can break your system.
The Unexpected Revelation: The Software You Might Be Missing
Here's the critical twist. The most common solution is often overlooked. Surprisingly, it's a software issue. Many Lenovo laptops don’t come pre-installed with DVD playback software. Think about it. You might be missing the codec. The codec enables your system to play the DVD.
Consequently, even if the drive functions, you won’t see anything. So, consider this: download a reputable media player like VLC. It is open-source and handles various codecs. After that, install the media player. After you install, try playing your DVDs again, and presto! It works!
Preventative Measures: Keeping Your Drive Happy
Preventative care goes a long way. You want to avoid future problems. First, keep your drivers updated. They are important for smooth operation. Regularly clean your drive. Use a cleaning disc specifically designed for DVD drives.
Additionally, handle your DVDs with care. Avoid scratches. Store them in a protective case. Finally, avoid extreme temperatures and humidity. They can damage both the drive and the discs.
The Final Word: Your Lenovo DVD Player is Ready!
In conclusion, the issue of a non-functioning Lenovo DVD player can be frustrating. It does not have to remain that way. Start with the basics. Then systematically troubleshoot. Remember the software angle. Install a media player. You'll be able to bring your movie collection back to life. So, don't despair. Because with a little investigation, you can conquer the DVD player drama and get back to enjoying your movies. Now go forth and conquer!
Acer Laptop Keyboard Nightmare: FIXED! (Easy Guide)Lenovo Laptop DVD Player Refusal: The SHOCKING Fix You NEED!
Hey there, fellow tech travelers! Ever felt like your Lenovo laptop's DVD player is playing a silent, frustrating game of hide-and-seek? You pop in your favorite movie, ready for a night in, and…nothing. The drive whirs, the screen stays black, and your mood plummets faster than a lead balloon. Well, buckle up, because we've all been there, and we're about to unravel the mystery of the Lenovo laptop DVD player that stubbornly refuses to cooperate. We're going to delve into the heart of the problem and, most importantly, provide you with solutions that actually work. Consider this your survival guide to DVD despair!
1. The Unseen Enemy: Unveiling the Mystery of the Silent Drive
Let's face it, the modern world revolves around streaming and cloud storage. But sometimes, you just crave the nostalgia, the familiarity, and the sheer tangibility of a physical disc. Your DVD collection is gathering dust, patiently awaiting its moment under the digital sun. So, why the cold shoulder from your Lenovo? The reasons are numerous, like tiny gremlins wreaking havoc inside your laptop. It could be anything from a simple software glitch to a more complex hardware issue. We'll walk through it all, step-by-step, so you don’t have to feel like you’re navigating a tech labyrinth on your own.
2. First Things First: The Obvious Checks (Don't Skip This!)
Before we get into the nitty-gritty, let's address the basics. It’s like checking the gas before a road trip – often, the simplest solutions are the ones we overlook.
- Is the disc clean? Seriously, fingerprints and dust are DVD players' kryptonite. Give it a gentle wipe with a soft cloth. I’ve been guilty of this myself countless times, only to realize a smudged disc was the culprit.
- Is the disc compatible? Check that your player supports the disc type (DVD, DVD-RW, etc.).
- Is the drive properly inserted? Make sure the disc is seated correctly and pushed in firmly (if applicable, some Lenovo models have tray-loading drives).
- Is the volume turned up? Embarrassingly simple, but hey, it happens!
3. Software Shenanigans: Troubleshooting the Digital Demons
Assuming the physical elements are in order, let's dive into the digital domain. This is where things get more interesting, and, frankly, more common.
- Driver Dilemma: Outdated, corrupted, or missing drivers are often the root of the problem. Think of drivers as tiny translators; they tell your laptop's system how to "speak" to the DVD drive.
- How to fix it: Go to your Device Manager (search for it in the Windows search bar). Look for "DVD/CD-ROM drives." Right-click your drive and select "Update driver." Choose "Search automatically for drivers." If that doesn't work, try uninstalling the drive and restarting your laptop. Windows should automatically reinstall the driver.
- Regional Restrictions: Is the DVD region-locked? Your drive might be set to a different region than the disc.
- How to fix it: You can try changing the region settings in your DVD player software (usually Windows Media Player or a third-party player). However, there's a limited number of changes allowed.
4. The Power of the Player: Software Solutions to the Rescue!
Sometimes, the issue isn't with the drive itself, but with the software your laptop is using to play the DVD.
- Windows Media Player Woes: This built-in player can be temperamental. Is it working, or not?
- Try this: Update Windows Media Player through Windows Updates. If that doesn't help, consider a different DVD player.
- Third-Party Power: Consider installing a reliable third-party DVD player like VLC Media Player (it's free!). VLC is like the Swiss Army knife of media players; it handles almost anything.
- Why it works: Third-party players often have their own codecs and are less reliant on the system's built-in components, bypassing potential conflicts.
5. Hardware Hurdles: When the Problem Runs Deeper
Okay, so the software is fine, the drivers are up-to-date, and the disc is pristine. Now, we're venturing into potentially trickier territory.
- Drive's Demise (The Sad Reality): Sometimes, the DVD drive itself has simply given up the ghost. It happens. Age, wear, and tear can take their toll.
- What to do: If you suspect a hardware issue, try an external DVD drive (they're relatively inexpensive). If that works, the problem is definitely with your internal drive.
- Loose Connections: Internally, the drive connects to your motherboard. A loose connection can cause problems.
- Caution: Unless you're comfortable opening up your laptop (and you know what you're doing!), do not attempt this. This can void your warranty. If you are comfortable, seek a guide or a professional.
6. The Bios Blues: Sneaking a Peek Under the Hood
Less common, but possible. Sometimes, settings within your BIOS (Basic Input/Output System) can affect how devices are recognized.
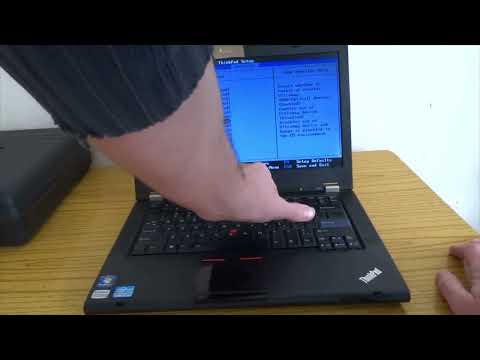
- Checking the BIOS: Restart your laptop and enter the BIOS setup (usually by pressing Del, F2, F12, or Esc during startup – the key varies by model; consult your manual). Look for a setting related to "Boot Order" or "Device Configuration." Ensure the DVD drive is enabled and in the boot order.
- Resetting the BIOS: If you're feeling adventurous (and after backing up your settings), you can try resetting the BIOS to its default values.
7. The Silent Treatment: When the Drive Doesn't Appear
This is a particularly frustrating scenario. The drive isn't even showing up in File Explorer or Device Manager.
- What to do:
- Re-check the Device Manager. Are there any unknown devices with exclamation points? Try updating their drivers.
- Run the Windows Troubleshooter. It often surprises you.
- If the drive still refuses to appear, a hardware issue is increasingly likely.
8. Dust and Debris: Cleaning the Drive (If You Dare!)
This is another one where caution is advised! But, if you're feeling brave, and your drive is a tray-loading model, you might be able to use a compressed air can (holding the can upright) to gently blow out any dust or debris that might be obstructing the lens.
9. The Warranty Whisper: When It’s Time to Call the Experts
If you've tried everything, and your Lenovo laptop is still giving you the silent treatment when it comes to DVDs, it's time to consider your warranty.
- Check your warranty: See if your laptop is still covered. Lenovo's customer support is generally pretty good.
- Contact Lenovo Support: Explain the problem and follow their troubleshooting steps. They might be able to diagnose the problem (and potentially fix it!) remotely.
10. External Drives: A Convenient Escape Route.
Sometimes the simplest solution is the best. Embracing a USB-connected external DVD drive can be a lifesaver.
- The Benefits: Portable, easy to use, and bypasses any issues with your internal drive.
- The Downside: It's an extra gadget to carry around.
11. Beyond the Disc: Exploring Digital Alternatives
Let's be honest, DVDs are becoming a bit…retro.
- Streaming Services: Netflix, Hulu, Amazon Prime Video – the world of streaming offers boundless entertainment at your fingertips.
- Digital Downloads: Purchase or rent movies and TV shows in digital format.
12. Prevention is Key: Protecting Your Drive for the Future
It's not just about fixing the problem; it's about preventing it from happening again.
- Keep your software updated: Regularly update Windows and your drivers.
- Avoid extreme temperatures: Excessive heat or cold can damage electronic components.
- Handle discs with care: Avoid scratches and smudges.
13. Lenovo Specifics: Model-Dependent Tweaks
Every Lenovo laptop is a unique snowflake, and sometimes, specific models have specific quirks.
- Research your model: Look up your specific Lenovo model online for any known issues related to DVD players.
- Consult Lenovo's website: They often have specific troubleshooting guides for different models.
14. The "Factory Reset" Gambit (Last Resort)
Think of this as a digital exorcism. It wipes everything and reinstalls Windows, potentially fixing lingering software issues.
- Backup your data first! This will erase everything on your hard drive.
- Consult your Lenovo manual: It will explain how to perform a factory reset.
15. The Final Word: You've Got This!
Don't let a stubborn DVD drive ruin your movie night! Armed with these troubleshooting steps, you're well-equipped to tackle the problem head-on. Remember to stay
Laptop Screen Dead? FIX IT NOW! (Easy Steps)How to eject a stuck CD drive from laptopshorts cdplayer
By Learn Basics How to eject a stuck CD drive from laptopshorts cdplayer by Learn Basics
DVD player nodisc problem shorts youtubeshorts viral

By RK Techsol DVD player nodisc problem shorts youtubeshorts viral by RK Techsol
CDDVD Drive Is Not Detected in Windows 10

By TechFixIT CDDVD Drive Is Not Detected in Windows 10 by TechFixIT
Title: Opening Eject DVD CD tray draw on Lenovo T420 laptop 3 ways Windows 10 11
Channel: cagmito76
Opening Eject DVD CD tray draw on Lenovo T420 laptop 3 ways Windows 10 11 by cagmito76
Working With Laptop
Lenovo Laptop DVD Player Refusal: The SHOCKING Fix You NEED!
It's a scene we've all encountered, and the frustration is palpable; you insert a DVD into your sleek Lenovo laptop, anticipation building for a film night, a presentation, or a nostalgic trip down memory lane, only to be met with… nothing. The disc spins, the drive whirs, and then, silence. Your Lenovo, typically a paragon of technological prowess, stubbornly refuses to play. This silence, this refusal, is the opening act of a drama we understand intimately. We're here to navigate the labyrinth of potential causes and, more importantly, to arm you with solutions, the precise, actionable steps to banish the black screen blues and revive your Lenovo's DVD-playing capabilities.
Troubleshooting the Initial Obstacles: A Diagnostic Deep Dive
Before we delve into the more complex fixes, let's systematically rule out the obvious culprits. This is your digital detective work, and we'll guide you through it meticulously.
The Disc Dilemma: Is the DVD itself the problem? Don't immediately blame your Lenovo. Try a different DVD. Borrow a friend's, or grab a previously successful disc. If a different DVD plays, the initial disc is likely damaged or incompatible. Scratches, fingerprints, or manufacturing defects can all render a DVD unreadable. Clean the disc gently with a soft, lint-free cloth, wiping from the center outwards. If even that doesn't work, test that disc on another device. A malfunctioning disc is a common culprit, so check it first.
Hardware Headaches: Is the DVD drive itself the problem? This may sound simplistic, but physical imperfections often play a vital role. Are you sure you are inserting the DVD correctly? Make sure the disc is properly seated. Some laptops have a manual eject button that might be sticking. Check your device to ensure the button is moving freely. Furthermore, dust can accumulate inside the drive and hamper performance. Examine the drive's slot for dust or debris. If you observe build-up, cautiously use compressed air to clear it.
Software Sabotage: Drivers and Playback Programs: Lenovo laptops, like all modern computers, rely on software to bridge the DVD and your viewing experience. The operating system, Windows, requires dedicated drivers to manage the DVD drive. Outdated or corrupted drivers are a common cause of playback failure. Similarly, your chosen playback software (like Windows Media Player or VLC) might be the issue. The software might not be correctly configured or might be missing essential codecs – the tiny software components that enable the laptop to decode and play certain formats like those encoded on DVDs.
Driver Diagnostics: The Key to Compatibility
Drivers are the unsung heroes of your computer's functionality. When your Lenovo refuses to recognize the DVD, the drivers often become the focus of our attention, and they are a key area to audit.
Locating and Updating Drivers: To verify the status of your DVD drive drivers, follow these steps. First, access the "Device Manager." You can usually find this by typing "Device Manager" into the Windows search bar. Within Device Manager, expand the "DVD/CD-ROM drives" section. You should see your DVD drive listed here. If there's a yellow exclamation mark next to the drive, it signals a problem. Right-click on the drive and select "Update driver". Windows will then search for updated drivers online. Allow the process to complete. If that doesn't resolve the issue, try uninstalling the drive by right-clicking and selecting "Uninstall device." Then, restart your laptop. Windows will typically reinstall the drivers automatically. If this fails, manually download drivers from the Lenovo support website, using your laptop's specific model number.
Rollback for Resolving Conflicts: Sometimes, a recent driver update can cause issues. Microsoft frequently releases driver updates. You can revert to the previous driver in such cases. In Device Manager, right-click on the DVD drive, select "Properties," then navigate to the "Driver" tab. If the "Roll Back Driver" option is available, click it. This will revert your drivers to a previous version, potentially solving compatibility issues.
Playback Program Problems: Decoding the Drama
Your chosen software is the stage on which the DVD unfolds, so it must be operating in sync with the rest of the system. It's important to take a second look inside the media player itself.
The Codec Conundrum: Codecs are like secret agents. They are necessary for decoding DVD video and audio streams. If your player is missing the appropriate codecs, it won't be able to translate the data on the DVD into viewable content. Many free media players, like VLC Media Player, come bundled with the necessary codecs. But Windows Media Player might require additional codec packs. Search the web for "K-Lite Codec Pack" to download a comprehensive package.
Playback Settings Shenanigans: Within your playback software, explore the settings. Make sure the drive is selected as the default playback device. Check settings for video and audio output. Sometimes, incorrect settings (like an incorrect aspect ratio or a muted audio channel) can lead to a perceived failure. Reset your software to its default configuration for a fresh start.
Alternative Software Solutions: If one playback program fails, try another. Install or launch alternatives like VLC Media Player, PotPlayer, or KMPlayer. These players are often more robust in handling various media formats and may bypass issues stemming from operating system limitations.
Hardware Hurdles: A Deeper Dive
Sometimes, the issue transcends the software level and stems from a physical or electrical problem. It's critical to recognize the symptoms beyond the software realm.
DVD Drive Malfunctions: Over time, DVD drives can wear out. If the drive is old, heavily used, or has been exposed to harsh conditions, it could simply be failing mechanically. A failing drive might make unusual noises, like clicking or grinding sounds, or it might struggle to read any discs. If you suspect a hardware failure, consider replacing the drive. Before investing in a replacement, consult your laptop's manual or the Lenovo support site to confirm the type of drive and the process for replacement.
USB Drive Challenges: Some Lenovo laptops have external DVD drives that connect via USB. If you're using an external drive, check the USB connection. Try a different USB port. Ensure the drive has sufficient power. Sometimes, a USB hub might not provide enough power. Plug the drive directly into the laptop.
BIOS Blunders: Rarely, BIOS (Basic Input/Output System) settings can interfere with DVD drive operation. Accessing the BIOS is usually done by pressing a specific key (like F2, F12, or Delete) during startup. Consult your laptop's manual to confirm the correct key. Within the BIOS, check the boot order to ensure your DVD drive is recognized. There is rarely a necessity to adjust BIOS settings, so proceed with caution here, and do not make alterations without fully understanding their implications. If uncertain, consult the Lenovo support documentation.
Beyond the Basics: Advanced Troubleshooting Techniques
If the typical methods fail, consider a more thorough approach.
Operating System Integrity: A corrupted operating system can contribute to a wide array of problems, including DVD playback issues. Run the System File Checker (SFC) tool. Open the Command Prompt as an administrator and type
sfc /scannow. This tool will scan for and attempt to repair corrupted system files. After the scan, restart your computer to examine the effects.Malware Mayhem: Malware infections, though uncommon, can sometimes interfere with hardware functionality. Run a thorough scan with your antivirus software. Make sure your antivirus is up-to-date, and consider a second opinion from a reputable malware removal tool.
Data Recovery and Drive Issues: If you've tried all of the above and still face issues, and you're really technically adept, you can try to ensure that data integrity is not the problem. Use the chkdsk command to repair logical errors on your hard drive. Open Command Prompt as an administrator, type
chkdsk /f /r C:(replaceC:with the drive letter of your system drive), and press Enter. Reboot your system to allow the check disk process to finish.
The Final, Unveiling Truth
Ultimately, resolving a Lenovo laptop's DVD player refusal is a process of methodical elimination. Start with the simplest solutions and gradually work your way through the more complex ones. By following these steps, you'll isolate the problem, address it directly, and reclaim the effortless enjoyment of your favorite DVDs. And if, after all, the problem persists, consulting Lenovo Support should be your ultimate final resort. With a clear understanding of the steps at hand, you can navigate the troubleshooting process and resolve this frustrating issue.
