dell laptop factory reset not working

Title: Fix There was a problem resetting your pc no changes were made in Windows 11 10 Solve CANT RESET
Channel: Victor Explains
Fix There was a problem resetting your pc no changes were made in Windows 11 10 Solve CANT RESET by Victor Explains
dell laptop factory reset not working, dell laptop hard reset not working, dell factory reset not working, dell laptop won't factory reset, i reset my dell laptop and now it won't work
Dell Laptop Factory Reset FAIL? This SHOCKING Fix WORKS!
Dell Laptop Factory Reset Failure? A Surprisingly Effective Solution!
Ever stared at a frozen Dell laptop screen, heart sinking as the factory reset crawls to a halt? It’s a frustrating experience, to say the least. Many users find themselves stuck, staring down the barrel of potential data loss and a non-functional machine. This article unveils a solution, hopefully turning that tech frustration into a sigh of relief.
The Dreaded Dell Factory Reset: A Common Tech Headache
Let's be honest. Technology, for all its advantages, can be a fickle beast. Dell laptops, in particular, have their share of factory reset hiccups. The intention is simple: Wipe the slate clean. Restore the laptop to its original, out-of-the-box state. Unfortunately, the execution doesn't always go according to plan. Maybe a corrupted system file lurks in the shadows? Perhaps a partition error throws a wrench into the works? Whatever the cause, a failed factory reset often leaves you in a technological limbo. Therefore, it’s crucial to know what to do.
Decoding the Failure: What Might Be Going Wrong
Before we get to the fix, let's briefly touch on the why. Understanding potential culprits helps you approach the solution with a better grasp. One common issue involves corrupted boot sectors. These crucial areas tell your computer how to start. If damaged, the reset process can stumble immediately. Another frequent problem centers around hard drive or SSD errors. These physical components store all your data. Damage here can render a reset impossible. Then, there are software conflicts. Some programs might interfere with the reset operation, causing it to stall. In addition, consider power interruptions. A sudden loss of power during the reset is a recipe for disaster.
The SHOCKING Fix: A Step-by-Step Guide
So, what’s the solution when your Dell laptop refuses to cooperate? Here is a method that has helped countless users. Ultimately, it might just save your digital day.
- The Preparation Phase: First, disconnect all non-essential peripherals. Remove USB drives, external hard drives, and anything else connected to your laptop. This minimizes potential conflicts. Next, make sure your laptop is plugged directly into a power outlet. Also, a stable power source is crucial.
- Accessing the Recovery Environment: You'll likely need to access the Dell recovery environment. Usually, this entails pressing a specific key during startup. Typically, this key is F12 or F11 repeatedly as the Dell logo appears. This action should bring up the boot menu.
- Booting from the Recovery Partition: Using the arrow keys, navigate to the "Recovery" or "Dell Recovery" option in the boot menu. Select it and press Enter. This tells the laptop to begin the reset process using Dell's built-in recovery tools.
- Initiating the Reset: At this stage, carefully follow the on-screen prompts. You’ll likely see options for restoring to factory settings. Select this option and confirm your choice. Be aware that this will erase all data from your hard drive. So, ensure your backups are current.
- The Waiting Game (and What to Do If It Fails Again): The reset process can take some time. It’s crucial to be patient. However, if the reset fails again, you might have a more serious issue.
Beyond the Basics: Advanced Troubleshooting
Even with those steps, you may encounter issues. Thus, further investigation helps.
- Bootable Media: You can create a bootable USB drive with a Windows installation image. Then, with the USB drive connected, boot from it. This may allow you to perform a clean operating system installation, bypassing some of the issues.
- Checking the Hard Drive (or SSD): If you suspect a hard drive problem, use diagnostic tools. Dell has built-in diagnostic tools you can access during startup. You can also use third-party tools. These may help identify any damage.
- Contacting Dell Support: Don't hesitate to contact Dell support. Their technicians can provide specialized guidance. They might assist you with specific issues. They may offer remote troubleshooting assistance. It's always wise to use their expertise.
Preventive Measures: Keeping Your Dell Running Smoothly
Although dealing with reset failures can be stressful, preventative measures minimize the chances of future problems.
- Maintain Regular Backups: Regularly back up your important files. Backups protect your data in case of any issue. Use both local and cloud-based backup solutions.
- Keep Your Software Updated: Regularly update your operating system and drivers. They often include important bug fixes. These fixes help prevent problems during resets.
- Install a Reliable Antivirus: A strong antivirus program safeguards your system from malware. Malware can cause system instability. It can also interfere with the reset process.
- Practice Safe Browsing Habits: Steer clear of suspicious websites. Avoid clicking on unknown links or downloading files from untrusted sources.
Conclusion: Reclaiming Your Laptop's Sanity
A failed Dell laptop factory reset feels defeating. It represents a roadblock on your journey to a clean, functional device. However, as we’ve explored, these failures aren't always insurmountable. By employing the methods discussed and understanding the underlying causes, you can increase your chances of successfully restoring your Dell laptop. Remember to remain calm. There's usually a solution. Don't give up hope. That frozen screen can go away. You can again have your laptop running smoothly. Good luck, and happy computing!
Laptop Pens: The SHOCKING Truth You NEED To Know!Dell Laptop Factory Reset FAIL? This SHOCKING Fix WORKS!
Hey there, fellow tech travelers! Ever felt that sinking feeling in your stomach when a factory reset goes… well, spectacularly wrong? You’re staring at your Dell laptop, maybe it’s a shiny new XPS or a trusty old Inspiron, and instead of a clean slate, you’re getting a cryptic error message, a frozen screen, or worse – a boot loop of doom! We've all been there, haven't we? It's the digital equivalent of your car breaking down just as you're about to leave for a road trip. Frustrating, to say the least! But don’t you worry, because we're here to dive headfirst into this frustrating scenario, and I'm going to show you a fix that actually works– and I’m not talking about the generic, cookie-cutter solutions you find plastered all over the internet.
1. The Factory Reset Fiasco: Your Dell's Unexpected Drama
Let's be honest, a factory reset should be straightforward. It's the digital equivalent of hitting a big, shiny reset button – a clean slate for your operating system. You want to sell your Dell, give it to a relative, or just want to start fresh. You follow the steps, cross your fingers, and prepare for a smoother, faster experience. Instead, you get… crickets. Or, even worse, a spinning wheel of death that mocks your hopes and dreams. What gives?
2. Why Does This Happen? Unraveling the Reset Mystery
The reasons for a failed Dell factory reset are as varied as the operating systems themselves. Think of your laptop's BIOS as the brain of your machine. Things can go haywire, like a short-circuit. We're talking corrupted system files, a wonky Windows installation, hard drive errors, or even a stubborn piece of malware clinging on for dear life. It’s like trying to clean a house that's infested with a particularly nasty type of dust bunny.
3. Before You Panic: Preliminary Checks and Sanity Saves
Before you start tearing your hair out (or smashing your laptop into a million pieces – we’ve all thought about it, right?), take a deep breath. Here’s a quick checklist:
- Plug In: Make sure your Dell is plugged into a power outlet. Don't try this with a dying battery!
- Back Up (If Possible): If you can access the system somewhat, back up any crucial data. Consider your photos, documents, and other files. Losing data on a failure is like forgetting to pack your swimsuit just before a beach vacation; it stinks.
- The Right Recovery Partition: Ensure you are using the correct methods to access the recovery partition.
- Boot Device Priority: Double-check that your boot order is set correctly in the BIOS if you're trying to boot from a USB or DVD.
4. Diving Deep: The Shocking Fix - A Game Changer
Now for the good stuff. Forget the generic advice. Here's the fix that really works. It might seem a little involved, but trust us, it's worth it when you're staring down the barrel of a broken computer. We're going to use a tool called a Windows Recovery Drive/USB.
5. What You'll Need: Your Tech Arsenal
This process requires a few things:
- Another Working Computer: You'll need a second machine to create your recovery media (another laptop, a desktop, anything that runs Windows).
- A USB Drive: A USB flash drive with at least 8GB of free space. Make sure you don't mind wiping it, because we will.
- Patience: This isn't a race. Take your time and follow the steps carefully.
6. Creating Your Windows Recovery Drive (The First Step To Salvation)
On your working computer:
- Search for "Recovery Drive" in the Windows search bar. Select "Create a recovery drive."
- Follow the on-screen prompts. This will guide you through the process, which includes selecting your USB drive and creating the recovery media.
- Let it finish. This step can take a while, depending on your internet speed and the speed of your USB drive. Go grab a coffee, binge-watch an episode of your favorite show – be patient.
7. Booting From the Recovery Drive: Entering Restore Mode
Now, the moment of truth.
- Insert the USB drive into your problematic Dell laptop.
- Power on your Dell and repeatedly tap the boot menu key. This key varies depending on your Dell model, but it's usually F12, Esc, or Del. Consult your Dell's manual or do a quick Google search "Dell [your model] boot menu key."
- Select the USB drive from the boot menu. This will boot your laptop from the recovery media.
8. Navigating the Recovery Environment: Your Digital Lifeline
Once your laptop boots from the USB, you'll find yourself in the Windows Recovery Environment (WinRE). This is our safe haven.
- Choose your language and keyboard layout.
- Select "Troubleshoot."
- Choose "Reset this PC."
9. The Real Magic: Advanced Recovery Options
Now comes where the magic happens. You have two options related to the reset – "Keep My Files", or "Remove Everything" (recommended). Your data is your choice.
10. Addressing HDD/SSD Issues: The Hard Drive's Last Stand
If the reset still fails, there could be a problem with your hard drive or SSD.
- While in WinRE, go to "Troubleshoot," then "Advanced Options," and then "Command Prompt."
- Type
diskpartand press Enter. This opens the disk partitioning utility. - Type
list diskand press Enter. You'll see a list of your hard drives/SSDs. - Type
select disk [number]where[number]is the number of your hard drive/SSD (usually Disk 0). Press Enter. - Type
cleanand press Enter. WARNING: this erases everything on that drive. Make sure you really, really want to do this. - Type
convert gptand press Enter. - Type
exitand press Enter to exit DiskPart. - Type
exitcommand prompt. - Restart the reset procedure as outlined in paragraph 8, point 3.
11. The Wait Continues: Patience, Young Padawan
The reset process takes time. Be prepared to leave your laptop alone for a while. The progress indicator might seem stuck at certain points, but resist the urge to interrupt.
12. Post-Reset Glorification: Setting Up Your Shiny New Dell
After the reset, your Dell should boot up like it's fresh from the factory. You'll go through the initial setup process: language selection, region, account creation, and so on. Congratulations, you’ve conquered the factory reset failure!
13. Preventing Future Fiascos: Keeping Your Dell Healthy
To avoid future reset nightmares:
- Regular Backups: Back up your important data regularly!
- Keep Your System Updated: Ensure Windows is up to date with all the latest patches and drivers.
- Run Disk Checks: Run disk checks periodically to catch potential hard drive problems early.
- Avoid Suspicious Software: Only download software from trusted sources.
14. Troubleshooting Tips: When All Else Fails
If the above steps still don't work, you might need to:
- Contact Dell Support: They may have specific solutions for your model.
- Consider Professional Repair: If your laptop is still under warranty, it's worth exploring this option.
15. You've Got This! Embracing the Tech-Savvy You
Remember, technology isn't always sunshine and rainbows. It's about learning, adapting, and not being afraid to get your hands dirty. By following these steps, you have the knowledge and the power to tackle even the trickiest of Dell factory reset failures. Pat yourself on the back, you deserve it, you're a tech wizard now!
Closing Thoughts
So, there you have it! An actionable, step-by-step guide to overcoming the dreaded Dell laptop factory reset failure. We’ve covered everything from the initial panic to the triumphant reboot, equipping you with the tools and the confidence to take control of your tech. Remember, don't let a tech issue hold you back. Embrace the challenge, learn from the experience, and always keep exploring the exciting world of technology. Now go forth, and conquer those digital demons!
Frequently Asked Questions (FAQs)
1. My Dell laptop won't boot at all. Can I still use this method?
Yes, absolutely! The Windows Recovery Drive can be used even if your laptop won't boot normally. This is a huge advantage. 2. Will I lose all my data using this method?
If you choose the "Remove Everything" option during the reset process, yes, you will lose all your data. However
Laptop & Monitor Magic: The Ultimate Hookup Guide!How to factory reset your dell Inspiron laptop
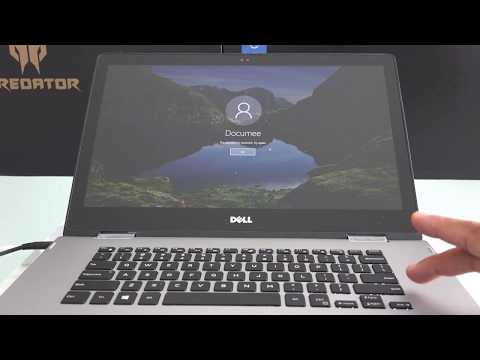
By Documee How to factory reset your dell Inspiron laptop by Documee
How to Factory Reset Windows 10 or Use System Restore.

By Computer Everywhere How to Factory Reset Windows 10 or Use System Restore. by Computer Everywhere
How to RESET DELL Laptop or PC without Password

By iTechSupport How to RESET DELL Laptop or PC without Password by iTechSupport

Title: FIX There was a problem resetting your PC - No changes were made In Windows 8, 10, 11
Channel: Tech Fusion Guy
FIX There was a problem resetting your PC - No changes were made In Windows 8, 10, 11 by Tech Fusion Guy
Change Wifi Settings
Here is the title: The Ultimate Guide to Mastering the Art of Sourdough Bread Baking at Home
The Ultimate Guide to Mastering the Art of Sourdough Bread Baking at Home
The aroma. The texture. The taste. Sourdough bread, with its complex tang and satisfying crust, is a culinary marvel that captivates bakers and bread lovers alike. For centuries, this ancient bread has sustained communities, and today, it enjoys a well-deserved renaissance. This meticulously crafted guide will serve as your compass, leading you through the rewarding journey of sourdough bread baking, transforming you from a novice into a confident artisan. Prepare to unlock the secrets of truly exceptional sourdough.
Understanding the Heart of Sourdough: The Starter
The cornerstone of any extraordinary sourdough loaf is the starter. Often referred to as the "mother," this living culture is a symbiotic community of wild yeasts and beneficial bacteria, responsible for the bread's characteristic rise, flavor, and texture. Cultivating a thriving starter requires patience, attention, and a commitment to understanding its needs.
Building Your Own Sourdough Starter: A Step-by-Step Approach
Embarking on this journey begins with creating your own starter. The process, while straightforward, demands precision.
Phase 1: The Initial Mix. Combine equal parts, by weight, of unbleached all-purpose flour and room-temperature, chlorine-free water in a clean glass jar. A ratio of 50 grams of flour and 50 grams of water is a good starting point for beginners. Stir the mixture thoroughly until all lumps disappear. Cover the jar loosely – a clean lid resting lightly on top or a breathable cloth secured with a rubber band works well – to allow air circulation.
Phase 2: Daily Rituals. For the first 5-7 days, discard approximately half of the starter each day and replenish it with the same ratio of flour and water (50g flour/50g water is a strong baseline). Observe the activity. Early signs of life might be subtle – tiny bubbles forming, a slight increase in volume, and a faint sour aroma. The environment greatly influences the starter's development; a warm, consistent temperature (around 70-75°F or 21-24°C) is ideal.
Phase 3: Monitoring and Adjustments. As the days pass, the starter will become more active. It will rise and fall with noticeable frequency, demonstrating the yeast's fermentation. The aroma will transform, transitioning from a simple floury smell to a distinct sourness, often described with terms such as "vinegary," "yeasty," or even "fruity." These are positive indicators. Consider these adjustments:
- Temperature: Adjust the feeding frequency based on the temperature. Warmer temperatures require more frequent feedings as the activity increases. Cooler temperatures will slow down fermentation.
- Flour: Experiment with different flours to refine the flavor. Introduce a small proportion of whole wheat or rye flour for a richer character.
- Water Quality: If you suspect that your water's chlorine content inhibits the starter's growth, consider using filtered water.
Phase 4: Identifying Maturity. The starter is typically ready to use when it consistently doubles in size within 4-8 hours after feeding. It should display a strong, tangy aroma and a bubbly, airy texture.
Essential Flour Choices: Unveiling the Grain
The type of flour you use significantly impacts the bread's final outcome. The protein content determines the gluten development and the overall structure of the loaf.
- Unbleached All-Purpose Flour: A versatile starting point, offering good gluten development and a neutral flavor profile.
- Bread Flour: With a higher protein content, bread flour results in a stronger, more elastic dough, enabling a better rise and a chewier crumb.
- Whole Wheat Flour: Adds a nutty flavor and a denser texture. Consider using a portion of whole wheat flour in addition to the primary flour.
- Rye Flour: Imparts a distinctive tang and a complex flavor. Use sparingly, as rye flour lacks gluten and affects the dough's elasticity.
The Bread-Making Process: A Symphony of Steps
Once the starter is ready, the real adventure begins.
Autolyse: Combine flour and water (excluding the starter and salt) and allow it to rest for 30-60 minutes. This crucial step allows the flour to fully hydrate, promoting gluten development and enhancing the final texture.
Mixing: Add the active starter and salt to the autolysed dough. Mix until the ingredients are evenly distributed. A stand mixer equipped with a dough hook simplifies this process; otherwise, hand-mixing is perfectly viable.
Bulk Fermentation: This is where the real magic happens! Place the dough in a lightly oiled bowl, cover it, and allow it to rise at room temperature. During bulk fermentation, the yeast and bacteria in the starter work together to produce gas, which causes the dough to expand and develop flavor.
- Folding: Over the course of bulk fermentation, perform a series of folds. Every 30-60 minutes for the first 2-3 hours, gently stretch a portion of the dough upward and fold it over onto itself. This strengthens the gluten network and promotes even gas distribution. The folds are critical to achieving a well-structured loaf.
- Duration: The total bulk fermentation time varies, depending on the strength of the starter, the type of flour, and the ambient temperature. Expect a duration of 4-8 hours. The dough should increase in volume by roughly 50-75% and exhibit small bubbles.
Shaping: After bulk fermentation, gently transfer the dough to a lightly floured surface. Shape the dough into a round (boule) or an oblong (batard). Precise shaping gives the bread its final form and contributes to the spring in the oven.
Proofing (Cold or Warm): Place the shaped dough in a banneton basket dusted with flour (or a bowl lined with a floured cloth). Cover and refrigerate (cold proofing) for 12-24 hours. This slow fermentation develops complex flavors and creates a more open crumb. Alternatively, you can proof the bread at room temperature for approximately 2-4 hours, dependent on the room temperature.
Baking: Preheat your oven, ideally with a Dutch oven inside, to 450-500°F (232-260°C). Carefully place the dough in the hot Dutch oven (or on a baking stone with steam). Bake covered for 20-25 minutes, then remove the lid and continue baking for another 20-30 minutes, or until the crust is deeply golden brown and the internal temperature reaches 200-210°F (93-99°C). The crust should be firm, and the bottom of the loaf should sound hollow when tapped.
Cooling: Allow the bread to cool completely on a wire rack before slicing. This crucial step prevents a gummy texture and allows the flavors to fully develop. Resist the temptation to cut into it too soon.
Troubleshooting Common Sourdough Problems
Even the most seasoned bakers encounter challenges. Here are some solutions:
- Dense Bread: This could be due to under-proofing, a weak starter, or insufficient gluten development. Ensure your starter is active, proof your dough for the appropriate amount of time, and perform proper folds during bulk fermentation.
- Sourness Overload: This is often caused by overly long fermentation times or a starter that is too mature. Experiment with shorter fermentation times or adjusting the starter's feeding schedule.
- Flat Loaf: This can be caused by a weak starter or under-proofing. Ensure the starter has fully matured and proofed the bread adequately.
Variations and Enhancements: Expanding Your Sourdough Horizons
Once you have mastered the basic process, explore the incredible versatility of sourdough:
- Whole Grain Sourdough: Experiment with different ratios of whole wheat, rye, and other whole grains to enhance flavor and nutritional value.
- Adding Seeds and Nuts: Incorporate a variety of seeds (sesame, sunflower, poppy) or nuts (walnuts, pecans) into the dough for texture and flavor.
- Flavored Sourdough: Infuse your bread with herbs, spices, or dried fruits. Rosemary and garlic, or cranberries and walnuts are outstanding combinations.
- Sourdough Discard Recipes: Don't throw away that extra starter. Use it in pancakes, crackers, or other baked goods to add a tangy flavor and reduce waste.
Maintaining Your Precious Starter: A Long-Term Commitment
Your starter is a living entity. Regular feeding is the key to its longevity and viability.
- Feeding Frequency: Feed your starter at least once a week if stored in the refrigerator. Increase the frequency to daily or every other day if stored at room temperature.
- Feeding Ratio: Follow the established 1:1:1 or 1:2:2 (starter:flour:water) ratio for refreshment.
- Storage: Store your starter in a clean, airtight container in the refrigerator. This slows down the fermentation process. Before baking, remove the starter from the refrigerator and feed it a few times to ensure it is active.
The Rewards of Sourdough: Beyond the Bread
Beyond the delicious crust and chewy crumb, sourdough offers several rewards:
Nutritional Advantages:
