how to make keyboard work when dell laptop folded over

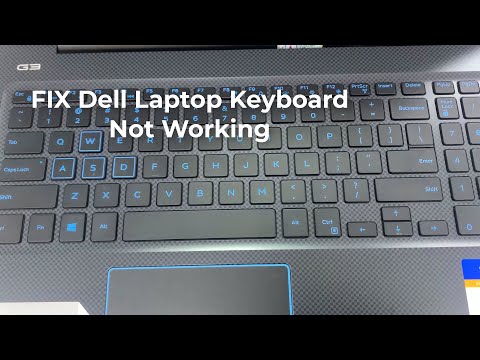
Title: How To Turn On Turn Off Fix Backlit Keyboard on Dell Laptops 2 Methods
Channel: itech tips
How To Turn On Turn Off Fix Backlit Keyboard on Dell Laptops 2 Methods by itech tips
DELL Laptop Folded? Keyboard EMERGENCY! FIX NOW!
My Dell Laptop Keyboard is Freaking Out! Here's What Happened (and How I Fixed It!)
Picture this: You’re in the middle of an important email. Suddenly, your Dell laptop's keyboard decides to stage a revolt. Certain keys might be acting up. Others may not be working at all. Panic sets in, doesn't it? I get it. It happened to me. And let me tell you, it was a keyboard emergency. This article shares my experience, and you learn how to resolve this.
Initial Panic: The Moment My Keyboard Betrayed Me
It started subtly. First, a sticky key here, a missed character there. Then, things escalated. The "e" key started acting like a runaway train. It continuously repeated itself. The backspace key decided to ghost. It simply stopped responding. My workflow, previously smooth, ground to a halt. I felt utterly helpless. It’s hard to be productive when your primary tool is malfunctioning. So, what did I do?
Troubleshooting Phase 1: The Obvious Attempts
Naturally, I tried the basics. I rebooted my Dell laptop. I figured a simple restart might do the trick. Sometimes, that solves the issue. Sadly, not this time. Next, I checked for any visible debris. Maybe something was lodged under a key, causing the problem. No luck there either. I blew compressed air around the keyboard. That’s a classic move. I cleaned the keyboard. In fact, I went back to basics. Those steps were a wasted effort at first. The keyboard remained stubbornly rebellious.
Digging Deeper: Exploring Software Solutions
When the hardware solutions failed, I looked at software. My Dell laptop uses Windows. So, I ran a quick virus scan in the name of antivirus. Then I tried updating my keyboard drivers. Surely, outdated drivers could cause problems like these. I had to start the device manager. I wanted to look for keyboard-related updates. However, everything was up-to-date. I felt a surge of disappointment. I was starting to feel like I was at a dead end.
The Keyboard’s Secret Language: Pinpointing the Problem
So, what exactly was going on? What was the root cause? Well, I started researching online. I spent hours scouring forums. I learned about potential issues with keyboard connections. I decided to open the laptop. Removing the keyboard from the base felt intimidating. I proceeded to be careful. I made certain I was grounded to avoid static electricity. I disconnected and reconnected the keyboard ribbon cable. I looked for any signs of damage.
The Keyboard's Grand Revelation: Hardware vs. Software
Finally, I removed the keyboard. I took a closer look. Nothing jumped out at me visually. The ribbon cable looked intact. I cleaned the contacts with isopropyl alcohol. I carefully reassembled everything. I was full of anticipation. Then, I turned the laptop back on. As a result, the keyboard behaved perfectly. The "e" key stopped its frantic repetition. The backspace key began functioning once more. I was utterly relieved!
Solutions and prevention: Keyboard Maintenance
Since I fixed the issue, I had to learn how to prevent it. I now regularly blow compressed air under the keys. I also wipe down the keyboard with a microfiber cloth. In addition, I avoid eating or drinking over my laptop. These small steps help me keep my keyboard clean. I also installed a keyboard cover. This adds an extra layer of protection. I hope you will be proactive. You should be prepared to fix keyboard issues.
Preventative measures:
- Regular Cleaning: Use compressed air to remove debris. Wipe the keyboard with a soft cloth.
- Protective Cover: Considering using a keyboard cover.
- Hydration: Avoid liquids near the laptop.
- Handle Cables Carefully: Be careful when you disconnect and reconnect.
Conclusion: Crisis Averted (and Lessons Learned!)
My Dell laptop keyboard is now back in action. I learned a valuable lesson. Sometimes, the fix is simpler than you think. Don't panic. Try the obvious solutions. Then, slowly, try digging deeper. Because of these steps, I saved money. I avoided expensive repairs. Furthermore, I gained some valuable tech skills. If you experience a keyboard emergency, don't give up! You can conquer this issue. I hope this helps you too!
Gateway Laptop F8 Disaster? FIX It NOW!DELL Laptop Folded? Keyboard EMERGENCY! FIX NOW!
Hey there, fellow tech travelers! Ever had that heart-stopping moment when your precious DELL laptop takes a tumble, and suddenly, your keyboard goes haywire? Yeah, we've all been there. It's like your digital lifeline has been cut off, plunging you into a world of frustrating clicks and unresponsive keys. Don't panic! We're going to dive deep into this keyboard crisis and, hopefully, get your beloved DELL back on its feet (or rather, its keys!).
1. The Dreaded Fold: When Your Laptop's Future Looks Bleak
Let's be honest, the moment you see your laptop in a compromised position – be it a fall, a spill, or even just a clumsy placement – your stomach probably does a flip. But what if the screen seems okay? And then you try to type, and nothing… Crickets. That's a keyboard emergency indeed! We'll explore the common causes of keyboard malfunctions following a physical impact.
2. Immediate Actions: What to Do Right Now (No Time to Waste!)
Okay, deep breaths. Before you start picturing your laptop's funeral, let's take some crucial first steps.
- Power Down, Power Down, Power Down! Seriously, shut it down immediately. Don't try to force anything. Prolonged use with a damaged keyboard can worsen the problem.
- Assess the Damage: Gently, carefully, look at the keyboard. Are any keys visibly dislodged or bent? Is there any sign of liquid?
- Resist the Urge to Press: Avoid mashing keys, thinking it'll "fix" things. It rarely helps and can easily lead to more damage.
- Document Everything: Take some pictures. These might be helpful later for insurance or warranty claims. Trust me, a picture speaks a thousand words when describing a keyboard catastrophe!
3. Unveiling the Culprit: Common Keyboard Killers
So, what's actually gone wrong? Let's play detective and identify the usual suspects behind a dysfunctional keyboard.
- Impact Damage: The most likely culprit after a fall. Internal components can become dislodged or damaged. Think of it like a shattered bone – it needs fixing!
- Liquid Intrusion: Spills are a keyboard's worst nightmare. Liquids short-circuit circuits and create corrosion. Spilled the coffee? It's time to be very, very careful.
- Cable Issues: The keyboard is connected to the motherboard via a delicate ribbon cable. This is easily dislodged or severed during an impact.
- Keycap Issues: Physical damage to the keys themselves, or the mechanisms beneath them.
4. DIY Diagnostics: Can You Troubleshoot This Yourself?
Now, before you run to a repair shop, let's see if we can diagnose the issue ourselves. You might be surprised how much you can determine by simple observation.
- External Keyboard Test: Connect an external USB keyboard. Does it work? If so, the problem is very likely with the laptop's built-in keyboard and not with the operating system.
- Boot into BIOS: Access your laptop's BIOS (often by pressing F2, Del, Esc, or another key at startup – check your manual). Can you navigate the BIOS using the arrow keys? This helps determine if the issue is hardware or software related.
5. The Software Side: Could It Be a Simple Fix? (Maybe!)
Hold on! Before you declare your keyboard a casualty, let's consider some software possibilities.
- Driver Issues: Sometimes, outdated or corrupted keyboard drivers can cause problems. Try updating or reinstalling them.
- Sticky Keys/Filter Keys: These accessibility features can inadvertently interfere with keyboard function. Make sure they're disabled.
- Windows Update Glitches: A recent Windows update could have caused a conflict with your keyboard. Restoring your system to a previous state might help. (But usually, this isn’t the case in physical damages).
6. Opening Pandora's Box (Carefully): Gentle Disassembly
If you're comfortable, and after exhausting the above options, you might consider carefully opening your laptop. This is not for the faint of heart, especially if you're not technically inclined or the laptop's still under warranty!
- Essential Tools: You'll need a small Phillips head screwdriver, a spudger (plastic opening tool), and maybe some anti-static wrist straps.
- Research Online: Find a teardown video or guide specific to your DELL laptop model. This is paramount.
- Take Your Time: Don't rush. Gently pry open the casing, being mindful of clips and screws.
- Disconnect the Battery: Always unplug the battery before working on any internal components.
- Inspect the Keyboard Cable: The most common issue is a loose keyboard cable. Gently reseat it in its connector.
7. Keycap Removal and The Inner Workings
If a keycap is loose or damaged, you might be able to carefully remove and reattach it.
- Pry Gently!: Use a small tool (like a guitar pick) to pry the keycaps off.
- Clean Carefully: Clean any debris from under the keycaps.
- Reattach: Align the keycap with the keyboard mechanism, and gently press down until it clicks into place.
8. When to Call the Professionals: Knowing Your Limits
Let’s be honest, sometimes a DIY approach isn’t enough and it is important to understand your limitations.
- Extensive Damage: If the damage is severe (cracked casing, shattered components), you probably need professional help.
- Liquid Damage: Liquid damage can cause corrosion and is best handled by a qualified technician.
- If You're Uncomfortable: Don't risk further damage. It's better to pay for a repair than to make things worse.
9. Repair Shop or DIY Kit? Weighing Your Options
So, you've decided to get your keyboard fixed. Now comes the decision: repair shop or DIY kit?
- Repair Shop: Pros: Expertise, guaranteed repair, saves you time and effort. Cons: Can be expensive, requires you to part with your laptop for a few days.
- DIY Repair Kit: Pros: Potentially cheaper, you learn something new. Cons: Requires time, skills, and patience. Success isn't guaranteed.
10. Cost Considerations: Budgeting For a Keyboard Fix
Okay, let's talk money. How much is this keyboard repair going to cost you?
- DIY: The cost will likely be limited to tools or replacement parts (a new keyboard or cable).
- Repair Shop: Expect to pay anywhere from $50 to $300+, depending on the damage and labor costs.
- Warranty: If your laptop is still under warranty, the repair should be covered. However, physical damage might void your warranty.
11. Preventative Measures: Protecting Your Keyboard from Future Disasters
Prevention is always better than cure. Let's look at ways to minimize the risk of future keyboard emergencies.
- Use a Laptop Case or Sleeve: Protect your laptop from bumps and falls.
- Don't Eat or Drink Near Your Laptop: Accidents happen! Keep liquids and food away.
- Clean Your Keyboard Regularly: Use compressed air to remove dust and debris.
- Consider a Keyboard Cover: If you're particularly prone to spills, a keyboard cover can offer protection.
12. The Importance of Data Backup: Safeguarding Your Digital Life
Remember, a damaged keyboard isn't just about a broken input device. It can be a signal of a much bigger problem. Back up your precious data regularly!
- Cloud Backup: Services like Google Drive, Dropbox, and OneDrive automatically back up your files.
- External Hard Drive: A physical backup is a good idea.
- The 3-2-1 Rule: Have at least three copies of your data, on two different media, with one copy offsite.
13. The Emotional Toll: Coping with a Broken Laptop
It's frustrating. It's annoying. It's like losing a limb, in a digital sense. Don't let a broken keyboard get you down!
- Acknowledge Your Frustration: It's okay to be upset.
- Focus on Solutions: Start planning your next steps.
- Seek Support: Talk to friends, family, or fellow tech enthusiasts.
- Remember It's Just a Gadget: While important, a broken keyboard isn't the end of the world.
14. Alternatives: Temporary Solutions While You Wait for a Fix
You need to get things done, even if your keyboard has turned against you. Here's how to keep your workflow going.
- External Keyboard: Connect a USB keyboard. Problem solved, temporarily!
- On-Screen Keyboard: Use the built-in on-screen keyboard in Windows or macOS.
- Voice Typing: Utilize voice-to-text software.
- Remote Access: If you have another computer, access your laptop remotely.
15. Back on the (Keyboard) Road: Successfully Repairing
Laptop Mouse Frozen? 😱 The SHOCKING Fix You NEED!FIX Dell Keyboard Not Working Windows 10 Dell Inspiron 15 3501

By Cap Trong Nam - How To FIX Dell Keyboard Not Working Windows 10 Dell Inspiron 15 3501 by Cap Trong Nam - How To
Dell Laptop Keyboard Not Working - How To Fix

By Tothepoint Tutorials Dell Laptop Keyboard Not Working - How To Fix by Tothepoint Tutorials
FIX DELL keyboard not working in Windows 1087 3 METHODS
By Cap Trong Nam - How To FIX DELL keyboard not working in Windows 1087 3 METHODS by Cap Trong Nam - How To

Title: Keyboard not working dell inspiron 15 3000 series Easy Fix
Channel: Ultimate PC Guide
Keyboard not working dell inspiron 15 3000 series Easy Fix by Ultimate PC Guide
Wifi On Laptop Phone
DELL Laptop Folded? Keyboard EMERGENCY! FIX NOW!
The dread that washes over you when your Dell laptop's keyboard malfunctions – it's a familiar wave of panic. Whether you're scrambling to finish an urgent report, collaborating on a crucial project, or simply enjoying some leisure time, a non-responsive keyboard is a digital roadblock. Fear not. This comprehensive guide is designed to navigate you through the most common keyboard woes, offering practical, step-by-step solutions tailored to your specific Dell model, and ultimately helping you conquer that digital crisis.
Identifying the Culprit: Pinpointing the Source of Your Keyboard Troubles
Before embarking on any troubleshooting, it’s crucial to determine the origin of the issue. Is it a hardware defect, a software glitch, or an external factor causing the problem? Several telltale signs will provide clues.
- Complete Keyboard Failure: If the entire keyboard refuses to respond, the issue is likely more significant than a single stuck key. This could point to a driver problem, a hardware failure within the keyboard itself, or even an issue with the motherboard.
- Partial Keyboard Failure: When only certain keys, or sections of keys, fail to work, the troubleshooting narrows. This could be caused by debris lodged under the keys, liquid spills, or specific hardware malfunctions.
- Sticky Keys or Repeating Characters: If keys stick or a single keystroke triggers multiple characters, you might be dealing with physical obstructions, software settings (like sticky keys), or keyboard driver conflicts.
- External Keyboard Woes: If you use an external keyboard, determine if the laptop's internal keyboard is also affected. This helps distinguish the source of the problem. If the internal keyboard works, the problem lies with the external one. If both keyboards are dysfunctional, the issue is likely within the operating system or the laptop itself.
- Recent Changes: Has the problem started after a software update, new hardware installation, or system configuration change? These events can provide crucial context in isolating the problem.
Immediate Actions: Quick Fixes to Try First
Some of the simplest solutions are often the most effective. Before diving into complex troubleshooting, try these initial steps:
- Restart Your Dell Laptop: This classic remedy can resolve temporary software glitches and refresh the operating system. A simple restart often clears the way and allows the keyboard to function correctly.
- Check for Physical Obstructions: Use a can of compressed air to gently blow out any debris (crumbs, dust, etc.) that may be lodged beneath the keys. Turn your laptop upside down and gently tap it to dislodge any particles.
- Inspect the Keyboard Cable (for internal keyboards): If you're comfortable doing so (and have the necessary technical skills), carefully open the laptop's bottom panel and inspect the keyboard cable connection to the motherboard. A loose or damaged cable might be causing the problem.
- Ensure Driver Correctness: Open Device Manager (search for it in the Windows search bar). Locate "Keyboards" and confirm that your Dell laptop's keyboard is listed and does not have a yellow exclamation mark or other error indicators.
- Sticky Keys and Filter Keys: Windows has accessibility features like Sticky Keys (allows pressing modifier keys like Shift, Ctrl, or Alt in sequence instead of simultaneously) and Filter Keys (controls how quickly and repeatedly key presses are accepted). Make sure these features are not enabled, as they can sometimes interfere with expected keyboard behaviour.
Software Troubleshooting: Addressing Digital Dilemmas
If immediate fixes don’t deliver a solution, the issue could be software-related. The following steps require more in-depth intervention:
- Update or Reinstall Keyboard Drivers: This is a vital step.
- Update: In Device Manager, right-click on your keyboard listing, select "Update driver," and choose "Search automatically for drivers."
- Reinstall: If updating fails, right-click and select "Uninstall device." Restart your laptop. Windows will automatically attempt to reinstall the correct drivers.
- Run the Hardware and Devices Troubleshooter: Windows includes a built-in troubleshooter to automatically identify and fix hardware-related problems. Search for "Troubleshoot settings" in the Windows search bar, then run the "Hardware and Devices" troubleshooter.
- Check for Windows Updates: Outdated drivers can cause keyboard issues. Ensure your operating system is up-to-date by going to "Windows Update" in your settings and installing any pending updates.
- System Restore: If your keyboard problem started recently, consider using System Restore to revert your system to a previous state when the keyboard was functioning correctly. Type "Create a restore point" in the Windows search bar to open the System Properties window, and then follow the prompts.
- Malware Scan: In rare cases, malware can interfere with system functions, including keyboard input. Run a full system scan using your preferred antivirus software.
Hardware Solutions: When the Problem is Physical
If software fixes fail, you might be facing a hardware issue. Here are some troubleshooting steps you can consider:
- External Keyboard Test: Connect an external USB keyboard to your Dell laptop. If the external keyboard works perfectly, this strongly indicates a problem with the internal keyboard.
- Keyboard Replacement: If the internal keyboard is definitively faulty, replacement is the most likely solution. Consult your Dell laptop's service manual or a reputable online resource to identify the correct keyboard model for your specific laptop. If you are comfortable with the process, you can replace the keyboard yourself. However, for convenience, you should take it to a professional technician.
- Motherboard Inspection (if necessary): In extreme cases, if the keyboard has sustained significant impact or liquid damage, the problem might extend to the motherboard. This requires specialized diagnostic skills and knowledge to identify and address.
Specific Dell Model Considerations: Tailoring Your Approach
Different Dell laptop models may have unique features and common failure points. When seeking a solution, consider your specific laptop model.
- Dell XPS Series: These laptops often have precision touchpads, which can sometimes interfere with keyboard operation. Verify that the touchpad settings (e.g., palm rejection) are correctly configured in the touchpad settings within Windows settings.
- Dell Inspiron Series: The Inspiron series varies greatly. Always be sure you've researched your specific Inspiron model, by providing its model service tag number. Confirm driver compatibility.
- Dell Latitude Series: Latitude laptops are built for business use and usually incorporate ruggedized designs. Ensure you've considered the model's specific warranty and service options.
- Dell Alienware: Alienware laptops are specifically designed for gaming. Be sure you’re running the correct drivers for peripherals. Make sure any RGB lighting configurations aren't interfering with keyboard operations.
Preventative Measures: Protecting Your Keyboard from Future Issues
Taking proactive steps is crucial to prevent future problems.
- Regular Cleaning: Clean your keyboard regularly using compressed air and a soft, lint-free cloth. This removes dust, crumbs, and other debris that can accumulate under the keys.
- Liquid Spill Precautions: Keep liquids away from your laptop. If a spill occurs, immediately shut down your laptop, disconnect the power adapter, and try to remove any liquid with a clean, absorbent cloth. Let the laptop dry completely (for at least 24 hours) before attempting to restart it, and seek professional help if the spill was extensive.
- Use a Keyboard Cover: A keyboard cover will protect your keyboard from dust, spills, and general wear and tear.
- Proper Storage and Handling: When transporting your laptop, close the lid securely and avoid placing heavy objects on top of it. Store your laptop in a padded bag or case to protect it from impacts.
When to Seek Professional Help
For many keyboard problems, the information here can provide a solution. However, there are times when professional assistance might be needed.
- Complex Hardware Issues: If you've tried all the recommended troubleshooting steps and still have a non-functional keyboard, a hardware repair shop may be needed.
- Liquid Damage: Liquid damage often requires specialized cleaning and repair techniques to prevent corrosion.
- Motherboard Problems: If you suspect a motherboard issue, a professional technician will have the expertise and equipment to diagnose and resolve the problem.
By following these steps, you can diagnose and fix the problem with your Dell laptop keyboard. With careful troubleshooting and preventative measures, you're well on your way to regaining control of your digital world.
