laptop dvd drive not working

Title: CDDVD Drive Is Not Detected in Windows 10
Channel: TechFixIT
CDDVD Drive Is Not Detected in Windows 10 by TechFixIT
laptop dvd drive not working, laptop dvd drive not opening, laptop dvd drive not showing my computer, hp laptop dvd drive not working, asus laptop dvd drive not working, dell laptop dvd drive not working, lenovo laptop dvd drive not working, laptop dvd player not opening, dell laptop dvd player not working, toshiba laptop dvd player not working
Laptop DVD Drive DEAD? 😱 FIX IT NOW!
Laptop DVD Drive: SOS! Revive Your Disc-Reading Companion
The dreaded moment arrives. You insert a disc, and nothing happens. Your laptop's DVD drive, once a reliable companion, seems terminally ill. Fear not! Before you resign yourself to a digital life, let’s explore some potential fixes. The goal? To rejuvenate that silent sentinel and bring your DVDs and CDs back to life.
Diagnosing the Silent Treatment: Is It Truly DOA?
First things first: confirm the diagnosis. Is the DVD drive truly dead? Sometimes, it's a software hiccup, not a hardware failure. Restart your laptop. This simple act often resolves momentary glitches. If that doesn’t do the trick, check your Device Manager (usually accessible by searching in the Windows search bar). Look for any errors or warnings related to your DVD/CD-ROM drive. An exclamation mark or a red "X" indicates a problem. In this case, you'll need further investigation.
Software Solutions: Waking Up the Digital Beast
Software is often the culprit behind a non-responsive DVD drive. First, ensure your drivers are up-to-date. Outdated drivers are a common cause of issues. Visit your laptop manufacturer’s website. Download the latest drivers for your specific model. Install them and restart your laptop. It's important to follow the instructions. If your drivers already have the newest versions, uninstall and reinstall the drive from the Device Manager. Right-click on the DVD/CD-ROM drive. Select "Uninstall Device". Reboot your machine. Windows should automatically reinstall the driver. This process is important. After that, check if the drive is working.
The Hardware Hustle: Unveiling the Inner Workings
Sometimes, it's not software at all. It is a physical issue. Laptop DVD drives aren't designed to last forever. Before you panic, carefully examine the drive itself. Is the disc tray fully opening and closing? Is there any unusual clicking or grinding noise? If the tray won't open, there may be a manual eject option. Search online for instructions specific to your laptop model. This could involve inserting a paperclip into a small hole on the drive. Be gentle, and don't force anything. You may also need to open your laptop’s case. This should be done with caution.
Dust Bunnies and Disc Debris: Cleaning Up the Act
Dust and debris are the silent assassins of electronic devices. They can interfere with the laser's ability to read discs. Buy a compressed air can. Use it to carefully clean the drive’s slot. Direct the air into the opening. Avoid excessive force. You could also try a cleaning disc. These discs have tiny brushes that gently clean the lens. Alternatively, you can attempt to clean the lens. However, opening the drive is risky.
Power Problems: The Silent Saboteur
A failing power supply can cause various issues. It can prevent the DVD drive from functioning correctly. Ensure your laptop is plugged into a working power outlet. Sometimes, intermittent power supply problems cause the issue. Furthermore, check the power settings in your laptop’s BIOS. There may be an option to enable the DVD drive. Make sure it is enabled. If all other aspects are in good order, inspect the power cable. It should be free of any damage or wear.
Disc Dilemmas: The Blame Game
Before you condemn the drive, consider the discs themselves. Are the discs scratched or damaged? A damaged disc is unreadable. Try several different discs. Try CDs and DVDs. If some work and others don't, the problem might be the disc, not the drive. Clean the discs. Use a soft cloth. Try to start the drive again.
The Final Frontier: Beyond Repair?
If you've exhausted all these steps, the drive may be beyond repair. The laser could be dead. The mechanism may have failed. The cost of replacing a laptop DVD drive can differ. It can vary depending on the model. However, external DVD drives are a cost-effective alternative. They connect via USB. They're relatively inexpensive. They provide a convenient way to read discs. Ultimately, consider your needs. If you rarely use DVDs or CDs, an external drive is a reasonable solution. On the other hand, if you rely heavily on the drive, a replacement or repair is worth considering.
The End of an Era?: Embracing a Digital Future
As technology evolves, the need for DVD drives diminishes. Streaming services and digital downloads are the norm. Therefore, consider if you truly need a functional DVD drive. You could migrate to a digital world. Nevertheless, you now have the knowledge to attempt a revival. So, don’t give up yet. Armed with these troubleshooting tips, you can bring that DVD drive back to life. Go on. Start working!
Unleash Your Productivity: The Fastest Laptop for Work (2024's Top Pick!)Laptop DVD Drive DEAD? 😱 FIX IT NOW!
Hey there, tech warriors! We've all been there. You reach for a classic DVD, eager for a nostalgic movie night or a software installation, only to be met with the dreaded silence… the laptop DVD drive seems utterly, completely, dead. Cue the internal groan! But before you resign yourself to an external drive or, worse, a new laptop, let's dive in and see if we can resurrect that digital phoenix. We're going to troubleshoot, troubleshoot, and troubleshoot some more, turning that digital frown upside down.
1. The Sigh of a Silent Spinner: Recognizing the Problem
Let's be honest, the first you hear is nothing. Absolutely nada. No whirring, no grinding, just an empty void of digital disappointment. The drive doesn't acknowledge the disc, or perhaps it spits it back out like a grumpy cat. If you're experiencing these symptoms, then you're in the right place. The key here is to identify the symptoms of the problem before we jump straight into any technical fixes. Is it completely dead, or are there intermittent issues? Understanding the nuances is the critical first step to recovery.
2. Check the Obvious: The Elementary School Checklist
Before we get our hands dirty, let's run through the digital equivalent of elementary school checks. I mean, we've all been there, right? The "Is it plugged in?" type situation.
- The Disc Itself: Is the disc clean? Free of scratches, sticky residue, or the fingerprint equivalent of the Mona Lisa? Sometimes the simplest solution is the best. A dirty disc can behave like a stubborn gatekeeper.
- Disc Type Compatibility: Does your laptop's drive actually support the type of disc you're trying to read (DVD-R, DVD+RW, etc.)? It's a long shot, but verify the disc type against your drive's specifications - you might find a mismatch!
- The Power Button (and Driver Updates): Obvious, I know, but let's make sure the drive is actually on. Also, check your Device Manager in Windows or System Information on a Mac; are there any yellow exclamation marks or errors next to your DVD drive? That suggests potential problems at the driver level. We'll discuss updating those drivers soon!
3. Driver Dilemmas: Updating Your Laptop's Digital Pilots
Ah, drivers. They're the unsung heroes of the digital world, these software pieces that allow your hardware to communicate with your operating system. Outdated or corrupted drivers can be a frequent culprit behind a malfunctioning DVD drive.
- Windows: Head to Device Manager (search for it in the Windows search bar). Expand "DVD/CD-ROM drives." Right-click on your drive and select "Update driver." Let Windows search for updated drivers automatically.
- Mac: macOS handles driver updates behind the scenes, but check for system updates in System Preferences. A fresh update can sometimes refresh the driver of your DVD drive.
If, after updating, you still see the problem, try uninstalling and reinstalling the driver. Again, right-click on the drive in Device Manager (Windows) or within System Information (Mac) and select "Uninstall device." Then, restart your computer; Windows or macOS should automatically reinstall the driver.
4. The Physical Examination: Opening the Digital Chest
Disclaimer: This step involves opening up your laptop. If you're uncomfortable with this, or if your laptop is still under warranty, stop here and seek professional assistance. Messing around with the internal components on a laptop is not for everyone, so it is essential to acknowledge.
If you are intrepid, and your warranty has expired, then let's proceed with caution.
- Power Down & Disconnect: Completely power off your laptop and unplug it from the power outlet. Remove the battery! Safety first, always.
- Locate the Drive: Identify the DVD drive's access panel. It's usually on the side of the laptop, and it might have a small eject button.
- Carefully Open: Use a tiny screwdriver to remove the screws holding the panel in place. Gently slide the panel off.
- Inspect: Examine the drive. Look for dust, debris, or anything that might be obstructing the mechanism. A can of compressed air can be your best friend here. Use short bursts to clear out any dust.
5. Disc Lens Cleaning: Bringing Back the Sparkle
Just like a camera lens, the disc lens in your DVD drive can get dusty or dirty over time, impeding its ability to read discs. Fortunately, there are a couple of solutions:
- Pre-made Cleaning Discs: Purchase a purpose-built DVD drive cleaning disc. These discs contain tiny brushes that gently clean the lens as the drive spins.
- DIY Cleaning (use with caution): If you're feeling adventurous, you could very gently try cleaning the lens with a cotton swab lightly moistened with isopropyl alcohol. But, be careful, because a misstep here could cause irreversible damage to your DVD drive.
6. Software Conflicts: The Digital Turf Wars
Sometimes, software can clash and mess things up. Let's consider software conflicts:
- Recent Software Installations: Did the DVD drive problem start after you installed a new piece of software? Try uninstalling it to see if that resolves the issue.
- Playback Software Issues: If you're using a specific software program to play DVDs (like VLC media player, or the pre-installed Windows Media Player), there could be a problem. Try updating the software, or even uninstalling and reinstalling it. Try using a different player to see if that gets you past the problem.
7. The External Drive Alternative: A Temporary Fix
Look, sometimes the fight just isn't worth it. If your internal DVD drive is being a major pain, think about external DVD drive. They are available at reasonable prices online and in consumer electronics stores.
- Plug-and-Play: External drives are typically super easy to use. Simply plug them into a USB port and you're good to go, no drivers needed.
- Portability: It's a handy backup option, especially if you need to use DVDs/CDs on other computers.
8. Power Supply Problems: A Grumbling Engine (Less Common, But Potentially Crucial)
While less common, power supply issues can affect your DVD drive.
- Flickering or Incomplete Operation: If the drive is struggling to spin up, or if the disc eject mechanism is acting strangely, it could point to a lack of power.
- Professional Assessment: If you suspect a power supply problem, it is a smart move to have it examined by a professional, and don’t attempt to fix it. It's a complex component and could be a sign of broader problems.
9. The Eject Button's Lament: Mechanical Maladies
The eject button on the drive itself can sometimes fail. It can get stuck, or it might not be making proper contact.
- Manual Override (if possible): Some drives have a tiny hole on the front that you can use to manually eject the tray with a straightened paper clip.
- Button Inspection: If you're comfortable doing so, gently open up the drive (as described in section 4) and inspect the eject button mechanism.
10. BIOS Blues: Adjusting System Settings
Rarely, the BIOS (Basic Input/Output System) settings can affect the DVD drive.
- Boot Order: Make sure the DVD drive is recognized in your BIOS settings. Sometimes, if the boot order is set incorrectly, the system won't even try to read from the DVD drive.
- BIOS Reset (Last Resort): If you're comfortable with it, you could try resetting your BIOS settings to their default values. Be careful, this can affect other settings, and it's usually not necessary.
11. The Windows Troubleshooter: A Digital Detective
Windows includes built-in troubleshooters that can sometimes identify and fix problems with hardware.
- Hardware and Devices Troubleshooter: Search for "Troubleshoot settings" in the Windows search bar. Select "Hardware and Devices" and run the troubleshooter. It might detect and resolve some issues.
- Follow the Prompts: The troubleshooter will guide you through the process.
12. Diagnostic Software: Diving Deeper
There are diagnostic tools available (some free, some paid) that, in some situations, can give you more detailed information about the DVD drive's health. However, often these tools show what we already know: the drive is not functioning as expected.
- Research and Choose: Research and select a reputable diagnostic tool. Some may be specific to your laptop brand (Dell, HP, etc.)
- Run the Tests: Run the tests and see if they uncover any specific problems.
13. The Ultimate Verdict: When to Fold 'Em
Unfortunately, sometimes the problem is beyond your ability to fix.
- Component Failure: If the drive mechanism has failed, or if internal components are damaged, you might need to consider a replacement.
- Professional Assistance: If you are uncomfortable with any of the steps, or after trying all of them and the drive still doesn't function, it might be time to take your laptop to a repair shop.
1
This Laptop Will SHOCK You: Perfect for Light Office Work!DVD CD-ROM drives not showing in device manager fix DVD drive not listed in device manager

By troubleshooterrors DVD CD-ROM drives not showing in device manager fix DVD drive not listed in device manager by troubleshooterrors
DVD ROM Repair DVD RW open and repair CD Drive Repair DVD Drive Repair

By Systo Tech DVD ROM Repair DVD RW open and repair CD Drive Repair DVD Drive Repair by Systo Tech
Laptop DVD-RW disassembly, take apart, teardown tutorial
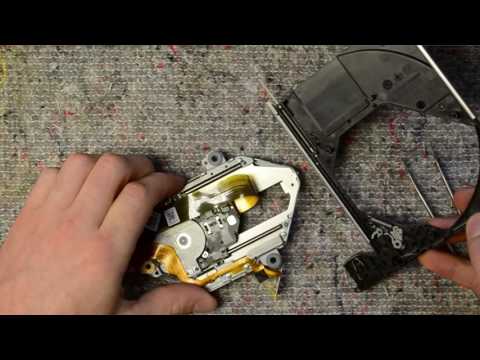
By Laptop disassembly Laptop DVD-RW disassembly, take apart, teardown tutorial by Laptop disassembly

Title: CD DVD Drive Not Reading Discs in Windows 10 11 Fixed
Channel: Tips Howto
CD DVD Drive Not Reading Discs in Windows 10 11 Fixed by Tips Howto
Laptop Wifi Connect
Here's the article:
Title: Unveiling the Secrets of Crafting the Perfect Sourdough Starter: A Comprehensive Guide
Sourdough bread, with its tangy flavor and airy crumb, has captivated bakers for centuries. The heart of this culinary masterpiece lies in the sourdough starter – a living culture of wild yeast and bacteria that leavens the dough. Mastering the art of cultivating a robust and reliable starter is the first step towards baking exceptional sourdough. We are here to guide you through every stage, ensuring your success.
Cultivating Your Initial Sourdough Starter: The Foundation of Flavor
The journey begins with the very beginning – creating the starter itself. This process, while seemingly simple, requires attention to detail and patience. We begin by obtaining a suitable flour. Unbleached, all-purpose flour works well. Though other types of flour might provide an extra layer of complexity, we will stick to our standard. In a clean glass jar, combine 50 grams of all-purpose flour with 50 grams of lukewarm, chlorine-free water. This ratio (1:1 flour to water by weight) is the bedrock of our endeavor. Mix the flour and water thoroughly, ensuring no dry clumps remain. The consistency should resemble a thick batter.
Once combined, cover the jar loosely. A lid, lightly placed, or a piece of cheesecloth secured with a rubber band, allows air to circulate while preventing contamination. Place the jar in a warm environment, ideally between 70-75°F (21-24°C). Avoid direct sunlight or drafts.
For the first few days, the starter may show little activity. The bacteria and wild yeast are starting to colonize. Feed the starter daily for the first week. Discard half of the starter (this is called a "discard" and ensures the starter doesn't outgrow your container) and replace it with a fresh 50 grams of flour and 50 grams of water. Observe the starter closely for signs of life: bubbles forming on the surface, a slight increase in volume, and a faint, pleasant sour smell.
Decoding the Phases of Starter Development: Recognizing Progress
As the days pass, the starter will undergo several noticeable transformations. The process is much more than just mixing; it is a dance of complex chemical and biological processes. The first few days might bring a lack of activity, which is normal. As the yeast begins to thrive, you’ll see tiny bubbles forming. This initial stage indicates the beginning of fermentation.
Around day 4-7, the starter should start to rise and fall noticeably between feedings. This "rise and fall" is a critical marker. The bacteria are producing gases (carbon dioxide), causing the starter to inflate. The yeast will start to multiply and produce alcohol during this period. This rise and fall process is key to identifying a well-functioning starter.
The aroma will change from a bland scent to a more sour, fermented fragrance. This sourness is another sign of progress. The bacteria, primarily lactic acid bacteria, are producing lactic acid, which contributes to the characteristic sourdough flavor. The aroma should be a pleasant sourness, not a putrid or foul odor. Discard any starter that produces strange or off-putting odors, as this can indicate contamination.
Maintaining a Thriving Sourdough Starter: The Key to Consistent Baking
Once the starter doubles in size within 4-8 hours after feeding and has a consistent, strong sour smell, it is ready for use. This timeframe will progressively shorten as the starter matures. Now, the real work begins: consistent maintenance.
The feeding schedule depends on usage and storage. If baking frequently (more than once a week), keeping the starter at room temperature and feeding it daily is recommended. For less frequent bakers, store the starter in the refrigerator. This slows down fermentation and extends the time between feedings. If storing in the refrigerator, feed the starter once a week.
To feed a refrigerated starter, remove it from the refrigerator. Allow it to come to room temperature (about 1-2 hours). Discard half of the starter and replenish it with a 50/50 mixture of flour and water, as previously described. Allow the starter to rise and fall, then return it to the refrigerator. The rising time will be slightly longer after refrigeration. Make adjustments in feeding to accommodate for this lag.
Troubleshooting Common Starter Issues: Addressing Challenges Effectively
Even with care, problems can arise. Recognizing and addressing these quickly can mean the difference between sourdough success and failure.
- Starter Doesn't Rise: This is a common problem. Several factors contribute, most notably temperature. If the starter isn't rising, check the environment. Is it warm enough? If the temperature is not optimal, move the starter to a warmer location. If the starter is freshly fed, it might take a few more hours to rise. Ensure the flour and water are of good quality (free of additives). If the starter is still not rising after several days and the conditions seem perfect, your starter might be weak. Feed it more frequently, perhaps twice daily. If that doesn't work, consider starting again.
- Weak Aroma/Lack of Sourness: The desired aroma may not develop. A weak aroma often indicates a young starter. Ensure that it is fed regularly. The sourness develops over time. You can try to increase sourness by using rye flour for a portion of the flour, but this change should not be too dramatic.
- Liquid on Top (Hooch): This is completely normal, particularly with a longer period between feedings and in a refrigerated starter. The liquid, called "hooch," is a byproduct of fermentation and alcohol production. It can be either stirred back into the starter or poured off. If the hooch smells foul, discard the starter and start again.
- Mold/Off-Colors: Contamination is rare but can happen. Discard the starter immediately if any mold appears or if any unusual colors are apparent. A pink or orange color usually indicates mold growth, which is dangerous.
- Starter Doesn't Double: It often takes several days to reach a double. This is not an issue. Feed the starter. Continue feeding it. If the starter is being stored in the refrigerator, it will take more time for the starter to double.
The Art of Discarding and Utilizing Sourdought Discard: Minimize Waste and Maximize Flavor
Discarding starter is a necessary part of starter maintenance, but it doesn't have to be wasteful. There are countless recipes for using discard, adding a characteristic sourdough tang to various baked goods.
Discard can be used in pancakes, waffles, crackers, pizza dough, and even cakes. Experiment with different recipes to discover your favorites. The flavor profile will not be as robust as sourdough bread made with a matured starter, but it offers a subtle tang and a convenient way to reduce waste.
Transitioning from Starter to Dough: The Baking Process
Once your starter is active and well-maintained, the fun truly begins. The transformation from starter to dough to bread is magic. This is where your starter does its best.
Begin by activating your starter. If it's been stored in the refrigerator, ensure it is fed and doubled in size before using it in your bread making. The timing of your feeding will be vital. A starter, ready to bake, provides the same level of rise, whether it’s a simple recipe or a more advanced one.
Follow a trusted sourdough bread recipe. Measure ingredients accurately, as precision is key in baking. The recipe will likely call for a bulk fermentation period, during which the dough rises. This stage allows for the development of flavor.
Experiment with different flours and hydration levels to customize your bread. The hydration level (ratio of water to flour) significantly impacts the bread’s texture. A higher hydration dough results in a more open crumb. The texture of the bread, especially the crumb, is defined by the dough’s hydration.
Troubleshooting Baking Results: Fine-Tuning Your Sourdough Technique
Even experienced bakers encounter issues. Here are common problems and their solutions:
- Flat Bread: This indicates the starter was not active enough or the dough was over-proofed.
- Tight Crumb: Insufficient fermentation or under-proofing can cause this.
- Sourness: To adjust the level of sourness, play with the bulk fermentation time and consider using a higher percentage of starter in your recipe.
- Burned Crust: Reduce the oven temperature or bake the bread for a shorter time.
- Dense, Heavy Loaf: This often indicates the starter wasn't active enough or the dough was over-mixed. Inadequate gluten development also leads to this issue.
Conclusion: A Lifelong Baking Journey
Crafting the perfect sourdough starter is a journey, not a destination. It requires attentiveness, patience, and a willingness to learn. The more you bake, the more you'll understand your starter and the nuances of sourdough baking. Enjoy the process, the smells, and the satisfaction of pulling a warm, crusty loaf from the oven. Your starter will be your loyal companion, providing the base for countless delicious loaves.
