dell laptop microphone not working
Title: How To Fix Microphone Not Working on Dell Laptop
Channel: Your Fix Guide
How To Fix Microphone Not Working on Dell Laptop by Your Fix Guide
dell laptop microphone not working, dell laptop microphone not working in teams, dell laptop microphone not working windows 11, dell laptop microphone not working in zoom, dell laptop microphone not working properly, dell laptop mic not working, dell laptop mic not working windows 11, dell latitude microphone not working, dell laptop microphone stopped working, dell latitude microphone not working windows 10
Dell Laptop Mic Dead? FIX It NOW! (Easy Steps)
Dell Laptop Mic Dead? Here's How to Resurrect It!
Ever find yourself in a virtual meeting, frantically tapping your laptop, only to realize your microphone has gone AWOL? Annoying, right? More often than not, a dead Dell laptop mic doesn’t signal the end of the world. Instead, it usually indicates a fixable issue. So, take a deep breath. This article will help you troubleshoot and get your mic back up and running in no time.
Troubleshooting Your Silent Dell Microphone: Initial Checks
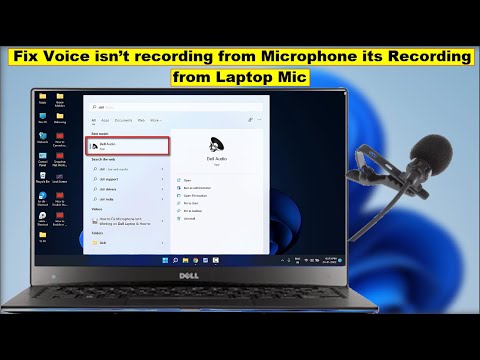
First things first: let’s tackle the obvious. Is your mic actually…enabled? It seems simple, doesn't it? But so many times, the fix is a basic setting. Therefore, begin by checking your system settings. Navigate to your sound settings. This is generally located in your control panel or system preferences. Within the sound settings, locate the input device section. Make sure your Dell laptop’s internal microphone is selected, and its volume isn’t muted. Also, verify that the correct microphone is selected. Additionally, sometimes, a simple reboot can surprisingly work wonders. Give your laptop a quick restart and see if the mic springs back to life.
Hardware Hurdles: Examining the Physical Connections
If the software seems fine, then let's dive deeper. Consider the hardware. Inspect the physical aspects as well. Are there any obvious obstructions, like dust or debris, blocking the microphone's intake? Furthermore, if you're using an external microphone, ensure it's properly connected. Check the connection. Double-check that the cable hasn't come loose. Consider trying a different USB port if applicable. Because faulty ports can lead to mic failures. Still no luck? Then, perhaps, it's a hardware issue.
Driver Dilemmas: Updating and Reinstalling
Drivers are the unsung heroes of your computer. They translate signals between your hardware and software. Outdated or corrupted drivers can easily cause microphone problems. So, let’s address this area. Open your Device Manager. You can usually find it by searching in the Windows search bar. Locate the "Sound, video and game controllers" section. Right-click on your microphone device. Then, select "Update driver." Choose "Search automatically for drivers." Windows will try to locate and install the latest drivers. If that fails, then try uninstalling and reinstalling the driver. Right-click again, select "Uninstall device," and restart your laptop. Windows should then reinstall the driver automatically.
Software Conflicts and App-Specific Settings
Your mic might work perfectly fine until you open a specific application. Consider that your video conferencing software, gaming platform, or other apps may have their own audio settings. Open the individual application and check its audio input settings. Usually, these are found in Settings or Preferences. Make sure your Dell microphone is selected as the input device within the app. Also, verify the volume levels within the app. Occasionally, the app itself may need an update. Therefore, look for updates within that specific application. After all, updates often fix bugs that cause issues.
Privacy Permissions: Granting Access
In the age of digital privacy, Windows often has permissions in place. These permissions control microphone access. This can be a culprit. Go to your Windows privacy settings. Search for "Microphone Privacy Settings" in the search bar. Ensure that microphone access is enabled. Check that the applications you're using have permission to access your microphone. If not, enable access for those specific applications. Afterwards, test your mic again.
Advanced Troubleshooting: System File Checks and Audio Troubleshooters
If you've tried everything above and are still dealing with a dead mic, it’s time to get more advanced. Windows has built-in troubleshooting tools. These tools are specifically designed to pinpoint audio issues. Run the Windows Audio Troubleshooter. It can often automatically identify and fix common problems. If the troubleshooter doesn’t work, then try a system file check. To do this, open Command Prompt as an administrator. Type "sfc /scannow" and press enter. This command will scan your system files for corruption and attempt to repair them. This might take a while. Thus, be patient and let the process finish.
Hardware Breakdown: When to Seek Professional Help
Sometimes, the problem goes beyond software tricks. It could be a hardware issue. If you've exhausted all the troubleshooting steps, then further investigation may be required. If your Dell laptop is under warranty, contact Dell support. Explain the situation and seek their assistance. Furthermore, if your laptop is out of warranty, consider taking it to a qualified computer repair technician. They have specialized tools to diagnose and repair hardware problems.
Prevention is Key: Maintaining Your Microphone Health
Once you’ve fixed your Dell laptop microphone, consider taking proactive steps to prevent future issues. Regularly update your drivers. Keep your system software updated. Don't forget to clean your microphone area physically. Avoiding extreme temperatures and humidity is beneficial. Be gentle with your laptop. Thus, extending its life and functionality.
Final Thoughts: Back to Talking, Quickly!
A non-functional microphone can be frustrating. But, with a little persistence, you can usually resolve the issue. By following these steps, you'll be back to chatting, recording, and collaborating in no time at all. Therefore, don't get discouraged. Go through these suggestions step by step. Most problems are straightforward to fix. Now, go ahead and restore your voice!
ASUS Laptop Volume Zero? This SHOCKING Fix Works!Dell Laptop Mic Dead? FIX It NOW! (Easy Steps)
Hey there, fellow tech travelers! Ever had one of those heart-stopping moments when you’re in a video call, ready to wow everyone with your brilliance, only to realize…your Dell laptop mic decided to stage a silent protest? Yeah, we've all been there. It's like your laptop is suddenly allergic to your voice. But don't sweat it! We’re going to dive deep into the world of dead Dell laptop microphones, and uncover simple, straightforward solutions to bring that tiny voice-capturing wizard back to life. Think of this as your personal, step-by-step rescue mission. Let's resurrect that mic!
1. The Silent Treatment: Recognizing a Dell Laptop Mic Problem
First things first, let's diagnose the patient. Is your Dell laptop mic truly dead, or is it just…napping? A proper diagnosis avoids unnecessary tech drama. Here’s how to know if your mic is really AWOL:
- No Audio Input: Try recording a simple audio clip using the Voice Recorder app (or whatever your OS uses). If you're met with utter silence, we have a problem.
- Feedback Fantasies: Do you hear a lot of static, crackling, or echoes instead of your voice? That's not a good sign.
- App-Specific Failures: Does it work in one app (like Zoom) but not another (like Skype)? This narrows down the problem's scope.
If you're experiencing any of these, your Dell laptop mic might indeed be taking a vacation. Don't panic, we’ll get it back from vacation.
2. Quick Checks: The Low-Hanging Fruit of Mic Repair
Before we dive into the tech trenches, let’s tackle the easy stuff. These are the equivalent of checking if your car has gas before blaming the engine.
- Mute Madness: Seriously, check the mute button! It's the simplest and most common culprit. Your physical mic mute button (on your laptop) or the software controls within your meeting app can be the silent killer.
- Volume Ventures: Ensure your microphone volume isn't set to zero in your operating system's sound settings and within the specific application you're using.
- Software Sabotage: Close any programs that might be using your microphone (like another video conferencing app) as this can cause conflicts. Think of it as a mic traffic jam.
3. Dive Into the Device Manager: Unveiling Hidden Hardware Issues
Now, let's get a little more technical. Device Manager is your Windows-based detective agency.
- Access Device Manager: Type "Device Manager" in the Windows search bar and click the result.
- Audio Inputs and Outputs: Expand this section. You should see your internal microphone listed (it might be called "Microphone Array" or something similar).
- Yellow Flags: If there's a yellow exclamation mark next to the mic, it means there’s a driver issue. Right-click the mic, select "Update driver," and let Windows search for updated drivers. If that fails, try "Uninstall device" and then restart your laptop; Windows should reinstall the driver automatically.
This is like giving your mic a fresh start.
4. Driver Dilemmas: Updating or Rolling Back for Mic Victory
Drivers are the language your laptop speaks to your mic. If they're speaking gibberish, your mic won't understand the commands.
- Update Drivers: As mentioned above, use Device Manager.
- Roll Back Drivers (If Updates Caused the Problem): If your mic stopped working after a driver update, right-click the mic in Device Manager, select "Properties," go to the "Driver" tab, and click "Roll Back Driver" (if the option is available). This is like hitting the rewind button on a bad movie.
5. Application Permissions: Ensuring Mic Access
Your apps need a green light to use your microphone. Sometimes, sneaky permissions can cause issues.
- Windows Settings: Go to Settings > Privacy > Microphone.
- App Access: Make sure the toggle for "Allow apps to access your microphone" is turned on.
- App-Specific Permissions: Scroll down and ensure individual apps (like Zoom, Skype, etc.) have permission to use your microphone.
Think of this as giving the apps the keys to your voice-capturing castle.
6. External Microphone Intervention: A Quick Test and Bypass
If your internal mic stubbornly refuses to cooperate, try an external microphone. This helps you determine:
- Is it the laptop, or the mic? If an external mic works, the problem is likely with the internal mic.
- Quick Fix: Using an external mic is a super easy workaround for those urgent situations.
7. Sound Settings Shenanigans: Configuring Input Devices
Let's dive into the sound settings and double-check everything.
- Control Panel (or Settings): Search for "Sound settings" in Windows.
- Playback and Recording Tabs: Ensure the correct microphone is selected as the default recording device.
- Test Your Mic: Click on your selected microphone and then "Properties." In the "Levels" tab, make sure the microphone volume is up. Test your mic by speaking and seeing if the sound level bar moves.
8. Troubleshooting Applications: Mic-Specific Settings
Each application has its own mic setup.
- Zoom, Skype, etc.: Open your video conferencing app.
- Audio Settings: Go to the app's audio settings.
- Mic Selection: Ensure the correct microphone (your internal mic) is selected. Double-check the input volume.
This is like checking the individual dials on your stereo system.
9. BIOS Blues: Resetting Default Settings
Rarely, your BIOS (Basic Input/Output System) settings might be the culprit.
- Accessing BIOS: Restart your laptop and press a designated key (often Del, F2, F12, or Esc) during startup. The key varies by Dell model. Consult your Dell's manual.
- Default Settings: Look for options to "Load Defaults" or "Reset to Factory Settings."
Warning: BIOS is a powerful tool. Be careful when changing settings or consult with an expert.
10. Hardware Hurdles: A Look Inside (Advanced)
Disclaimer: This step is for those comfortable with hardware and voiding warranties.
- Internal Connections: If you are tech-savvy, consider opening up your laptop and inspecting the internal microphone connections.
- Professional Help: If you are not comfortable with hardware, don’t attempt this. Take your laptop to a professional repair shop.
Attempting this step carries risks.
11. Operating System Conflicts: The Silent Culprit
Sometimes, the issue can be caused by some operating system conflicts.
- Run Windows Troubleshooter: Go to Settings > System > Troubleshoot > Other troubleshooters and run the "Recording Audio" troubleshooter. The troubleshooter will automatically identify and fix any problems.
- Latest Operating System Version: Make sure your operating system is up to date.
12. Resetting Your Dell Laptop: The Nuclear Option
Important: This will erase your data, so back up everything first. This should be your last resort.
- Windows' Reset Feature: Go to Settings > Update & Security > Recovery.
- Reset This PC: Click "Get Started." Choose whether to keep your files or remove everything.
This is like hitting the ultimate reset button.
13. Consider Environmental Factors: Reducing Noise
Sometimes noise is affecting your microphone input, for example:
- Reduce Background Noise: Use a quiet environment.
- Headset Considerations: Using a headset can improve the recording quality and eliminate all background noise.
14. Software Conflicts: Compatibility Issues
- Compatibility Issues: Uninstall any recently installed applications that use the microphone, such as virtual camera applications, audio processing software, or any application that may cause a conflict with the built-in microphone.
- Reinstall Drivers: Reinstall the audio drivers from the Dell website.
15. Professional Assistance: When to Call the Experts
If nothing works, it's time to admit defeat (temporarily).
- Dell Support: Contact Dell's customer support. They have specialized knowledge of their products.
- Local Tech Repair: Find a reputable local computer repair shop.
They have the expertise to diagnose and fix complex issues.
Closing Thoughts: Mic Mastery Achieved!
Well, there you have it! We've navigated the treacherous waters of dead Dell laptop microphones, armed with a treasure map of troubleshooting steps. Hopefully, by now, your voice is soaring through the virtual airwaves, and your mic is back in action. Remember, tech problems are like puzzles. Piece by piece, you can usually solve them. And if you're still struggling, don't hesitate to reach out to the experts. So go forth, conquer those audio woes, and keep chatting!
1) Principal Keywords: Dell Mic Fix, Repair
2) SEO Headline: Dell Mic Dead? Fix It! Easy Repair Steps
3) Pathway: Dell Mic Repair
**4) Meta Summary: Dell laptop microphone not working? Quick fix steps to repair your Dell mic! Update drivers, check
Laptop Speaker Dead? 😱 This FIX Will SHOCK You!Fix Microphone Not Working on Windows 10

By The Geek Page Fix Microphone Not Working on Windows 10 by The Geek Page
How to Fix Audio on Dell Computer Official Dell Tech Support

By Dell Support How to Fix Audio on Dell Computer Official Dell Tech Support by Dell Support
Fix DELL Laptop Audio Sound Not Working

By Murugan S Fix DELL Laptop Audio Sound Not Working by Murugan S
Title: How to Fix Microphone Isnt Working on Dell Laptop & How to Get Back Dell Audio Windows 11 & 10
Channel: Tech Tales
How to Fix Microphone Isnt Working on Dell Laptop & How to Get Back Dell Audio Windows 11 & 10 by Tech Tales
Change Wifi Settings
Dell Laptop Mic Dead? FIX It NOW! (Easy Steps)
Experiencing audio input woes with your Dell laptop? A microphone malfunction can be a frustrating interruption to your workflow or entertainment. Fortunately, resolving a dead microphone on a Dell laptop is often within reach. This comprehensive guide provides effective, actionable steps to diagnose and rectify the issue, ensuring your laptop’s microphone functions flawlessly.
Initial Assessment: Pinpointing the Problem
Before diving into solutions, a methodical approach is crucial. Establishing the source of the microphone failure is paramount. Eliminate common culprits before proceeding to more complex troubleshooting.
Hardware Check: Begin with a physical inspection. Ensure your microphone (internal or external) isn't visibly damaged. Examine the microphone input jack if using an external microphone for any bent pins or debris. Gently unplug and replug external microphones to confirm a secure connection. If using a headset, inspect the cable for damage.
Software Silence: Mute settings can be a hidden cause. Check your volume mixer (right-click the speaker icon in your system tray) for accidental microphone muting. Also, review the audio settings within the application you are using (e.g., Zoom, Skype, etc.) to confirm the correct microphone is selected and not muted.
System Restart: The simplest, yet often overlooked, solution: restart your Dell laptop. A simple reboot can resolve temporary software glitches or driver conflicts that may be affecting your microphone's functionality.
Driver Diagnostics: The Digital Backbone
Drivers are the software intermediaries between your hardware and operating system. Outdated, corrupted, or missing drivers are frequent causes of microphone malfunctions.
Device Manager Examination: Access the Device Manager (search for it in the Windows search bar). Expand “Audio inputs and outputs” and “Sound, video and game controllers.” Look for any devices with an exclamation mark or a downward-pointing arrow—these indicate driver issues.
Driver Updates: Right-click on your microphone device in the Device Manager. Select "Update driver." Choose "Search automatically for drivers" to let Windows attempt to find and install the latest drivers. If this fails, try "Browse my computer for drivers" and manually locate the driver files (often found on Dell's support website).
Driver Reinstallation: If updating fails, consider uninstalling and reinstalling the microphone drivers. Right-click the device, select "Uninstall device," and confirm. Restart your laptop, and Windows should automatically attempt to reinstall the drivers. If not, visit the Dell Support website (enter your service tag) to download and install the appropriate drivers.
Privacy Permissions: Unblocking the Audio Gates
Modern operating systems often implement privacy controls that can restrict microphone access for applications.
Microphone Privacy Settings: Open "Settings" (search for it in the Windows search bar). Navigate to "Privacy" and then "Microphone." Ensure the "Microphone access for this device" is enabled. Also, verify that individual applications are granted permission to use the microphone by toggling the "Allow apps to access your microphone" option to "On".
Application-Specific Permissions: Some applications require explicit microphone access within their settings. For example, in Skype, ensure the correct microphone is selected in its audio settings and that microphone access is enabled.
Hardware Troubleshooting: Beyond the Software Horizon
If software solutions prove ineffective, the issue might be hardware-related. While more complex, certain hardware checks can be performed.
Microphone Testing: If your Dell laptop has an internal microphone and a headset microphone, test both. If one works and the other doesn't, it indicates a problem with the non-functional microphone or its associated port.
External Microphone Test: If using an external microphone, try it on another device (e.g., another laptop or smartphone) to ensure the microphone itself is working. This eliminates the possibility of a faulty microphone.
Headphone Jack Inspection: For combo jacks (mic/headphone), look for dust or debris obstructing the connection. A can of compressed air can be used to gently clean the port.
BIOS Configuration: The Foundation Level
The Basic Input/Output System (BIOS) is the firmware that initializes your hardware during startup. Occasionally, microphone settings may be disabled within the BIOS.
- BIOS Access: Restart your Dell laptop and repeatedly press the key specified for BIOS access (typically Del, F2, F12, or Esc) during startup. The key varies per model; refer to your Dell laptop’s documentation.
- Audio Settings: Navigate to the BIOS settings. Look for an "Audio" or "Integrated Devices" section. Ensure that the internal microphone is enabled. Specific settings vary by model, so carefully review the available options.
- Save and Exit: Once you've made any necessary changes, save the BIOS settings and exit. Your laptop will restart.
Audio Enhancements and Interference: Fine-Tuning your Sound
While often helpful, audio enhancements can sometimes interfere with microphone functionality. Additionally, electrical interference may cause audio problems.
- Disable Enhancements: Right-click the speaker icon and select “Sounds”. Go to the “Playback” tab, right-click your output device (speakers/headphones), and select “Properties”. Then on the “Enhancements” tab, uncheck all enabled enhancements and apply the setting. If you see an enhancement tab for the microphone, disable any enhancements there, too.
- Reduce Interference: Move your laptop away from potential sources of electromagnetic interference, such as other electronics, speakers, or power cables.
- Test in a Quiet Environment: Noise can sometimes mask microphone problems. Test the microphone in a quiet environment to isolate the issue.
Dell Specific Solutions: Tailored Approaches
Dell laptops often have specific software or diagnostic tools that can help resolve microphone issues.
- Dell SupportAssist: Dell SupportAssist is a preinstalled application or downloadable software that offers diagnostic tests. Run the audio tests to diagnose the microphone problem. Support Assist can also automatically update drivers.
- Dell Audio Drivers: Ensure you have the latest Dell audio drivers installed specifically for your laptop model. These are typically found on the Dell support website using your service tag.
- Run the Hardware Troubleshooters: Windows has built-in troubleshooters that can help identify problems. Navigate to Settings, then Update & Security, then Troubleshoot, and run the audio troubleshooter.
Factory Reset: The Ultimate Resort
As a last resort, if all else fails, a factory reset can restore your laptop to its original state, potentially resolving deeply rooted software conflicts.
- Backup Data: Important: A factory reset erases all data on your hard drive. Back up your important files before proceeding.
- Reset Process: Access the reset options through "Settings," then "Update & Security," then "Recovery." Select "Reset this PC" and follow the on-screen instructions. Choose to keep your files or remove everything, based on your preference.
- Reinstall Software: After the reset, reinstall the necessary software, including the Dell Audio drivers and any applications that use the microphone.
Preventative Measures: Maintaining Audio Excellence
Preventing microphone malfunctions is easier than fixing them. Following preventive measures will improve your experience.
- Regular Driver Updates: Regularly update your Windows operating system and your Dell laptop’s drivers (especially audio drivers) through Windows Update or the Dell support website.
- Avoid Malware: Viruses and malware can damage your system and affect audio devices. Use reputable antivirus software and scan regularly.
- Physical Care: Handle your laptop with care, avoiding physical damage to the ports, jacks, and internal microphone.
- Cleanliness: Keep your laptop clean. Dust and debris can accumulate in ports and hinder connections.
Professional Assistance: Knowing When to Seek Help
While this guide covers extensive troubleshooting steps, sometimes the problem requires professional attention.
- Hardware Failure: If you suspect internal hardware failure (e.g., a broken microphone component), contact Dell support or a qualified computer repair technician.
- Persistent Software Issues: If the troubleshooting steps do not resolve the issue, especially after a factory reset, advanced technical assistance may be required.
- Warranty Considerations: If your Dell laptop is still under warranty, contact Dell support for assistance and potential repair or replacement.
By systematically following the steps outlined in this comprehensive guide, you can diagnose and resolve most microphone issues on your Dell laptop. From basic checks to advanced driver management and potentially a factory reset, this article gives you the tools to restore your audio functionality, allowing you to communicate effortlessly.
