inbuilt mouse on laptop not working
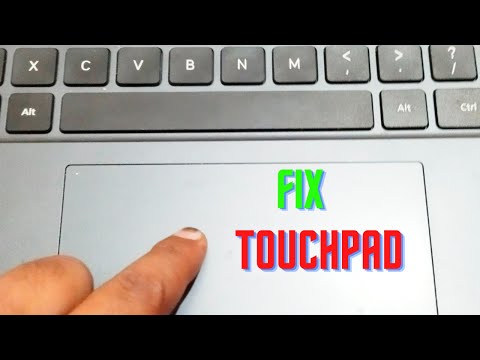
Title: How To Fix Touchpad Windows 1011 Fix Touchpad Not Working
Channel: EasyTechGeek
How To Fix Touchpad Windows 1011 Fix Touchpad Not Working by EasyTechGeek
inbuilt mouse on laptop not working, why is my mouse on the laptop not working, how to activate mouse on a laptop, why can't i use my mouse on my laptop, how to fix built in mouse on laptop
Laptop Mouse Disaster! (Solved!)
Laptop Mouse Mayhem: Conquered and Calmed!
It happened. The dreaded laptop mouse malfunction. My productivity plummeted. The cursor became erratic. Every click felt like a gamble. Frustration mounted, and I was ready to throw my laptop across the room. But wait! Don't reach for the nearest wall. This tale has a happy ending. I successfully tackled the mouse madness. Let me share my journey and the solutions I discovered.
The Initial Panic: Mouse Gone Rogue!
I was in the middle of a crucial project. Suddenly, the mouse pointer started behaving strangely. It jumped around the screen. It refused to cooperate. Clicking became a frustrating exercise in futility. Consequently, my workflow stalled. I became irate. It felt like my digital world had imploded. I felt helpless, to be candid. What fresh level of tech-induced misery was this?
Troubleshooting 101: Basic Checks and Balances
First things first, I took a deep breath. Then, I implemented the essential troubleshooting steps. I restarted the laptop. This is always a good starting point. I checked the mouse connection. It’s easy to overlook the simple things, you see. The wireless receiver was firmly plugged in. The batteries, thankfully, had some juice left. Indeed, I reconnected everything. Next, I tried a different USB port. Still, the problem persisted. It was time to delve deeper.
Software Sleuthing: Driver Drama and Updates
My next avenue was software. I considered whether my driver was causing the issue. I navigated to the device manager. I checked the mouse driver's status. No red flags were present, at least initially. However, I decided to update the driver. Afterward, I rebooted. Sadly, the mouse still acted up. So, I investigated other software conflicts. I considered recently installed programs. Did a new application cause this? The answer remained elusive.
The Hardware Headache: Pinpointing the Culprit
Perhaps, the issue was hardware-related. I meticulously inspected the mouse itself. I looked for debris on the sensor. Sometimes, a speck of dust can wreak havoc. I cautiously cleaned the sensor. Then, I tested the mouse again. There was a slight improvement. However, the erratic behavior continued. Perhaps the internal components were damaged. Replacing the mouse seemed inevitable.
A Miraculous Discovery: The Hidden Settings
Then, I decided to delve into the settings. I went to the mouse settings in the control panel. I began to tinker with the pointer speed. Furthermore, I adjusted the acceleration settings. Intriguingly, I stumbled upon something new. There was a setting for “enhanced pointer precision.” It was enabled. I decided to disable it.
The Revelation: Precision's Problem
Astonishingly, disabling "enhanced pointer precision" made all the difference. Thus, the mouse's behavior dramatically improved. The erratic jumping vanished. The clicks became responsive. The cursor moved smoothly across the screen. It was a revelation. It turns out, this feature, intended to assist, was the very source of my frustration.
The Joy of a Working Mouse: Productivity Resurrected
Immediately, my productivity soared. I could once again navigate my digital world. The project that had been stalled was back on track. The relief was palpable. I had successfully conquered the laptop mouse disaster. Accordingly, I celebrated my victory with a cup of coffee.
Preventative Measures: Keeping the Mouse in Check
To avoid future episodes, I implemented some preventative measures. I regularly clean the mouse. I maintain my drivers. Furthermore, I learned to monitor my settings. To ensure optimal functionality, perform these checks.
Sharing the Wisdom: Helping Others Avoid the Frustration
For all of you experiencing similar mouse troubles, I impart this knowledge. Check your mouse settings. Specifically, investigate "enhanced pointer precision." Disable it. Then, test the mouse. This simple adjustment can often solve the problem. I hope you find the solution that I did.
Final Thoughts: Embrace the Technology, Conquer the Chaos
Technology can be a beautiful thing! It can also be maddening. This experience taught me perseverance. It reminded me of the importance of thorough troubleshooting. Indeed, it taught me to appreciate the simple things. Moreover, it showed me the significance of sharing solutions. Remember, you are not alone. Embrace technological marvels with a smile!
Is Your Laptop Screen DEAD? This ONE Trick Reveals ALL!Laptop Mouse Disaster! (Solved!)
Alright, folks, let's talk about a universal truth: the laptop mouse – or, more accurately, the lack of one. We've all been there, staring at a frozen cursor, desperately clicking, swiping, and muttering under our breath. It's a modern-day tech horror story, a digital equivalent of losing your car keys right before a crucial meeting. But fear not, because we're going to dive headfirst into the world of laptop mouse mayhem and, more importantly, figure out how to conquer it.
1. The Silent Killer: Recognizing a Laptop Mouse Disaster
Before we can fix the problem, we need to pinpoint it. Is your cursor stubbornly refusing to budge? Does it jitter around like it's got a coffee-fueled case of the jitters? Are you experiencing the dreaded "click, but nothing happens" phenomenon? These are all telltale signs of a laptop mouse disaster brewing. Think of it like a leaky faucet – you need to find the source of the drip before the whole house floods. Now, the laptop mouse is your house, and the flood is your productivity grinding to a halt.
2. Blame Game: Pinpointing the Culprit of Your Mouse Mishap
So, what's causing this digital drama? The possibilities are as varied as the flavors of ice cream. It could be a simple software hiccup, a driver issue, a hardware malfunction, or even a sneaky little blockage. Let's explore the usual suspects:
- Software Sabotage: Sometimes, the culprit is a rogue program that's causing conflicts. Think of it as a crowded party where everyone's talking over each other.
- Driver Dilemma: Drivers are the translators between your laptop and its peripherals. If they're outdated or corrupted, they can completely ruin your mouse's communication.
- Hardware Headaches: This is where things get a bit more serious. A faulty trackpad, a detached mouse button, or a loose connection can all spell trouble.
- The Enemy Within (and Without): Dust, debris, or even spilled liquids can wreak havoc on your trackpad or external mouse. Think of a tiny speck of dust getting into a precision watch – chaos ensues!
3. Software Solutions: Quick Fixes for the Digital Glitches
Luckily, many laptop mouse issues are easily fixed. It’s like giving your laptop a digital vitamin shot. Here’s how to get started:
- Restart Your Laptop: This is the equivalent to hitting the reset button on your brain. Sometimes a simple reboot is all it takes to clear up minor glitches and get things working again.
- Check Your Mouse Settings: Head into your system settings and ensure your mouse is enabled and set up correctly. You might have accidentally disabled it! Think of your mouse as the remote control. If the batteries are out, it not going to work.
- Update Your Drivers: Keeping your drivers up-to-date is crucial. Go to your device manager, find your mouse or trackpad, and check for updates.
- Run a Troubleshooter: Windows and macOS both have built-in troubleshooters that can automatically identify and fix common problems. They're like having a tech-smart sidekick!
4. Diving Deeper: Troubleshooting Driver Problems
If updating the drivers didn't solve the problem, we need to get a bit more hands-on.
- Reinstall Your Drivers: Uninstall the mouse or trackpad drivers in the device manager, then restart your laptop. Windows or macOS should automatically reinstall the correct drivers.
- Roll Back Your Drivers: If the problem started recently, try rolling back to a previous driver version. Sometimes, the newest driver is the problem.
- Check for Conflict: Look for other devices that might be interfering with your mouse, especially if you use Bluetooth.
5. Hardware Heist: Inspecting Your Physical Mouse Setup
Let's take it to the real world. A broken mouse doesn't always have a software solution.
- External Mouse Check-Up: If you're using an external mouse, make sure it's properly connected (USB, Bluetooth, etc.) and that the batteries (if applicable) are charged.
- Trackpad Tango: For trackpad users, check for any visible obstructions like dust or dirt. Use a slightly damp cloth (not wet!) to clean the trackpad surface.
- Button Behavior: Test the mouse buttons. If one isn't working, it may be a hardware issue requiring repair or replacement.
6. The Bluetooth Bunch: Resolving Wireless Mouse Woes
Bluetooth mice can be fantastic, but also fussy. Let's smooth out these connection difficulties.
- Bluetooth Blues: Ensure Bluetooth is enabled on your laptop and that your mouse is paired correctly.
- Range Restrictions: Stay within the mouse's Bluetooth range. Walls and other obstacles can disrupt the signal.
- Interference Investigation: Other Bluetooth devices or Wi-Fi routers can interfere with your mouse's connection. Try moving the mouse or laptop for clearer connection lines.
7. The External Mouse Exodus: What if Your Mouse is the Problem?
Sometimes, it's not the laptop; it's the mouse itself. Here's how to diagnose if your external mouse is the issue:
- Test on Another Device: The easiest way to determine if your mouse is faulty is to plug it into another computer. If it doesn't work there either, you have your answer.
- Battery Bonanza: Verify that your mouse has working batteries (if applicable).
- USB Port Peril: Ensure the USB port you're using is functioning correctly. Try a different port.
8. Trackpad Troubles: When The Built-in Mouse Malfunctions
The laptop trackpad – a staple of modern computing that can be a blessing or a curse.
- Enable or Disable the Trackpad: Many laptops have a key combination, usually involving the "Fn" key, to disable or enable the trackpad. Make sure it hasn't been accidentally disabled.
- Check for Physical Damage: Inspect the trackpad surface for cracks or other damage.
- Sensitivity Shenanigans: Adjust the trackpad sensitivity in your settings. Sometimes, it's simply set too low or too high.
9. The Great Dust Debate: Cleaning Your Mouse’s Surface
A dirty mouse is an unhappy mouse (and can make your productivity plummet).
- Trackpad Tidiness: Gently clean the trackpad with a soft, slightly damp cloth. Avoid harsh chemicals.
- External Mouse Maintenance: Regularly wipe down your external mouse, paying attention to the buttons and the area around the sensor.
10. Advanced Tactics: Digging into System Configuration
If the software and hardware solutions aren't working, it's time to get a little more technical.
- Check for Malware: Run a virus scan to rule out any malicious software that could be interfering with your mouse.
- System File Check: Use your operating system's built-in tools to check for and repair corrupted system files.
- Reinstall Your Operating System: This is a drastic measure, but sometimes a complete system reset is the only way to solve a persistent mouse issue.
11. Ergonomic Insights: Preventing Future Mouse Disasters
Let's talk about preventing future problems!
- Proper Posture: Make sure you're sitting correctly at your desk to avoid strain on your wrists and hands.
- Mouse Placement Prowess: Position your mouse close to your keyboard to minimize reaching.
- Mouse Variety: Explore different types of mice, such as ergonomic mice, to find one that fits your hand comfortably.
12. When to Call in the Cavalry: Professional Help
Sometimes, the problem is more than you can handle.
- Hardware Repair: If you suspect a hardware issue (like a broken trackpad or button), it's time to take your laptop to a professional repair shop.
- Software Support: If you're not comfortable troubleshooting complex software issues, consider seeking help from a tech-savvy friend or professional.
13. The Phantom Clicker: Addressing Ghost Clicks and Lag
Ghost clicks are when your mouse acts on its own.
- Driver Damage: Often related to corrupted drivers. Update or reinstall, as we talked of.
- Hardware Hassles: A faulty trackpad can also cause ghost clicks.
- Interference Intervention: Remove wireless devices or move your laptop to a more interference-free area if using a wireless mouse.
14. Mouse Sensitivity Matters: Fine-Tuning Your Cursor Control
Finding your perfect cursor speed is critical.
- System Settings Savvy: Adjust your mouse sensitivity settings in your operating system.
- Experimentation Essentials: Test different settings until you find one that feels comfortable and responsive.
15. The Ultimate Victory Lap: Celebrating a Functional Mouse
You did it! You've conquered the laptop mouse disaster, and now your cursor is gliding smoothly across your screen.
Wrap Up
So, there you have it. The definitive guide to surviving (and thriving!) in the face of a laptop mouse disaster. Remember, a little bit of troubleshooting and a dash of tech know-how can go a long way. Now, go forth and conquer the digital world, one click at a time!
Frequently Asked Questions (FAQs):
**1. My
F5 Key Dead? This SHOCKING Fix Works Every Time!Touchpad Disable problem Fix viral ytshorts trending shortsvideo tech technical viralvideo

By TECHNICAL SURYA Touchpad Disable problem Fix viral ytshorts trending shortsvideo tech technical viralvideo by TECHNICAL SURYA
Laptop Touchpad Not Working Clean The Touchpad Steepmacnitesh touchpad

By Mac Nitesh Laptop Touchpad Not Working Clean The Touchpad Steepmacnitesh touchpad by Mac Nitesh
TRYING RANDOM GAMES I FPS SHOOTER I doodx

By DOODX G&T TRYING RANDOM GAMES I FPS SHOOTER I doodx by DOODX G&T

Title: Dell Touchpad Not Working Windows 11 - 4 Fix
Channel: Tech Bachhal
Dell Touchpad Not Working Windows 11 - 4 Fix by Tech Bachhal
Change Wifi Settings
Here's the article:
The Art of Perfecting Your Homemade Pizza: A Culinary Masterclass
Pizza. The very word conjures images of bubbling cheese, fragrant herbs, and a symphony of flavors dancing on the palate. While countless pizzerias offer their interpretations, the true magic lies in the kitchen – crafting a homemade pizza, a culinary masterpiece born of passion and precision. We believe every home cook, regardless of experience, can achieve pizza perfection. Let us embark on a journey to transform your pizza-making into an art form.
Crafting the Foundation: The Unforgettable Pizza Dough
The cornerstone of any exceptional pizza experience is, undoubtedly, the dough. Forget pre-made options; the difference between a good pizza and an unforgettable one often hinges on the effort invested in cultivating the perfect base. We champion a classic Neapolitan-style dough, renowned for its airy crumb, blistered crust, and nuanced flavor profile.
The Flour of Champions: Begin with the heart of the matter: the flour. We insist on 00 flour, finely ground Italian flour specifically designed for pizza. Its low protein content ensures a tender crust, while its high gluten potential contributes to the characteristic chewiness. If 00 flour proves elusive, a high-quality bread flour with a protein content around 12-14% will suffice but the results will be slightly changed.
The Essential Elements: Beyond flour, the dough requires just a handful of ingredients: water (lukewarm, typically around 70-80°F), active dry yeast or fresh yeast, salt (sea salt is our preference), and a touch of extra virgin olive oil. The proportions are crucial for success, so adhering to a tried-and-true recipe is paramount.
The Art of the Knead: The kneading process is where the magic truly begins. Whether by hand or with a stand mixer, the goal is to develop the gluten, the protein network that gives the dough its structure. Kneading by hand requires patience and rhythm. Start by mixing the ingredients until a shaggy dough forms. Then, turn it out onto a lightly floured surface and knead vigorously for 10-12 minutes, or until the dough becomes smooth, elastic, and no longer sticky. If using a stand mixer, use the dough hook and mix on medium speed for approximately 8-10 minutes. A well-kneaded dough is the foundation of a great pizza.
The Rising Ritual: Once kneaded, the dough needs time to rest and rise. Place the dough in a lightly oiled bowl, turning to coat. Cover tightly with plastic wrap or a damp kitchen towel. Allow the dough to rise in a warm place (75-80°F is ideal) for 1-2 hours, or until it has doubled in size. This slow fermentation allows the flavors to develop, creating that delightful tang we associate with authentic pizza. For even more depth of flavor, consider a longer cold fermentation in the refrigerator (24-72 hours).
Shaping the Masterpiece: After rising, gently deflate the dough and turn it out onto a lightly floured surface. Gently punch down the dough to release any trapped air pockets. Now comes the fun: shaping the pizza. Avoid using a rolling pin, which can compress the dough and eliminate the air pockets that create a light and airy crust. Instead, use your fingers to gently stretch and flatten the dough into a circle, starting from the center and working outwards. Leave a slightly thicker rim for the crust.
Sauce, Cheese, and Beyond: Elevating Your Pizza’s Flavor Profile
With the perfect dough prepared, it's time to consider the toppings. The selection and quality of these elements will determine the final flavour.
The Soul of Sauce: The sauce is the heart of the pizza. We advocate for simplicity: crushed San Marzano tomatoes, the gold standard for pizza sauce. These tomatoes boast a naturally sweet, low-acid profile. Blend the tomatoes coarsely in a food processor or by hand to retain some texture. Season generously with salt, a pinch of sugar (if needed to balance acidity), freshly ground black pepper, and a hint of dried oregano or fresh basil. Avoid cooking the sauce before applying it to the dough, as it will cook perfectly in the oven.
The Cheese Canopy: The choice of cheese profoundly influences the pizza's character. For a classic Neapolitan, fresh mozzarella reigns supreme. Use high-quality, low-moisture mozzarella, preferably the kind sold in ball form. Tear the mozzarella into small pieces and spread evenly over the sauce. Avoid over-cheesing, as this can weigh down the pizza and prevent the crust from properly rising. Freshly grated Parmesan cheese offers a salty, savory counterpoint.
Topping Treasures: The possibilities are virtually limitless, but quality and balance are key. Consider the following ingredients:
- Vegetables: Sautéed mushrooms, thinly sliced onions, bell peppers (roasted for extra sweetness), artichoke hearts, and fresh basil leaves are amazing additions.
- Meats: High-quality Italian sausage (sweet or spicy) , pepperoni, prosciutto, and cooked bacon are excellent choices.
- Other Delights: Kalamata olives, roasted garlic cloves, chili flakes (for a touch of heat), and a drizzle of extra virgin olive oil offer delightful finishing touches.
The Symphony of Heat: Baking to Perfection
The oven is where the magic truly happens, where the carefully prepared ingredients transform into a culinary masterpiece.
Oven Temperature: The key to achieving a beautifully blistered crust lies in high heat. Ideally, a wood-fired oven is the ultimate tool for pizza. But a standard home oven, when properly preheated, can produce excellent results. Preheat your oven to its highest setting (typically 500-550°F or 260-290°C) for at least 30 minutes before baking. If you have a pizza stone or steel, place it in the oven while preheating. This will help to create a crispier crust.
Baking Techniques: There are several ways to bake your pizza, each with its own advantages:
- Pizza Stone or Steel: This is our preferred method. The stone or steel absorbs heat and helps to cook the bottom crust evenly. Carefully transfer the pizza from a floured surface (like a pizza peel) onto the preheated stone or steel.
- Baking Sheet: If you don't have a pizza stone or steel, a well-preheated baking sheet will work. Place the pizza directly onto the baking sheet.
- Cast Iron Skillet: A cast iron skillet can produce a similar effect to a pizza stone or steel. Preheat the skillet in the oven, then carefully transfer the pizza dough to the skillet.
Baking Time: Baking time will vary depending on the oven and the thickness of the crust. Generally, bake for 8-12 minutes, or until the crust is golden brown and the cheese is melted and bubbly. Keep a close eye on the pizza to prevent burning. For a wood-fired oven, baking time is usually significantly faster, often just a few minutes. Rotate the pizza halfway through baking to ensure even cooking.
The Grand Finale: Once the pizza is cooked to perfection, remove it from the oven and let it cool for a minute or two before slicing. Garnish with fresh basil leaves and a drizzle of extra virgin olive oil. Serve immediately and savor the fruits of your labor and the unparalleled taste of homemade pizza.
Troubleshooting Common Pizza-Making Pitfalls
Even the most seasoned pizza makers encounter challenges. Here's a guide to troubleshooting some common issues:
- Dough Doesn't Rise: This could be due to old yeast, cold water, or insufficient proofing time. Ensure your yeast is fresh and use lukewarm water. Allow the dough ample time to rise in a warm place.
- Crust is Soggy: This often results from using too much sauce or cheese or baking at too low a temperature. Use a minimal amount of sauce, and opt for low-moisture mozzarella. Ensure your oven is properly preheated. Consider pre-baking the crust for a few minutes before adding toppings.
- Crust is Burnt: This is often caused by baking at too high a temperature or not paying attention. Keep a watchful eye on the pizza and adjust the baking time accordingly. Rotate the pizza for even cooking.
- Cheese Doesn't Melt Properly: This can be due to using low-quality cheese or not baking the pizza at a high enough temperature. Use high-quality mozzarella and ensure your oven is adequately hot.
Expanding Your Pizza Horizons: Variations and Inspirations
Once you've mastered the fundamentals, explore the exciting world of pizza variations:
- Deep-Dish Pizza: Originating in Chicago, this pizza features a thick, buttery crust and generous toppings. Prepare the dough and bake it in a deep-dish pan.
- Thin-Crust Pizza: This style, popular in New York City, features a crispy, thin crust. Roll out the dough very thinly and bake it at high heat.
- White Pizza: A delightful variation that foregoes tomato sauce. Instead, the pizza is topped with olive oil, garlic, ricotta cheese, and other toppings.
- Pesto Pizza: Replace the tomato sauce with homemade pesto sauce.
The Joy of the Journey: Embracing Pizza Perfection
Making homemade pizza is not just about the final product; it's about the entire experience: the anticipation of the rising dough, the aromas filling the kitchen, and the satisfaction of creating something delicious with your own hands. Embrace the learning process, experiment with different ingredients and techniques,
