cd/dvd drive not working on hp laptop

Title: CDDVD Drive Is Not Detected in Windows 10
Channel: TechFixIT
CDDVD Drive Is Not Detected in Windows 10 by TechFixIT
HP Laptop CD/DVD Drive Dead? FIX IT NOW!
HP Laptop CD/DVD Drive Blues? Breathe Easy!
Dealing with a non-functional CD/DVD drive on your HP laptop? It can be frustrating, no doubt. Firstly, don't panic. Secondly, we’ll troubleshoot the issue together. Consequently, getting it working again is often simpler than you think. Instead of rushing to purchase a new laptop, let's investigate your current situation.
Diagnose the Drive: Is It Really Dead?
Before we jump to conclusions, confirm the drive's actual state. Perhaps it’s a simple software glitch. For example, try to eject the drive using the physical button on your laptop. If nothing happens, proceed with further steps, and you will learn how to approach this issue. Consider restarting your laptop. After a reboot, sometimes the drive magically springs to life. This is a common fix! Also, try inserting a CD or DVD into the drive. Observe if it spins. Sometimes, the smallest things are the problem. If you hear no activity, it’s time to dig deeper. Furthermore, your specific model may have known issues. So, let us look into a few potential causes.
Software Solutions: Giving Your Drive a Helping Hand
Software conflicts are often the culprits. Therefore, updating or reinstalling drivers can resolve many issues. First, access the Device Manager. Search for it in the Windows search bar. Locate the DVD/CD-ROM drives section, typically under "DVD/CD-ROM drives." Right-click on your CD/DVD drive. Next, select "Update driver." Choose the option to search automatically for updated driver software. Windows will search for and install the latest drivers. If the update doesn’t work, uninstall the drive. Then, restart your laptop. Windows will automatically attempt to reinstall the correct driver.
Sometimes, the drive letter may be missing or incorrect. This is another possible issue. First, access Disk Management. You can search for it in the Windows search bar like before. Locate your CD/DVD drive in the list. Check whether a drive letter is assigned. If not, right-click the drive. Select "Change Drive Letter and Paths." Assign a drive letter from the available options. Remember, there are also several other options. For example, drivers may cause a problem. They may be outdated, corrupted, or simply incorrect for your system.
Hardware Troubleshooting: When Things Get Physical
Software isn’t always the problem. Occasionally, hardware malfunctions are the cause. First, verify the physical connection. Shut down your laptop and unplug it. This is exceptionally important for safety. Remove the battery if you can. Next, consult your HP laptop's service manual (search online for your specific model). Then, find instructions on how to access the CD/DVD drive. Carefully disconnect and reconnect the drive’s cable. This procedure can often solve connectivity issues.
Dust and debris accumulation can hinder performance. Additionally, carefully clean the drive's lens using compressed air. The CD drive may be dirty. Use a cotton swab and isopropyl alcohol (for lens cleaning). Gently clean the lens, ensuring you are extremely careful. Be gentle. Otherwise, you might make things worse. Also, inspect the drive for any signs of physical damage. This can be in the form of scratches or cracks. If the drive is damaged, you may need to replace it.
Beyond Basic Fixes: Advanced Troubleshooting
If the basic steps fail, you might need to explore more advanced options. Check for BIOS Updates. An outdated BIOS can cause hardware compatibility problems. Visit the HP support website. Then, select your laptop model. Download and install the latest BIOS update. Follow the on-screen instructions carefully. Because this is an important procedure.
Consider a system restore. If the drive recently stopped working, a system restore might help. It reverts your system to a previous state. Choose a restore point prior to when the issue began. Be aware this will erase your downloads since then. This can resolve conflicts caused by recent software installations. However, remember that you will likely lose recent data.
External Drive: A Temporary or Permanent Solution
If all else fails, an external CD/DVD drive will work. These are relatively inexpensive. You simply connect it via USB. It provides a functional solution. Also, that lets you continue to use CDs and DVDs until you can find a more permanent fix. This is a fast and simple solution. In addition, many people prefer this option.
Preventative Measures: Keeping Your Drive Healthy
Proper care will extend your drive's lifespan. Avoid inserting damaged or dirty discs. Doing so can cause damage to the drive mechanism. Keep your laptop clean. This will prevent dust buildup. Regularly clean the drive lens. Finally, handle discs carefully. These simple steps can significantly extend the life of your drive.
The Final Verdict: Success or Replacement
Sometimes, despite our best efforts, the drive is beyond repair. If this is the case, there are other options. Consider replacing the drive. Replacement drives are available. These are often inexpensive. Alternatively, consider using an external drive, as we discussed. This is a perfectly valid solution. By following these steps, you’ll have a functional CD/DVD drive again, or at least a plan to gain one soon. And, therefore you can utilize your CD/DVD drive again.
Unlock Adventure: Connecting Your Laptop to the FrameWorks Database!HP Laptop CD/DVD Drive Dead? FIX IT NOW!
Hey there, fellow tech travelers! Ever feel that sinking feeling when your HP laptop’s CD/DVD drive just… gives up? It’s like the digital equivalent of discovering your favorite record player has kicked the bucket. Suddenly, those precious memories stored on CDs, the software installation discs you absolutely need, and maybe even that nostalgic DVD collection feel like they're trapped in a digital purgatory. Don't worry, though! We’ve all been there. And the good news is, often, it's not a death sentence. We can usually revive that optical drive and get you back in the game. Think of us as the tech superheroes of the everyday digital world, here to rescue you from the impending doom of a non-functional drive!
1. The Silent Treatment: Recognizing the Signs of a Defunct Drive
Before we dive into the fix-it-now part, let’s make sure we’re on the same page. How do you know your HP laptop's CD/DVD drive is actually dead? Well, it’s usually not a subtle affair. Here are some telltale signs:
- No acknowledgment: You insert a disc, and… crickets. No whirring, no spinning, no trying to read. Just silence.
- Error messages galore: You might get a cryptic "drive not found" error, a message about an inaccessible CD, or perhaps the dreaded "hardware failure."
- Ejection woes: The drive won't eject the disc, either mechanically (the button does nothing) or digitally (clicking the eject icon has no effect).
- Disappearing act: The drive simply vanishes from your "This PC" or "My Computer" list, acting like it's not even there.
If any of these apply, and the drive used to work fine, it’s time to investigate. It's like forgetting where you parked, except the car is your data, and the parking lot is your laptop.
2. Is It Really Dead? Ruling Out the Obvious Blunders
Before we assume the worst, let’s do a quick reality check. Sometimes, the fix is simpler than you imagine. It’s like discovering the car wouldn't start, only to realize it had run out of gas.
- The Disc Dilemma: Is the disc itself the problem? Try a different CD or DVD. Maybe it’s scratched, damaged, or simply dirty.
- The Reboot Remedy: A good old-fashioned restart can work wonders. It can clear temporary glitches and reset the system, giving your drive a fresh start. Think of it as a digital nap!
- Driver Drama: Sometimes, a driver update can resolve the issue. Head to your HP support page (we'll get to that!) and download the latest drivers for your CD/DVD drive and your specific laptop model.
- Check the Connection: If you’re comfortable, and your laptop allows it (some are sealed), check the internal connections. Loose cables can be a common culprit in desktop PCs, but less common in laptops, as they're built to be more durable. Proceed with caution if you choose to explore this option.
3. HP's Support Page: Your Digital Doctor
This is your first port of call. It's the digital hospital where your laptop gets treated. HP has an excellent support site, and for most problems, it's a goldmine of information.
- Find Your Model: You will need your laptop's specific model number. This is usually found on a sticker on the bottom or inside the battery compartment. It's like finding the blueprint.
- Navigate the Support: Once you find your model, search for "CD/DVD Drive Issues" or similar terms. You’ll find troubleshooting guides, driver downloads, and FAQs.
- Use the Diagnostic Tools: HP often provides diagnostic tools that can automatically detect and fix common issues. Think of it as a digital check-up.
4. Driver Updates: The Digital Tune-Up
Drivers are like the communication translators between your laptop and its hardware. Sometimes, they get out of sync. Updating them can be like giving your car a much-needed tune-up.
- Manual Update: Go to the HP support site, find your model, and locate the drivers section, then select the drive-related drivers. Download and install the latest version.
- Device Manager: A Driver's Hub: Access the Device Manager (search for it in the Windows search bar). Locate your CD/DVD drive (it might be listed under "DVD/CD-ROM drives"). Right-click on it and select "Update driver." Windows will search for the newest version.
- Consider Reinstalling: If an update doesn't work, try uninstalling the drive in Device Manager (right-click, "Uninstall device") and then restarting your laptop. Windows should automatically try to reinstall the driver.
5. Troubleshooter Time: Let Windows Take a Crack at It
Windows has built-in troubleshooters designed to fix common problems. Think of it as a digital handyman.
- Access the Troubleshooter: Go to "Settings" (Windows key + I) > "Update & Security" > "Troubleshoot."
- Hardware and Devices: Look for the "Hardware and Devices" troubleshooter. Run it. Windows will scan for any hardware issues and attempt to fix them.
6. The Registry Check: A Little Techie Touch
This is a more technical step, so proceed with caution. The registry is like the control panel of your operating system. A corrupted entry can sometimes cause drive problems.
- Open the Registry Editor: Type "regedit" in the Windows search bar and open the Registry Editor.
- Navigate the Path: Navigate to the following key:
HKEY_LOCAL_MACHINE\SYSTEM\CurrentControlSet\Control\Class\{4D36E965-E325-11CE-BFC1-08002BE10318} - Check for UpperFilters and LowerFilters: In the right-hand pane, look for entries named "UpperFilters" and "LowerFilters." If they exist, delete them. Reboot. Be very careful when working with the registry. One wrong move can cause serious problems. Back up your registry before making changes.
7. Physical Inspection (With Caution!)
This is where you might want to open up your laptop. (If you're not comfortable, don't! It's better to take it to a professional). However, it can sometimes be done, but only if you're comfortable with this degree of diagnostics.
- Power Off and Unplug: First and foremost, power off and unplug your laptop. Remove the battery if possible. Safety first!
- Locate the Drive: Find the screw holding the drive in (consult your laptop's manual).
- Carefully Remove the Drive: Sometimes, you might simply have to reseat the drive or clean the laser with a soft, dry cloth. Do so with extreme care.
8. Cleaning the Lens: Like Giving Your Glasses a Wipe
Sometimes, the laser lens gets dusty. Cleaning it is like wiping your glasses clear for better vision.
- Disc Cleaners: You can buy specialized CD/DVD drive cleaner discs. These often have a cleaning solution and tiny brushes to gently clean the lens.
- Gentle Cleaning: Never use harsh chemicals. A small amount of isopropyl alcohol on a cotton swab can be employed with immense care. Gently wipe the lens (if you can access it—see #7).
9. Firmware Flashing: The Tech Upgrade
Firmware is like the drive’s internal software. An outdated firmware can sometimes cause problems.
- Check HP Support: Go back to the HP support site for your model. Look for firmware updates specifically for your CD/DVD drive.
- Follow Instructions Carefully: The flashing process is usually straightforward, but follow HP's instructions and back up your data beforehand. Firmware glitches can be as dangerous as a rollercoaster malfunctioning on an uphill inclimation.
10. The External Drive Option: A Temporary Lifesaver
If all else fails, consider an external CD/DVD drive. They’re inexpensive and plug in via USB. Think of it as a life raft in a digital storm.
- Easy Setup: Plug it in, and Windows usually recognizes it immediately.
- Compatibility: Works with almost any laptop.
- Long-Term Solution: It can keep you going while you figure out a permanent fix, such as replacing the internal drive.
11. Hardware Replacement: If All Else Fails
Sometimes, the drive is simply dead. It's like a car engine seizing: nothing can be done.
- Replacement Drive: You can buy a replacement drive. Ensure it is compatible with your laptop model. Check online retailers.
- Professional Help: If you're not comfortable with the replacement, take your laptop to a repair shop. This option may be your best bet.
12. Data Recovery Considerations: Saving Those Memories
If you have data on discs that you need to get off, consider using a data recovery service.
- Professional Services: They have specialized tools that can often retrieve data even from damaged discs.
- Backup is Key: This is a reminder to back up your data
DVD CD-ROM drives not showing in device manager fix DVD drive not listed in device manager

By troubleshooterrors DVD CD-ROM drives not showing in device manager fix DVD drive not listed in device manager by troubleshooterrors
CD DVD Drive Not Reading Discs in Windows 10 11 Fixed

By Tips Howto CD DVD Drive Not Reading Discs in Windows 10 11 Fixed by Tips Howto
How to Solve CD-ROM or DVD Drive not working in Windows
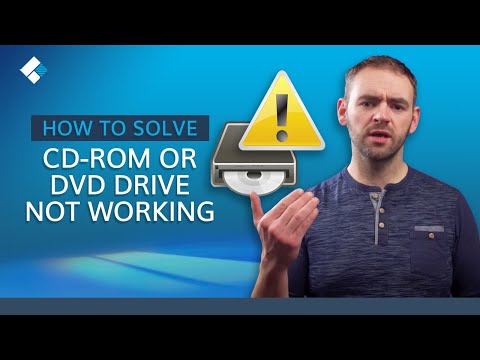
By Wondershare Recoverit Data Recovery How to Solve CD-ROM or DVD Drive not working in Windows by Wondershare Recoverit Data Recovery

Title: DesktopPC CD Drive Not Working Problem CD Drive onOff Button Not Workingmacnitesh2023shorts
Channel: Mac Nitesh
DesktopPC CD Drive Not Working Problem CD Drive onOff Button Not Workingmacnitesh2023shorts by Mac Nitesh
Laptop Wifi Connect
HP Laptop CD/DVD Drive Dead? FIX IT NOW!
If you are currently wrestling with an HP laptop whose CD/DVD drive has decided to stage a permanent sit-in, you've arrived at the right digital sanctuary. We understand the frustration. That moment when you insert a disc, anticipating a symphony of data retrieval, only to be met with the cold, hard silence of a dysfunctional drive. Fear not, fellow tech traveler. The situation, though inconvenient, is often rectifiable. Here, we'll navigate the labyrinth of potential causes and provide solutions, arming you with the knowledge to resurrect your optical drive and restore its functionality. Let's embark on this journey of digital restoration.
Diagnosing the Issue: Pinpointing the Culprit
Before we plunge into troubleshooting, let's establish a clear understanding of the problem. A "dead" CD/DVD drive can manifest in several ways, each pointing to a different potential source of the malady. Is the drive completely unresponsive, showing no signs of life whatsoever? Does it attempt to read a disc, only to fail and eject it? Or, does the drive appear to operate, but the laptop fails to recognize the inserted media? Accurately diagnosing the issue is the first step towards a successful recovery.
Software Conflicts: The Digital Saboteurs
Sometimes, the culprit isn't a hardware failure but a software skirmish. Certain applications, especially those involving disc imaging or virtualization, can interfere with the operation of your CD/DVD drive. These programs might be unintentionally hijacking the drive's resources or creating compatibility issues.
- Driver Problems: Obsolete or corrupted drivers are common offenders. Drivers are the software translators that allow your operating system to communicate with the hardware. An outdated driver might not be fully compatible, leading to erratic behavior or complete failure. To address this, navigate to the Device Manager (search for "Device Manager" in the Windows search bar). Expand the "DVD/CD-ROM drives" section. If you see any warning icons next to your drive, this is a strong indicator of a driver problem. Right-click on the drive and select "Update driver." Choose the option to search automatically for updated driver software. If this doesn't resolve the issue, try uninstalling the drive from Device Manager (right-click and select "Uninstall device") and then restarting your laptop. Windows will often reinstall the correct driver upon restart.
- Filter Driver Interference: Occasionally, filter drivers, which are designed to enhance functionality or security, can conflict with the optical drive. These can be tricky to identify, but a system restore to a point before the problem began can often resolve the conflict. Be aware that this will revert other installed software to an earlier state.
- Malware or Malicious Software: In rare cases, malware can interfere with the proper function of hardware. Run a full system scan with your preferred antivirus software to eliminate or at least isolate this possibility.
Hardware Inspection: Checking the Physical Realm
If software solutions prove ineffective, it's time to delve into the physical aspects of the drive. While HP laptops are generally robust, physical damage or mechanical failure can occur.
- Loose Connections: If you are comfortable with hardware repairs, the first step is to ensure that the drive is properly connected to the motherboard internally. This involves disassembling some parts of the laptop, which can be delicate. If you decide to proceed, disconnect the power and remove the battery before opening the case. Locate the CD/DVD drive and check that its SATA cable is securely connected to both the drive and the motherboard.
- Dust and Debris: Dust and debris can accumulate inside the drive mechanism, interfering with the laser reader or the disc-spinning mechanism. If you see any dust or other debris, gently remove it with a can of compressed air. Be careful not to apply too much force, as this could damage delicate components.
- Laser Lens Cleaning: The laser lens is crucial for reading the data on discs. A dirty lens can hinder disc recognition. Use a CD/DVD lens cleaner kit, available at most electronics stores. These kits usually include a cleaning disc and a cleaning solution.
- Drive Failure: Sadly, the drive itself might have simply reached the end of its lifecycle. At this stage, we have exhausted all the other simpler solutions. In this case, replacement might be your only option. If you decide to replace the drive, make sure to acquire a compatible one.
BIOS Configuration: Ensuring Recognition
The BIOS (Basic Input/Output System) is the core software that initializes the hardware during the startup process. Sometimes, the BIOS settings can interfere with the CD/DVD drive's operation.
- Boot Order: Check the boot order in your BIOS. Ensure that the CD/DVD drive is listed as a possible boot device. If it's not, the laptop might not attempt to access the drive at startup. To access the BIOS, restart your laptop, and repeatedly press the designated key (usually Del, F2, F10, or Esc) during startup. The specific key will be indicated on the screen during the boot process. Then, navigate to the boot order settings and adjust the order accordingly.
- SATA Mode: In the BIOS, there might be settings related to SATA mode (e.g., AHCI, IDE). Experimenting with these settings, if possible, might resolve incompatibility issues, but exercise caution. Changing this setting can sometimes affect the operating system's ability to boot. Try changing the SATA mode setting and then restarting the computer.
Manual Troubleshooting Steps: The Power of the Practical
Sometimes, seemingly simple solutions can yield remarkable results. It's worth trying a few manual troubleshooting techniques before resorting to more complex procedures.
- Eject Button Malfunction: Verify the eject button. Sometimes, the eject button itself might be malfunctioning. Try gently pressing the eject button multiple times to ensure that it's not stuck or unresponsive. You can also attempt to eject the disc through the operating system by right-clicking on the drive in File Explorer and selecting "Eject."
- Disc Compatibility: Ensure that the discs you're using are compatible with your drive. Some older drives might not support more recent disc formats.
- Power Cycling: Try power-cycling your laptop. Shut down your HP laptop completely. Disconnect the power adapter and remove the battery (if removable). Press and hold the power button for 30 seconds. This discharges any residual power. Reconnect the power adapter and battery, then turn on your laptop. This straightforward action can sometimes resolve minor glitches that prevent the drive from operating correctly.
Advanced Troubleshooting: When the Simple Solutions Fall Short
If the basic troubleshooting steps fail to restore your CD/DVD drive, consider these more advanced options. Proceed with caution, as these steps might involve more technical knowledge.
- Clean Boot: A clean boot starts Windows with a minimal set of drivers and startup programs. This helps to identify if a third-party application is interfering with your CD/DVD drive. To perform a clean boot, search for “msconfig” in the Windows search bar and open System Configuration. Go to the “Services” tab, check the box "Hide all Microsoft services," and then click "Disable all." Then, go to the "Startup" tab and click "Open Task Manager." Disable all startup items, and click "OK." Restart the laptop.
- System Restore: As mentioned earlier, system restore can roll back your system to a previous state, potentially undoing changes that may have caused the issue. Search for "Create a restore point" in the Windows search bar, and then click "System Restore." Follow the on-screen prompts to select a restore point before the CD/DVD drive problem occurred.
- Reinstalling the Operating System (Last Resort): If all else fails, you might consider reinstalling your operating system. This is a time-consuming process that erases all data on your hard drive, so back up your important files before proceeding. Reinstalling the operating system usually resolves multiple underlying software issues.
Repairing or Replacing the Drive: The Final Decisions
If you've exhausted all troubleshooting methods and your HP laptop's CD/DVD drive remains unresponsive, you face two final choices: repair or replacement.
- Repair: Depending on the nature of the damage, the drive might be repairable. However, unless you're experienced in electronics repair, it’s often best to entrust this task to a qualified technician. The cost of repair can vary depending on the extent of the damage.
- Replacement: Replacing the drive is often the more practical solution. CD/DVD drives are generally affordable and readily available. First, determine the type of drive your laptop requires. This information can usually be found in your laptop's user manual or by searching online using your laptop's model number. Then, purchase a compatible replacement drive from a reputable supplier. During installation, carefully follow the instructions provided with the new drive or consult online tutorials for your specific laptop model.
Conclusion: Resurrecting Your Digital Companion
We have covered the landscape of CD/DVD drive failures on HP laptops. By approaching the problem systematically, from software conflicts to hardware issues, you will be able to significantly increase your chances of restoring the drive's functionality. Remember to document each step to keep track of what actions have been taken. With patience and perseverance, you can often overcome these challenges and breathe new life into your optical drive.
