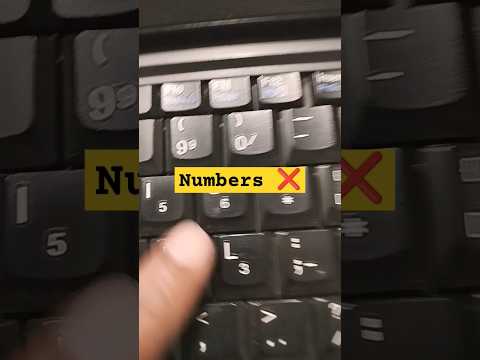
keyboard not working on lenovo laptop

Title: How To Fix Lenovo Keyboard Not Working Windows 10
Channel: Cap Trong Nam - How To
How To Fix Lenovo Keyboard Not Working Windows 10 by Cap Trong Nam - How To
keyboard not working on lenovo laptop, keyboard not working on lenovo laptop windows 11, keyboard not working on lenovo laptop windows 10, keypad not working on lenovo laptop, keyboard not working on lenovo ideapad flex 5, keyboard not working on lenovo ideapad 330, keyboard not working on lenovo legion laptop, keyboard not typing on lenovo thinkpad, keyboard and touchpad not working on lenovo laptop, keyboard and mouse not working on lenovo laptop
Lenovo Laptop Keyboard Dead? FIX IT NOW!
Lenovo Keyboard Woes? Don't Panic! Here's How to Revive It
So, your Lenovo laptop keyboard has gone silent. The keys, once lively and responsive, now offer nothing but a vacant stare. The cursor sits frozen, and your productivity grinds to a halt. Before you resign yourself to a frustrating fate, take a deep breath. Because, as it turns out, you’re not alone in this battle. And more importantly, there's a good chance we can get things back on track, pronto!
The Silent Symphony: Diagnosing the Keyboard Crisis
First, let's perform a quick reconnaissance. We need to understand the scope of the problem. Is the entire keyboard unresponsive, or are only specific keys failing? If the entire keyboard is dead, the issue might be more systemic. However, if a few keys have gone rogue, the fix could be simpler. Furthermore, consider when this keyboard rebellion began. Did it coincide with a software update, a spilled liquid, or a particularly aggressive keyboard-smashing session (we've all been there!)? All of this information helps narrow down the potential culprits.
Software Sleuthing: Troubleshooting in the Digital Realm
Now, let’s delve into the digital world. Software glitches can often masquerade as hardware failures. Therefore, the first step involves a simple restart. It clears out temporary files and reignites processes that might have gone haywire.
Then, check your keyboard settings. See if the keyboard is disabled in device manager as a possible scenario. Access this panel using the search bar. Look for the "Keyboard" section. If your keyboard displays an error icon, this is your smoking gun. Right-click on your keyboard and choose 'Update Driver'. Moreover, check for recent updates. System updates often contain important driver updates. Also, navigate to the "Updates" section in your settings.
The Physical Examination: Inspecting the Hardware
Alright, if the software side checks out, let's get physical. Inspect the space around your keycaps. Are there any visible signs of debris, dust, or liquid? Sometimes, a single crumb can cause havoc. Begin by carefully turning off your laptop. Then, use a can of compressed air. Direct the air stream in and around the keycaps. This removes any lurking particles.
After that, consider a more in-depth clean. With the laptop still powered off, you can gently remove keycaps (use a keycap puller if you have one) for thorough cleaning. Most Lenovo models make this process relatively easy. Take a picture before you start so that you know how to place everything back correctly. Be careful not to damage the delicate scissor mechanisms beneath the keys.
The External Input Gambit: Testing with Alternative Devices
Sometimes, the problem lies not with the keyboard itself, but with the laptop's internal communication with the keyboard. Therefore, a simple test can provide you with more context. Plug in an external USB keyboard. If the external keyboard works flawlessly, the issue does indeed point toward the built-in keyboard. This strongly suggests that the internal connection might be dysfunctional.
In addition, try using an on-screen keyboard. Access the on-screen keyboard. This can help you determine if the issue is hardware-related. The on-screen keyboard functions independently of your physical keyboard. If it works, you've likely isolated a hardware problem.
The Battery Tango: Power Cycle Strategy
Another tactic to try involves power cycling your laptop. It is a simple yet effective method often overlooked. Turn off your laptop entirely. Furthermore, disconnect the power adapter. Remove the battery (if it's removable). Now, press and hold the power button for at least 30 seconds, this drains any residual power. Reinsert the battery (if applicable). Plug the adapter back in and turn on your laptop. Sometimes, this resets the internal components and alleviates the issue.
Factory Reset: A Last Resort Solution
If all else fails, consider a factory reset. This is a drastic measure, so back up your important data first. A factory reset returns your laptop to its original settings. It can resolve deep-seated software conflicts that might be causing keyboard issues.
However, understand that a factory reset deletes all your files. In your settings, you will find the reset option. Follow the on-screen prompts carefully. While complex, it might be necessary if other solutions have failed.
When to Seek Professional Help
If you’ve exhausted all these troubleshooting steps, it’s likely time to consult the experts. Bring your Lenovo laptop to a reputable repair shop. They have the specialized tools and skills to diagnose hardware problems. The technician can assess the extent of the damage and offer repair or replacement options.
Conclusion: Back to Typing Bliss
Keyboard troubles can be frustrating. But, with patience and a systematic approach, you can often resurrect your Lenovo keyboard. Remember to stay calm and follow the steps. And be sure to back up your data before undertaking any major troubleshooting steps. Now, go forth and reclaim your typing superpowers! You've got this.
HP Pavilion Laptop Sound DEAD? (Beats Audio Fix Inside!)Okay, let's get your Lenovo laptop keyboard back to life! We're going to tackle this head-on, like a modern-day keyboard whisperer. Forget those generic, copy-pasted solutions you see online; we're crafting a truly helpful, engaging, and unique guide. Buckle up!
Lenovo Laptop Keyboard Dead? FIX IT NOW!
Let's face it; a dead keyboard on your Lenovo laptop is about as fun as a root canal. It can bring your productivity and your peace of mind to a screeching halt, leaving you staring at a blank screen, twitching with frustration. But before you spiral into a keyboard-less panic, take a deep breath. We're here to help you troubleshoot and hopefully resurrect your beloved keyboard.
The Keyboard Catastrophe: Recognizing the Signs of a Dead Keyboard
First things first: is it truly dead? Sometimes, a seemingly unresponsive keyboard is just suffering from a temporary hiccup. Before we dive into complex fixes, let's make sure we're not jumping the gun. Are you certain that every key is unresponsive, or could it be a single, stubborn key? Is it happening consistently, or just intermittently? Think of it as the keyboard equivalent of a patient explaining their symptoms to a doctor.
- No reaction to any key presses: This is the classic "keyboard is dead" scenario. No letters, numbers, symbols, or commands work.
- Intermittent key failures: Some keys function, while others are unresponsive. This might point to a hardware issue with those specific keys.
- Caps Lock, Num Lock, or other indicator lights unresponsive: If these lights don't illuminate when you press their corresponding keys, it's a sign something deeper is amiss.
- Phantom key presses: The keyboard seems to be typing on its own, even when you're not touching it. This can sometimes indicate a stuck key or a software glitch.
Double-Checking the Obvious: The Basic Keyboard Sanity Checks
Before we start poking around in the digital guts of your laptop, let's eliminate the simplest possibilities. It's like checking if your car has gas before you call a mechanic. Often, the solution is staring us right in the face.
- Restart Your Lenovo: This is the digital equivalent of a good night's sleep. A simple restart can often fix software glitches that are causing keyboard problems. Click restart, and let your Lenovo reboot.
- Check Your USB Connection (if applicable): If you're using an external USB keyboard, make sure it's plugged in securely. Try a different USB port to rule out a faulty port. It's like checking the power cord of a lamp – obvious, but essential!
- Inspect the Physical Keyboard: Take a good look at the keyboard itself. Are there any obvious signs of damage? (Spilled coffee? Crumbs galore?) Any debris lodged between the keys? Use a can of compressed air to gently clean between the keys.
- Check your keyboard settings: Make sure that you haven't inadvertently changed your keyboard language options.
Diving Deeper: Software Solutions and Troubleshooting
If the basic checks didn't work, it's time to dig a little deeper. This is where we explore the software side of things. Think of it as the keyboard's operating system – if it's out of whack, so is your typing experience.
Update Your Keyboard Drivers: Outdated drivers are like using a dial-up modem in the age of fiber optics. Here's how to update them on Windows:
- Right-click the Start menu and select "Device Manager."
- Expand the "Keyboards" category.
- Right-click on your keyboard (it might say something like "HID Keyboard Device") and select "Update driver."
- Choose "Search automatically for drivers." Let Windows do its thing.
Run the Windows Troubleshooter: Windows has built-in troubleshooters designed to detect and fix common problems.
- Type "troubleshoot" into the Windows search bar and select "Troubleshooting settings."
- Click "Keyboard" and then "Run the troubleshooter."
Check for Malware: Malware can sometimes interfere with keyboard functionality. Run a full scan with your antivirus software. It's like a digital flu shot for your keyboard!
Safe Mode: Booting your laptop into Safe Mode can help determine if the problem is related to third-party software. If the keyboard works in Safe Mode, the issue is almost certainly a software conflict. Restart in Safe Mode, test the keyboard, and if all is well, then return to the normal OS to troubleshoot your third party software if needed.
Hardware Hurdles: When It's Time to Get Physical
If the software solutions haven't worked, we're likely dealing with a hardware issue. This is where things get a bit more complex, requiring a little bit of tech savvy (or the courage to call a professional!).
- External Keyboard Test: Connect an external USB keyboard. Does it work? If it does, it strongly indicates that the problem lies with your laptop's built-in keyboard.
- Cleaning the Keyboard (Again, But More Thoroughly): Use compressed air. Turn your laptop upside down and gently tap on the keyboard to dislodge any trapped debris. You could also use a small brush to gently clean between the keys.
- Keyboard Replacement (If Necessary): If all else fails, the keyboard itself might need to be replaced. This can range from a simple DIY project (if you're comfortable with that) to a job best left to a professional. Replacement keyboards for Lenovo laptops are often readily available online.
The BIOS Connection: Exploring Firmware Fixes
Occasionally, the problem could lie with the Basic Input/Output System (BIOS), the fundamental software that runs when your computer starts up. It is the brain of your computer!
- Access the BIOS: Restart your Lenovo and repeatedly press the appropriate key (often F2, F12, Delete, or Esc) during startup to enter the BIOS setup. The key varies depending on the Lenovo model.
- Test the Keyboard in BIOS: Once in the BIOS, try using the keyboard to navigate the menus. If the keyboard doesn't work in BIOS, it's a strong indication of a hardware issue.
Keyboard Replacement: DIY or Professional?
The decision of whether to replace the keyboard yourself depends on your comfort level with electronics and your willingness to take risks. It's a project that involves delicate maneuvering.
- DIY Advantages: Potentially cheaper (only the cost of the keyboard), a good learning experience, and a sense of accomplishment.
- DIY Disadvantages: Risk of damaging the laptop, potential for future issues if the replacement isn't done correctly, and the time commitment.
- Professional Advantages: Avoids any risk of damage, guarantees a working keyboard, and often comes with a warranty.
- Professional Disadvantages: More expensive.
Preventative Measures: Keeping Your Keyboard Happy
Once you get your keyboard working again, it's a good idea to take some preventative measures to keep it happy.
- Regular Cleaning: Clean your keyboard regularly with compressed air to remove dust and debris.
- Avoid Spills: Keep liquids away from your laptop! A spilled drink is one of the most common keyboard killers.
- Gentle Typing: Avoid excessive force when typing.
- Use a Keyboard Cover: A silicone keyboard cover can help protect your keyboard from spills and debris.
The Warranty Factor: Lenovo's Got Your Back (Hopefully)
If your Lenovo laptop is still under warranty, it’s imperative that you contact Lenovo support first before attempting any repairs yourself. Opening the laptop or attempting DIY repairs could void your warranty.
External Keyboard as a Temporary Fix
If you're in a pinch and need to get work done immediately, an external USB keyboard is your best friend. It's a quick and easy way to bypass the dead keyboard and maintain your productivity.
Software Conflicts: Pinpointing Those Pesky Programs
Sometimes, a rogue software program can interfere with keyboard functionality. The steps below will help you narrow down the culprits.
- System Restore: System Restore is a useful tool to revert your laptop to a previous state, before these issues began.
- Clean Boot: A clean boot allows Windows to start with a minimal set of drivers and startup programs. It reduces the chances of software conflicts.
The "Miracle" Solutions: Avoiding Unreliable Fixes
Be wary of overly simplistic solutions claiming to magically fix every problem. Always rely on trusted sources and known troubleshooting steps.
When To Seek Professional Help
If you've exhausted all of the above steps and your Lenovo laptop keyboard is still dead, do not feel like a failure. It's time to call in a professional.
- Laptop Service Centers: Most certified laptop service centers can quickly diagnose and repair keyboard issues.
- Lenovo Authorized Repair Centers: These centers are equipped to handle specific Lenovo issues and have access to official parts, ensuring quality repairs.
Don't Give Up! (And Other Words of Encouragement)
Fixing a dead Lenovo laptop keyboard can be a frustrating process, but don't give up! By systematically going through these troubleshooting steps, you'll significantly increase your chances of getting your keyboard back in working order.
In Conclusion:
So, there you have it! A comprehensive guide to troubleshooting and fixing a dead keyboard on your Lenovo
Acer Laptop Shift Key Dead? FIX IT NOW!Lenovo ThinkPad L421 Series Laptop Numbers Key's Not Working Problemmacniteshkeyboardtricks2025
By Mac Nitesh Lenovo ThinkPad L421 Series Laptop Numbers Key's Not Working Problemmacniteshkeyboardtricks2025 by Mac Nitesh
Lenovo IdeaPad S540 Series Laptop Keyboard Backlight Not Working Problemmacniteshkeyboardtricks

By Mac Nitesh Lenovo IdeaPad S540 Series Laptop Keyboard Backlight Not Working Problemmacniteshkeyboardtricks by Mac Nitesh
Lenovo V15 G2 Series Laptop Function Key's Lock Unlock ShortCut Key's in Windows 11,10macnitesh

By Mac Nitesh Lenovo V15 G2 Series Laptop Function Key's Lock Unlock ShortCut Key's in Windows 11,10macnitesh by Mac Nitesh

Title: Lenovo ThinkPad not turning ON
Channel: Ajithkumar Saravanan
Lenovo ThinkPad not turning ON by Ajithkumar Saravanan
Laptop Working
Lenovo Laptop Keyboard Dead? FIX IT NOW!
We've all been there – staring at a blank screen, fingers poised, only to find our Lenovo laptop keyboard unresponsive. Frustration mounts, deadlines loom, and the seemingly simple task of typing a single word becomes an insurmountable obstacle. But before you resign yourself to the dreaded external keyboard or, worse, a costly repair, let's delve into the practical solutions to revive your silent Lenovo. We'll navigate the intricacies, from basic troubleshooting to more involved diagnostics, empowering you to regain control of your keyboard and your productivity.
Initial Assessment: Pinpointing the Problem
The first step is a methodical assessment. Is the entire keyboard dead, or are specific keys malfunctioning? Are you experiencing this issue consistently, or does it come and go? These observations will guide our troubleshooting efforts.
External Keyboard Test: Connect an external keyboard. Does it function correctly? This crucial step helps isolate the problem. If the external keyboard works, the issue almost certainly lies within your Lenovo’s integrated keyboard. If the external keyboard also fails, consider a broader hardware malfunction or software conflict.
Boot Sequence Observation: Power on your Lenovo and carefully observe the start-up sequence. Do the Num Lock or Caps Lock indicators respond when pressed? If these lights fail to toggle, the problem might be more deep-seated than a simple driver issue.
Operating System Access: Can you access the BIOS/UEFI setup during startup (typically by pressing F2, F12, Delete, or Esc during the Lenovo logo screen)? If the keyboard works within the BIOS/UEFI environment, the problem is likely software-related within the installed operating system.
Software Solutions: Breathing Life Back into Your Keyboard
Often, the culprit is a software glitch, a corrupted driver, or conflicting settings. Fortunately, these issues are usually resolvable without specialized technical knowledge.
Driver Reinstallation and Updates
Device Manager: Initiate the Device Manager (search for it in the Windows search bar). Expand the "Keyboards" section. You should see your Lenovo keyboard listed.
Driver Uninstall: Right-click on your Lenovo keyboard entry and select "Uninstall device." Confirm the uninstallation.
Restart and Auto-Detection: Restart your laptop. Windows should automatically attempt to reinstall the keyboard driver once the system reboots.
Manual Driver Update: If the automatic reinstallation fails, revisit Device Manager. Right-click on the keyboard entry (which may now be listed as "Unknown Device" or as "Keyboard") and select "Update driver." Choose "Search automatically for drivers."
Driver Download (Advanced): If automatic updates fail, visit the Lenovo support website (support.lenovo.com). Enter your laptop's serial number or model number to find and download the latest keyboard drivers specifically for your model and operating system. Once downloaded, install them manually through Device Manager by selecting "Browse my computer for drivers" and navigating to the downloaded driver files.
Troubleshooting Keyboard Compatibility
Keyboard Layout: Ensure the correct keyboard layout is selected in your operating system settings. Wrong layouts can cause keys to output incorrect characters or become unresponsive. Go to the “Language Settings” in Windows and confirm the keyboard layout matches your physical keyboard.
Sticky Keys, Filter Keys, and Toggle Keys: These accessibility features can sometimes interfere with normal keyboard operation. Access these settings through the Control Panel or, in Windows 10 and 11, by searching for "Ease of Access keyboard settings." Disable these settings and test your keyboard functionality.
Software Conflicts and Malware
Recent Software Installs: Consider any recently installed software. Some programs, especially those designed for keyboard customization or macro management, can interfere with keyboard operation. Try uninstalling any suspicious software to determine if it's the cause.
Malware Scan: Run a thorough scan with your antivirus software to rule out malware infections, as some malicious software can hijack keyboard input.
Hardware Diagnostics and Fixes: When Software Isn't the Answer
If software solutions fail, the problem might lie within the hardware. Before resorting to professional repairs, explore these potential fixes.
Keyboard Connection and Physical Inspection
Internal Connection Check (Caution Advised): This step requires some technical aptitude. Proceed with caution and ensure your laptop is powered off and the battery disconnected before opening it. Refer to your Lenovo laptop's service manual (available on the Lenovo support website). Locate the keyboard's internal connection cable (usually a flat, ribbon-like cable) and disconnect it, then reconnect it firmly. This can resolve loose connections.
Keyboard Physical Inspection: Carefully examine the keyboard itself. Look for any visible signs of damage – spilled liquids, detached keys, or physical impacts. Gently clean the keyboard with compressed air to remove dust and debris.
Key Removal and Cleaning - Some keys may have come loose. if you know how to remove them safely, remove the key, clean the underlying area, and replace the key.
Battery and Power Management
Battery Reset: Sometimes, a simple power reset can resolve seemingly complex issues. Shut down your laptop, disconnect the power adapter, and remove the battery (if it's removable). Press and hold the power button for 30-60 seconds to drain any residual power. Reinstall the battery and power adapter, then attempt to boot up your Lenovo.
Power Settings: In Windows, verify your power management settings. Ensure the laptop isn’t configured to disable USB ports or other components to save power, which could potentially interfere with keyboard functionality.
BIOS/UEFI Update
- BIOS/UEFI Update Outdated BIOS (Basic Input/Output System) or UEFI (Unified Extensible Firmware Interface) firmware can sometimes cause keyboard incompatibility. Visit the Lenovo support website, enter your laptop's serial number, and follow the instructions to download and install the latest BIOS/UEFI update for your specific model. Important: Follow the instructions meticulously during the BIOS/UEFI update process, as an interrupted update can render your laptop unusable.
Advanced Troubleshooting and When to Seek Professional Help
If you've exhausted all the above steps without success, it's time to consider more advanced troubleshooting or professional assistance.
Operating System Reinstallation
System Restore: If the issue coincided with a recent Windows update or software installation, try using System Restore to roll back your system to a previous working state. This can sometimes resolve driver conflicts or software-related keyboard problems.
Operating System Reset/Reinstallation: As a last resort, consider resetting or reinstalling your operating system. This will erase all data, so make sure to back up your important files beforehand. There are options to save your files, but it's best to back them up completely! This can eradicate deep-seated software conflicts that are affecting keyboard functionality.
Professional Repair
If all else fails, a hardware malfunction is highly probable. Contact Lenovo support or a reputable computer repair service. Common hardware problems include:
- Keyboard Replacement: The keyboard itself may be faulty and require replacement.
- Motherboard Issues: Problems with the motherboard can affect keyboard connectivity.
- Connector Damage: Damage to the keyboard cable connector on the motherboard can prevent proper operation.
Provide as much detail as possible about the troubleshooting steps you've already undertaken to expedite the repair process.
Preventative Measures: Keeping Your Lenovo Keyboard Healthy
Proactive measures can help prolong the life of your Lenovo laptop keyboard.
Spill Protection: Be extremely careful around liquids. Consider using a keyboard cover or placing your laptop away from potential spill hazards.
Regular Cleaning: Regularly clean your keyboard with compressed air to remove dust and debris that can accumulate under the keys.
Gentle Use: Avoid excessive force when pressing keys.
Proper Storage: When storing your laptop, ensure it's protected from extreme temperatures and humidity.
Firmware Updates: Keep your BIOS/UEFI and drivers updated! These updates can prevent future compatibility problems.
By methodically applying these solutions, we've significantly increased the likelihood of a successful keyboard revival. While some issues might require professional intervention, many keyboard problems can be addressed with the troubleshooting steps outlined. Armed with this knowledge, you're well-equipped to diagnose and fix your Lenovo laptop's keyboard, returning you to the world of seamless typing.
