how to make camera work on hp laptop

Title: FIXED - Camera Not Working in Windows 11 Laptop or PC
Channel: Techie Leopard
FIXED - Camera Not Working in Windows 11 Laptop or PC by Techie Leopard
how to make camera work on hp laptop, how to get camera working on hp laptop, how to get my camera working on hp laptop, how to make my camera work on my hp laptop, how to get camera on hp laptop, how do i activate the camera on my hp laptop, how do i change the camera settings on my hp laptop
HP Laptop Camera Not Working? FIX IT NOW!
HP Laptop Camera Troubles? Don't Panic! Solutions Await
Ever found yourself staring into the abyss of a black screen during a crucial video call? That sinking feeling when your HP laptop camera refuses to cooperate is a universal tech woe. However, before you launch your laptop across the room, take a deep breath. You're not alone. Furthermore, solutions are readily available. We'll explore them together. This is your comprehensive guide to reclaiming your webcam in no time.
Is It Really Broken? Basic Checks First!
Before anything, let's perform some simple diagnostics. Because, it's always best to eliminate the obvious. Did you accidentally disable the camera? Oftentimes, it's a simple toggle. Check the physical switch on your laptop, if it has one. Initially, make sure it's in the "on" position. After that, explore the keyboard. Some HP models come with a dedicated camera button (often F8 or F10). Press it to see if the camera activates. If that doesn't work, move on. Otherwise, you might have just found a quick fix!
Driver Dilemmas: The Usual Suspect
Drivers are, fundamentally, the lifeblood of your hardware. They're the software that allows your camera to communicate with your operating system. Therefore outdated, corrupted, or missing drivers are a common culprit in camera malfunctions. You can update drivers through Device Manager. To access it, search for "Device Manager" in the Windows search bar. Next, expand the "Cameras" or "Imaging devices" section. You'll find your HP webcam listed there. Right-click on your camera's name. Then, select "Update driver." Choose "Search automatically for drivers." Windows will search for and install the latest drivers. If Windows can't find a driver, you'll have to update it manually. In this case, go to HP's support website. Search for your specific laptop model. Download the latest drivers for your camera from there. Consequently, install those drivers. Restart your laptop after installation.
Privacy Settings: Your Camera's Hidden Gatekeepers
Privacy settings play a crucial role in camera functionality. Perhaps, you've inadvertently blocked camera access to certain applications. To check this, open your Windows Settings. Navigate to "Privacy & security," then "Camera." Firstly, ensure that "Camera access" is turned on. Secondly, verify that the apps you want to use your camera with have permission. Toggle the switches on. If the camera still doesn't work, scrutinize individual app settings. Certain apps have their own internal camera permissions, too. Review the settings within each app.
Software Interference: The App that's Blocking You
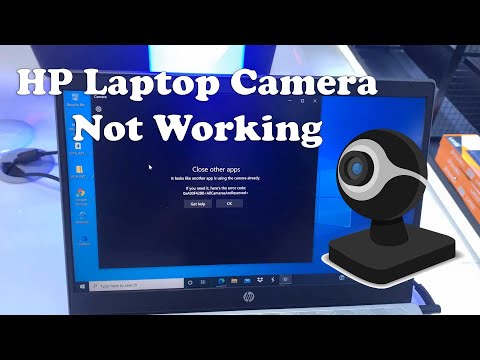
Sometimes, a rogue application can hog your camera. This often happens with programs that use your camera in the background. Close any applications that might be using the camera. Examples include video editing software, or other potential culprits. Then try your camera again. Furthermore, if you suspect a specific app, uninstall and reinstall it. This can refresh its camera permissions. In some cases, a corrupted app is silently creating the problem.
BIOS Shenanigans: A Deep Dive
BIOS (Basic Input/Output System) settings can sometimes interfere. While not common, it's worth a look. Restart your laptop and enter the BIOS setup. The exact key to press depends on your HP model (F2, F10, or Esc are popular choices). Carefully search for camera-related settings. Ensure the camera is enabled within the BIOS. If you make changes, save them and restart.
Hardware Woes: When It's Time for Professional Help
After exhausting all software troubleshooting steps, the problem might be hardware-related. If your camera still isn't working, consider these possibilities. Firstly, the camera itself has failed. Secondly, the cable connecting it to the motherboard might be loose or damaged. In these cases, it's best to seek professional assistance. Contact HP support or a qualified technician. They can assess the hardware. They can provide the necessary repairs or replacement.
The Final Word: Persistence Pays Off
Troubleshooting technical issues can be frustrating. However, don't lose heart. Systematically working through these steps typically resolves most HP laptop camera problems. Remember to be patient and methodical. By following these guidelines, you should regain your camera's functionality. You will be back to video calls and content creation in no time. Good luck, and happy camming!
Laptop Zoom Sound Dead? 😱 FIX This NOW!HP Laptop Camera Not Working? FIX IT NOW!
Hey everyone! Ever found yourself staring blankly at a black screen during a Zoom call, your face contorted in a mixture of panic and frustration? I have. More times than I care to admit! Let’s face it, a non-functioning webcam on your HP laptop is a modern-day tragedy, right up there with a flat tire when you're already running late. But fear not! We're diving deep into the murky waters of webcam woes and emerging victorious, ready to reclaim our digital faces. This is your ultimate guide to fixing that pesky HP laptop camera, and we're going to do it together!
1. The Dreaded Black Screen: Why Isn't My HP Camera Working?
First things first: let's figure out why your camera is acting up. Pinpointing the root cause is crucial, like diagnosing the engine before you start tinkering with the brakes. It could be a simple software glitch, a driver issue, a hardware problem, or something completely unexpected. Think of it as a digital mystery: We’re the detectives, and the faulty camera is the culprit.
2. The Obvious Suspect: Checking Camera Hardware and Basic Settings
Before we get knee-deep in technical jargon, let's start with the basics. Sometimes, the solution is as simple as turning it on and off again.
- Physical Check: Does your laptop have a camera? (Sounds silly, but we've all been there!). Is there a physical switch or privacy cover obscuring the lens? These are surprisingly common culprits.
- Camera Enabled? Most laptops have a function key (usually with a camera icon) that toggles the camera on or off. Make sure this isn’t accidentally disabled. It's like accidentally hitting the mute button on a crucial phone call – we've all done it!
- External Webcam? If you're using an external webcam, make sure it's properly connected (USB, etc.) and the cable isn't loose.
3. Diving into Device Manager: Unveiling Hidden Camera Issues
Now, let’s get a little more technical. Think of Device Manager as the control panel of your laptop's hardware.
- Accessing Device Manager: Right-click on the Windows Start button and select "Device Manager." Alternatively, you can search for it in the Windows search bar.
- Locating the Camera: Look for "Cameras," "Imaging devices," or something similar. Expand the section to see your camera listed.
- Any Errors? Do you see a yellow exclamation mark or red cross next to your camera? That’s a telltale sign of a problem. It's like seeing a flashing red light on your car's dashboard – time to investigate!
4. Driver Dilemmas: Updating or Reinstalling Your Camera Driver
Drivers are the unsung heroes of your laptop, translating instructions between the hardware and the software. An outdated or corrupted driver is a common cause of camera malfunctions.
- Updating the Driver: Right-click on your camera in Device Manager and select "Update driver." Choose the "Search automatically for drivers" option. Windows will (hopefully) find and install the latest driver.
- Reinstalling the Driver: If updating doesn't work, try uninstalling the driver (right-click, "Uninstall device") and then restarting your laptop. Windows should automatically reinstall the driver upon startup.
- Manufacturer Website: If Windows can't find the driver, head to the HP support website and download the latest driver specifically for your laptop model. This is like going directly to the source for the best information.
5. App Permissions: Granting Camera Access to Your Apps
Believe it or not, some apps are shy and need explicit permission to use your camera.
- Windows Settings: Go to "Settings" (the gear icon), then "Privacy & security," and finally "Camera."
- Check App Permissions: Ensure that the toggle is turned on for any apps you want to use with your camera (Zoom, Skype, etc.). If it's off, it's like not giving the app the key to your front door!
6. Software Conflicts: Identifying Programs That Might Be Blocking Camera Access
Sometimes, another program is hogging the camera, preventing other apps from using it. Think of it as a tug-of-war, with your camera as the rope.
- Close Unnecessary Apps: Close all open applications, especially those that might use the camera (e.g., video editing software, streaming apps).
- Check Task Manager: Open Task Manager (Ctrl+Shift+Esc) and see if any suspicious processes are using the camera. If you find anything, end the task.
7. Malware Mayhem: Scanning for Viruses That Could Be Interfering
Malware can wreak havoc on your system, including disabling your camera or using it without your knowledge.
- Run a Scan: Use your antivirus software to run a full system scan. This is like calling in the pest control experts to get rid of unwelcome guests.
8. BIOS Configuration: Ensuring Camera Hardware is Enabled in BIOS
The BIOS (Basic Input/Output System) is the underlying software that starts up your computer.
- Accessing BIOS: Restart your laptop and repeatedly press the key specified by your HP model (usually F2, F10, or Delete) to enter the BIOS setup.
- Camera Settings: Navigate the BIOS menus to find the "Integrated Camera" or similar setting. Make sure it's enabled. This is the last line of defense, ensuring the camera is even activated at the boot level.
9. Troubleshooting Camera in Specific Applications: Zoom, Skype, and More
Different apps can have their own quirks. Let’s troubleshoot some popular ones:
- Zoom: Go to Zoom settings, then "Video," and select your camera from the dropdown menu. Check that the correct camera is selected.
- Skype: In Skype settings, go to "Audio & Video" and select the correct camera. Test your camera within Skype.
10. Factory Reset: A Last Resort Option for Unresolvable Camera Issues
If all else fails, a factory reset might be necessary. This will erase all your data, so be sure to back up everything important before proceeding. This is like hitting the reset button on your life's game.
- Accessing Reset Options: Go to "Settings," then "System," and then "Recovery." Choose "Reset this PC."
- Follow Instructions: Carefully follow the on-screen instructions to reset your laptop.
11. Hardware Check: Is Your Camera Physically Damaged?
Sometimes, the problem is simply a hardware failure.
- External Damage: Inspect the camera lens for cracks or damage.
- Professional Repair: If you suspect a hardware issue, it's best to take your laptop to a qualified repair technician for diagnosis and repair.
12. Power Management Settings: Preventing Camera Shutdown to Conserve Energy
Power settings can sometimes interfere with device functionality. It is an important topic of conversation as well.
- Device Manager Again: Open Device Manager, find your camera, right-click, and select "Properties."
- Power Management Tab: Go to the "Power Management" tab. Uncheck the box that says, "Allow the computer to turn off this device to save power."
13. HP Support Assistant: Utilizing HP's Built-In Troubleshooting Tools
HP often provides its own troubleshooting tools to help with these kinds of issues.
- Open HP Support Assistant: Find and open the HP Support Assistant on your laptop.
- Run Diagnostics: Look for a "Troubleshooting" or "Diagnostics" section related to your hardware. Run the camera test and follow the provided instructions.
14. Contacting HP Support: When to Seek Expert Assistance
If you've tried everything and your camera still refuses to cooperate, it's time to contact HP support.
- Visit HP's Website: Navigate to the HP support webpage for your laptop model.
- Describe the Problem: Explain the steps you've taken and the problems you're experiencing. Provide as much detail as possible.
15. Prevention is Key: Maintaining Your HP Camera's Health
Now you know how it works, let's maintain it so it lasts a lifetime.
- Regular Driver Updates: Keep your drivers up to date to prevent future issues. This includes checking from time to time.
- Antivirus Protection: Always use a decent antivirus program to protect your system from malware. This will help maintain the health of your camera.
- Physical Care: Handle your laptop with care and protect the camera lens from dust and scratches.
Alright, we’ve covered a lot of ground! We’ve gone from basic checks to advanced troubleshooting, and hopefully, your HP laptop camera is now back in action. Remember, solving these issues is often a process of elimination. Don't get discouraged! The most important thing is to be patient and methodical, and we know you can fix it.
Final Thoughts
So, there you have it! A comprehensive guide to tackling those pesky camera problems on your HP laptop. We’ve learned how to diagnose, diagnose, and conquer the black screen of doom. From simple checks to delving into Device Manager, updating drivers, and even considering a factory reset, we’ve explored every avenue. Now go forth, armed
HP Laptop Keyboard Nightmare: THIS Fixes Those Stuck Keys!How To Fix HP Laptop Camera Not Working In Windows 10
By Cap Trong Nam - How To How To Fix HP Laptop Camera Not Working In Windows 10 by Cap Trong Nam - How To
How to turn on the camera in laptop

By Simple Networkings How to turn on the camera in laptop by Simple Networkings
How to turn on webcam and camera in Windows 10 Simple
By Feb28 How to turn on webcam and camera in Windows 10 Simple by Feb28

Title: 100 SOLVED NEW 2024 - We cant find your camera ERROR CODE 0xA00F4244 in Windows 1011- NEW 2024
Channel: How To Fix Tech
100 SOLVED NEW 2024 - We cant find your camera ERROR CODE 0xA00F4244 in Windows 1011- NEW 2024 by How To Fix Tech
Wifi On Laptop
HP Laptop Camera Not Working? FIX IT NOW!
It's a scenario that plagues countless users: the HP laptop camera refuses to cooperate. You click the camera icon, anticipating a glimpse of yourself on the screen, only to be met with a frustrating black void, an error message, or worse, complete silence. The purpose of this detailed guide is to empower you to troubleshoot and resolve all camera-related issues on your HP laptop, allowing you to swiftly reconnect with the visual world. We will leave no stone unturned, providing a comprehensive roadmap to restoring your camera's functionality.
Understanding the Common Culprits: Why Your HP Laptop Camera Might Be Failing
Before diving into solutions, it’s essential to recognize the potential causes behind a malfunctioning camera. These issues often stem from a variety of factors, which we'll address individually. This understanding is crucial for effectively diagnosing the problem and implementing the appropriate fix.
- Driver Corruption or Outdated Drivers: The drivers are the software that enable your laptop's operating system to communicate with the camera hardware. Corrupted or outdated drivers are a primary cause of camera failure.
- Hardware Malfunction: While less frequent, the camera hardware itself could be defective. Physical damage, wear and tear, or internal component failure can render the camera unusable.
- Software Conflicts: Other applications or software installed on your laptop may interfere with the camera's operation. This can include security software, video conferencing tools, or other programs accessing the camera.
- Privacy Settings and Permissions: Within the operating system, specific settings might be configured to block camera access. This is often a deliberate security feature.
- BIOS/Firmware Issues: In rare cases, problems within the laptop's BIOS (Basic Input/Output System) or camera firmware can lead to malfunctions.
- Physical Disconnection or Damage: Loose connections within the laptop, or physical damage to the camera module itself, can prevent it from functioning correctly.
The Initial Steps: Troubleshooting Basics for Your HP Laptop Camera
Begin with these fundamental checks before progressing to more complex troubleshooting steps. These initial actions can often resolve basic problems quickly.
- Restart Your Laptop: Simply restarting your laptop can often resolve temporary software glitches. It's a simple yet effective first step.
- Check the Physical Camera: Many HP laptops feature a physical camera shutter or a switch to disable the camera. Make sure the camera itself is uncovered and the switch isn't in the "off" position.
- Ensure the Camera is Enabled in Windows Settings: Navigate to Settings > Privacy > Camera. Verify that camera access is enabled for the device and that individual apps are also granted permission to use the camera.
- Test the Camera in Multiple Applications: Verify whether the camera works with different apps like Skype, Zoom, or the built-in Camera app. This helps determine if the problem is app-specific or systemic.
Driver-Related Solutions: Resolving Software Conflicts
Driver issues are a frequent cause of camera malfunctions. The subsequent steps will help you update, reinstall, and troubleshoot drivers.
Updating the Camera Driver:
- Open Device Manager: Right-click the Start button and select "Device Manager."
- Locate the Camera: Expand the "Cameras," "Imaging devices," or similar category. Your camera will likely be listed under a specific name (e.g., "HP TrueVision HD Camera").
- Update Driver: Right-click on your camera's name and select "Update driver."
- Search Automatically: Choose "Search automatically for drivers." Windows will search for updated drivers online.
- Apply Updates: If new drivers are found, follow the on-screen instructions to install them.
Reinstalling the Camera Driver:
- Open Device Manager: Follow the steps in the "Updating the Camera Driver" section to open Device Manager and find your camera.
- Uninstall the Driver: Right-click your camera and select "Uninstall device." Confirm the uninstallation when prompted. Ensure you select the "Delete the driver software for this device" checkbox, if it's available.
- Restart Your Laptop: Restart your laptop to allow Windows to automatically reinstall the driver. Alternatively, go back to Device Manager, click "Action," and select "Scan for hardware changes" to try and reinstall the driver.
Rolling Back to a Previous Driver:
- Open Device Manager: Access Device Manager as described previously.
- Access Driver Properties: Right-click on your camera and select "Properties."
- Navigate to the Driver Tab: Select the "Driver" tab.
- Roll Back: If the "Roll Back Driver" button is active, click it. This will revert to the previously installed driver. This option is only available if a driver update has taken place recently.
Addressing Privacy and Application Permissions
Ensure applications have permission to access your camera, and privacy settings are appropriately configured.
- Check Camera Permissions in Windows Settings:
- Open Settings: Press the Windows key + I to open Settings.
- Navigate to Privacy & Security: Click on "Privacy & Security". Then, select "Camera."
- Enable Camera Access: Make sure the "Camera access" setting is turned “On.”
- App Permissions: Scroll down to "Let apps access your camera." Ensure the setting is also turned "On."
- Individual App Settings: Check the settings for individual apps to verify they have permission to use the camera.
- Check the Camera in the BIOS: Some laptops allow you to enable or disable the camera within the BIOS settings. Restart your laptop and enter the BIOS setup (usually by pressing F2, Del, or Esc during startup). Look for an option related to the camera and confirm that it is enabled.
Hardware Troubleshooting: Assessing Physical Integrity
Address any physical damage or internal connection issues.
- Inspect the Camera Lens: Carefully examine the camera lens for smudges, dirt, or physical damage. Clean the lens gently with a microfiber cloth if needed.
- Check for Internal Connection/Physical Damage (Advanced): If you're comfortable with hardware, carefully open your laptop's service panel (or consult a qualified technician). Look for any loose connections or signs of physical damage to the camera module or its connecting cable. This can be complex and should only be attempted if you possess the necessary skills and tools.
Advanced Troubleshooting Techniques: Further Solutions
If the basic steps don't work, proceed with these advanced methods.
- Run the Windows Troubleshooter: Windows has a built-in troubleshooter that can detect and fix common camera problems.
- Open Settings: Go to Settings > System > Troubleshoot.
- Run the Troubleshooter: Click "Additional troubleshooters."
- Select the Camera Troubleshooter: Scroll down and select "Camera." Click "Run the troubleshooter."
- Follow the Prompts: Follow the on-screen instructions and see if the troubleshooter identifies and resolves any issues.
- System Restore: If the camera stopped working after a recent software or driver installation, you can try using System Restore to revert your system to a previous state.
- Search for "Create a restore point": Type "Create a restore point" in the Windows search bar and open it.
- Open System Restore: Click on the "System Restore…" button.
- Choose a Restore Point: Select a restore point from before the camera malfunction began.
- Follow the Prompts: Follow the on-screen instructions to restore your system.
- Reset Your Laptop (Last Resort): As a last resort, you can reset your laptop to its factory settings. This will erase all your data, so back up your important files before proceeding.
- Open Settings: Go to Settings > System > Recovery.
- Reset this PC: Click "Reset PC."
- Choose an Option: Choose between "Keep my files" (which attempts to reinstall Windows while preserving your files) or "Remove everything" (which completely wipes your hard drive).
- Follow the Prompts: Follow the on-screen instructions to reset your laptop.
Contacting HP Support
If you've exhausted all troubleshooting steps and the camera still isn't functioning correctly, it's time to contact HP support. They may be able to provide further assistance or determine if a hardware repair is necessary. Be prepared to provide details about the steps you've already taken so they can quickly assess the situation.
