accidentally got laptop wet some keys don't work

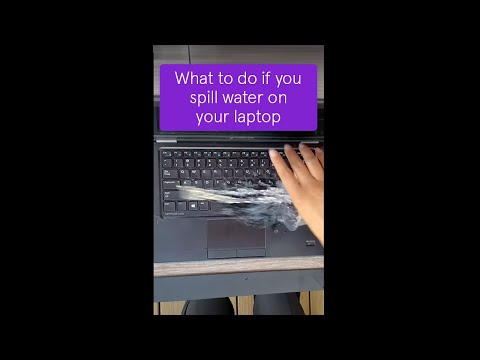
Title: Computer Water Damage Repair Tip 1
Channel: TechInsomnia
Computer Water Damage Repair Tip 1 by TechInsomnia
Laptop Bath? My Keyboard's Drowning! (And What I Did Next)
Oh No! My Laptop Took a Dive (And Survived!)
Life throws curveballs. Sometimes, those curveballs involve liquids and expensive electronics. This story isn't about coding or spreadsheets. It's about a near-disaster. It's about a laptop, a spilled beverage, and a whole lot of panicked thinking.
The Dreaded Splash: A Moment in Time
The scene unfolds in my kitchen. I was working, the usual. My laptop perched on the counter, a faithful companion. Then, catastrophe! A rogue coffee mug, fueled by gravity, decided to take a tumble. Predictably, the contents went everywhere. My keyboard became a temporary swimming pool. Time seemed to slow. Consequently, I felt a wave of pure dread.
Immediate Action: Every Second Counts
My instincts kicked in, hopefully, quicker than my rational brain. Immediately, I unplugged the power cord. Furthermore, I grabbed some absorbent towels. I needed to stop the liquid from seeping further. The primary goal was speed. Seconds felt like hours. Finally, I flipped the laptop upside down. I wanted to encourage any remaining liquid to escape.
The Aftermath: Assessing the Damage
Next, I surveyed the scene. The coffee, thankfully, wasn't a sugary concoction. Therefore, corrosion could be less aggressive. I gingerly began the drying process. I carefully wiped down every surface. Then, I meticulously cleaned the keyboard. I disassembled it as much as was safely possible.
Keyboard SOS: The Real Challenge
The keyboard was the real concern. It's where the liquid had lingered the longest. Many keys felt sluggish. Some didn't respond at all. It was evident it would take more than a simple wipe-down.
First Aid Measures: Trying Everything
I researched online. I consulted various tech forums. I read every article about liquid-damaged laptops. I learned about rice. I even learned about specialized drying chambers. I tried the rice method. I left it in a bag for days. However, the result was not promising.
Seeking Professional Help: Admitting Defeat
Clearly, this was not going to be a DIY fix. I started to look for a professional. I needed someone with experience. Someone with the right tools. I found a local repair shop. I hoped they could bring my laptop back from the brink.
Diagnosis and Repair: A Glimmer of Hope
The technician opened my laptop. He assessed the damage. Fortunately, the spill hadn't reached the motherboard. He cleaned the components. He replaced the keyboard. Then, he performed a thorough diagnostic test.
The Big Reveal: Success!
After a nail-biting wait, the news arrived. My laptop was operational! The repair was successful. The keyboard was fully functional. Consequently, I felt immense relief. Therefore, I knew I'd dodged a major bullet.
Preventative Measures: Learning From Mistakes
Naturally, I learned a harsh lesson. Liquids and laptops don't mix. Henceforth, I'm a much more cautious computer user. Consequently, I've implemented a few new habits. I’ve upgraded my desk. I try to keep liquids away from my workspace. Furthermore, if a spill happens, I'm ready.
Final Thoughts: A Tech Tale of Woe and Triumph
This whole experience was stressful. It was also a learning opportunity. It taught me the value of quick thinking. Moreover, it reinforced the importance of professional help. So, if your laptop ever takes a dive, don't panic. Take action. Seek help. And hope for the best!
Ethernet Cable Nightmare: Why Your Laptop Refuses to Connect!Laptop Bath? My Keyboard's Drowning! (And What I Did Next)
Oh boy, did I have a day. You know those moments when you feel like you've single-handedly conjured Murphy's Law? Well, that was me. Let's just say my trusty laptop decided to take an unplanned dip. No, it wasn't in a sparkling pool of liquid sunshine; it was a rather unceremonious bath of… well, you'll see. This is the story of my keyboard’s aquatic adventure and the (hopefully) triumphant rescue mission that followed.
1. The Accidental Aquarium: The Moment of Truth
It all started innocently enough. I was working, fueled by a questionable amount of coffee, when, in a moment of clumsiness that would make even a seasoned klutz blush, I knocked over a full glass of water. You can probably guess where this is headed. The icy cascade, unfortunately, didn't just find its way to the floor. It cascaded directly onto my open laptop. Time seemed to slow down as I watched the clear liquid flood the keys. My heart plummeted. My keyboard was, quite literally, drowning. It was a laptop bath of the worst kind.
2. Panic Stations: Initial Reactions and Regret
The immediate reaction? Panic. Pure, unadulterated panic. Followed swiftly by a healthy dose of self-blame. “Why did I have a glass of water next to my laptop?!” I screamed internally. My fingers flew to the power button, hoping against hope that I could somehow mitigate the damage. I scrambled to unplug the power cord, fearing electrocution more than the potential for a permanently defunct laptop. The regret was immediate and palpable, like a heavy cloak I couldn't shake off.
3. Assessing the Damage: The Grim Reality
Once the initial shock subsided, reality set in. I gingerly tilted the laptop, watching a small waterfall of water pour out of the vents. This wasn't good. The keys, the very tools of my trade, were now sticky, unresponsive, and likely harboring enough bacterial colonies to start a small-scale biohazard. I knew, with a sinking feeling in my stomach, that this was going to be more complicated than a quick wipe-down. It was time for a serious operation.
4. The Emergency Room Procedures: Steps I Took (Without Calling 911)
Okay, no 911 was necessary, but this felt close. Here’s what I did in a desperate attempt to save my digital lifeline:
- Immediate Power Down: This was the first and most crucial step. Unplugging and turning it off quickly is essential to prevent short-circuiting.
- The Inverted Savior: I flipped the laptop upside down, like a flipped-over turtle, to drain out as much water as possible. This went on for what felt like an eternity.
- Air Dry Adventure: I left it open and upside down, propped up at an angle, allowing air to circulate through the keyboard. I’d read that air drying could work miracles.
- The Disassembly Dilemma: Now, I'm no tech whiz. But, I started to look into dissassembling the keyboard to help dry it.
5. The Waiting Game: Patience is a Virtue (Especially Now)
After the initial steps, came the hardest part: waiting. I’d read advice online on how long, from days to weeks, it could take to dry out completely. Checking it periodically didn't help with the anxiety. I spent the time worrying. Did my laptop have a chance of survival? Would I have to cough up a fortune for a new one? The waiting game was an exercise in controlled chaos, but there was little else I could do.
6. Digging Deeper: Researching the Problem and Potential Solutions
While the laptop dried, I dove headfirst into the internet, searching for solutions. I researched everything from the best ways to dry a laptop keyboard, to the cost of replacements and repair. There were horror stories and tales of triumphant recoveries. I learned about rice, silica gel packets, and professional repair services. It was a deluge of information, and I felt a bit overwhelmed. What was the best course of action?
7. The Rice Myth: My Attempts at Salvation (and Its Potential Pitfalls)
Ah, the rice trick. A classic. I’d read that burying the laptop in a giant tub of uncooked rice could absorb moisture. So, I did just that. But, after a few days, I realized it wasn’t the magical cure-all I’d hoped for. While it might help to absorb some moisture, it didn't necessarily penetrate the spaces well enough to fully dry out the deeper components. Besides, rice dust! It was everywhere!
8. The Silica Gel Savior: A More Effective Approach (Maybe)
Next, I invested in some silica gel packets. You know, those little desiccant packets you find in new shoes or electronics? I gathered enough to cover the laptop and hoped for a better result. This approach felt more targeted, as silica gel is designed to absorb moisture. However, it was still a waiting game.
9. Testing the Waters (The Reboot Test) The Moment of Truth (Again!)
After several days filled with nail-biting anticipation, it was time to face the music. Or, more accurately, the start-up sequence. I cautiously plugged in the power, took a deep breath, and hit the power button. The screen flickered. Then, the familiar Windows welcome screen appeared! A silent scream of relief left my throat.
10. The Keyboard Check-Up: Observing Functionality
The laptop was on! But now came the really scary part. Would the keyboard work? I opened a text editor and started typing. Some keys stuck. Others registered multiple times. It was a mixed bag of successes and failures. My heart sank a bit. This wasn't a complete victory, but it was a start.
11. Intermediate Stages: Troubleshooting the Sticky Keys
The sticky keys were the biggest problem. They felt gummy and unresponsive. I tried gently cleaning them with a cotton swab and some isopropyl alcohol, but it only helped so much. I'd have to take the laptop in for a professional repair.
12. Calling in the Pros: When to Seek Professional Help
I decided to take my laptop in. I needed a professional to assess the damage and get it operational again. The technician was able to disassemble the keyboard and clean all the contacts and individual keys.
13. The Breakdown: Cost, Time, and Lessons Learned
The cost of the repair was significant, but the alternative was buying a new laptop. The repair took a few days, which was a small price to pay. One of the biggest lessons learned was to avoid keeping liquids near my laptop.
14. The Triumphant Return: Back in Business!
Finally, the day came when I picked up my laptop. The technician had worked, and the keyboard was working! I was overjoyed. It felt like I had been reunited with an old friend.
15. Lessons Learned: Protecting Your Precious Digital Companion
The entire experience was a crash course in laptop survival. Here's what I learned:
- Act Fast: Time is of the essence. Unplug and turn off the laptop immediately.
- Assess the Damage: Figure out the extent of the water damage.
- Air Dry: Let it dry, ideally for several days.
- Consider Professionals: Don’t be afraid to seek expert help for complex repairs.
- Prevention is Key: Keep liquids away from your gadgets!
And most importantly, always back up your data. It's a lesson every laptop-owner should etch in their mind. My laptop bath was a harrowing experience. It was an ordeal, but it also gave me a renewed appreciation for my trusty machine and the importance of its well-being.
Closing Thoughts
So, there you have it. The story of my laptop's accidental plunge and my frantic attempts to rescue it. It was a stressful experience, but ultimately, it had a happy ending. We live, and we learn, right? Now, if you'll excuse me, I'm going to go back up my data and maybe invest in a leak-proof coffee mug.
FAQs
1. What should I do immediately if water spills on my laptop?
Unplug it, turn it off, and flip it upside down immediately to drain excess liquid. Don't delay!
2. Is putting my laptop in rice a good solution?
It can help absorb some moisture, but it's not a guaranteed fix and can be messy. Consider it a temporary measure.
3. How long should I wait before turning my laptop back on after a spill?
Give it at least 48-72 hours, preferably longer. The longer you wait, the better your chances of a full recovery.
4. When should I consider professional repair?
If the keyboard is not working correctly, or if you're uncomfortable disassembling the laptop, seek professional help.
5. Can I prevent this from happening again?
Yes! Keep liquids away from your laptop, invest in a spill-proof container for drinks, and back up your data regularly.
``` 1) Principal Keywords: Laptop Keyboard Water Damage Repair 2) SEO Headline: Laptop Keyboard Drowning? Water Damage Repair Guide 3) Pathway: Laptop Water Damage 4) Meta Summary: My laptop bath was a
Dell Laptop Wi-Fi Nightmare? FIX This NOW!Water Spilled on Laptop - What To Do

By A-Plus IT Group, Inc. Water Spilled on Laptop - What To Do by A-Plus IT Group, Inc.
SOLUTION Some Keys Not Working on Laptop Keyboard

By Tech Express SOLUTION Some Keys Not Working on Laptop Keyboard by Tech Express
How to Deep Clean Your Laptop Keyboard No Damage

By How to Clean Guide How to Deep Clean Your Laptop Keyboard No Damage by How to Clean Guide
Title: Spilled water on your laptop Here's what to do shorts
Channel: Asurion
Spilled water on your laptop Here's what to do shorts by Asurion
Wifi Not Found
Laptop Bath? My Keyboard's Drowning! (And What I Did Next)
The heart leaped into my throat. There, on my desk, a scene of utter, unexpected chaos unfolded. A tipped water bottle, a spreading lake of clear liquid, and the grim realization that my trusty laptop, my digital companion, was taking an unscheduled, and decidedly unwelcome, bath. Panic, a cold, hard knot, tightened in my stomach. My keyboard, the very gateway to my digital world, was drowning.
The Initial Shock and the Race Against Time
The immediate aftermath was a blur of frantic action. My first instinct, born purely of terror, was to snatch the laptop up. I knew instinctively the dangers of electricity and water mixing, a hazard I'd thankfully avoided throughout my life. The power cord was unceremoniously yanked from the wall. Speed was paramount. Every second counted. The creeping tendrils of the spilled water were already making their way across the chassis. My mind raced. What to do?
Immediate Actions: Saving What I Could
After the initial panic subsided, I realized that immediate action was critical. First, I gently tilted the laptop, positioning the keyboard downwards to prevent further water ingress into its internal components. Gravity, I reasoned, was now my ally. I had to minimize the damage at all costs. Thankfully, the laptop was closed.
I swiftly grabbed a clean, dry towel, a fluffy white one I usually reserved for guests. With painstaking care, I patted around the keyboard, absorbing as much of the liquid as I could. I paid particular attention to the edges of the keys, where the water seemed to pool. It was a delicate dance, this, attempting to soak up the water without pushing it further in. Nothing could be left to chance.
The Disassembly: A Delicate Operation
Knowing that surface drying would only be a superficial solution, I made the decision to disassemble the laptop. This was not a task I undertook with glee. I had never taken my laptop apart. But I had to find out what to do next. I had to try to save the innards of the laptop.
I retrieved a small Phillips head screwdriver and, after a quick online search for my specific model's disassembly instructions, I braced myself. The screws were tiny, easily lost; the internal components, I knew, were delicate. The manual, thankfully, provided a step-by-step guide with visual aides. With surgical precision, I started removing the screws, placing them carefully in a small, labeled container to avoid losing them.
The bottom casing came off, revealing a network of wires, circuit boards, and the fan that kept the device cool. My heart sank a little. It looked more complex than I anticipated. I could see the keyboard's undercarriage, the source of the initial problem. It was wet. Very wet. There was some water near the battery.
Keyboards and Circuitry: The Examination
I gently disconnected the small ribbon cables that connected the keyboard to the rest of the system. Then, with a careful push, the keyboard popped free. I turned the device upside down, hoping gravity would continue its work. The keyboard itself was a marvel of engineering, a complex matrix of switches and sensors.
I examined the keys, one by one, gently pushing them down to see if any residual water remained. There was, indeed, some trapped. I cleaned the area with a microfiber cloth.
The circuits, the most vulnerable part of the laptop, also had to be scrutinized. I visually inspected the motherboard, looking for any signs of corrosion or residue. Thankfully, the spill had not been substantial enough to do irreparable damage to the circuits. However, I knew water damage can sometimes show up later.
Drying Techniques: The Patience Game
The drying process became a crucial part of the rescue mission. Patience was paramount. I carefully laid out the keyboard, its underside up, in a well-ventilated area. I avoided direct sunlight, knowing it could potentially damage the components.
I considered using a hairdryer on a low setting, but I decided against it, fearing the heat could warp the plastic or damage the delicate internals. I opted for a gentle, natural drying process.
I also employed a method recommended on several tech forums: placing the components in a bag of uncooked rice. Rice, I knew, was legendary for its moisture-absorbing properties. I carefully placed the keyboard, and other disassembled parts, into a large plastic bag filled with rice, ensuring that each component was completely submerged.
The Waiting Game: Days, Not Hours
The waiting began. I resisted the urge to check on my laptop every few minutes. The rice would absorb the water, a process that demanded time. I gave it a full three days, making sure not to disturb the bag or the rice. It felt like an eternity.
Reassembly: A Moment of Truth
After what felt like an eternity, the moment of reassembly arrived. This was the ultimate test. Would my laptop boot up? Would the keyboard function correctly?
With my screwdriver, I carefully started reassembling the laptop. I replaced the screws, carefully tightening each one. I reconnected the ribbon cables, making certain they were properly seated. My hands were steady, and my breath was held.
The Boot-Up: Anticipation and Relief
The moment of truth. I plugged in the power cord and pressed the power button. The familiar hum of the fans filled the air. The screen flickered to life, displaying the manufacturer's logo. Relief washed over me.
My heart skipped a beat. The operating system started to load. It was working! I was able to log in. But the keyboard? That was the real test.
Keyboard Functionality: The Moment of Ultimate Success
I opened a text editor and started typing. Each key, one by one, was tested. The A key…worked. The B key… also functioned. All the keys worked! The keyboard, miraculously, was fully functional. All the keys registered as they should. I typed for a few minutes, marveling at the fact that my keyboard was working and that the spilling of water might not have been as devastating as it looked.
Post-Rescue: Preventative Measures and Lessons Learned
I learned a valuable lesson that day. First and foremost, liquids and electronics are not a good combination. I had been fortunate. Accidents happen, but preparedness is crucial.
I invested in a spill-proof keyboard cover, a simple, preventative measure that would help to shield the keyboard in the future. I also made a backup of my important files, an exercise I should have done previously. I'd learned the importance of data security.
Lastly, I realized, the most reliable tech support can be yourself. When things go wrong, you have to step up and take control. And I'm glad I did! My laptop lives on.
