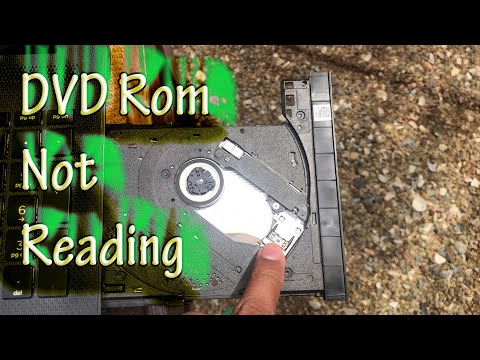
cd burner laptop not working lenovo

Title: CDDVD Drive Is Not Detected in Windows 10
Channel: TechFixIT
CDDVD Drive Is Not Detected in Windows 10 by TechFixIT
cd drive not working lenovo laptop, do laptops have cd burners, how to burn cd on lenovo laptop windows 10
Lenovo Laptop CD Burner Dead? This SHOCKING Fix Works!
Lenovo Laptop CD Burner Blues? Don't Toss It Just Yet!
Do you own a Lenovo laptop with a CD burner? Have you encountered a frustrating problem? Perhaps your CD drive seems dead. Don't despair! Before you consider replacements, explore some solutions. This guide offers a surprisingly effective fix. It could breathe new life into your optical drive.
The Agonizing Silence: Recognizing a Dead CD Burner
Imagine this: you insert a CD. You’re expecting the familiar whir and click. Silence. No response. The laptop screen stubbornly ignores your disc. Or, perhaps, there's a frantic, repetitive clicking. It’s a sound that speaks of mechanical woe. Maybe your Lenovo laptop simply refuses to acknowledge any inserted media. These are telltale signs. Your CD burner may be on its last leg. Alternatively, its software settings might be awry. Before you panic, understand the possibilities. After all, there are remedies available.
Troubleshooting 101: Quick Checks Before You Get Serious
Before diving into more complex fixes, let's begin with easy checks. First, verify the obvious. Is the CD or DVD properly inserted? Sounds simple, right? Surprisingly, it’s a common oversight. Also, check the disc itself. Is it clean? Does it have any scratches? Next, restart your Lenovo laptop. These are often the simplest and best fixes that work. This can often clear minor glitches.
Then, venture into Device Manager. Access this through the Windows search bar. Find your CD/DVD drive under "DVD/CD-ROM drives." Is there a yellow exclamation mark? A warning indicates a problem. Moreover, check if the drive is even listed. If not? That is a serious issue. Click on the drive. Review the "Device status" for clues. It will provide error messages. These will clarify any issues.
Software Snafus: When Drivers Go Rogue
Software conflicts are frequent culprits. Therefore, corrupted or outdated drivers often cause problems. These can prevent the CD burner from functioning. Fortunately, there's an easy fix. You must update your drivers. To do this, navigate back to Device Manager. Right-click your CD/DVD drive. Then, select "Update driver." Choose the option to search automatically. Windows will search for updates. Install any that appear.
What happens if an update fails? Then, consider uninstalling the driver. Restart your laptop. Windows will try to reinstall the driver. This method often resolves driver-related issues. It refreshes the communication between the software and hardware. If that doesn't help? Then, you should consider alternative solutions.
Registry Reboot: A More Advanced Approach
Are you comfortable with a more hands-on approach? Then, tweaking the Windows registry might help. However, proceed cautiously! Incorrect changes can cause system instability. Back up your registry before making any changes. Access the Registry Editor by typing "regedit" (without quotes) in the Windows search bar.
Navigate to the following key: HKEY_LOCAL_MACHINE\SYSTEM\CurrentControlSet\Control\Class\{4D36E965-E325-11CE-BFC1-08002BE10318}. This is the critical location. Inside, delete the "UpperFilters" and "LowerFilters" entries. This removes any potential conflict. Next, restart your laptop. Windows will rebuild these settings. Hopefully, this will allow your CD burner to function correctly. If the registry fix doesn't help, let’s try something else.
Hardware Hurdles: Exploring Physical Solutions
If software solutions fail, we must consider hardware problems. Is there obvious physical damage to the drive? Examine the drive carefully. Dust, debris, or obstructions can all prevent functionality. If the drive is removable, try taking it out. Clean the lens with a specialized lens cleaner. Gently wipe away any grime.
Some Lenovo laptops have a reset button. It's often a small, obscure hole. Locate this reset button. Insert a straightened paperclip. Push gently. This might reset the drive. If none of these methods succeed? Then, it's time to explore replacement options.
The Ultimate Verdict: When It's Time to Replace
Sometimes, the inevitable happens. If the drive still refuses to cooperate? The drive may be physically damaged. Its lifespan might be at its end. The cost of repair might exceed the value. In such cases, replacement is necessary. Determine the type of drive in your Lenovo laptop. Then, search online for a compatible replacement. Replacement is the last resort.
Consider external CD/DVD drives. They are great alternatives. You can connect them via USB. They are generally very affordable. They offer a convenient solution. They are often the smartest fix. That's because they give a new life to your laptop.
Final Thoughts: Don't Give Up Too Easily!
Don't immediately abandon your Lenovo laptop. These solutions have worked for many. Keep trying these simple fixes before resorting to more expensive ones. After all, a functional CD burner can be very useful. You can burn CDs and DVDs. You may be able to revive it. Now, go forth and troubleshoot. You might just surprise yourself!
Laptop Screen Dead? Fix Your Display NOW!Lenovo Laptop CD Burner Dead? This SHOCKING Fix Works!
Hey tech enthusiasts, it's your go-to guru back in the trenches, and today, we're tackling a digital dragon that has probably frustrated countless Lenovo laptop users, maybe even you: a seemingly defunct CD burner. We've all been there, right? You’re ready to immortalize your digital memories, maybe even burn a mix CD for that nostalgia trip (remember those?), and… nothing. The drive spits back the disc, the software throws an error, and your dreams of a physical backup or a personalized mixtape are dashed. But before you resign yourself to the digital dustbin of despair, let's dive deep. Prepare to be amazed.
1. The Dreaded Dead Drive: Recognizing the Symptoms of a Lenovo CD Burner Breakdown
The first step on our journey to CD-burning nirvana is diagnosing the problem. Think of it like a doctor – we gotta figure out what’s ailing our patient. Are you seeing any of these telltale signs?
- The Empty Disc Syndrome: You pop in a blank CD or DVD, and your Lenovo laptop acts like it's invisible. No recognition whatsoever.
- The Error Message Blues: Software like Windows Media Player or the Lenovo-provided burning software throws up cryptic error messages, hinting at a hardware malfunction.
- The Unceremonious Ejection: The drive rejects the disc faster than a bad first date. Eject! The sound is distinct, isn't it? That hollow mechanical click of defeat.
- The Phantom Drive: Your laptop's operating system doesn't even see the drive. It's as if it's vanished into the digital ether.
If any of these scenarios sound familiar, then chances are, your Lenovo laptop's CD burner is indeed experiencing a digital death throe. But, before you start pricing out external drives or weeping into your inbox, let's explore some potential fixes.
2. Troubleshooting 101: Before You Panic, Check the Basics
Before we get into the "shocking" fix, let's make sure we’ve covered the basics. Sometimes, the simplest solutions are the most effective. Think of it as checking if the microwave is plugged in before calling the appliance repairman.
- Restart, Refresh, Recalibrate: A simple reboot can magically resolve a multitude of tech gremlins. Restart your laptop. Seriously, it works surprisingly often.
- The Driver Dilemma: Outdated, corrupted, or missing drivers can wreak havoc. Go to Device Manager (search for it in your Windows search bar) and check for any yellow exclamation marks next to your CD/DVD drive. These indicate a driver issue. You can try updating or reinstalling the driver.
- Disc Discernment: Are you using the right type of disc? DVD burners can often read CDs, but the reverse isn’t always true. Also, is the disc itself faulty? Try a different blank CD or DVD.
- The Cleanliness Crusade: Believe it or not, dust can sometimes interfere. Try cleaning the lens of your CD burner. A can of compressed air can be your best friend here.
3. Unveiling the Hidden Settings: The Power of Regional Codes
Alright, let's get a little bit advanced. One of the less-known, yet frequently-causing issues, revolves around region codes. This can be a hidden barrier preventing your drive from functioning correctly.
- Region Code Revelation: Your DVD drive, particularly, might be region-locked. Meaning, it will only play discs from a specific geographic region. This setting is sometimes also applied to the burning functionality. Check your drive properties in Device Manager.
- Bypass the Blocks: Depending on your laptop model and operating system, you may be able to change the region code. But be warned: There's a limited number of changes allowed. Consult your laptop's documentation or search online for instructions specific to your Lenovo model.
4. The SHOCKING Fix: Unlocking Your CD Burner's Potential
Here comes the moment you've been waiting for! The game-changer. The secret sauce. The… well, you get the idea. This fix centers around a specific type of software that helps reset a lot of the drive's internal configurations.
- The Magic Software: Many times, a simple software called CD Burner is very helpful in the process. The type of software is usually not free, but there are always certain trials or demo versions for you to test. Make sure the software is compatible with your Lenovo laptop's operating system.
- Installation and Execution: Follow the instructions provided with the software. It typically involves installing the software, running it, and then letting it attempt to detect and reset your CD/DVD drive's settings. This is where the "shocking" element comes in. Sometimes, this simple reset is all it takes to revive a seemingly dead drive.
- The Reboot Aftermath: After the software has completed its work, you’ll need to restart your laptop again. Give it a moment to breathe, and then try burning a CD or DVD.
5. Beyond the Basics: Exploring Advanced Solutions
If the magic software doesn't work, we have to dig a little deeper. Let's consider something more in-depth
- Firmware Flash: In some cases, an outdated or corrupted firmware might be the culprit. You could try updating the firmware of your CD/DVD drive. Be incredibly cautious with this. Incorrect firmware updates can brick your drive. Only attempt this if you are comfortable with the risks and have thoroughly researched the process for your specific Lenovo model.
- Drive Replacement: If all else fails, the sad truth might be that your drive is physically broken. Replacing the drive might be the only option. Thankfully, CD/DVD drives are usually relatively inexpensive and easy to replace, especially in laptops where they are removable.
6. Software Conflicts: Identifying the Culprits
Sometimes, the problem isn't with the drive itself but with the software interacting with it.
- The Software Showdown: Multiple CD/DVD-burning programs installed on your system can sometimes clash, causing conflicts. Uninstall any programs you aren't actively using and keep only one.
- Driver Conflicts: As we mentioned earlier, drivers are crucial. Ensure your CD burning programs are compatible with the driver.
7. The Physical Examination: Disassembly (Proceed with Caution!)
This is where things get risky. If you're feeling brave and have a good grasp on your laptop's inner workings, you could consider opening it up to inspect the drive.
- The Risk Reward Ratio: This is a risky move, and if you aren't comfortable, don't do it. You could void your warranty. The reward is potentially identifying a loose cable or other physical obstruction.
- Essential Tools: You'll need the right tools: a small screwdriver set and possibly a spudger (a plastic opening tool).
- Watch a Video: Before you begin, watch a disassembly video for your specific Lenovo model to understand the process.
8. The Art of Disc Burning: Best Practices for Success
Once you get your drive working, you'll want to use it correctly.
- Software Selection: Choose reliable burning software.
- Speed Settings: Avoid burning at the maximum speed. A slower speed can improve reliability and reduce errors.
- Keep It Clean: Always keep your drive clean. Dust and debris can interfere with the process.
9. Lenovo Laptop Specific Considerations
Lenovo laptops have unique quirks. Let’s ensure your model isn’t the problem.
- Model-Specific Issues: Research online forums specific to your Lenovo laptop model. Other users may have encountered similar problems and found solutions unique to your configuration.
- Warranty Woes: If your laptop is still under warranty, contact Lenovo support before attempting any of these fixes.
10. The Power of External Drives
Sometimes, the solution isn't about fix-a-failing drive. Sometimes a new drive will be your best bet.
- USB Salvation: External CD/DVD drives are readily available and can be a simple and effective solution. They connect via USB and bypass any potential internal issues.
- Portability Perks: External drives are also portable, meaning you can use them with multiple computers.
11. Preventing Future Burnout
Protect your drive to extend its lifespan.
- Gentle Handling: Treat the drive with care. Avoid abrupt movements.
- Regular Maintenance: Clean the lens using compressed air.
- Proper Storage: Store discs in a cool, dry place.
12. Leveraging Online Resources
Don't be afraid to delve further into the realm of repair.
- YouTube Tutorials: Search for videos that demonstrate the fixes we've discussed. They are invaluable.
- Lenovo Forums: Engage with other Lenovo users. They can share solutions.
13. Beyond CDs: Exploring Digital Alternatives
Sometimes, the best solution is a permanent shift in approach.
- Cloud Storage: Store your files online.
- USB Drives: They are fast and reliable.
- Digital Downloads: Embrace an era without physical media.
14. The Psychological Aspect: Managing Frustration
Repairing tech can be stressful.
- Stay Calm: Don't let frustration get the best of you.
HOW TO REPAIR DVD WRITER LAPTOPCOMPUTER.-LAPTOP DVDCD WRITER NOT WORKING SOLUTION IN HINDI

By Pankaj Kushwaha HOW TO REPAIR DVD WRITER LAPTOPCOMPUTER.-LAPTOP DVDCD WRITER NOT WORKING SOLUTION IN HINDI by Pankaj Kushwaha
CD DVD Drive Not Reading Discs in Windows 10 11 Fixed

By Tips Howto CD DVD Drive Not Reading Discs in Windows 10 11 Fixed by Tips Howto
Lenovo Think pad CD DVD drive removal and refitting replacement

By cagmito76 Lenovo Think pad CD DVD drive removal and refitting replacement by cagmito76
Title: CDDVD Rom is not reading and writing files How to Fix it techmindacademy
Channel: Tech Mind Academy
CDDVD Rom is not reading and writing files How to Fix it techmindacademy by Tech Mind Academy
Wifi On Laptop
Lenovo Laptop CD Burner Dead? This SHOCKING Fix Works!
For those moments when your Lenovo laptop's CD burner seemingly throws in the towel, leaving you staring at a blank screen and a mountain of data, take heart. We've all been there. The frustration of a non-functional drive can be immense, especially when you need to access vital information residing on a CD or DVD. Forget tearing your hair out – this guide provides a series of targeted solutions, from the simplest troubleshooting steps to more advanced methods, guaranteeing a resolution to the problem of your Lenovo laptop's CD burner. Prepare to revive that drive and reclaim your ability to burn and read discs.
Initial Troubleshooting: Rule Out the Obvious
Before diving into complex solutions, let's eliminate the easily resolvable issues. Often, the problem isn't a catastrophic failure, but rather a minor glitch.
Physical Inspection: First, double-check the drive itself. Is a disc properly inserted? Ensure it's seated correctly, with the label facing upwards. Inspect the disc for scratches, smudges, or damage, which can render it unreadable. Clean the disc gently with a soft, lint-free cloth if necessary. Also, carefully examine the drive's eject button. Make sure it isn't stuck or malfunctioning. A simple push can sometimes be the solution.
Restart the Laptop: This age-old tech remedy is occasionally the most effective. A simple reboot can clear temporary glitches and refresh your system's recognition of the CD/DVD drive. Close all running applications first. Shut down your Lenovo laptop completely, then restart it. This simple action can frequently resolve software conflicts that might be interfering with the drive's operation.
Check Device Manager: Navigate to the Device Manager to determine if your system recognizes the CD/DVD drive. You can access it by typing "Device Manager" in the Windows search bar or by right-clicking on the Start button and selecting it from the menu. Expand the "DVD/CD-ROM drives" category. If your drive is listed without any error symbols (a yellow exclamation mark or a red "X"), the hardware is likely at least recognized by the operating system. If you see an error icon, right-click on your drive and select "Update driver" to attempt a driver update.
Deeper Dive: Driver-Related Diagnostics and Solutions
If the preliminary steps don't yield success, driver issues are a likely culprit. Drivers are the software bridges that allow your operating system to communicate with hardware components, like your CD/DVD burner.
Driver Uninstallation and Reinstallation: Corrupted or outdated drivers can prevent the drive from functioning correctly. In Device Manager, right-click on your CD/DVD drive and select "Uninstall device." Carefully confirm the uninstall action. Do not worry; Windows will, in most cases, reinstall the driver automatically. Restart your Lenovo laptop after uninstalling. Windows should detect the missing drive and automatically reinstall the appropriate driver.
Manual Driver Updates: If the automatic reinstallation doesn't work or if you have specific driver software, you can manually update the drivers. Visit the official Lenovo support website and enter your laptop's model number. Under the "Drivers & Software" section, search for drivers related to your CD/DVD drive. Download and install the most recent driver available for your operating system. Follow the on-screen instructions to complete the installation.
Roll Back Driver: If the problem started after a recent driver update, it's possible that the updated driver is incompatible or faulty. In Device Manager, right-click on your CD/DVD drive, select “Properties,” and then go to the "Driver" tab. If the "Roll Back Driver" button is active, click it to revert to the previous driver version.
Software Conflicts and Configuration Issues: Addressing Operating System Interference
Sometimes, the issue isn't with the hardware or its drivers, but with the operating system's configuration or with software conflicts.
Check for Conflicts with Burning Software: If you're using third-party burning software (such as Nero, Ashampoo Burning Studio, or similar programs), verify that it's compatible with your Lenovo laptop and operating system. Outdated burning software can sometimes interfere with the system's ability to recognize the CD/DVD drive. Update the software to the latest version or uninstall and reinstall it. Ensure that the burning software is correctly configured to utilize your CD/DVD drive.
Registry Tweaks (Use with Caution): The Windows Registry contains configuration settings for your hardware, including the CD/DVD drive. Incorrect entries can cause malfunctions. However, modifying the Registry can be risky if not done correctly, so proceed with caution. We recommend creating a system restore point before making any changes.
- To access the Registry Editor, type "regedit" in the Windows search bar and press Enter.
- Navigate to the following key:
HKEY_LOCAL_MACHINE\SYSTEM\CurrentControlSet\Control\Class\{4D36E965-E325-11CE-BFC1-08002BE10318} - In the right pane, look for "UpperFilters" and "LowerFilters." If they exist, right-click on each and select "Delete." Confirm the deletion.
- Close the Registry Editor and restart your laptop.
Run System File Checker: Windows includes a built-in System File Checker (SFC) tool that can scan and repair corrupted system files. This can sometimes resolve issues that affect hardware functionality. Open the Command Prompt as an administrator (search for "cmd," right-click, and select "Run as administrator"). Type
sfc /scannowand press Enter. The scan may take some time. Once complete, restart your laptop.
Hardware-Level Solutions: Addressing Physical Issues
If software-related solutions fail, a deeper look at hardware is required, though it is less common that the drive itself is faulty.
Inspect the Drive's Physical Connection: In some Lenovo models, the CD/DVD drive is removable. If you have the technical proficiency and confidence, consider opening your laptop (consult your laptop's manual for specific instructions, as this can vary widely between models). Disconnect and reconnect the drive's data cable and power cable to ensure a secure connection. Clean any dust or debris that may be present.
Consider Replacing the Drive: If all else fails, the CD/DVD drive itself might be faulty. This is more common with older laptops. You can usually replace the drive with a new one, provided that your Lenovo laptop supports a standard-sized drive. Research the specifications of your laptop's CD/DVD drive type (Slimline SATA, etc.) and purchase a compatible replacement. Replacing the drive can often restore the functionality.
Preventive Measures: Safeguarding Your CD/DVD Drive
Prevention is always better than cure. Implement the following practices to help extend the life and reliability of your CD/DVD drive.
Avoid Excessive Use: Frequent and heavy use of your drive can accelerate wear and tear. Minimize the need for CD/DVD usage by utilizing digital alternatives, such as cloud storage, USB drives, and online media streaming services.
Handle Discs with Care: Always handle CDs and DVDs by their edges to prevent fingerprints, scratches, and other damage. Avoid bending or flexing the discs.
Clean the Drive Regularly: Over time, dust and debris can accumulate inside the drive, potentially affecting its performance. Consider using a CD/DVD drive cleaning kit periodically. These kits typically include a disc with cleaning brushes and solutions.
Keep Your Laptop Clean: Regularly clean the exterior of your laptop to prevent dirt and dust from entering the drive. Pay attention to the air vents to ensure proper cooling.
Keep up software updates: Ensure that your software drivers are up to date to prevent conflicts with your drive.
Conclusion: Restoring Functionality and Enjoying Your Media
By following the steps outlined above, you should be able to get your Lenovo laptop's CD burner working again. From basic troubleshooting to more advanced driver and registry modifications, the solutions are designed to address a wide range of potential causes. Remember to proceed systematically, starting with the simplest solutions and working your way up. Patience and persistence are key. No matter the issue, hopefully, you can revive your CD burner and continue to enjoy your media.
